BennehBoy's D2 adventure

This site contains affiliate links for which LandyZone may be compensated if you make a purchase.
Ah got it, cheers James.

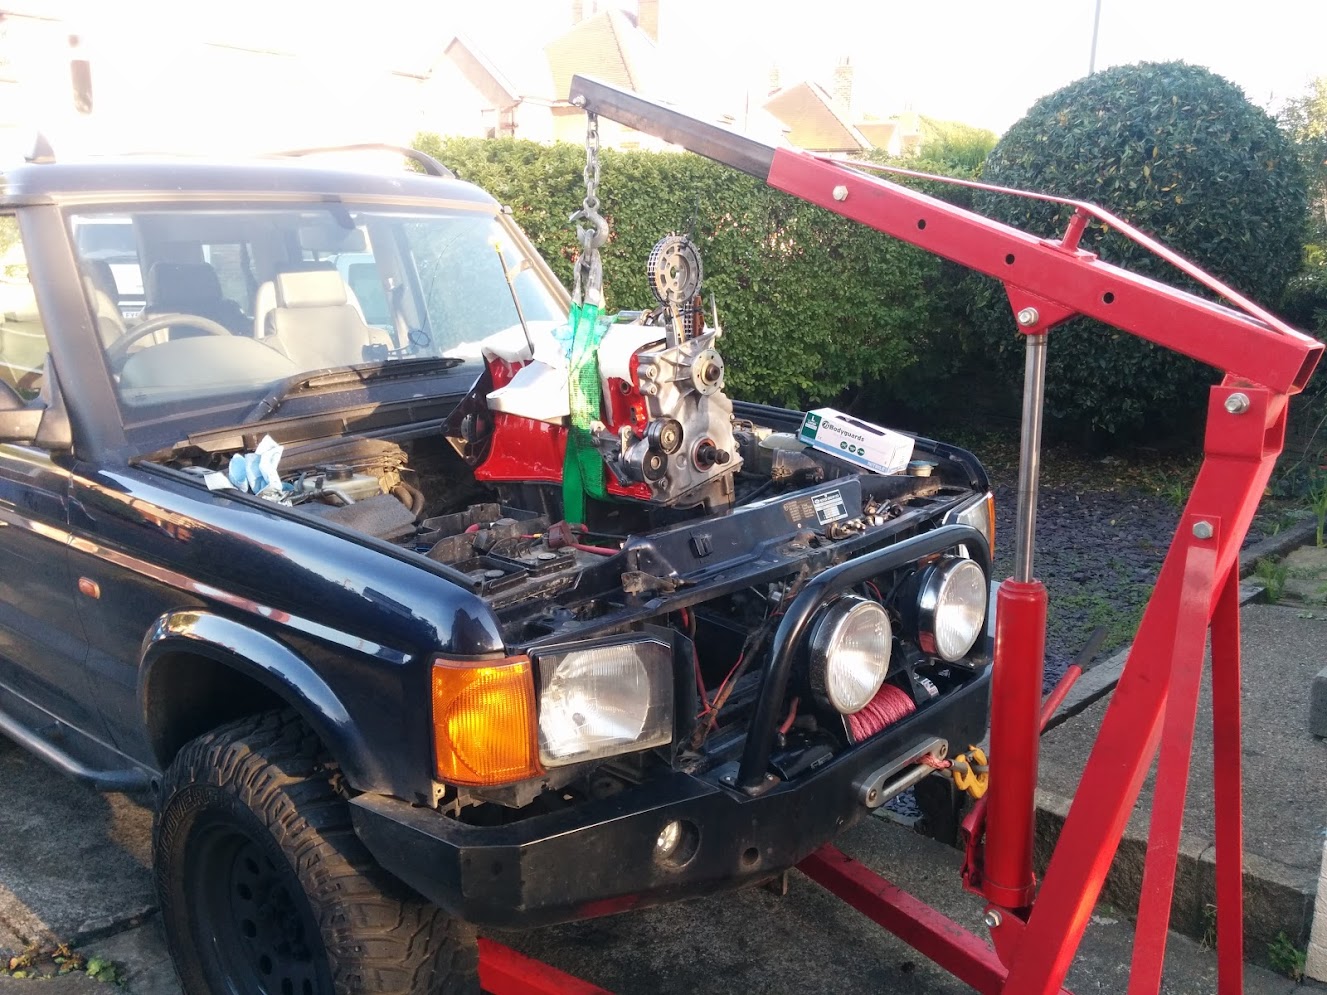
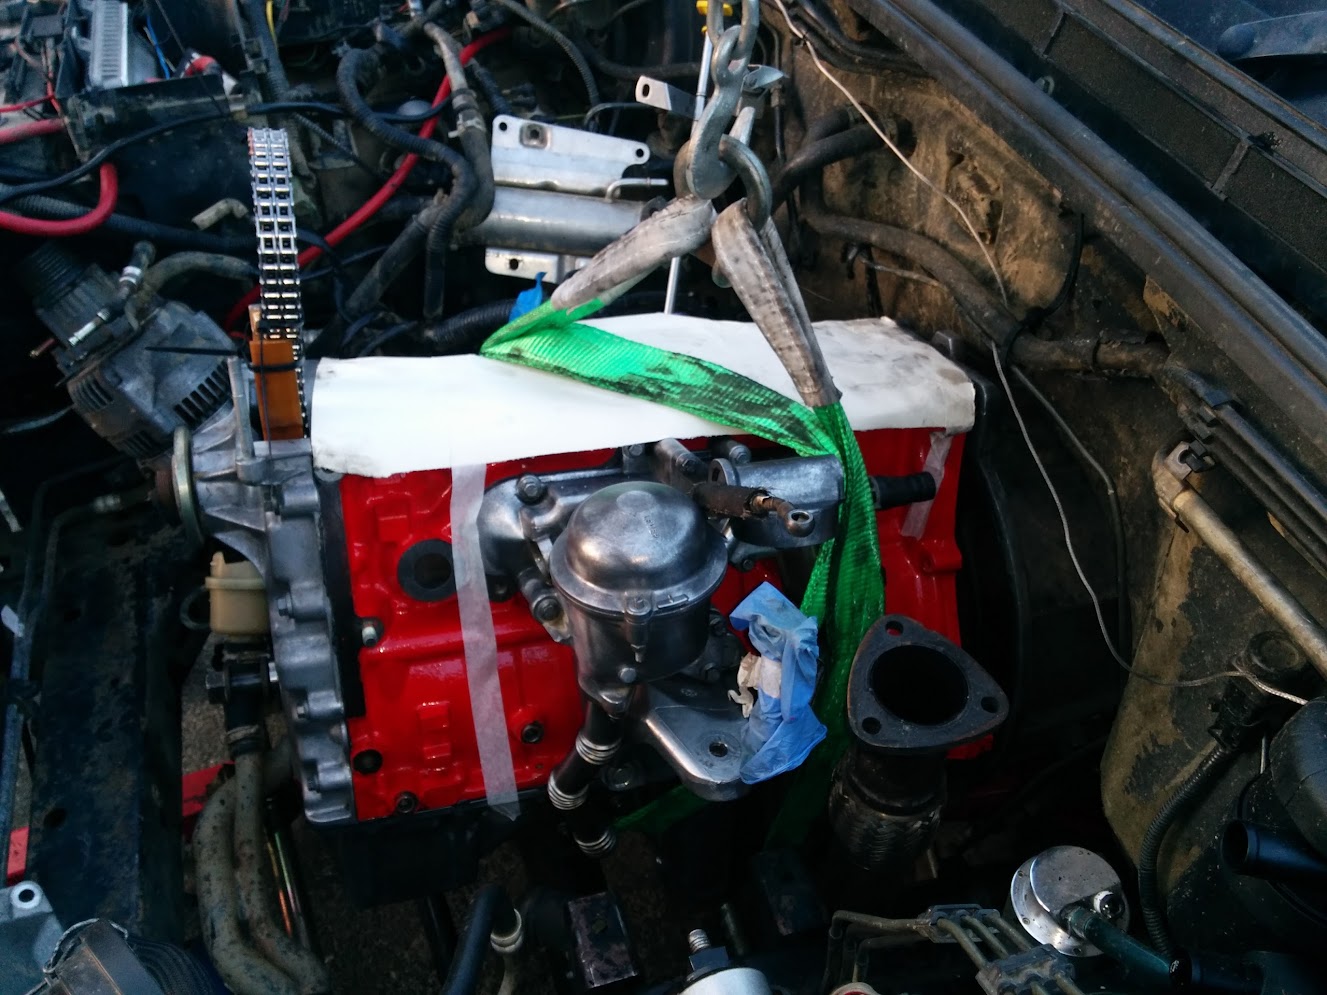
I was going to give the entire head a parrafin bath once I'm happy with the seats and have popped the oil stem seals off.

try it dry see what you get ,i presume stem seals are off already, when you hone a bore you would be surprised the amount abrasive /metal paste gets absorbed in to bores even after it looks clean ,something you have to be very particular about ,same with valve seats
 
Balls, guess I aint done yet....

Guess this is the black line? But it doesn't go all the way round :(
IMG_20140713_230648.jpg
 
try it dry see what you get ,i presume stem seals are off already, when you hone a bore you would be surprised the amount abrasive /metal paste gets absorbed in to bores even after it looks clean ,something you have to be very particular about ,same with valve seats

No the stem seals are still in, should I lap it with them off? I thought the valve might wobble more or something?
 
Edges feel a bit hard, but I don't know how soft a normal one is - don't want to jam my big fat fingers into a new one and ruin it :D

PS I have a full new set to go on.
 
Feeling a bit of a tard, the springs, collets and spring tops that I soaked in coke to clean now have a nice hard baked on layer of coke - oops.

Boiling them to see if that dissolves it, paraffin not really touching it :(
 
re lapping in valves. it seems theres quite a few different ideas floating around. when i did a motorbike head, which is an awful lot easier to handle than a td5 head. after each lap with fine paste. i held the valve in place and poured some parafin down the port until it did`nt leak out any more.
 
re lapping in valves. it seems theres quite a few different ideas floating around. when i did a motorbike head, which is an awful lot easier to handle than a td5 head. after each lap with fine paste. i held the valve in place and poured some parafin down the port until it did`nt leak out any more.

I'm going to do something similar, cheers.
 
Starting to come back together now....

Honed all the bores using a Flex Hone - brilliant bit of kit! Then washed them down with dish soap and hot water, and finally gave them a good oil:
IMG_20140715_092346.jpg


The 4 extra new pistons arrived, so I wasted no time and got cracked on fitting them - forgot to take photos I'm afraid, but it's pretty simple:

1) oil everything up and fit to conrods with conrod front mark aligned to arrow on piston top
2) align ring gaps as per instructions, 120 degree apart avoiding thrust side.
3) fit piston into ring compressor
4) Remove big end cap and put to one side, oil the shells and make sure they are spotless
5) oil the bore and make sure it's spotless
6) oil the crank journal and make sure it's spotless
7) insert piston into bore and gently nudge down with wooden handle of hammer until it slips out of the compressor - if you meet resistance remove, reseat, check compressor tension (not too tight!), and try again
7) check the journals and shells are spotless again! apply judicious amounts of oil to wash any dirt away.
8) align conrod bottom with crank journal and push home
9) check big end cap is still spotless and fit to conrod ensuring correct orientation!
10) torque up, 20nm then 80 degrees.
11) Repeat for the other 4 pistons, rotating crank as necessary
IMG_20140715_114816.jpg


Next job is refitting the oil pump/stiffener assembly....
 
Started to clean up the stiffener plate bolts - these need to be threadlocked on so wanted to get them as clean as I could, parrafin bath, thread chased, blown off with air gun, then wiped down with blue roll:
IMG_20140715_122455.jpg


Finished product, much cleaner:
IMG_20140715_123750.jpg


So next the stifferner plate/pump goes back on after blowing out all the bolt holes:
IMG_20140715_124341.jpg


This is the bit where you MUST IGNORE EVERYTHING THE HAYNES MANUAL SAYS!! Haynes says to use 23nm torque on the bolts, RAVE says 13nm so I went with RAVE after hearing of people braking bolts!

Both Haynes & RAVE say to replace an o ring under the pump to block housing, this o-ring was superceded by a metal gasket, so use this - you can just see it under the pump here:
IMG_20140715_124347.jpg


All fastened up and with new screws & o-ring for the pickup (10nm for the pickup screws). I primed the pump with oil before fitting the pickup by the way:
IMG_20140715_130845.jpg


New crank sprocket (15P type) fitted:
IMG_20140715_131550.jpg


New locktighted oil pump bolt:
IMG_20140715_131938.jpg


And to be extra sure a nord lock:
IMG_20140715_132059.jpg


Pump chain cleaned, oiled, and fitted. Bolt torqued to 30nm ~25nm+20% due to nord lock (took this before bolting up oops):
IMG_20140715_131943.jpg


New main chain on and aligned to timing mark:
IMG_20140715_133821.jpg


New cam sprocket on, aligned to timing marks, set to roughly TDC and zip tied up:
IMG_20140715_133826.jpg


Next job, refit timing cover and sump
 
Binned the nord lock it was too small, should've ordered the large flanged version.

Timing cover back on:
IMG_20140715_144409.jpg


Sealant in the right places and the sump gasket laid out:
recent


Sump on - once again completely ignore Haynes, it states 45nm for the bolts, when in fact it should be 25!
IMG_20140715_151535.jpg


Oil drain hose being connected with new gasket, 10nm torque for the nuts:
IMG_20140715_151646.jpg


I appear to have a short engine!
IMG_20140715_151919.jpg


Oops forgot the tensioner:
IMG_20140715_153544.jpg
 
Going back in....
IMG_20140715_194017.jpg


And back out... used a socket to align the clutch and well erm it was a pants alignment, rembered I had the perfect tool in the shed.... (engine has grown legs)
IMG_20140715_201634.jpg


And it's in, YAY!
IMG_20140715_202149.jpg
 
Back
Top