Series King Cab

This site contains affiliate links for which LandyZone may be compensated if you make a purchase.
New crossmember made up for the middle where I have to chop out the old box in order for the LT230 to fit in.
IIRC is 120x100x5mm box and then I used 6mm plate for the ends, simple enough, chop the box 12mm too small then the 6mm plate makes up the difference

Also started making up the gearbox adaptor as I've been a bit busy til now, looking good so far and I'll get a pic up later tonight as I've left it in the boot of my car


517138A9-7678-44B2-ACEE-13E3D98D6481-7008-00000762A1443BA4_zps4bc811c2.jpg

36A5BD55-0959-4017-A200-9E98F64864F3-7008-00000762AB858271_zpsbc467116.jpg

3D264E82-1A04-4947-9B3E-416B5377EEC6-7008-00000762B53E242C_zps8b4e00ea.jpg

092A598D-8B57-45AF-82C6-933913CC1FA7-7008-00000762963ED60A_zpsd069834b.jpg

128C3F56-6D52-4608-A5A6-6AB182C22204-7008-000007628C769D10_zps43a8911b.jpg
 
Discovery to defender gearbox convertor, simple enough if you have a lathe. This is it about 50% complete, two of the three lips are turned and then it needs a hole drilling and tapping along with a 5/8th hole in either end with a 3/4" solid in the to separate them

Started life as a 50mm bar and turned to the correct diameter

I'll make a separate thread detailing it incase anyone needs to search in the future but I used some pinched designs (essentially going to compound the info)


94829883-1025-4256-B169-41678B65237E-7008-0000076B3BB3EE8E_zpse4715dba.jpg

2720CE89-46CB-459D-9582-004B32948B4A-7008-0000076B113DA7A8_zps83809c61.jpg

80660A13-776A-48FD-9CBD-39D7B904EBA1-7008-0000076B533EA00F_zps94ef5d80.jpg

F9AA56E2-2D31-4A48-853F-71A655B3ADC8-7008-0000076B2812D5B7_zps340bf61f.jpg
 
Got a shift on again today, body off and started to look at the best place to move the cab back to!

Thinking 1/3rd into the pickup bed leaving a decent amount of space and giving a good amount of extra room inside

So heres the pics (didn't get any in situ ones)

Floor out as well as checker plate bench pieces and crossmember cover (britpart sticker was still on that crossmember)

83ACE8D1-417F-4BD2-8443-40D98ACD0493-7556-000007E3E3770C38_zps5745c369.jpg


Tub off

B71CA211-812F-454A-9944-FBFE1FA3F1AF-7556-000007E37851E7B8_zps4f06d490.jpg


Central slat missing as the fixing was corroded so going to put some angle onto the sides, rivet it in and rivet the slat to that for support

44CD8D87-427F-4C77-BD4F-FF27C694D7F4-7556-000007E39E4C3C9A_zps9e838492.jpg

16EB58BC-CBD1-4F31-85DC-3A4745F274D8-7556-000007E3B3AFCEFB_zps538e39c1.jpg

2A4E1C8C-402D-41DA-AA6F-5969446F3882-7556-000007E3CCE1BFB2_zps80992b33.jpg


Bottom of the cab off too as the ****ing bastard had welded it to the galv capping :doh: total ####wit given that theres bolt holes there………

DDBDB158-4702-4689-805A-4F5E8AA641E1-7556-000007E38D74C6F2_zpsff91e78b.jpg


54305856-4884-4456-ACFD-6B1D5A913CBA-7556-000007E3F07D4492_zpsfae9603a.jpg


Held together with pigeon **** too :doh: and sealant!

Guy welded about 1/4 of it in random spots and used sealant for the rest!

6FD069E9-8713-440A-95E7-B09458F33843-7556-000007E3FC754148_zpsdc36bbee.jpg

364012D8-B97D-4CD2-98F1-12EF3518E0B7-7556-000007E4188DA4B0_zpse8bf09c5.jpg

BF02F2D0-1A67-47F9-AB95-09D4C2CDC35F-7556-000007E426E85FE3_zpscc3cc3fe.jpg

77261E4C-B903-4EE1-9890-EC7F6AC5AE61-7556-000007E442B05C6A_zps33047b09.jpg

ED1F5D52-961E-43B1-91CB-A6DE1D935C41-7570-000007E4B46A5B17_zpsc40729b0.jpg


New crossmember fits

D758DE03-BDBA-4DA8-909C-64477421EAC4-7556-000007E434D7EC5E_zps80a53390.jpg


Gearbox wrapped up

6E6CB231-4B03-4D9A-A3A8-FC95CC19C937-7570-000007E4C4E59A94_zps9a5b58fe.jpg


Looking a bit bare :rolleyes: doors tied together in order to support the roof too

34FA7342-B97B-4A06-A7CF-35618D3F522C-7570-000007E4D30B6486_zps8158f659.jpg


Wrapped up now as its gonna rain………


7662E994-D3B2-45EC-A4B2-1115F7CBA739-7570-000007E4DDEFAFB9_zps7414f2db.jpg
 
Measured up a 90 tub today off an 89 IIRC, seems to be 10mm wider and one inch longer so that and the matching sides + seatbox

Going to flatpack it as best I can the rivet back together once I've trimmed the king cab sides then weld an S extension onto the x-member
 
Todays work, started about 11 and finished packing away at 4 cos of rain

Heres the pics of how to do it anyway

0DD18F8D-226D-45DF-8B64-3388FD89B151-1909-00000384EBB90191_zps47f8caf1.jpg


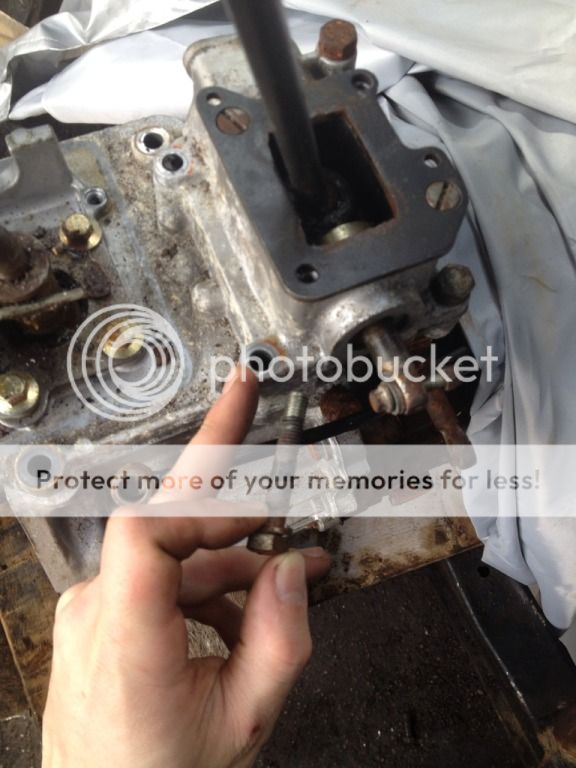
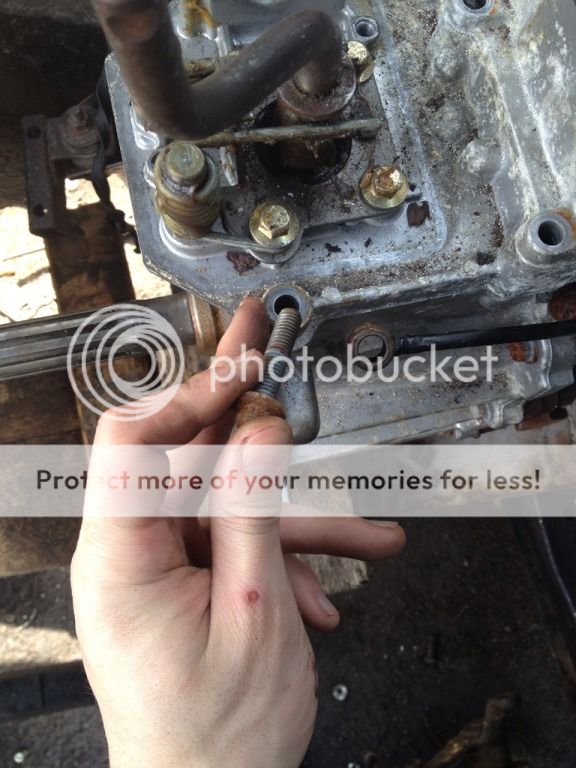
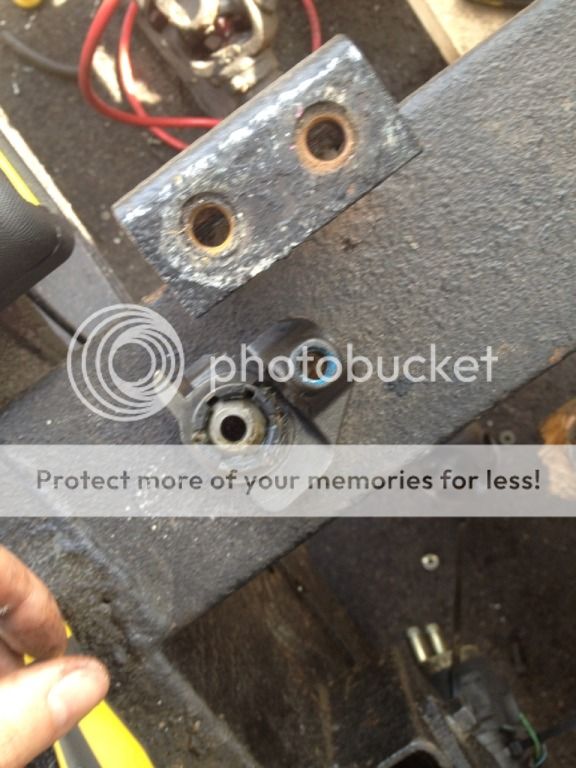
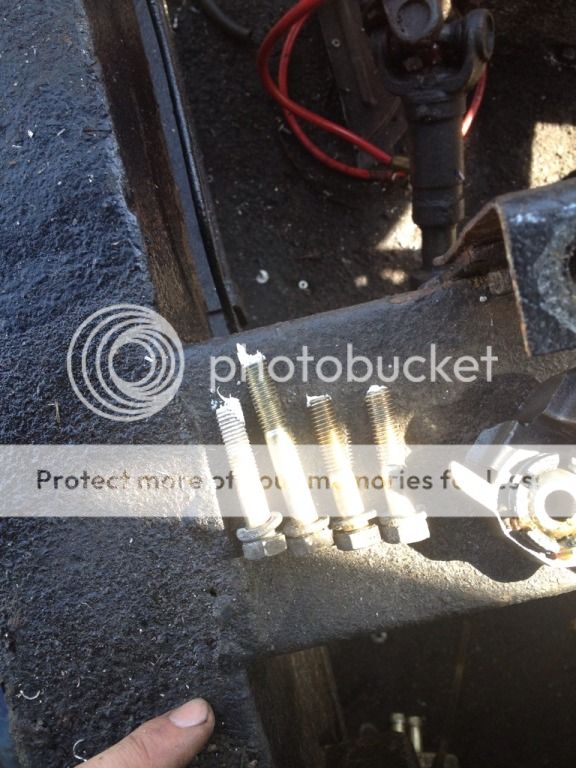
Long bolt is from this hole

102B5E70-FA57-4B0B-B4A9-2381DD52CD2C-1909-00000384FDF8082A_zpse94345ed.jpg


Short bolt holes

86791A90-3585-4651-BCBA-740F484CA849-1909-000003851EA17F89_zpsfca6e940.jpg


10BDC78C-DDCC-4AA4-85A3-80E3404D5858-1909-00000385576BC25B_zpsd6406e24.jpg


331647BA-9BD7-400E-B34D-92317F941746-1909-000003858BEC354D_zps8db1ff7d.jpg


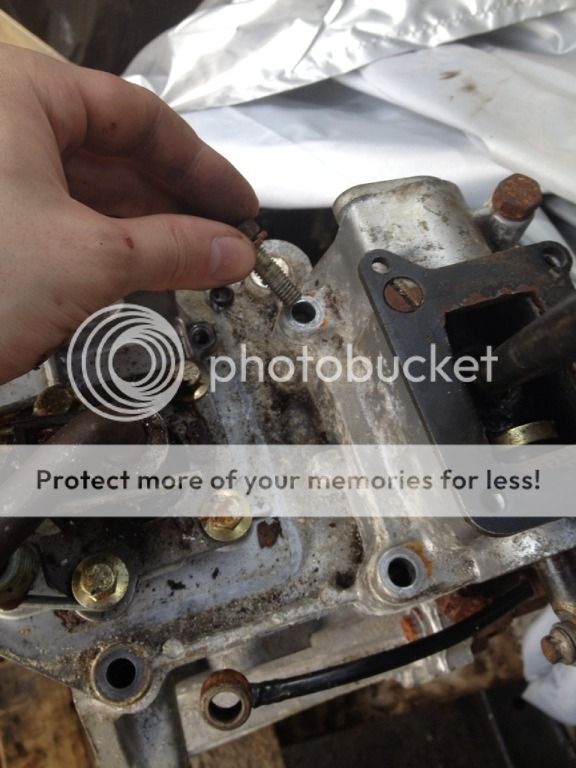
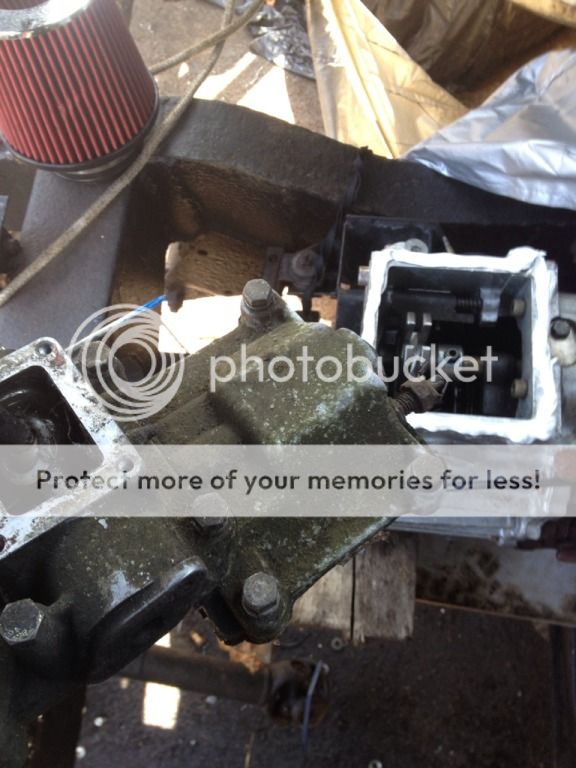
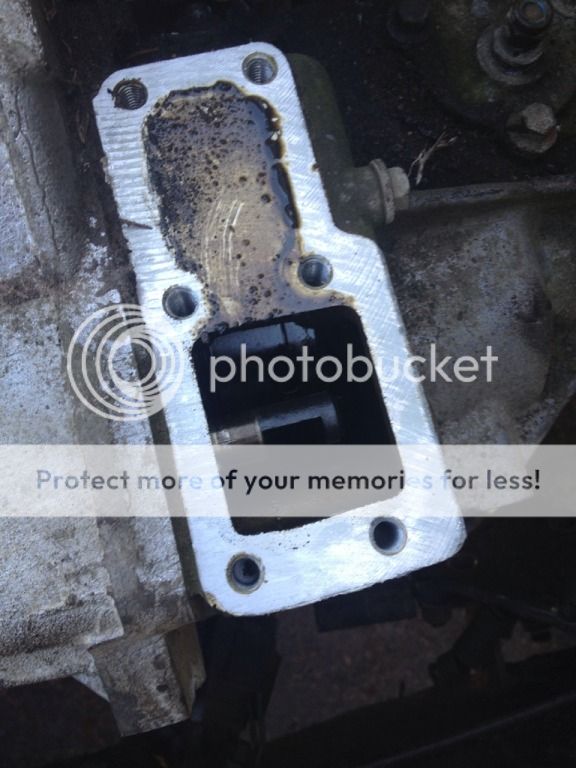
With those three removed then take off the cover plate to get access to number four


85C0316D-A899-46E7-976D-4B4219AEC7B7-1909-00000385BA21C7B6_zps80c4474f.jpg


7A6CEF4B-6D9C-4A28-9165-C2B5CF669E99-1909-0000038661579348_zps8d3d0dbc.jpg


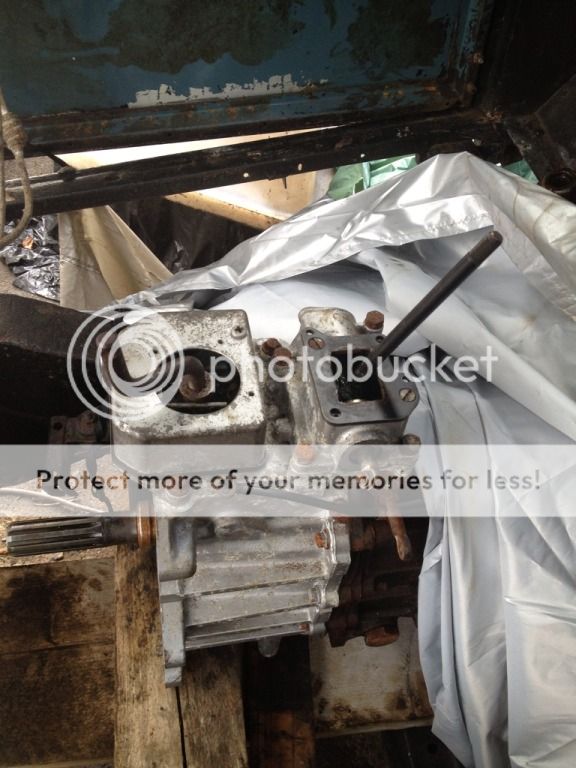
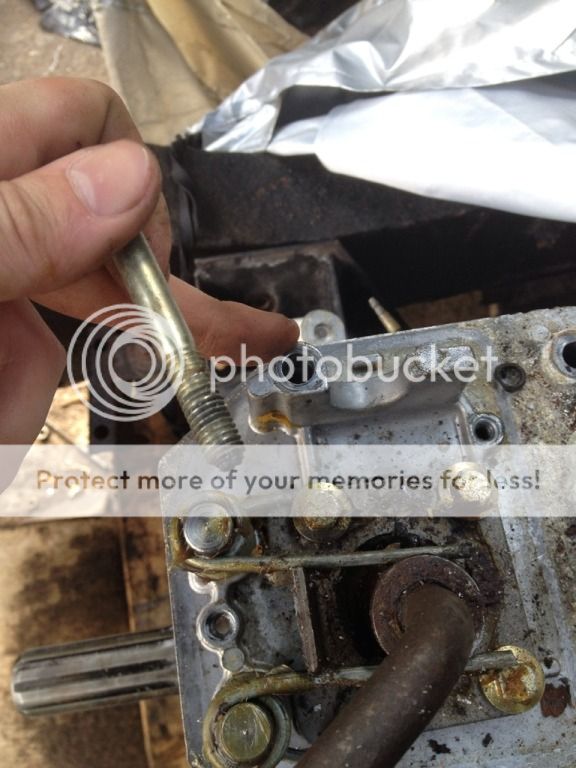
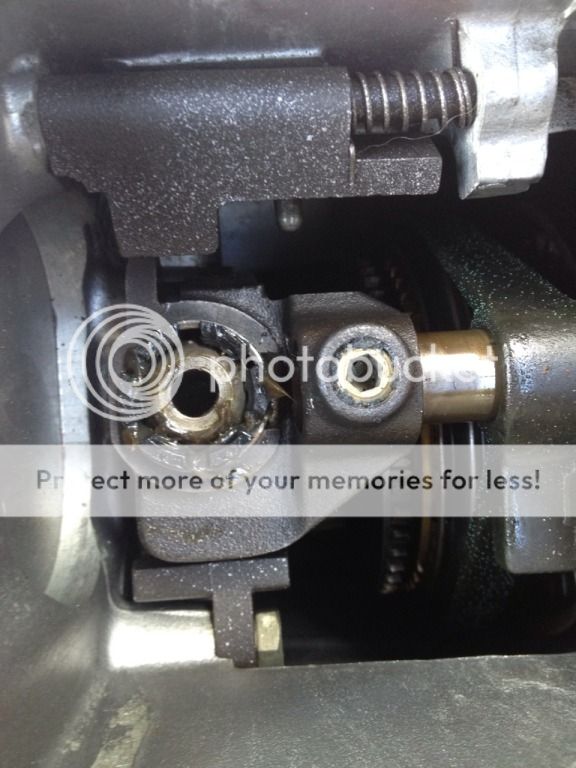
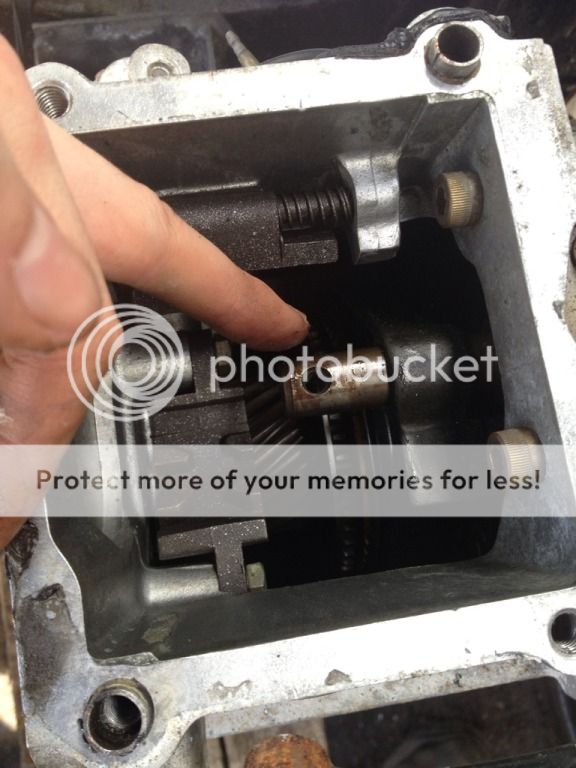
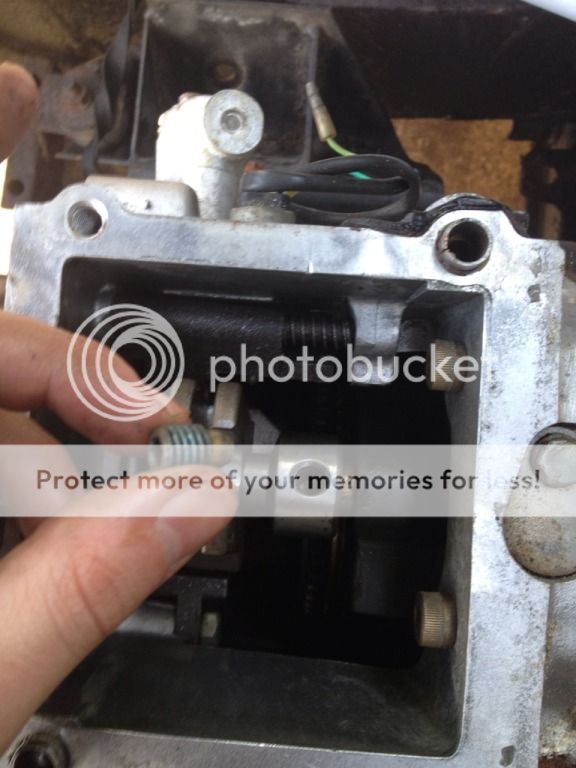
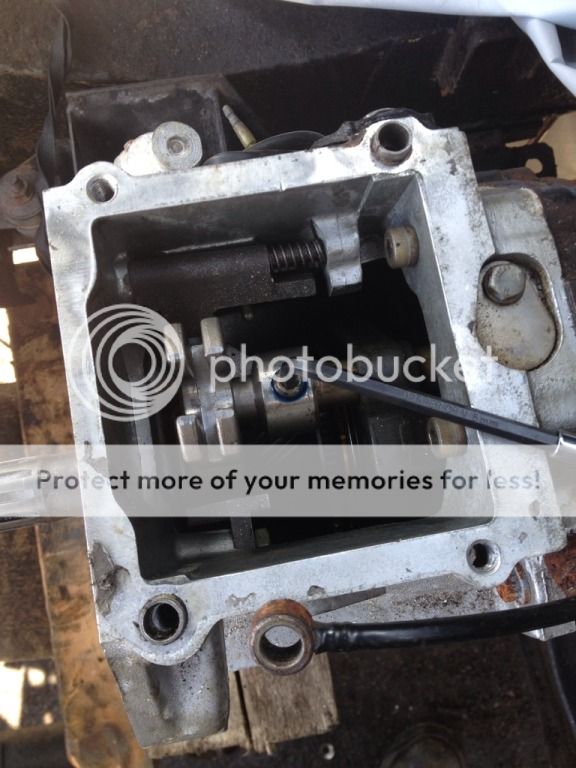
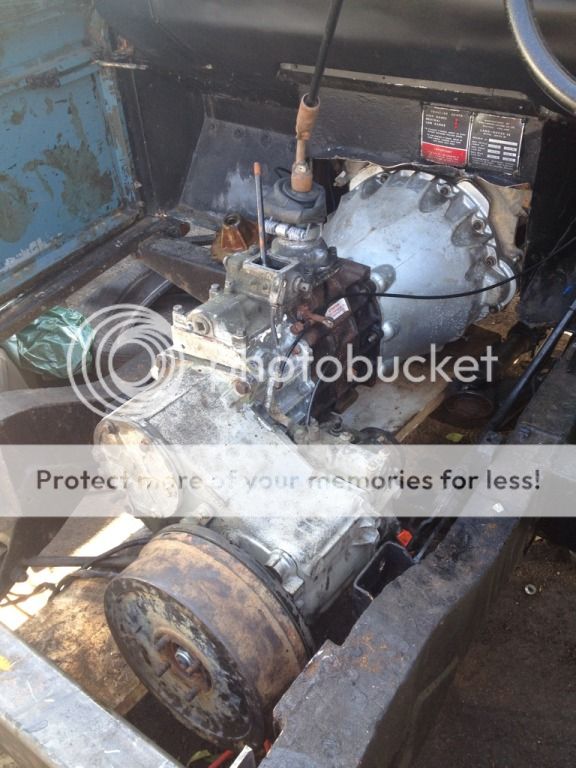
Remove the selector housing


E2469980-AE2B-40C3-9566-B0527A5F5F2E-1909-00000386840F6340_zps2e6e5fdf.jpg


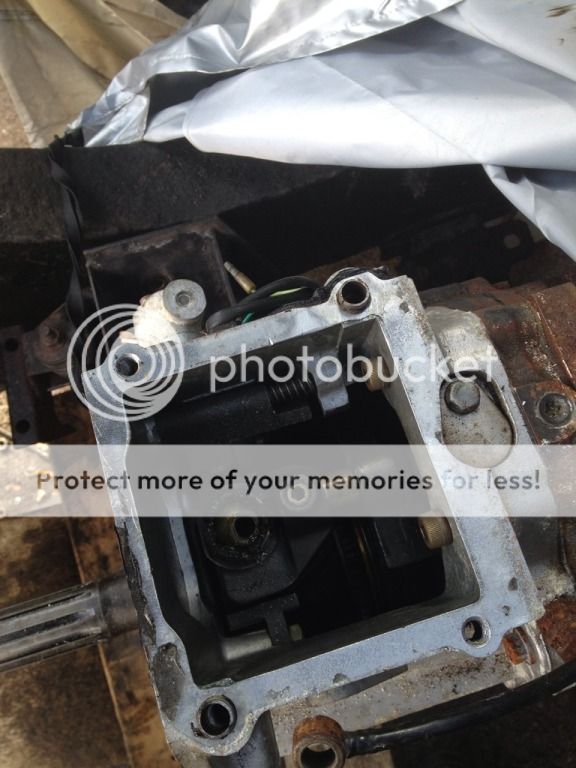
Selector shaft exposed

766FAF3F-0941-4270-8B75-B598E784E532-1909-000003869CABB31E_zps85267482.jpg


64AEA3F7-F935-4C47-B27E-C21370729D37-1909-00000386C662307A_zpsb4bff60d.jpg


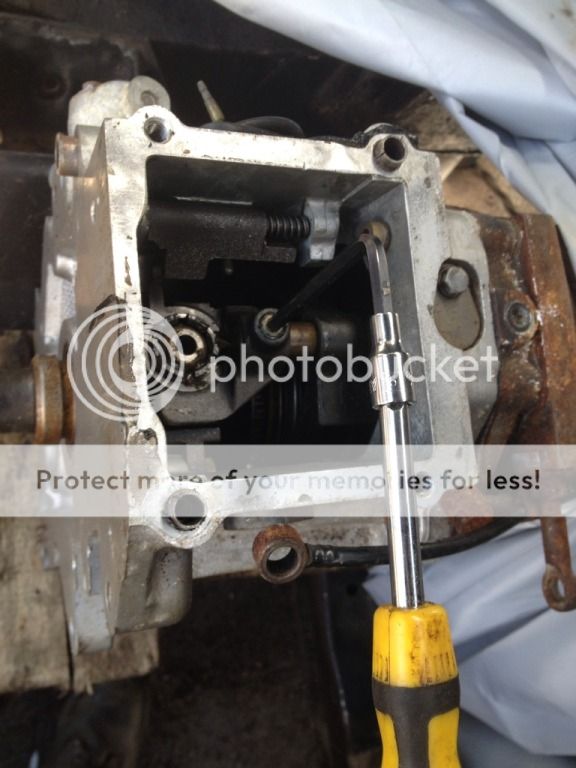
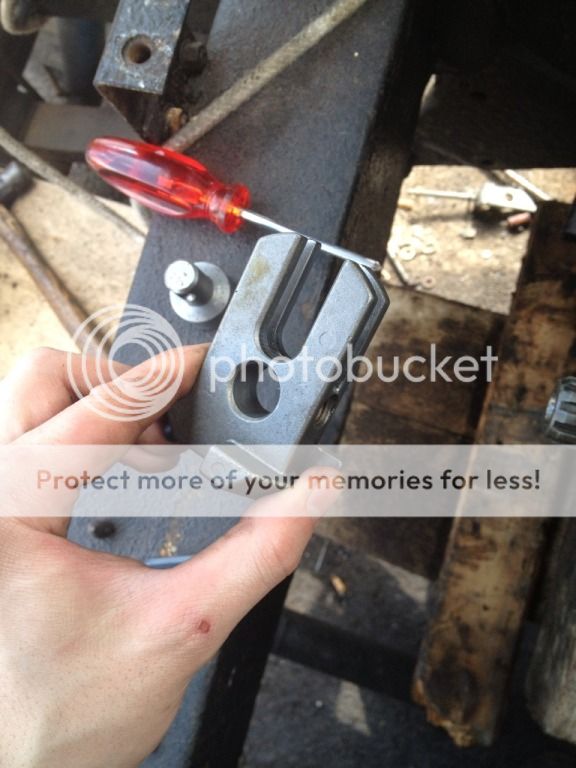
5mm allen key and a suitable driver to get some purchase on there
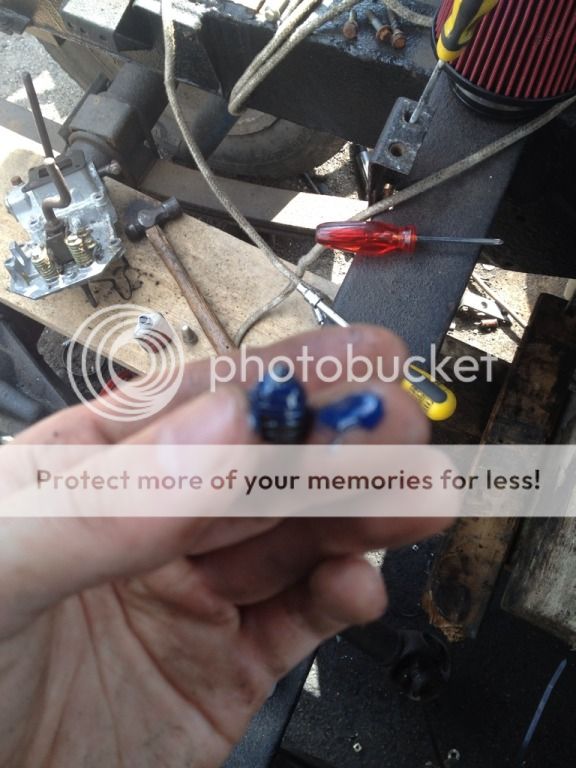
69A30FA1-7F12-426A-B97A-F7EAAF056E75-1909-00000386ED628497_zps80a1a2ce.jpg


Remove the screw


3C589B5C-BD1A-499B-ACAF-055EEFF73D10-1909-000003870937BFF5_zps912588e1.jpg


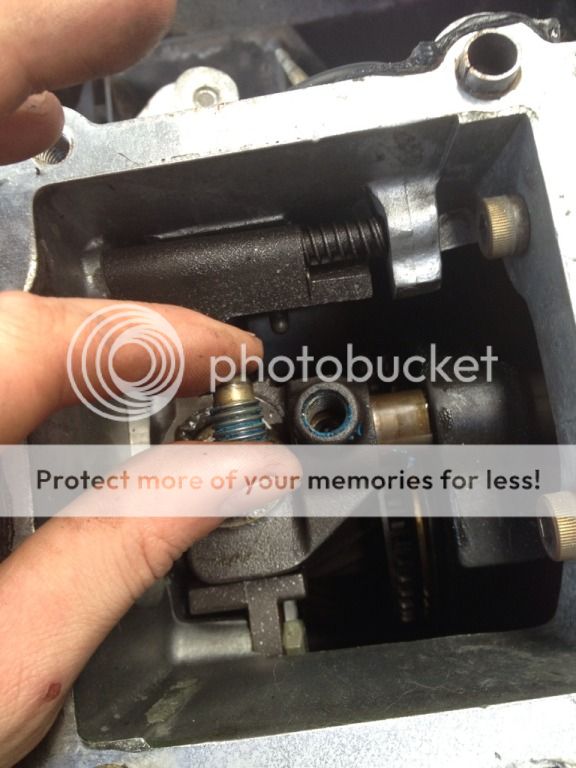
Other grub screw you'll need


5F0172EB-9BE8-4434-9B01-79D1EC4A37A1-1909-0000038729269212_zps60a05f7e.jpg


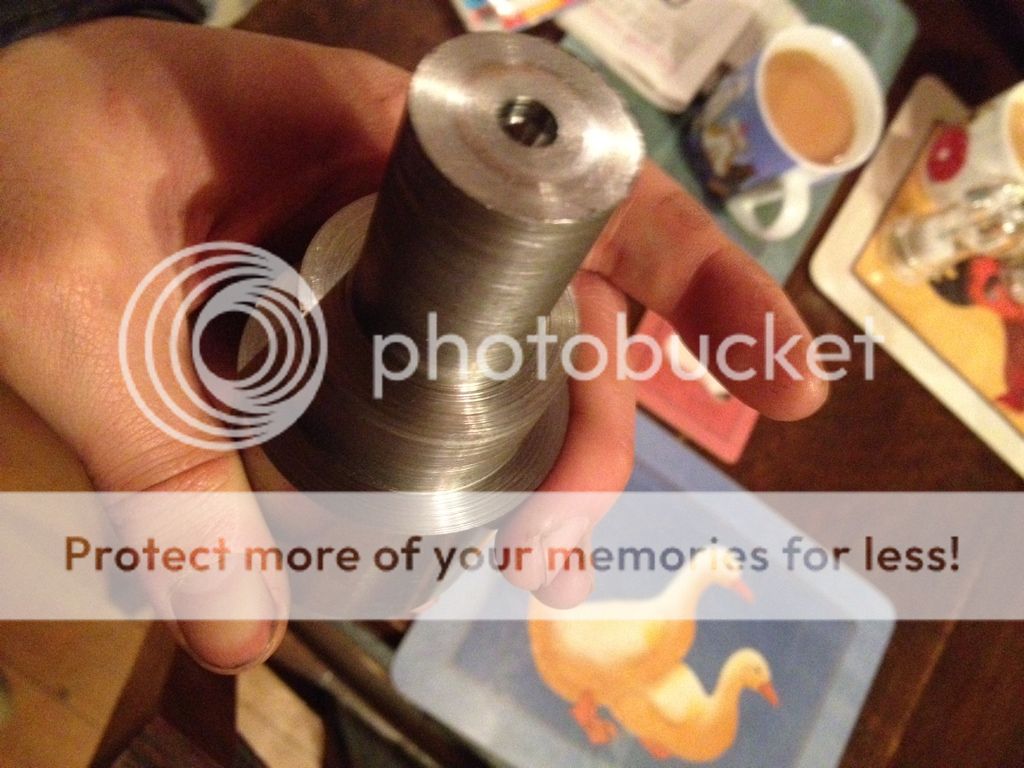
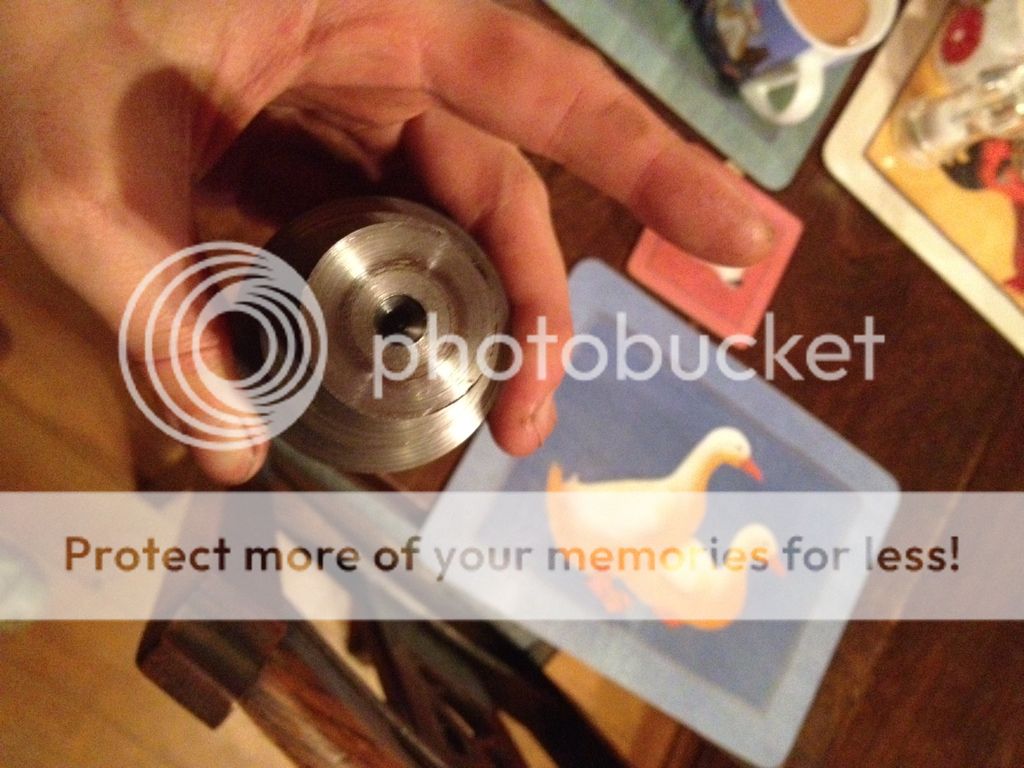
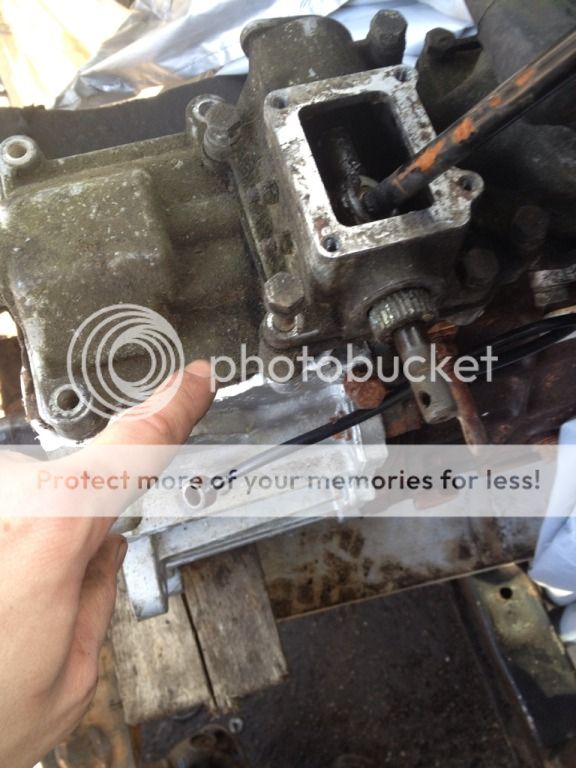
This is the selector rail adaptor


D3DB6449-D294-46A3-9192-B256180D348A-1909-000003874602D14B_zps253033c9.jpg


Gear selector quadrant

85EC455A-7F8A-49FE-AEB0-A5A14FF4EAD3-1909-0000038762933330_zps3fdbda15.jpg


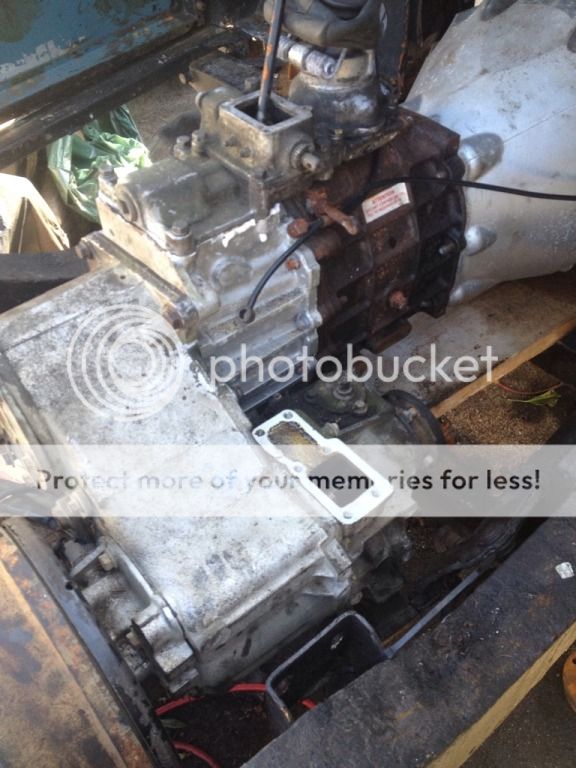
You need to push the shaft into third in order to get enough space to remove the disco selector and get the defender selector mechanism on there

268F106F-FAEE-424E-94E8-75F02505775B-1909-0000038777AB3DE6_zpscfb5cdfe.jpg


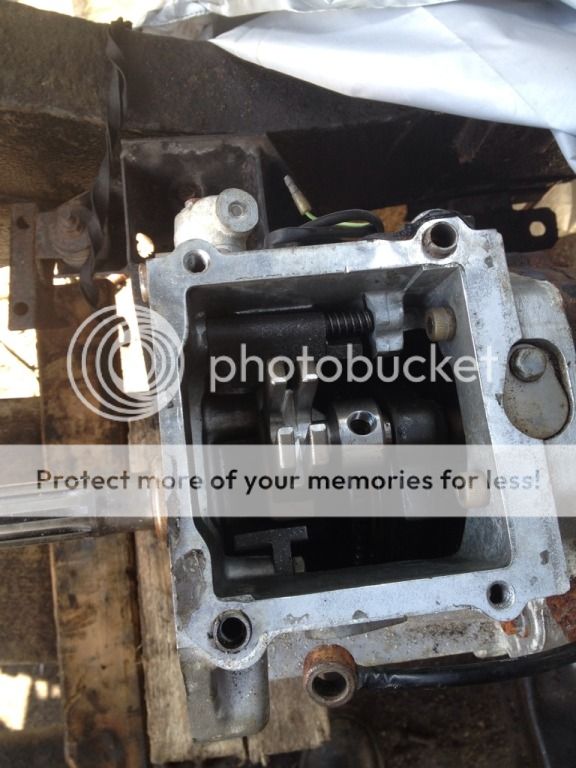
This is the old mechanism


738549A7-B1B1-4544-8DE1-83C5016F8766-1909-000003879335874A_zps178a9a28.jpg


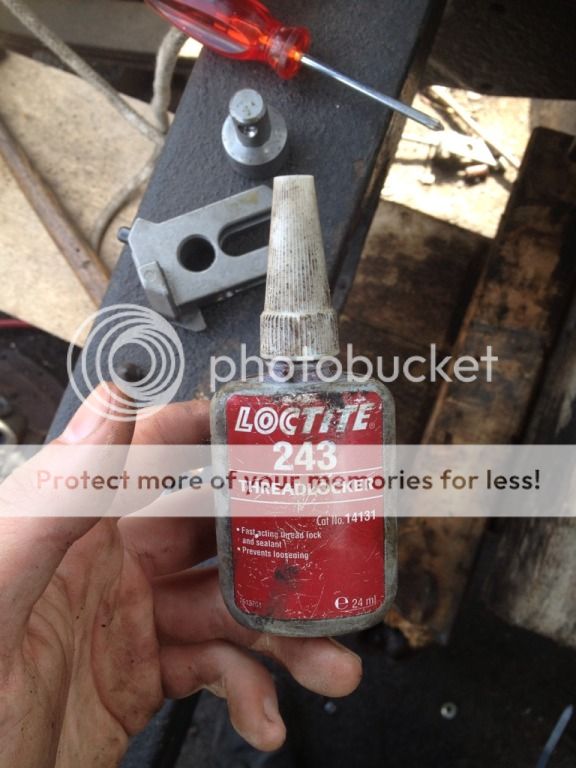
Apply loctite to the screws

CE3DBC38-C970-411C-9ACD-3A7E760016F6-1909-00000387BA2C8AC9_zpsfeefb4cb.jpg


Pointed one goes onto the shaft that slides into the selector

25684756-B153-4ABF-B339-8114FAE08469-1909-00000387E0FE6BE7_zpseea534aa.jpg


Tighten this mutha####a up! And I mean tighten!
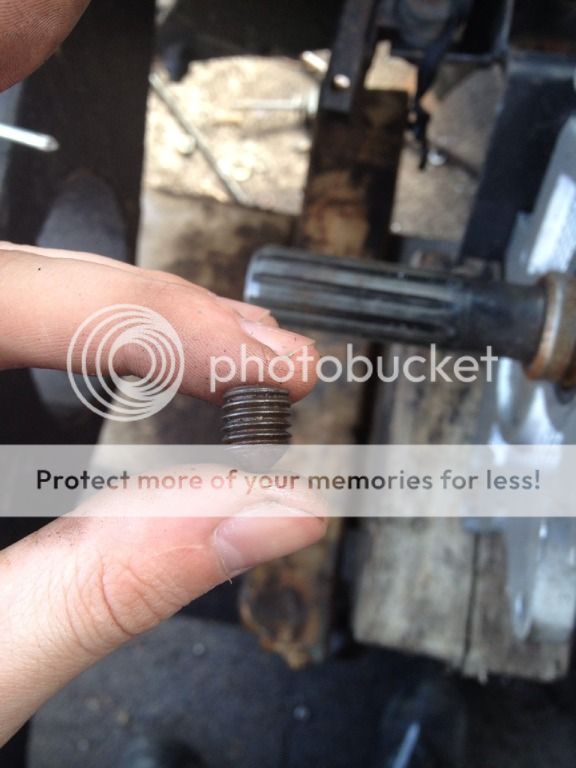
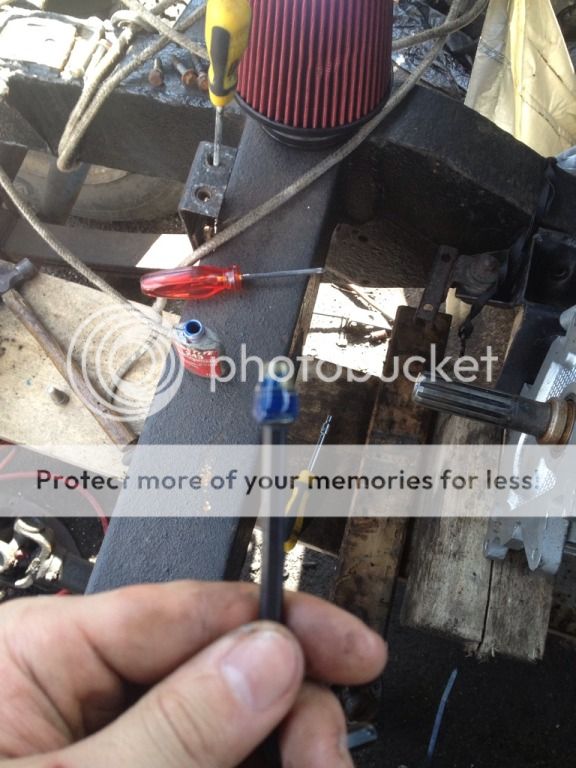

9C42E67D-AC43-46D7-9A96-E14ECFAEFE04-1909-000003880029CEB5_zps571c0558.jpg


Long grub screw now


F4C09CA1-A319-440E-8982-9FC8E1492AA4-1909-0000038823D64B37_zps6ce8511f.jpg


4119485E-1F73-4A91-95ED-61272D4905F0-1909-0000038844E67FDF_zps8f8fa0a1.jpg


Apply loctite again

27B03E11-336F-462F-8E56-18D7497242F6-1909-00000388656B2019_zps680588c2.jpg


Again torque the bastard!


E05FA52D-D97D-4CC4-979E-3028DCB91812-1909-0000038A097F99C0_zps741d7fde.jpg


You don't want them coming undone!


Step back and take a break


509B5A55-488C-45A2-A5D8-0BE0FB91AFD4-1909-0000038A2A10C277_zps28ef5a69.jpg


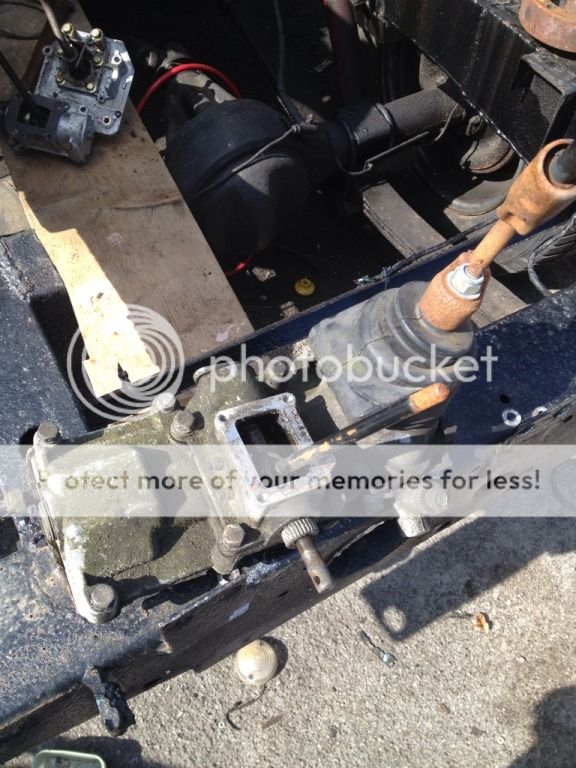
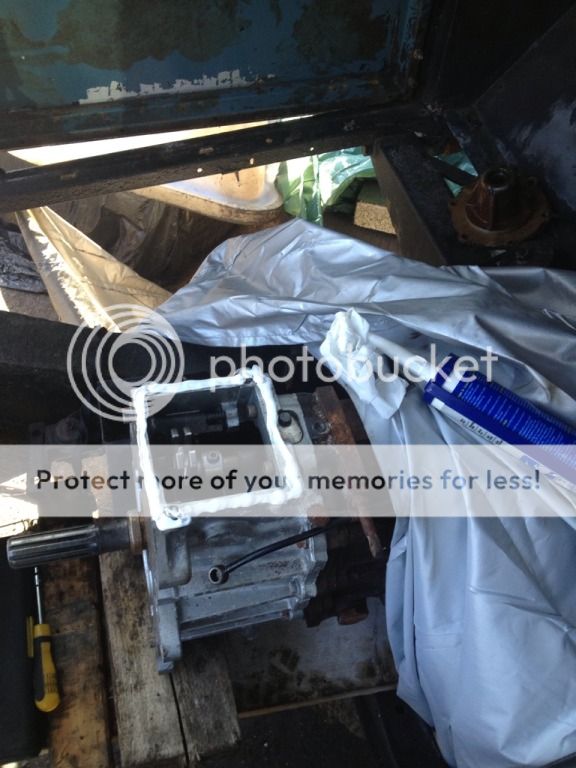
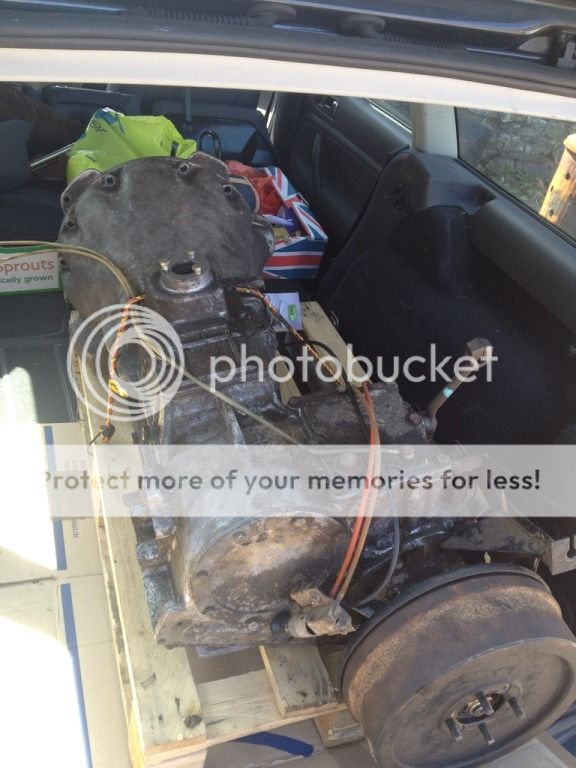
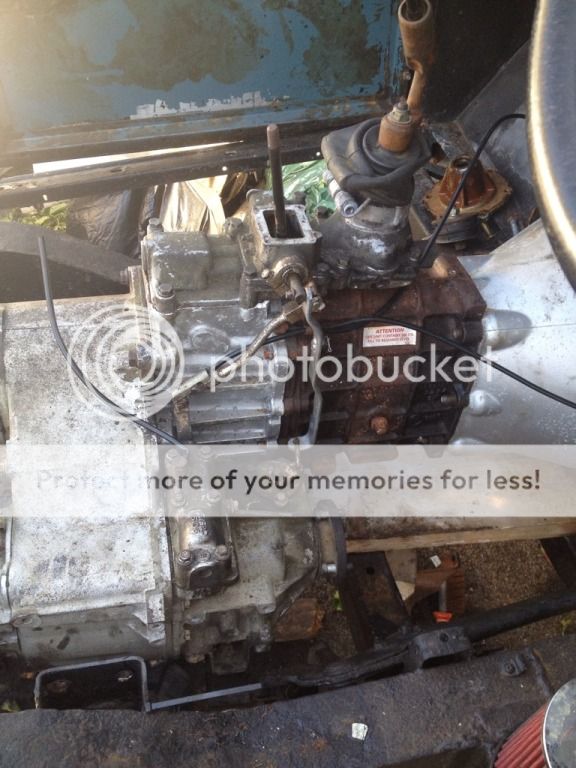
Remove the LT77 selector from your chosen storage space

275CA2E4-1A31-4D2E-8D99-32A2CD4CD254-1909-0000038A6C6EE14B_zpsad6a1d1f.jpg


F7B417CE-8F3D-423D-8270-034CD8DF62EE-1909-0000038A8F4AF41E_zps1f5ee495.jpg


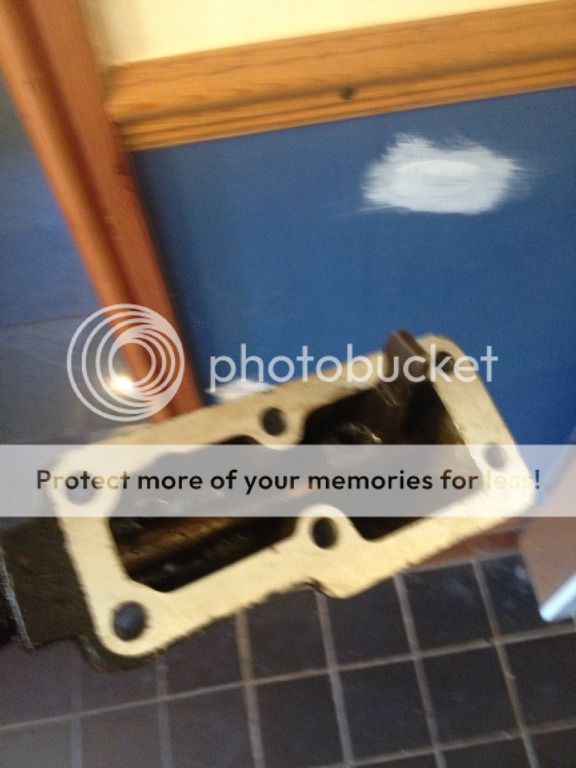
Apply a good bead of sealant and begin assembly


D2B77618-0876-4DF6-8A46-3297923427DE-1909-0000038AA8C9970F_zps5613854f.jpg


48A55622-FE05-4FAE-B679-145A49D1DB91-1909-0000038ABE2A621F_zps19366e52.jpg


Locate it on dowel and remember where your bolts came from

CCBA4B10-155F-459C-9880-56F2678FE5C4-1909-0000038ADCC7E36C_zpsbcf831e1.jpg


Begin with the long bolt

B327393C-5514-4C03-BF8B-0CDB53BD7404-1909-0000038AF5D7936F_zps1708d64c.jpg


0EB9FEE8-4854-4323-82A9-2F9702BFD1C1-1909-0000038B099B385B_zpsed90b8f8.jpg


After this just tighten the buggers up, I found out I cant select the bottom set of gears too easily which on inspection looks to be the bias plate that needs some fettling so I'll sort that at a later date


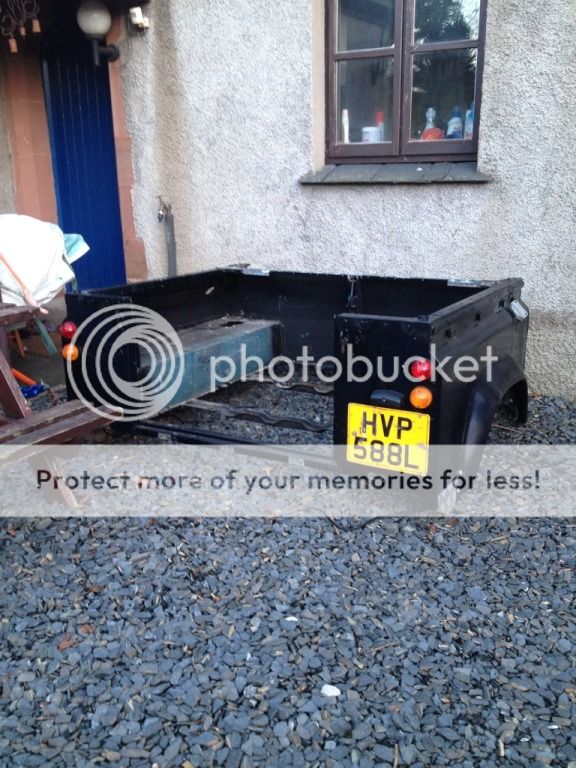
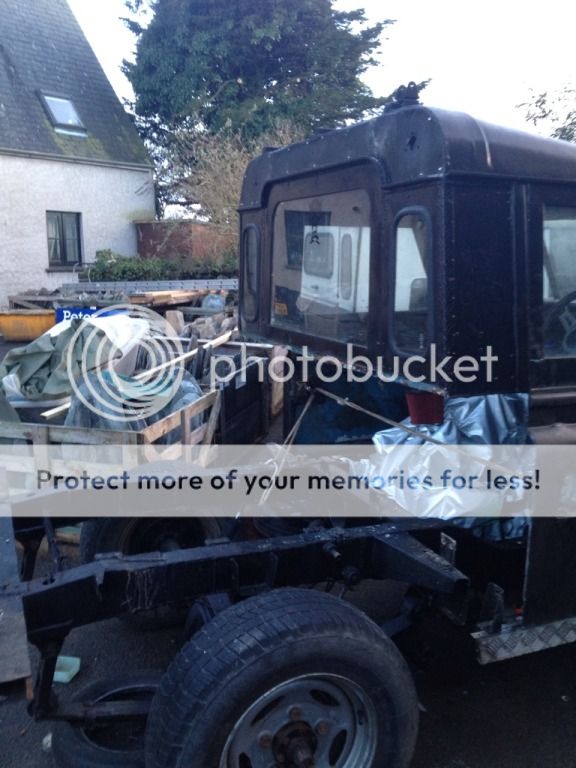
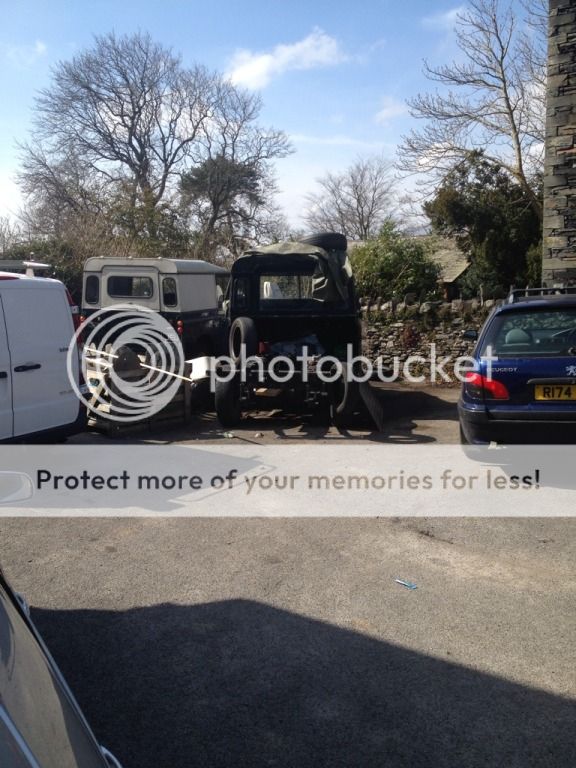
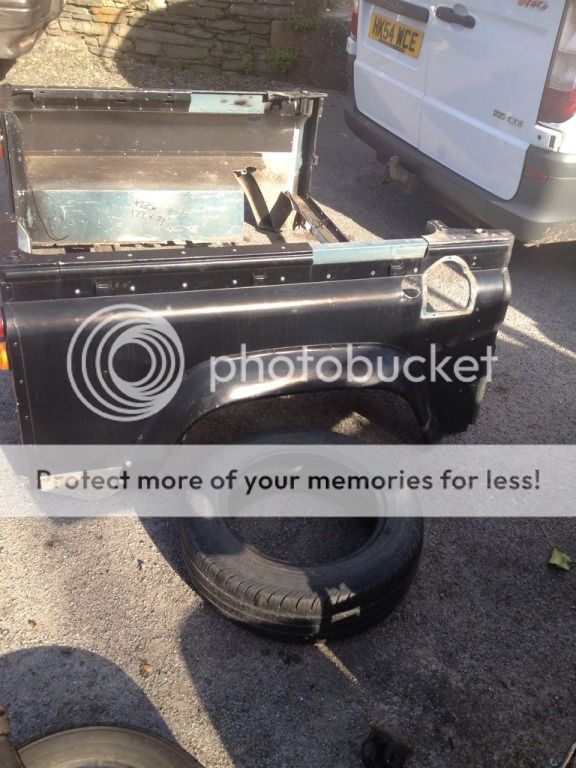
So I did some more work after this as the sun was still out
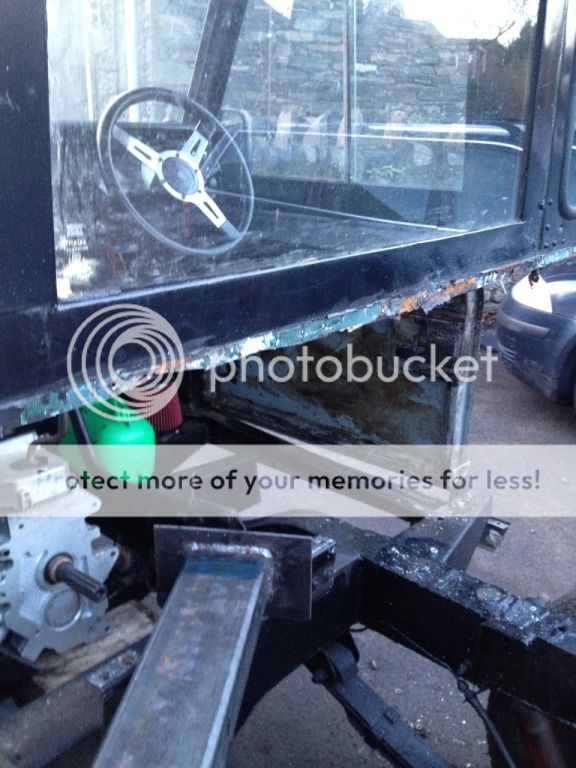
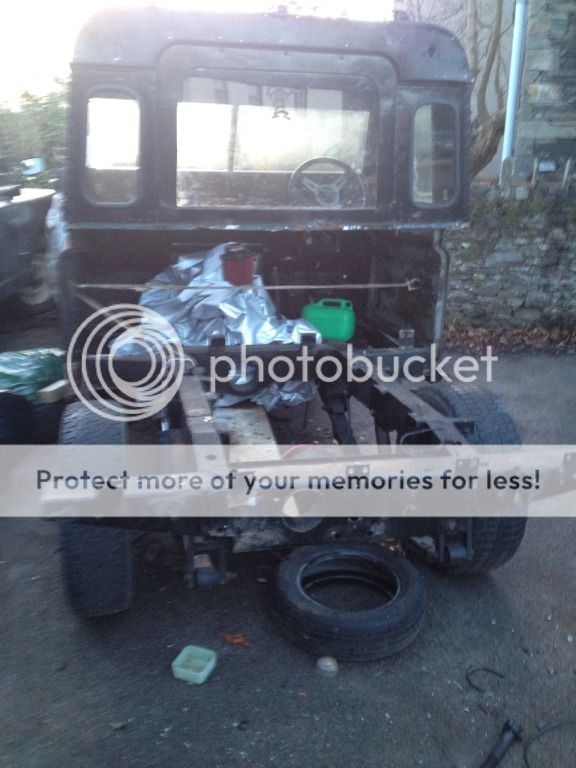
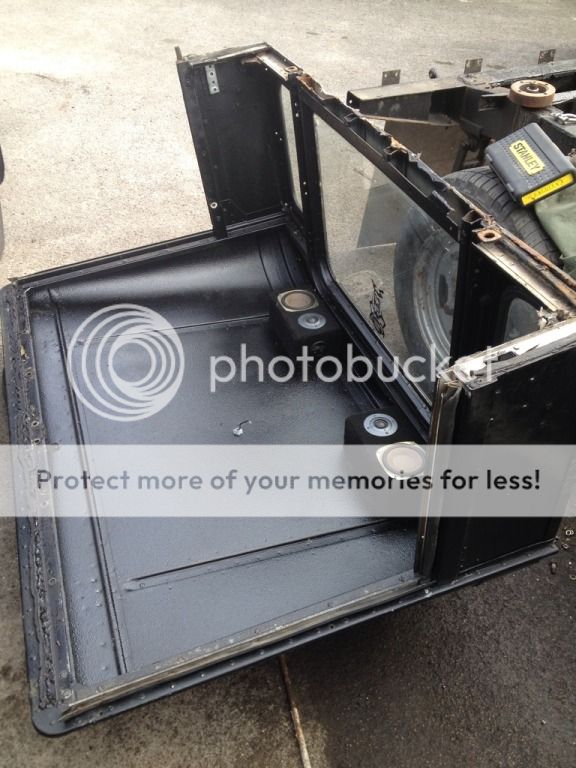
Roof off

50867D95-75FE-4266-A3AB-7053F73D1A01-1909-0000038B1B5B6779_zpsecbbc9f1.jpg


72D95BF8-60F8-481A-8C84-6D3FDFDA5834-1909-0000038B319C25F4_zps0919f915.jpg


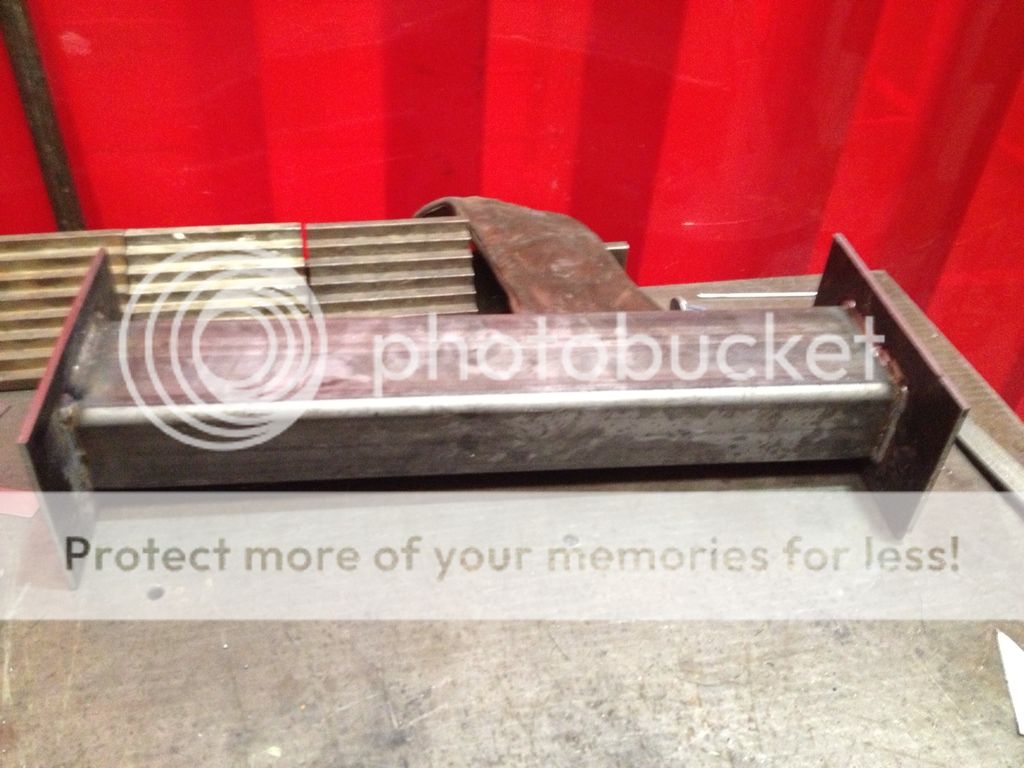
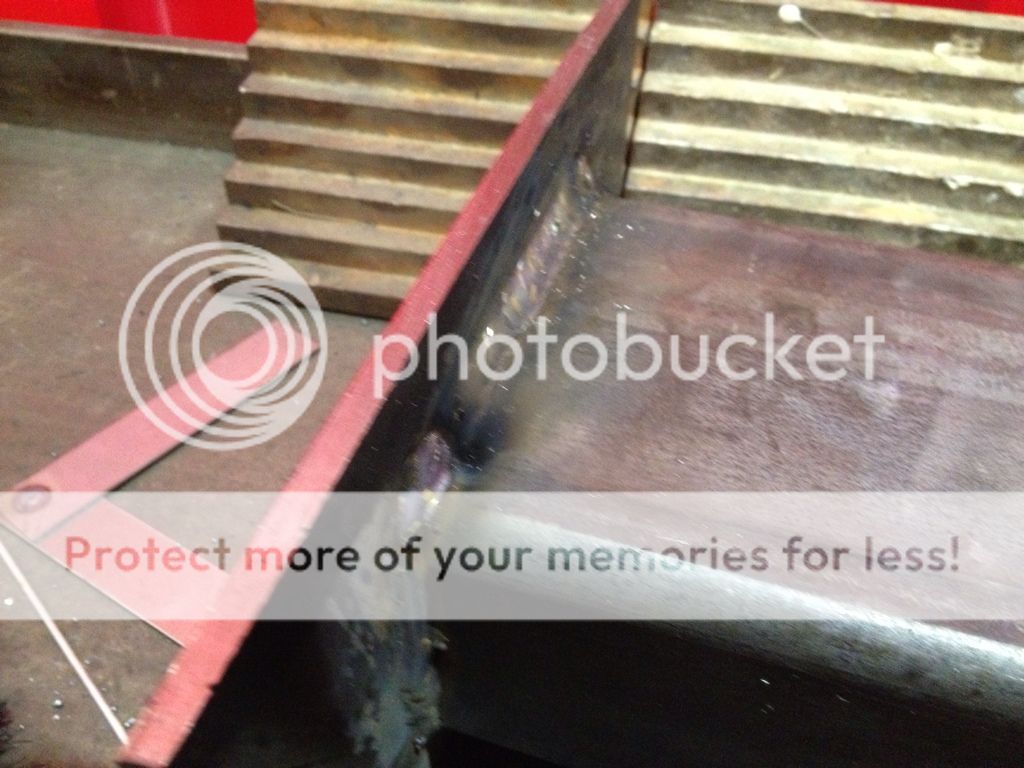
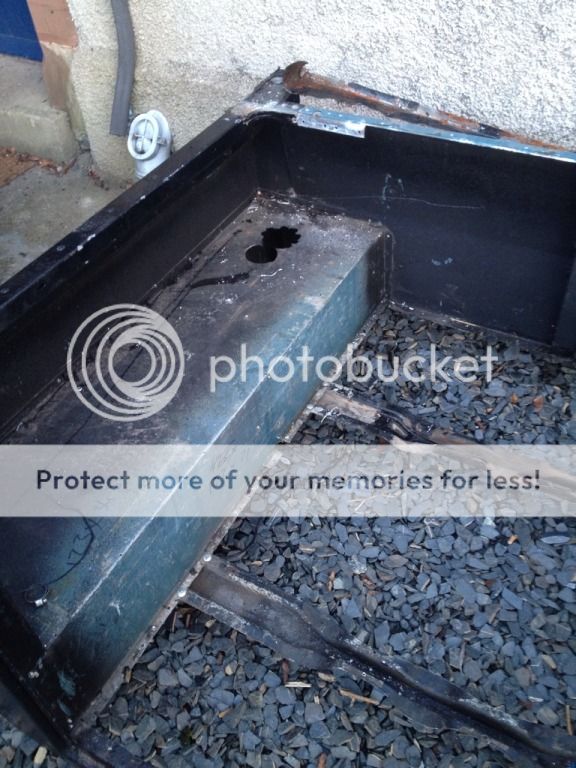
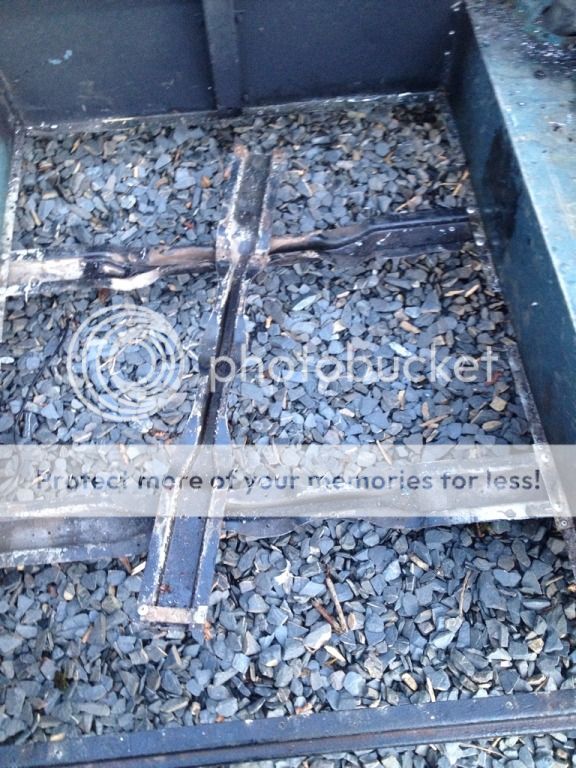
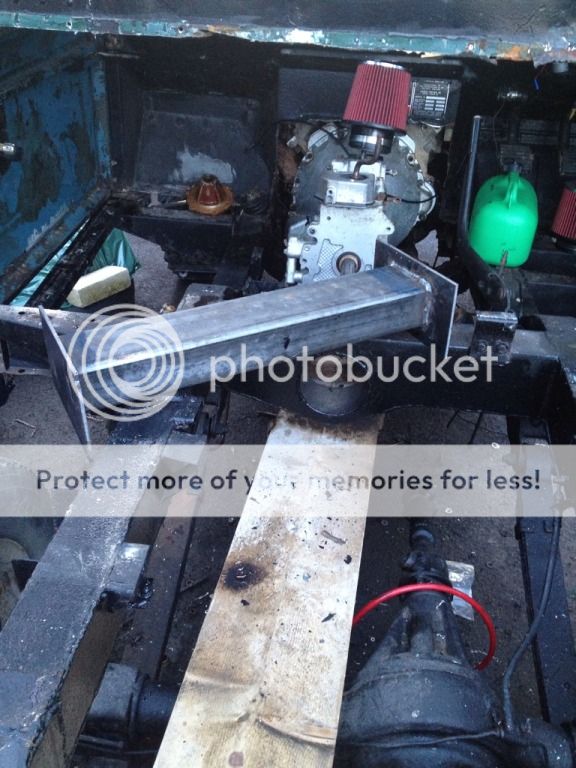
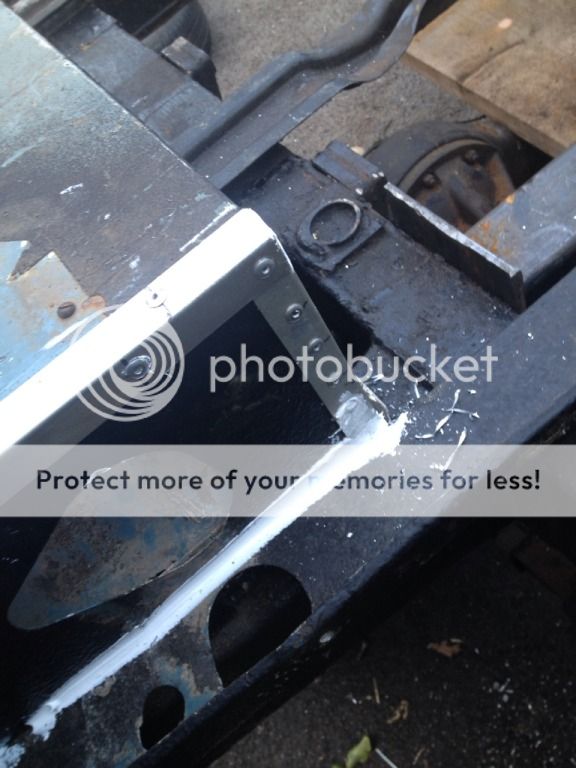
New crossmember in (had to grind a chamfer and remove some old welds from the previous owner) Needs welding in but its not going anywhere as I had to fit it with a No.1 engineers tool

0BC9EB14-867B-4735-A505-C5358B918588-1909-0000038B4BABEB80_zps3c199c6b.jpg


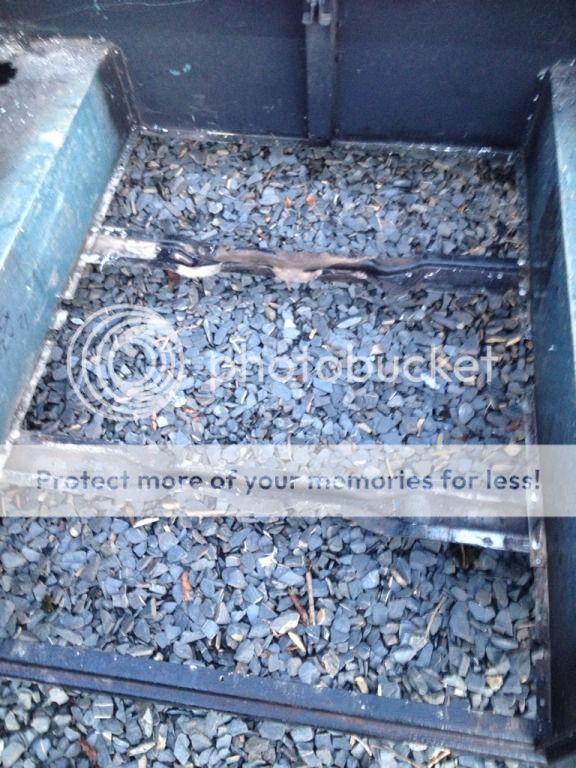
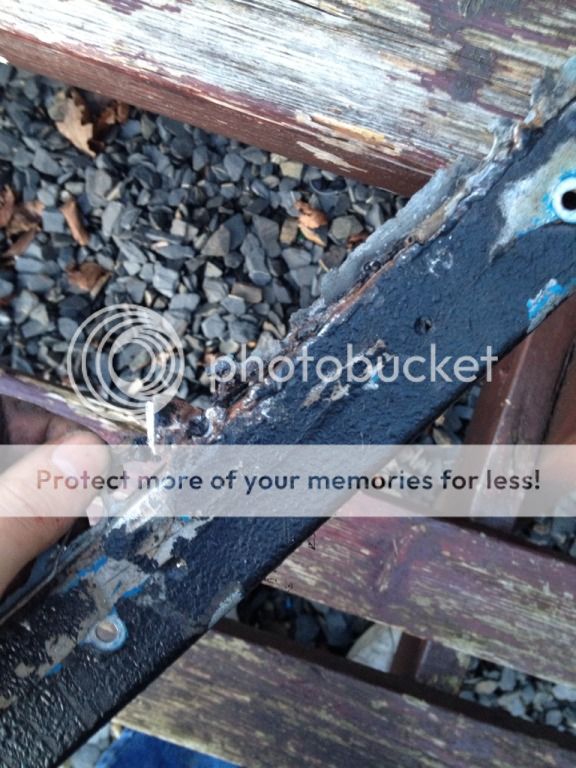
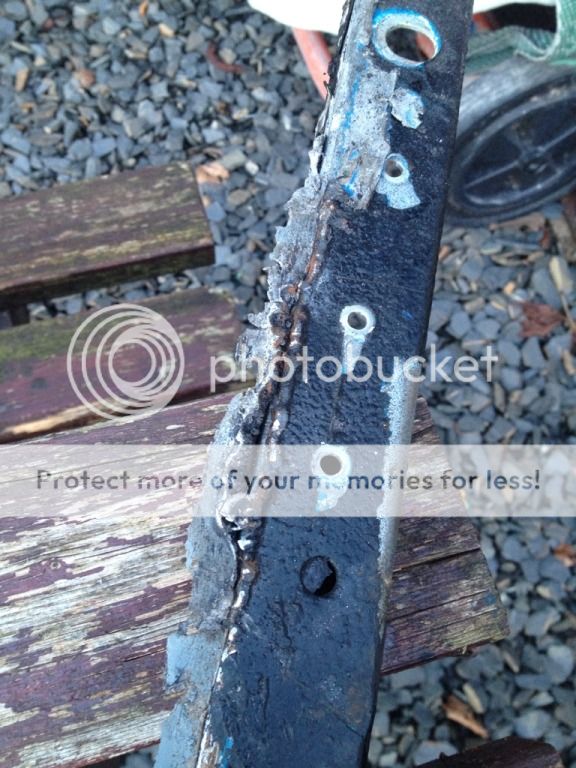
Removed old crossmember (it had a hole in it and had water inside but was fairly solid)


0CF2E8A5-749D-4E02-A3D8-E75DC50DD80F-1909-0000038B642287E8_zps3c81e051.jpg


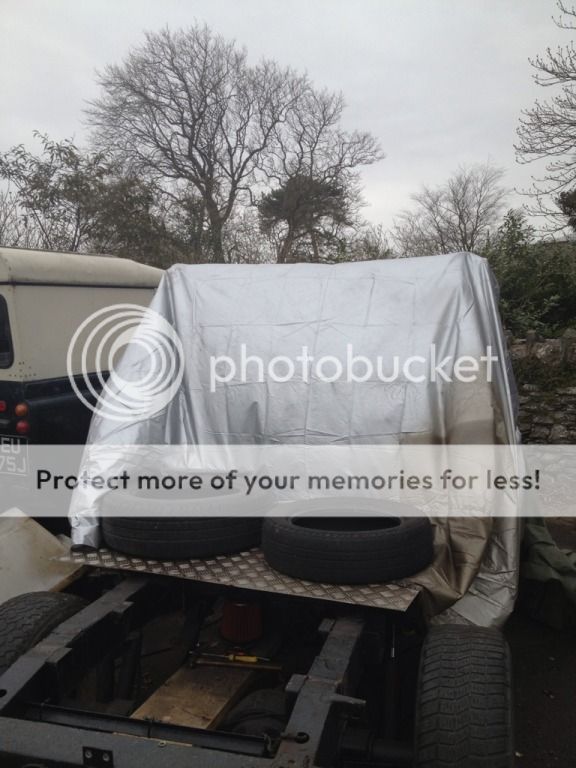
My cutting disc ran out about half way in so had to use a hacksaw, cold chisel and a large hammer to roughly remove the rest, rain then stopped play before I could put the transfer box on so I tucked him in and set about tidying up

683D0320-0A72-4549-8ADE-ACE1B8DF1005-1909-0000038B82E60614_zps83c829b6.jpg


FF2E9959-1708-48CA-A601-08A2B74F4A62-1909-0000038C0747ACBA_zpsd0c8e156.jpg


FA845AA1-B8A0-4906-9714-2097F797128B-1909-0000038C331F1B3A_zps64dba0c1.jpg


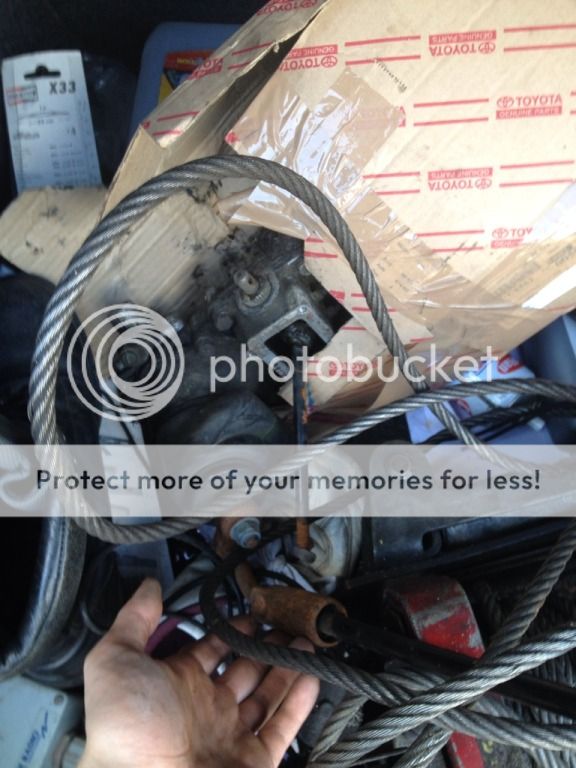
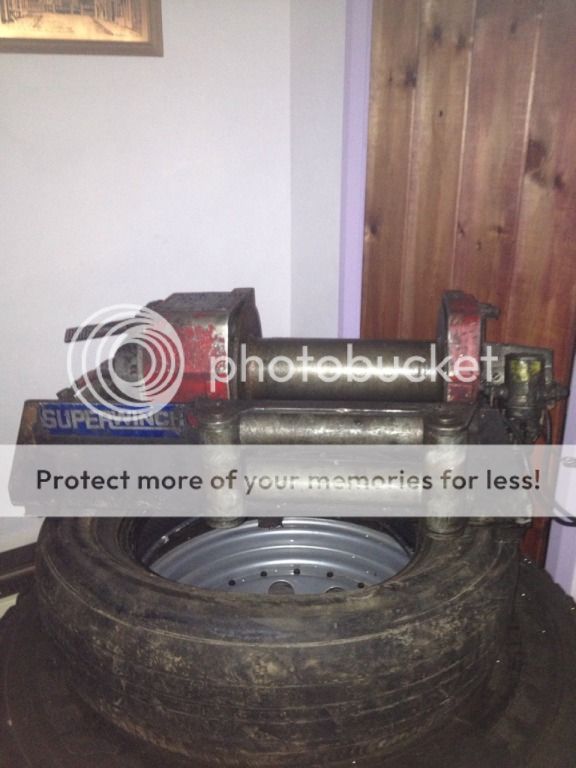
Brought the winch inside after this and began to strip it

564820A1-6CA2-406D-B0D4-FF1C8B7D9492-1909-0000038C58EB20BC_zpsb9e76782.jpg
 
So today I got a bit of a move on again, sorted out transfer box and linkages, put body back on and started tidying it up ready for the new innards


In removing the final parts of the old crossmember I smashed my thumb open :doh:


6444E4E1-25A3-4F0F-B4DD-8CFA18F5A194-4957-000008A6437297A2_zpsb38353f7.jpg


720218CB-6BDB-4EC3-BFAC-7E7A13B11F63-4957-000008A64A1273B2_zpsa41d7be1.jpg


05128E14-8419-41D9-B6D5-885A29D8F47D-4957-000008A74FBB2D97_zpsc904ca29.jpg


Anyway after this I moved onto getting the transfer box in


A792E1C7-0323-458A-B4D0-FAC55D815D55-4957-000008A65917E267_zpsadaae91d.jpg


Removed selector in order to free it up


3177428D-5ABB-46DD-AA6E-C49F855D1AB9-4957-000008A6B3546C2B_zps21f960ec.jpg


3A3AD531-B7F5-4213-9D93-C3AE5EFD120E-4957-000008A690F60D11_zpsf00ec912.jpg


C6369B38-1781-41E9-BF31-334A7923C2A5-4957-000008ACAAF126D5_zps05d667cc.jpg


After this I hooked it up again and sorted out the linkages, now goes into high, neutral and low. Gearbox also selects all gears now that I've removed the T-Piece and plunger switch from the housing

Roof delivered and packed away (Cheers Egg ;))


D0CC57E7-D31B-4803-8427-1BD3BE3354A1-4957-000008A745DC237D_zps4748abed.jpg


813F61A7-3C3E-449E-BC59-0385A9E3AB89-4957-000008A737FFDC93_zps9e156a3a.jpg


LT95 arrived too

827B7710-CB2B-4D0D-822C-56D581D549AB-4957-000008A66F114EC7_zpsf96688cb.jpg


One man removal is simple with some planks, just lift up the pallet by hand and slide them under before using them as a ramp to slide it down


C5CB11BD-7822-40F4-B795-0EB463F3CBC9-4957-000008A67F79582D_zpsf4b27bda.jpg


B21F9F33-C859-4E23-986C-AFAFA3A7CA21-4957-000008A69F17C026_zps7acda6b4.jpg


855A0E0A-1AE5-4C1F-A537-FF5A01EDA869-4957-000008A72B54BCB6_zpsd8c593a3.jpg


Rear tub back on (turtled it over then used planks to slide it on properly)


8F8C42F7-7ADB-4EFE-BE62-0E97CD3F4646-4957-000008A6DC5CC5BB_zps49edfaa3.jpg


06136DA4-C719-4DA3-822F-449F9CE90987-4957-000008A6D0101498_zpsb3b9a861.jpg


4F15DE38-F703-4FF6-84E7-FE5C42C89BBA-4957-000008A6F5BA239D_zps8711bb92.jpg


Sorted out the drivers side seatbox with some aluminium angle after this


2E962F7F-A467-45EC-8169-A8498D0DE3F3-4957-000008A70F2D8F54_zps4adfd8b1.jpg


ED01C875-BBAF-42DF-9EAF-A25E7979651C-4957-000008A719C6BD15_zps1b6eb566.jpg


Looking more series like again!


703C1F38-17FF-4E5E-ABD5-8B2DD8A60096-4957-000008A702032666_zps5c221d33.jpg


Packed up under a tarp again


7141CE80-8F4F-4DAD-83D6-B9CCAD6624E6-4957-000008A722C66314_zps9d81c6b4.jpg


Gonna get some more aluminium to sort out the floor and then make a start on the gearbox mounts, its getting there! Pace has picked up now and the to do list is rapidly shrinking :D
 
Bonus, the other week I dropped a heavy piece if steel on my finger split it right to the bone and blackened the nail, wrapped it up in steristrips and a plaster and removed my RR gearbox ;)
 
I just went with TCP soaked bandage and some elastoplast tape :p


Not crushed any bones yet just seems to be flesh wounds, had a deep cut on my hand when I removed the overdrive and no idea how I got it! Only realised when I saw the overdrive had started turning red :eek:
 
Cheers ;)


I'm tempted to try and fire it up this weekend if my new engine mounts are in the shop tomorrow :D

However that being said I still need to work out how I'm going to do this stupid prop shaft, been quoted £90 for a 30* wide angle prop shaft which isn't bad at all! But it limits my rear axle travel to 110mm down from 200mm which isn't so bad when you think about it for greenlaning but I'm half tempted to try and increase it back towards 200 with some fancy fabrication ;)
 
WTF happened to almost finished?????

I ripped it apart again……….


Wings need to go on, floor needs to go in, prop shafts need making, roof and sides want bolting together plus final riveting on roof and I've opted for new engine mounts in order to raise the sump away from the axle.
Tunnel I can knock up in a couple of hours, could have used old floor but decided I may as well do it properly instead of use the piece of **** floor that came with it


Basically adding more jobs to it that I didn't need to do but may as well in order to make it better
 
Back
Top