Project 1989 90 (Bruce)

This site contains affiliate links for which LandyZone may be compensated if you make a purchase.
had a days holiday today so spent a couple of hours on it,
started by checking whether the roof and sides still fit, they seem ok obviously not fully bolted down but that shouldn't matter right?....
DSC00678.jpg


DSC00677.jpg

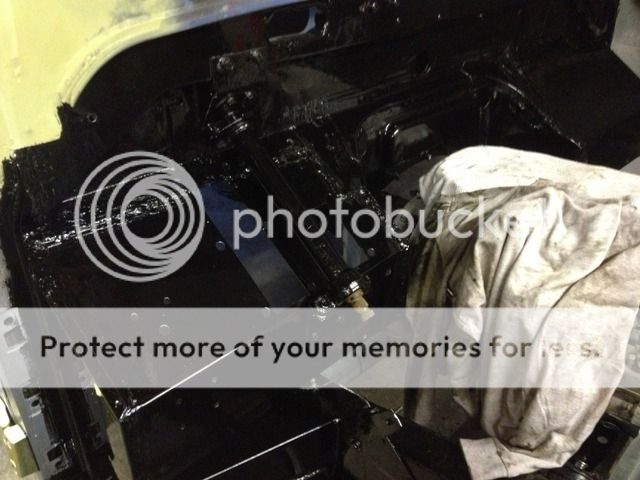
i also got a coat of paint on the centre part of the bulkhead so i can start to think about fitting the brakes and clutch boxes.
IMG_0069.jpg


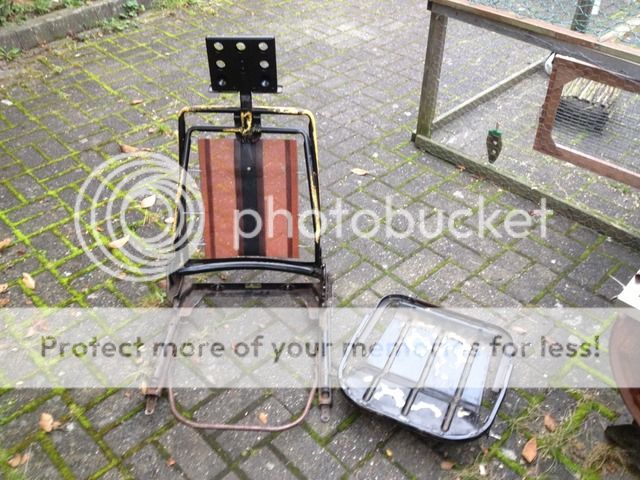
also stripped the seats ready for when i buy the retrim kits can't decide which pattern or material to get though.:confused:
IMG_0071.jpg

:cool:
 
i have come across a slight issue with my lack of space although the garage is plenty big enough it is lacking in height meaning i have minimum clearance...
and thats from the top of the door to the garage door, having new springs and still more weight to add I'm hoping it will lower a little, either way the roof can't go on until it goes out on the drive. thanks for looking Sam :tea:

I had the same issue, took the hard top off the 90, drove it into the garage and fitted the soft top and frame, then realised it wouldn't get out past the up-and-over door :doh: Had to let the tyres down and compress the chassis towards the axles with ratchet straps :rolleyes:

After fitting the lift kit, the only way to get it inside is to put it on a set of old rims with no tyres

i did wonder about that as i have a the original steelies but i don't think it will get up the slope into the garage, that and it seems a bit of a ball ache just to put it in the garage.:p
 
the final majorly expensive parts were delivered today. courtesy of mr Ashcroft, expensive but look great, well apart from the horrible grease there coated in gets everywhere. I'm still trying to fit replace my starter gear on my flywheel but struggling tried the oven then a ceramic hotplate at work still won't go on so going to attempt the oxy gear in the morning then once a clutch has arrived they can be fitted.
IMG_0074.jpg

:D
 
done a bit more today started by fitting the flywheel as i finally managed to install the starter gear so fitted that the the motor this morning along with my starter which a friend rebuilt for me,

IMG_0081.jpg


IMG_0076.jpg


once i had finally sourced some bolts for the tow ball i fitted that.

IMG_0079.jpg


then i assembled the transfer box to the transmission and made a start on the hand brake and linkages all was going well until i came to fit the diff lock pivot, the connecting rod has broken so need to fabricate something to make that work tomorrow.
IMG_0077.jpg


IMG_0083.jpg


once i had done all that i removed the roof to help with access when the time comes to fit the gearboxes.:)
 
Took advantage of some fine weather today and tidied up the front bumper, i made the mistake of leaving outside over winter and it filled up with water and rusting through on one end. so got out the grinder and wire wheeled the entire bumper then used a flap disk to take the damage part to the metal then cut out enough metal to leave me with some weldable metal and cut and welded in a new piece.

IMG_0084.jpg


measure twice cut once didn't quite come into play here so the top joint took a couple of passes

did all this in the garden so to save me lugging the mig round i dug out the arc welder and used that so don't be to harsh on the welding please:eek:

IMG_0085.jpg


ground down, not perfect but the adds to bumpers "character" its bent and dented as it is.

IMG_0087.jpg


then i did some work on the chassis bolted up the gearbox mounts and cut some bolts down that were sticking through bait far.

i have placed some orders so works should progress next weekend when all the parts have arrived wiring, fluids,clutch parts, all the lights and a couple of cans of spray paint so i can carry on with the interior, the plan was to spray the whole vehicle inside and out but as I've hit a few holdups its behind schedule meaning that I'm going to rattle can the visible interior parts and door jams/panel gaps get it all reassembled ready for spring when it warms up enough to spray the rest.:)
 
got a couple of hours on the landy today started off with taking out the engine, fitting the transmission and transfer box, smashed my head multiple times whilst fitting the propshafts, filled the boxes and diffs with oils and then finished of by making a start on the clutch assembly i have sourced new parts, clutch, master cylinder, slave cylinder, bulkhead pipe and modded my clutch fork. all was going well until it came to connecting the clutch pipe to the master cylinder and it appears that one of the two parts is incorrect the thread seams to large and the formed end piece on the pipe looks to me anyway of the incorrect type. any ideas?

IMG_0094.jpg


possibly an incorrect pipe?

IMG_0093.jpg


repaired diff lock connector

IMG_0098.jpg


IMG_0097.jpg


IMG_0096.jpg


IMG_0095.jpg


any suggestions welcome?:confused:
 
For the brake pipes & stuff Landys went metric in 1981, only thing that I can think of is that you have a pre- 1981 master cylinder or pipe ????

They look nearly the right size but the threads different !
 
For the brake pipes & stuff Landys went metric in 1981, only thing that I can think of is that you have a pre- 1981 master cylinder or pipe ????

They look nearly the right size but the threads different !

thanks for the reply it can't comment on the thread being correct or not, but the flare on the pipe prevents it from going in enough to reach the thread anyway :confused:
the pipe is" NRC8330 Applicable Models: RHD models only.Defender 1984 on to vin. LA939975"

and the master cylinder is 550732G Clutch master cylinder-S3 - TRW Lucas suitable for the Land Rover Series 2, 3 and Defender. says its suitable for all defenders. so I'm baffled at the minute :wtf:
 
while on the subject of things not going to plan, i attempted to fit the exhaust today but there seems to be a complete lack of bracketry on the richards chassis?

DSC00185.jpg

my new chassis only has the bracket that doesn't seem to be used on this exhaust set up and no sign of a way of attaching the rear exhaust hanger

DSC00266.jpg

and the two holes that appear in the blueish rectangle (parallel to the chassis rail) for the centre exhaust mount do not exist? i have the bracket but no way of attaching it. may be as simple as drilling and tapping them

had the old chassis been butchered to fit a strange exhaust out of bits? I've tried looking up the part numbers visible on the first pic to see what it is for/ come off but no luck :roll eyes: any pics of what it should look like would be great or any information.
cheers Sam
 
wow! awesome rebuild/new-build :D. have just sat and read all 8 pages in one go, absolutely fookin brilliant :D :D. can't wait to see it finished

cheers, just getting to the complex bit now, putting all the small bits back on/in. the plan has changed engine wise I've been persuaded that rebuilding the 19j is a waste and that the money should be spent on a tdi be it 200 or 300 still undecided. but there both close in power, reliability and cheap to run so i am led to believe. but from looking the 300s are a tad cheaper i guess its because fitting them in needs a little "tinkering" and the 200s are easier so more desirable therefore cost more.
 
Somthing was bothering me about this photo last night but as it was dark & pishing it dooooon could'nt be arsed to go out and have a look at mine !

But I did this morning and it looks like your missing an adaptor jobby on your master cylinder ;)

thanks the pic explains the problem. looks like i need to get myself a 139082

139082 ADAPTOR BRAKE / CLUTCH PIPE | shop | www.lrseries.com | L. R. Series

going out to see if i have the old master cylinder, i fear it may have gone on the scrap pile.

ta :tea:
 
had a quick look at my stripped chassis, there is a mounting bracket bolted on to the rear crossmember.
see attached photo of old chassis bracket and also pic of new rear crossmember, there are untapped holes that go thro both skins.

Cool rebuild by the way !
 

Attachments

  • Exh.jpg
    Exh.jpg
    318.6 KB · Views: 376
  • ex2.jpg
    ex2.jpg
    264 KB · Views: 393
Back
Top