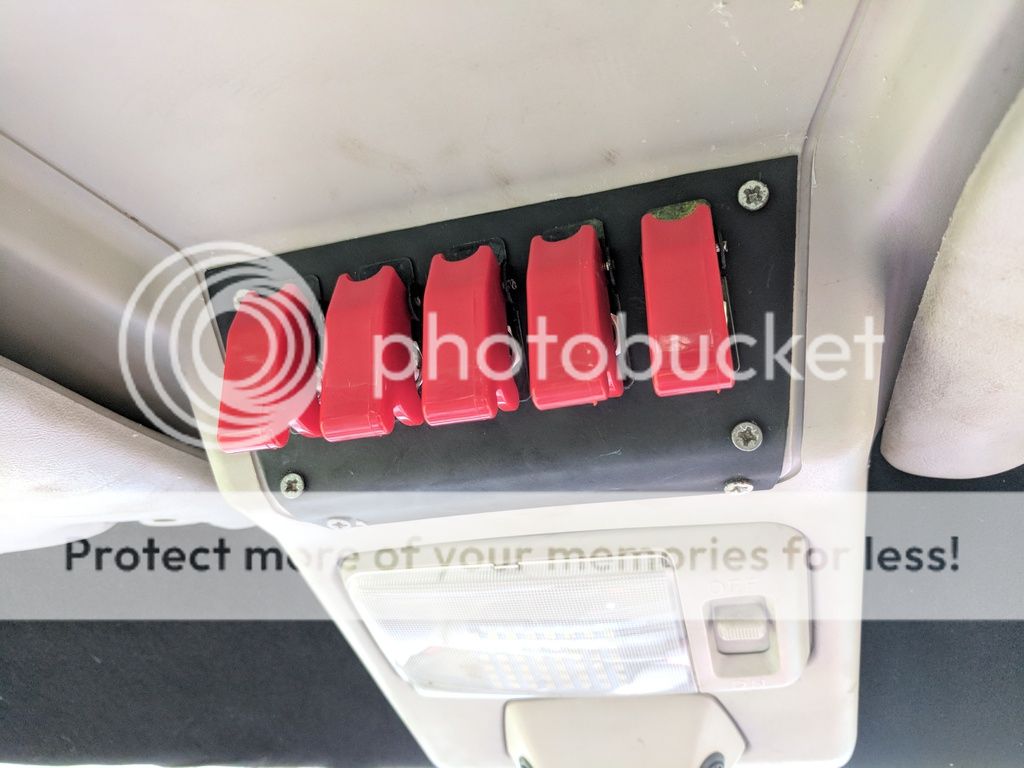
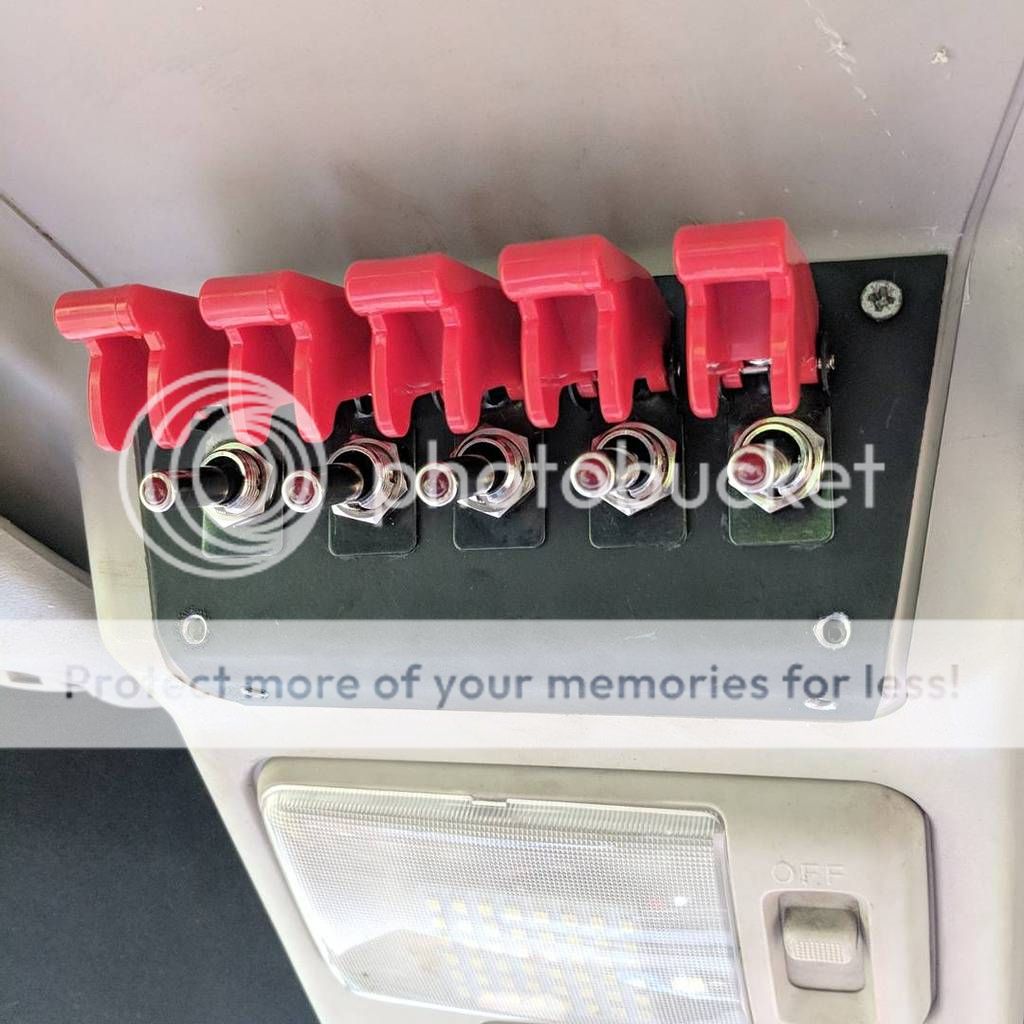
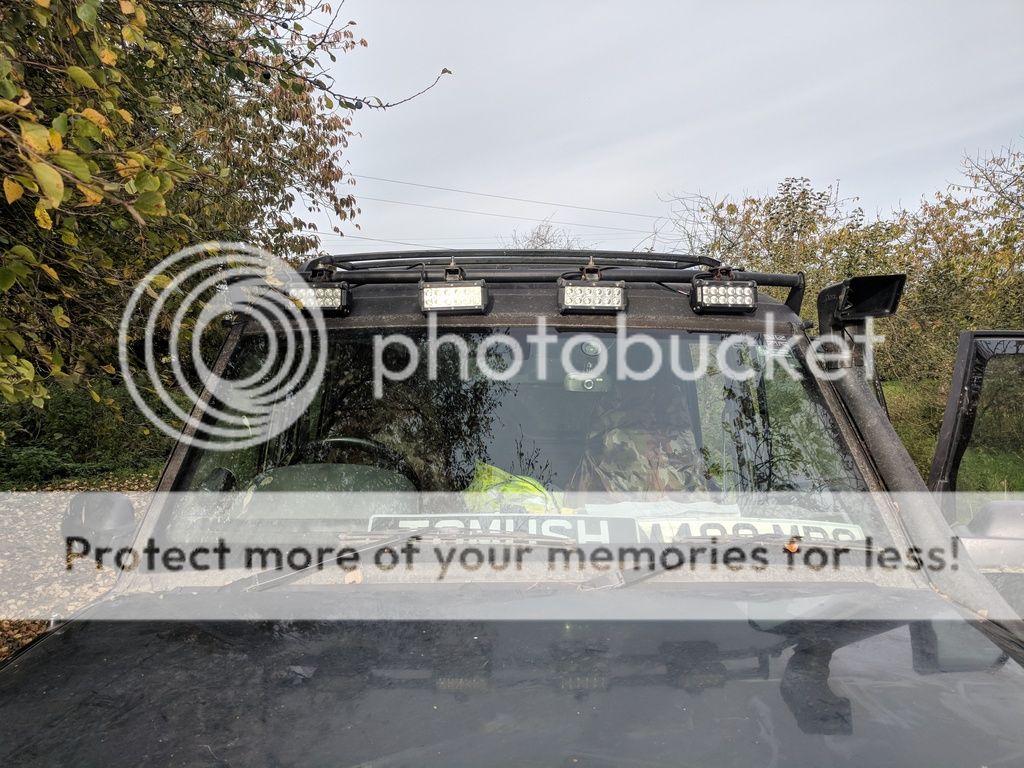
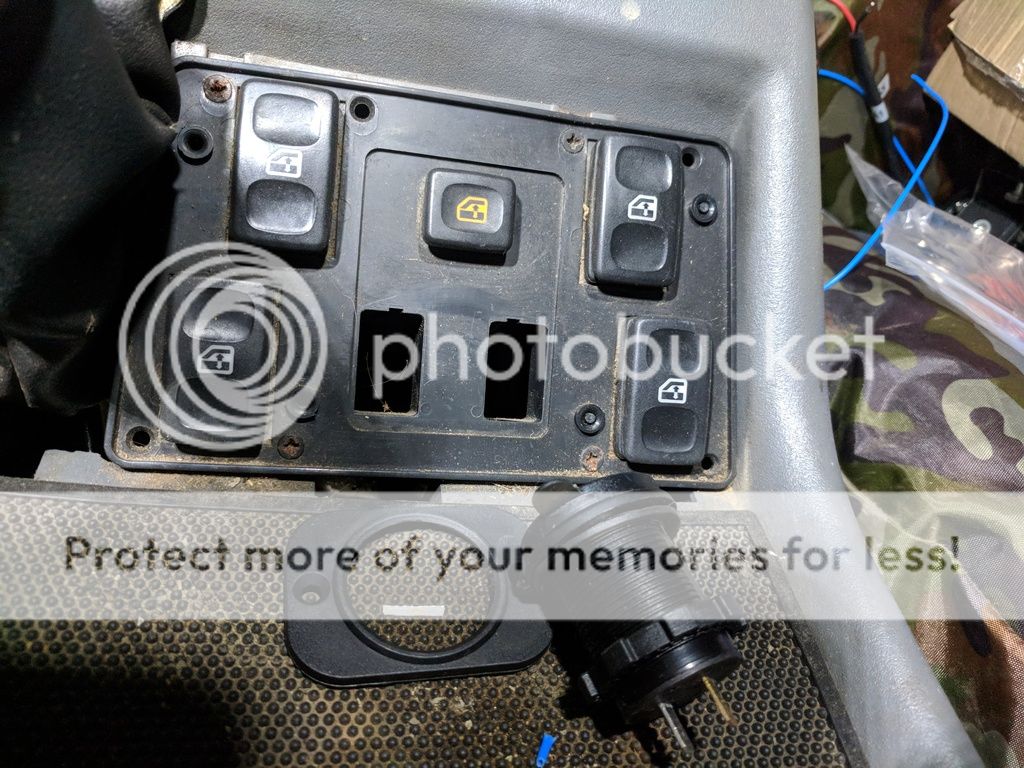
In between doing bits n bobs in the evenings been making some bits up for the interior, I've always wanted overhead switches because it's cool as hell in my eyes lol. So I made a panel up which will go where the sunroof buttons go. I took the motor out and it was dead about a year ago (and the sunroofs are sealed up because they were majorly leaky. So there has always been a gap where the buttons went, never bothered to put them back. This looked like the ideal place to put an overhead switch panel complete with flip switches!
Started out with a piece of cardboard to make the template up, then put it in a vice and slowly bent a curve in two places to match the shape of the hole. Looks harsh but it's the lighting, once you see it painted you can see it's a fairly nice curve.
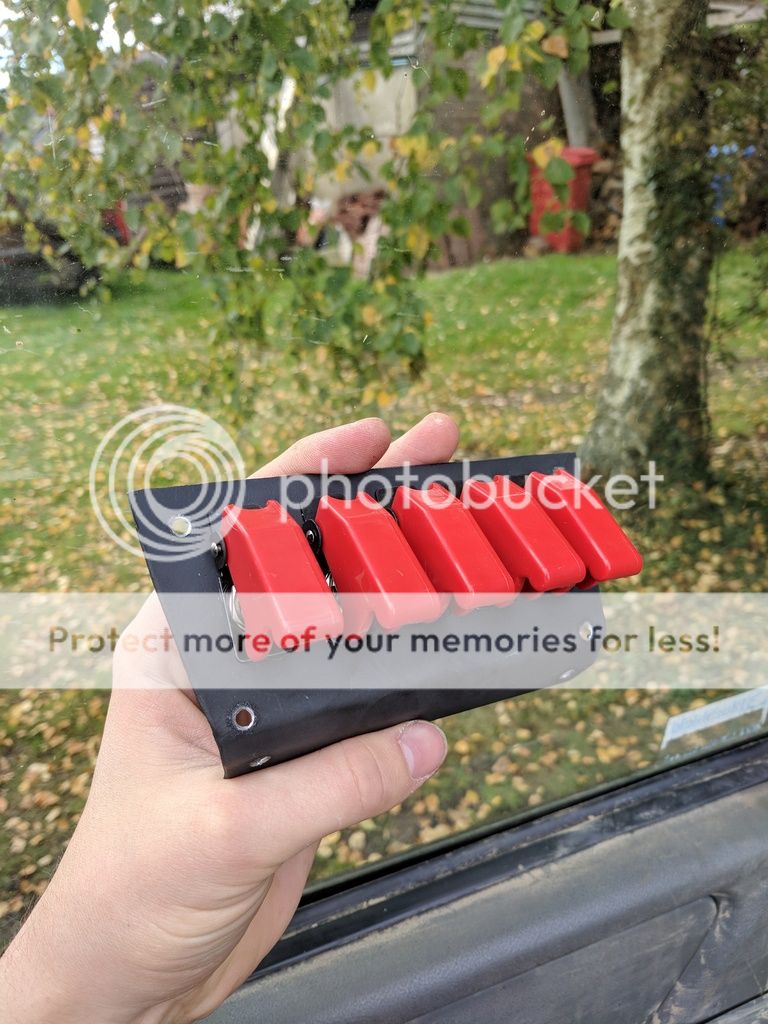
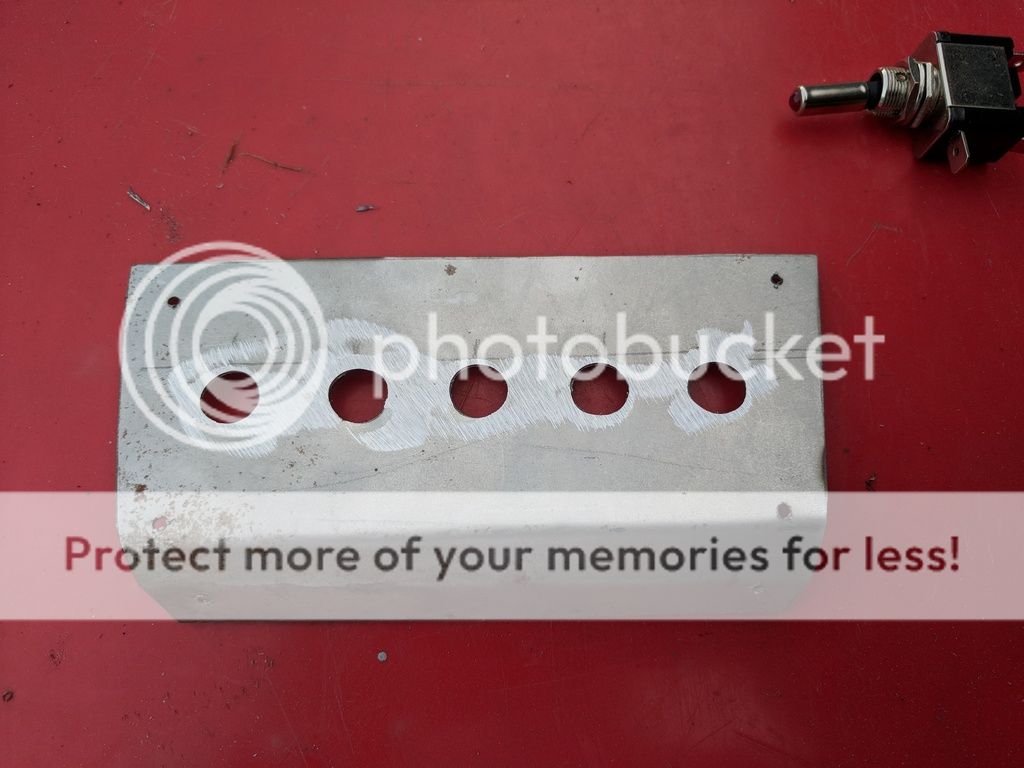
Worked out at about 6 inches in width across the middle and as I had 5 switch holes to dill out, worked out perfectly to mark a point at every inch on it.
Also drilled out some pilot holes for the screws to hold it into place.

After drilling the pilot holes for the switches I gradually went up in size on the holes (mainly because I couldn't find the correct size drill bit, but in the end I found one that was a perfect fit.
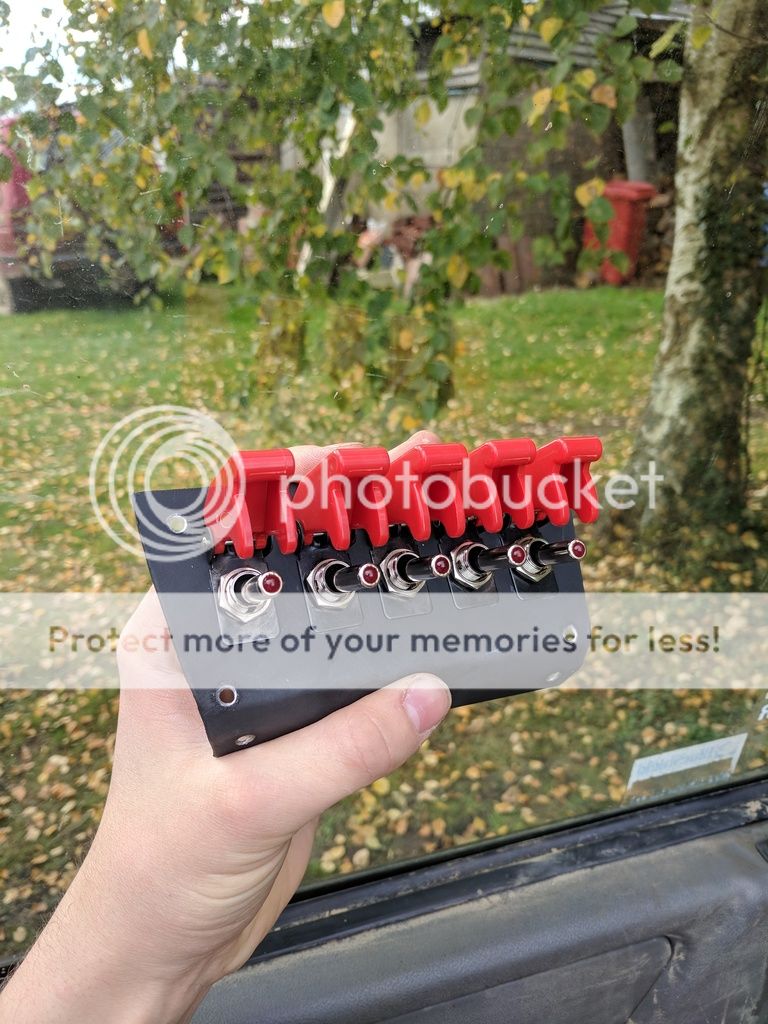
Test fitted one of the switches, fits perfect! Note that it doesn't have the flip cover on the switch at the moment, I'll add that when it all gets put together.
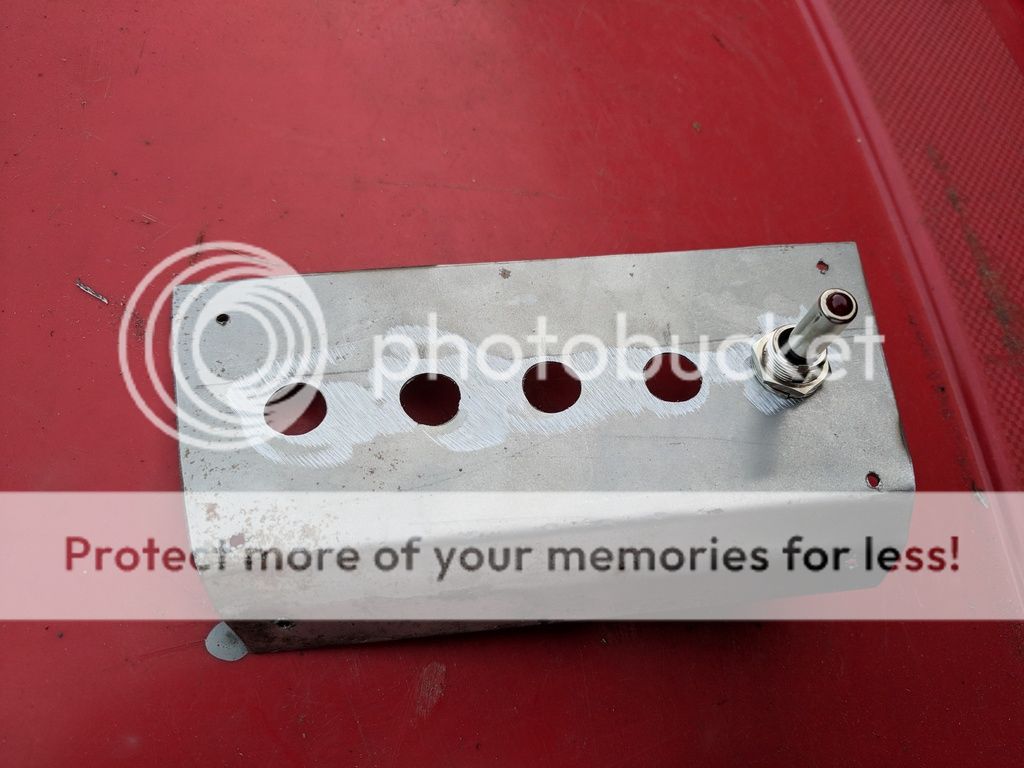
After keying the metal a bit I sprayed some stonechip shield to protect it, mainly because it was all that I had but it also has a nice satin finish to it when dry so makes it look like plastic.
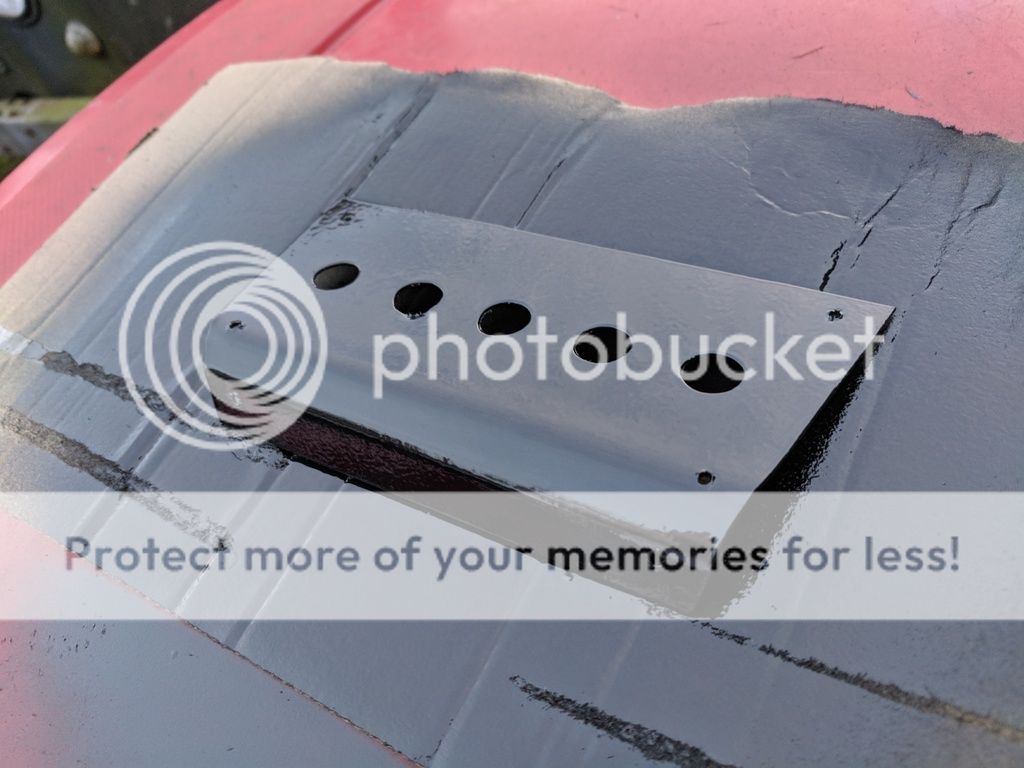
Didn't get a picture of it dry as I did that a few days ago, and done a second coat of paint since. I'm yet to put it all together ready to go in the car, will likely get round to it at the weekend.
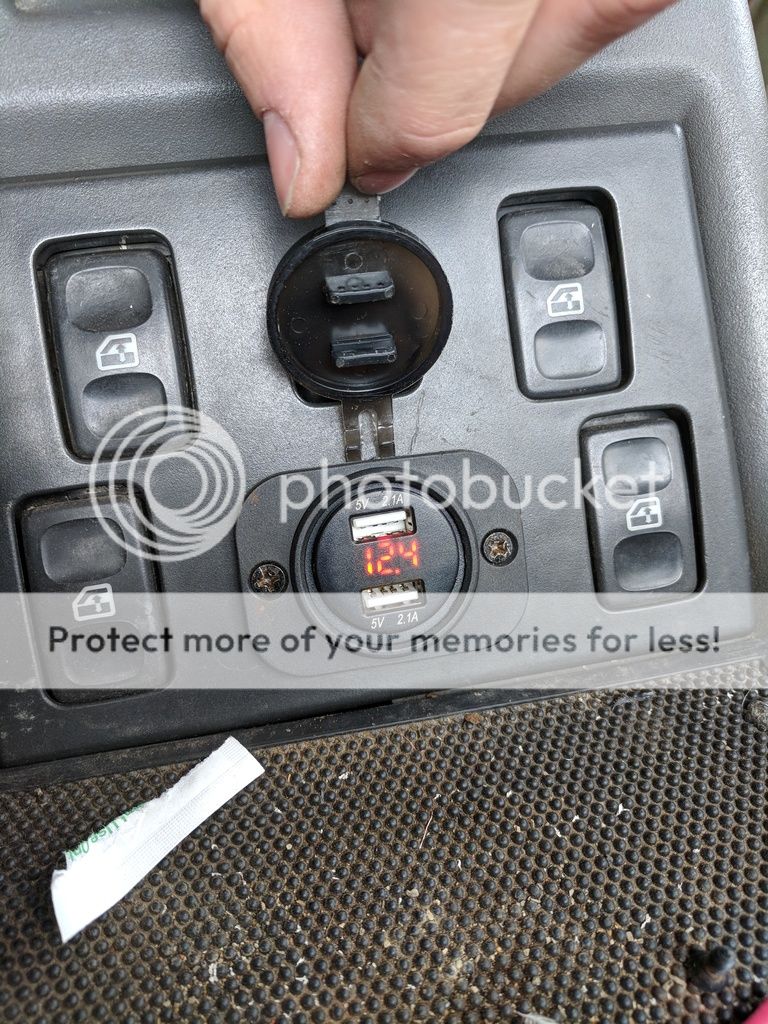
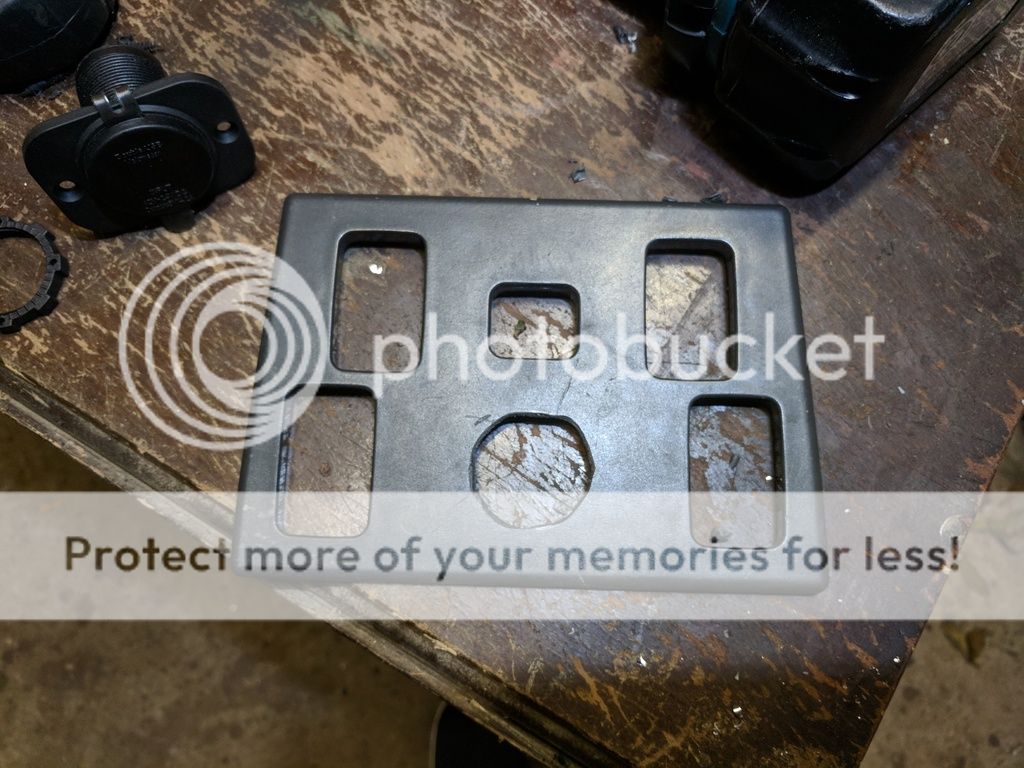
Next thing was that I bought a 2.1a x2 USB socket hub (which also has a voltmeter on it) from Amazon in the sale, just saw it come up and liked it so thought why not!
Been thinking where to put it for a while but as I don't have much space on my dash (and I don't think it would look that good). I also thought about putting it in the glove box and center console but if I have my phone set up on the dash for a satnav or something I wouldn't be able to route the cables there easily.
In the end I settled for here! Seemed clean enough, plus gives both the driver and the passenger a space to have something connected. Just got to make a hole in between those two square gaps.
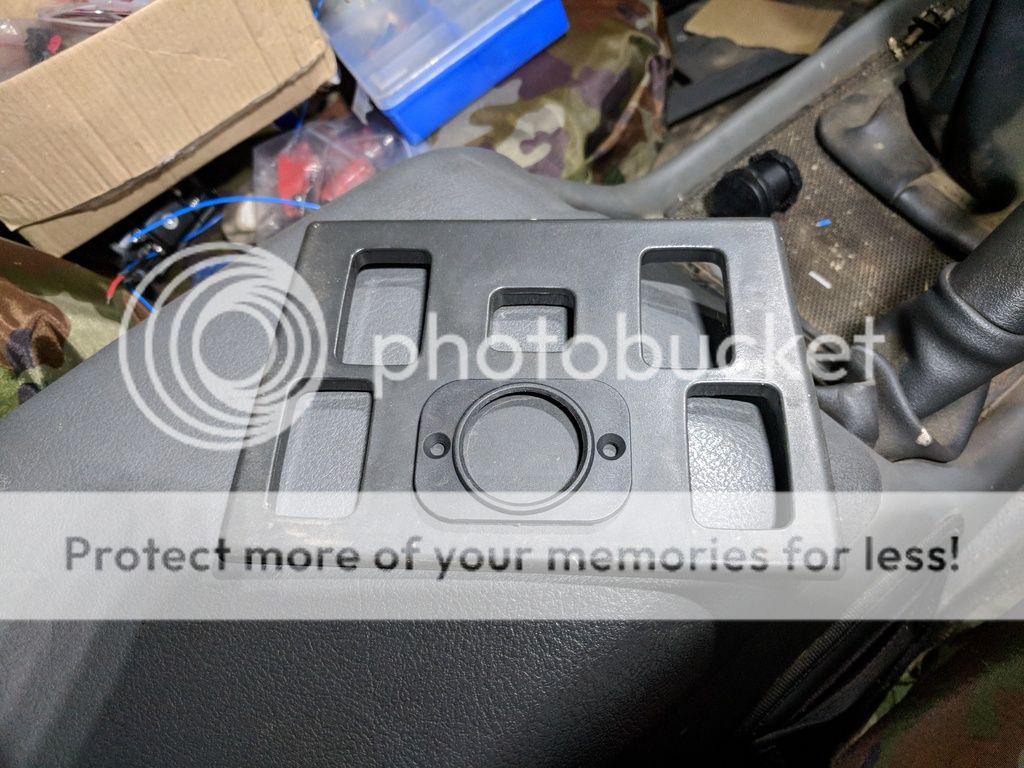
Drilled a hole best as I could, didn't have anything of this size so made a few holes with a bigger drill bit and then cut the rest out as best as I could, then used a Dremel to round the rest off and get the flaky plastic out the way.
Didn't turn out too bad I don't think! I like that it has a waterproof cover to protect it from dust and potentially some splashes of water getting in the sockets. Plus the cover is thin enough to see the volt meter.
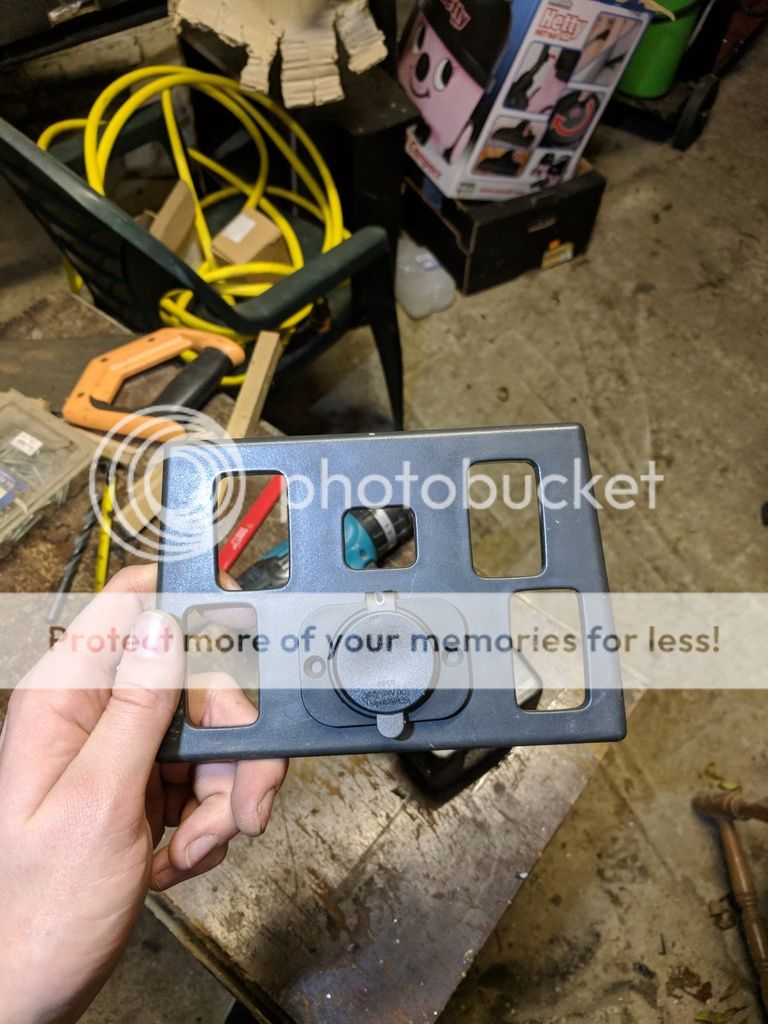
Yet to fit the rest into the car but will do at the weekend among the other stuff.
I've also wired in a switch and relay to the fusebox so I can manually isolate everything from the battery for whatever reason e.g. lights and any other accessories. Haven't got any pictures of that but one of the switches will be one of the five on the switch board i've made.
Started out with a piece of cardboard to make the template up, then put it in a vice and slowly bent a curve in two places to match the shape of the hole. Looks harsh but it's the lighting, once you see it painted you can see it's a fairly nice curve.
Worked out at about 6 inches in width across the middle and as I had 5 switch holes to dill out, worked out perfectly to mark a point at every inch on it.
Also drilled out some pilot holes for the screws to hold it into place.
After drilling the pilot holes for the switches I gradually went up in size on the holes (mainly because I couldn't find the correct size drill bit, but in the end I found one that was a perfect fit.
Test fitted one of the switches, fits perfect! Note that it doesn't have the flip cover on the switch at the moment, I'll add that when it all gets put together.
After keying the metal a bit I sprayed some stonechip shield to protect it, mainly because it was all that I had but it also has a nice satin finish to it when dry so makes it look like plastic.
Didn't get a picture of it dry as I did that a few days ago, and done a second coat of paint since. I'm yet to put it all together ready to go in the car, will likely get round to it at the weekend.
Next thing was that I bought a 2.1a x2 USB socket hub (which also has a voltmeter on it) from Amazon in the sale, just saw it come up and liked it so thought why not!
Been thinking where to put it for a while but as I don't have much space on my dash (and I don't think it would look that good). I also thought about putting it in the glove box and center console but if I have my phone set up on the dash for a satnav or something I wouldn't be able to route the cables there easily.
In the end I settled for here! Seemed clean enough, plus gives both the driver and the passenger a space to have something connected. Just got to make a hole in between those two square gaps.
Drilled a hole best as I could, didn't have anything of this size so made a few holes with a bigger drill bit and then cut the rest out as best as I could, then used a Dremel to round the rest off and get the flaky plastic out the way.
Didn't turn out too bad I don't think! I like that it has a waterproof cover to protect it from dust and potentially some splashes of water getting in the sockets. Plus the cover is thin enough to see the volt meter.
Yet to fit the rest into the car but will do at the weekend among the other stuff.
I've also wired in a switch and relay to the fusebox so I can manually isolate everything from the battery for whatever reason e.g. lights and any other accessories. Haven't got any pictures of that but one of the switches will be one of the five on the switch board i've made.
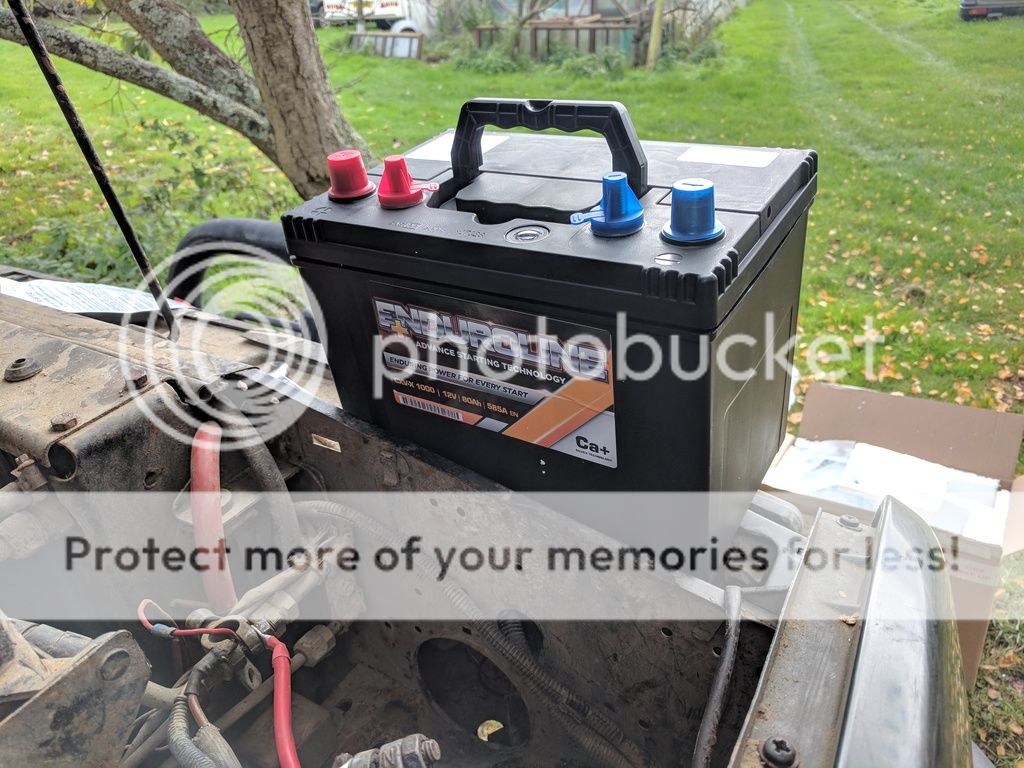
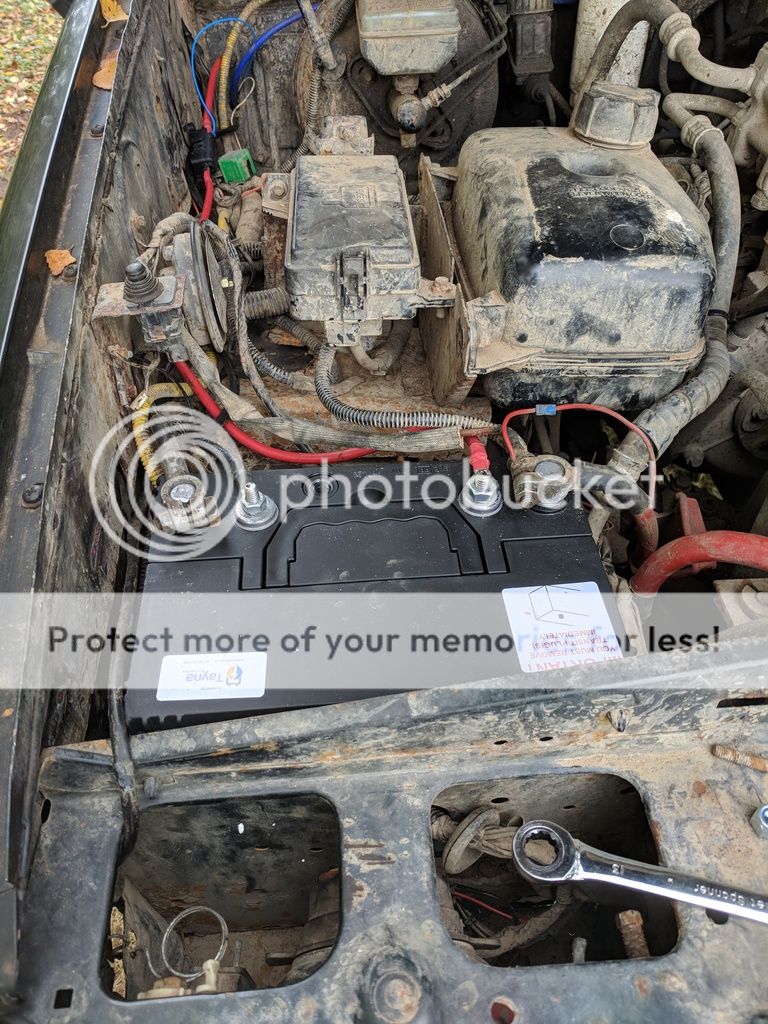
") Was a little annoying that the positive was larger than the negative because I had to find another nut that would fit and all that were correct sizes had the wrong pitch angle so I had to re-thread one to the correct pitch. Annoying that the battery didn't come with the nuts! Starts the engine a treat though, can definitely tell it was a lot more powerful than the old one!
Was a little annoying that the positive was larger than the negative because I had to find another nut that would fit and all that were correct sizes had the wrong pitch angle so I had to re-thread one to the correct pitch. Annoying that the battery didn't come with the nuts! Starts the engine a treat though, can definitely tell it was a lot more powerful than the old one!