You are using an out of date browser. It may not display this or other websites correctly.
You should upgrade or use an alternative browser.
You should upgrade or use an alternative browser.
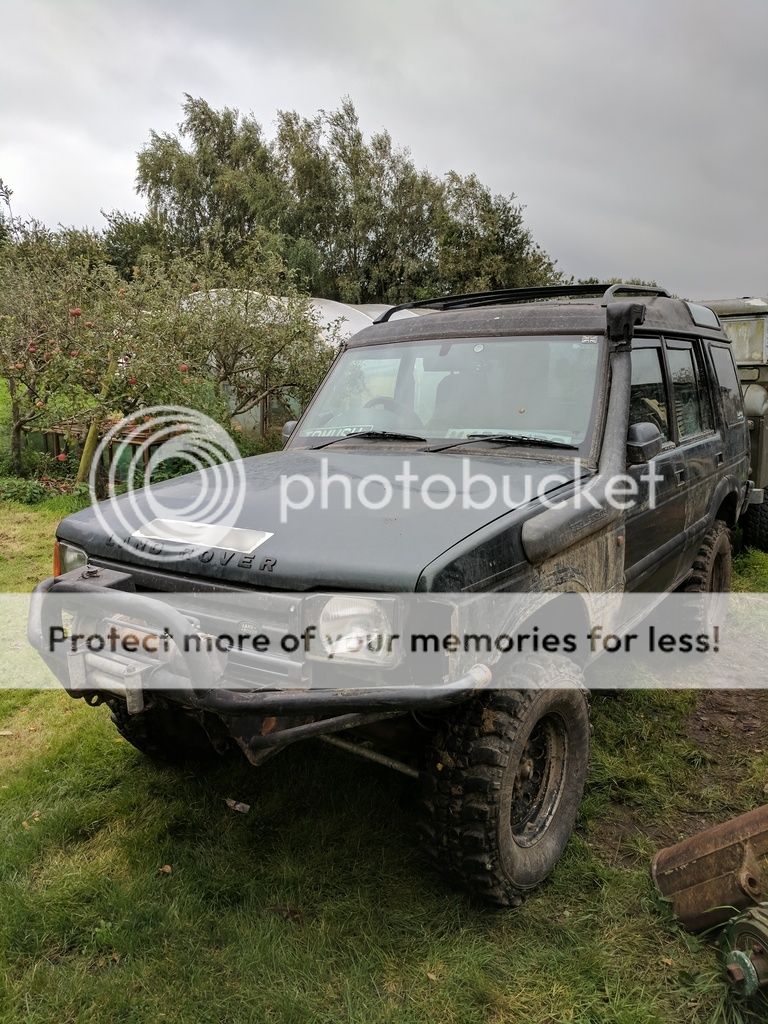
Discovery 300Tdi Off Roader
- Thread starter Tomushh
- Start date
This site contains affiliate links for which LandyZone may be compensated if you make a purchase.
callisr
Well-Known Member
- Posts
- 615
- Location
- Burton-on-Trent, Staffs
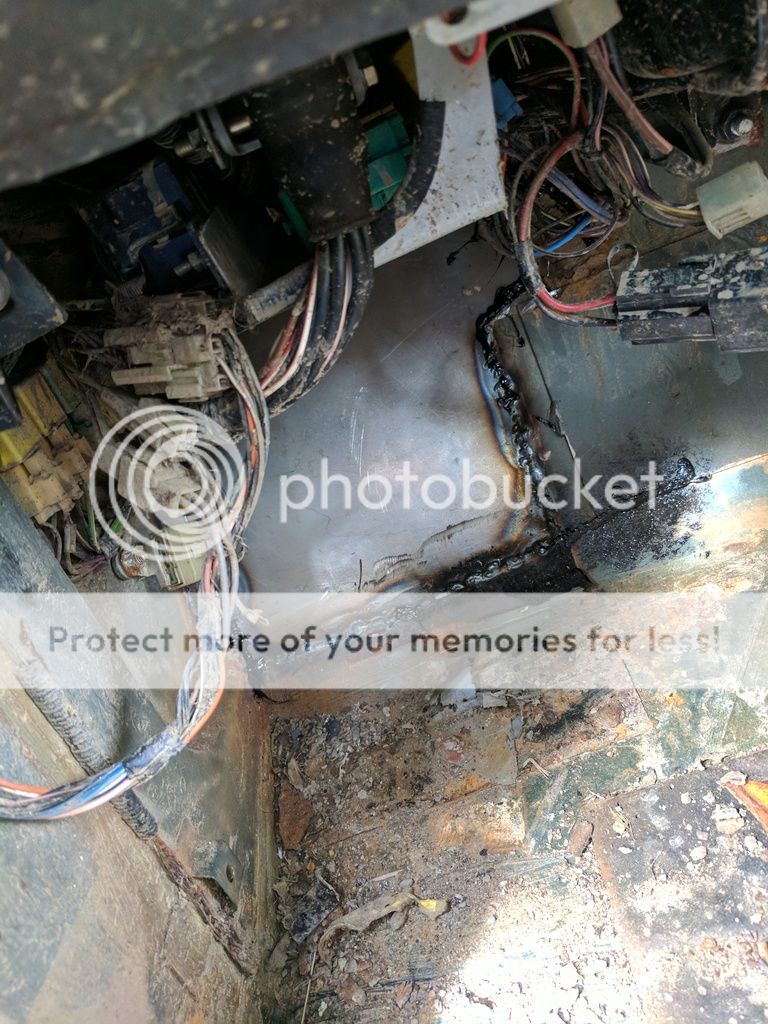
A grommet or cable gland would be better........
That red wire looks ripe for rubbing through and setting the whole truck on fire.
I wouldn't rely on sealant for this job
Rich
That red wire looks ripe for rubbing through and setting the whole truck on fire.
I wouldn't rely on sealant for this job
Rich
Bit of an update, should be a few over the week as well so stay tuned
Got a nice delivery of more electrical goodies,

Got some cool toggle switches with a flip cover, looks awesome. Also has a little LED on the end, will try and wire it up so that the led only comes on when the part is on.

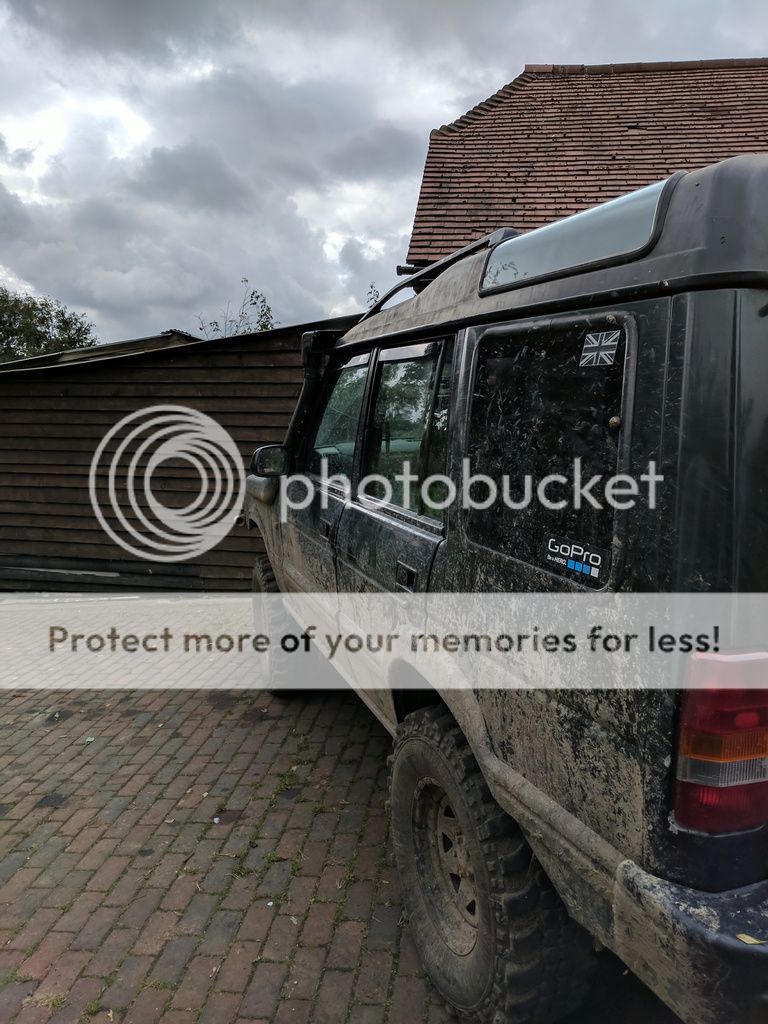
So anyway, the main part of this update is I am finally going to do the last bit of rust on my discovery. It's one of those horrible jobs you really can't be bothered to start as it doesn't really have much gain other than the thing rotting in to ground.. So thinking about it maybe it does have a benefit!
When I bought it almost a year to the day now, it came with brand new repair panels for the front arches. Unsure on the make of them, but they appear to fit well and if they don't, I will make them fit well lol.
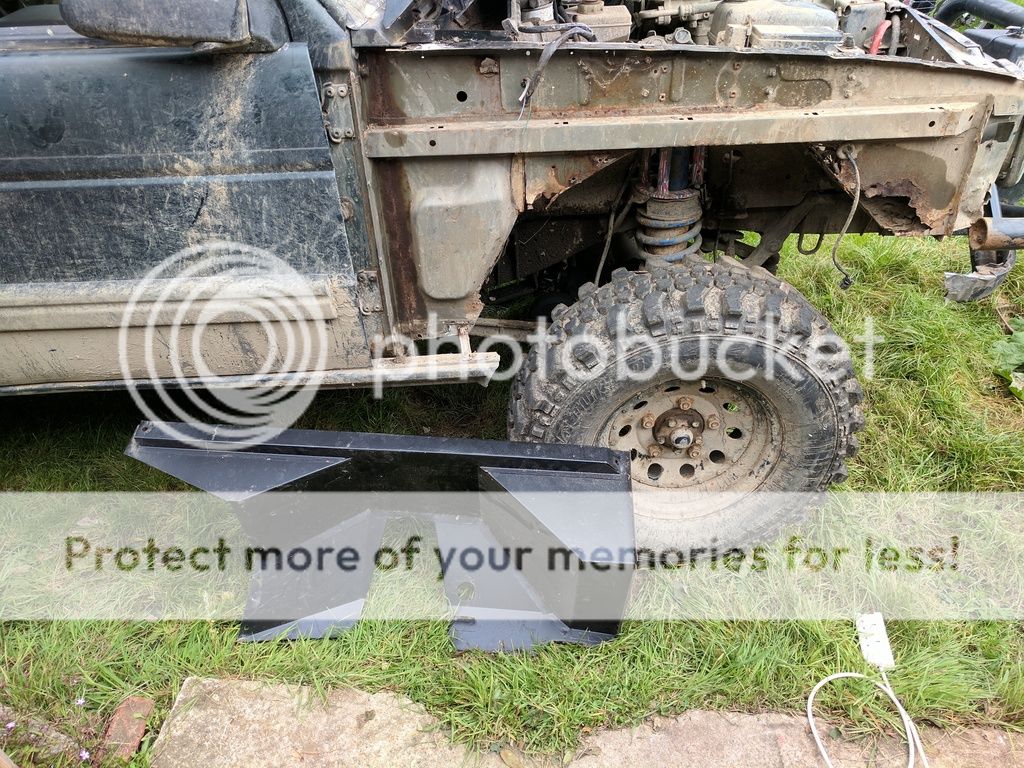
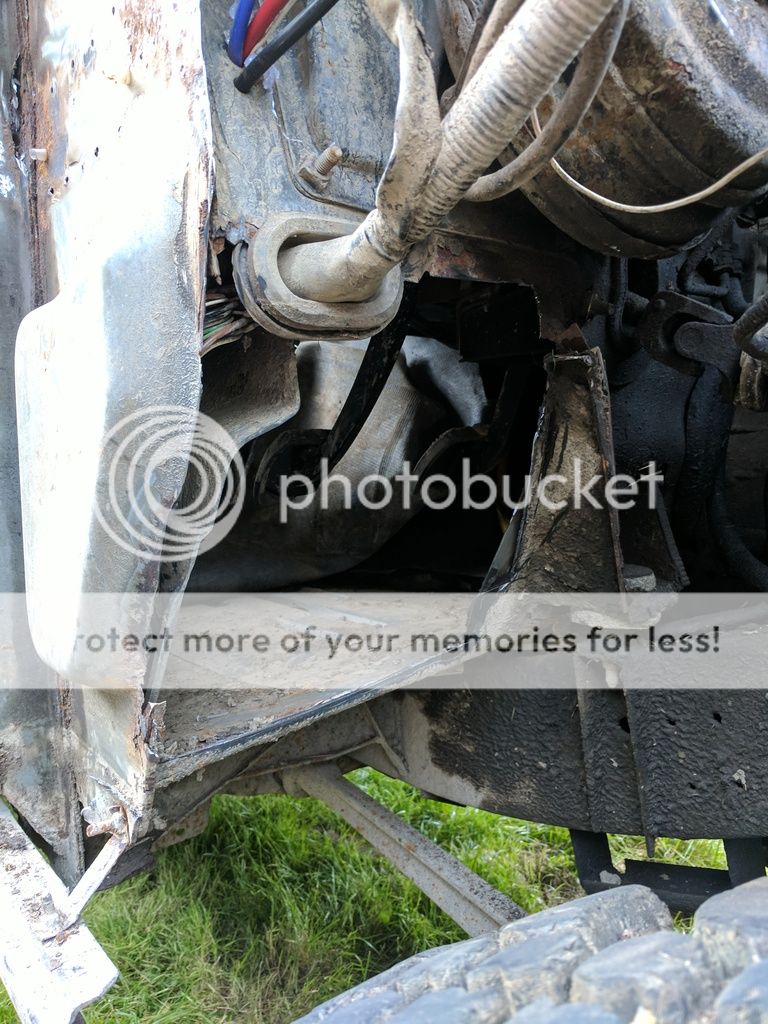
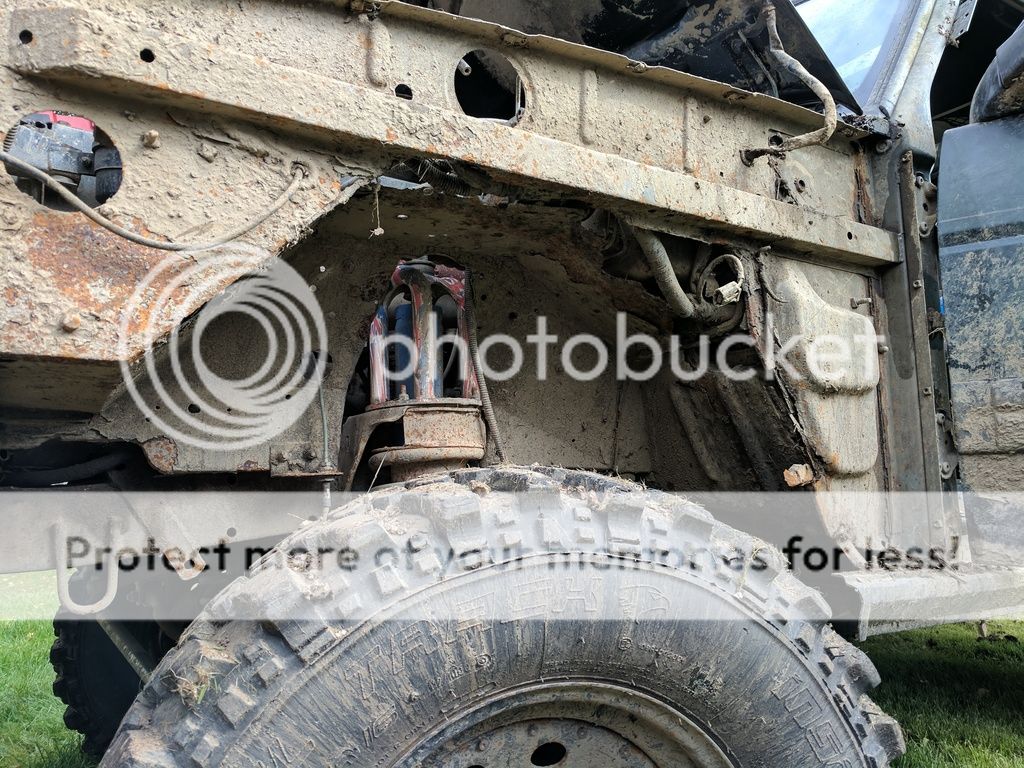
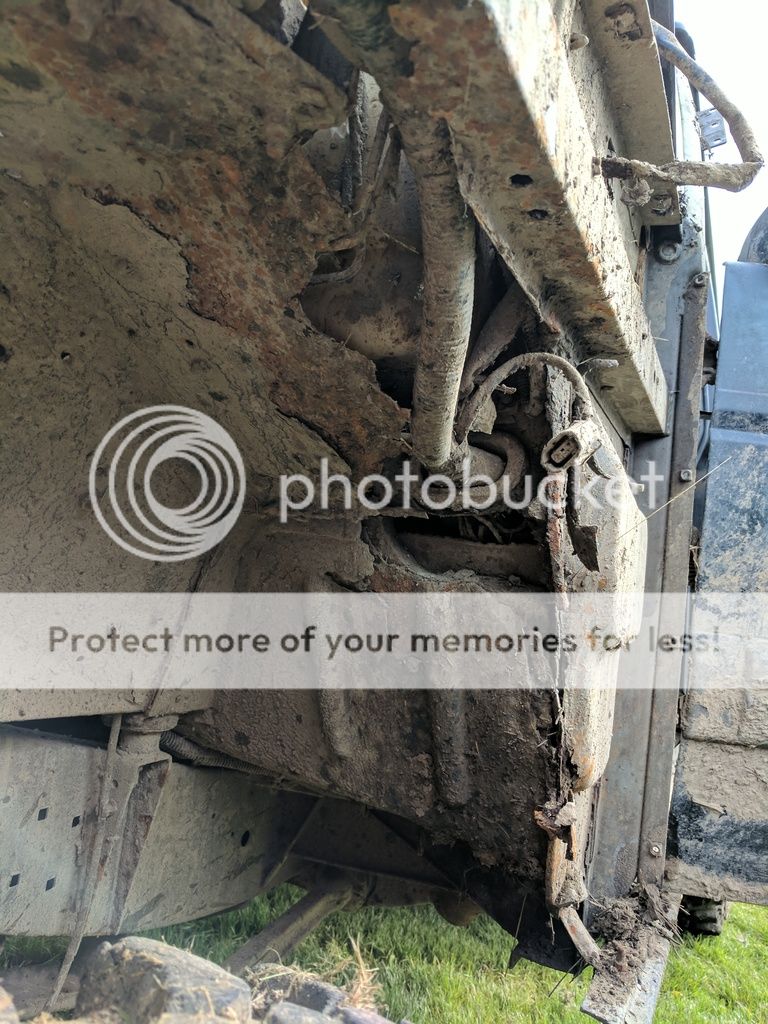
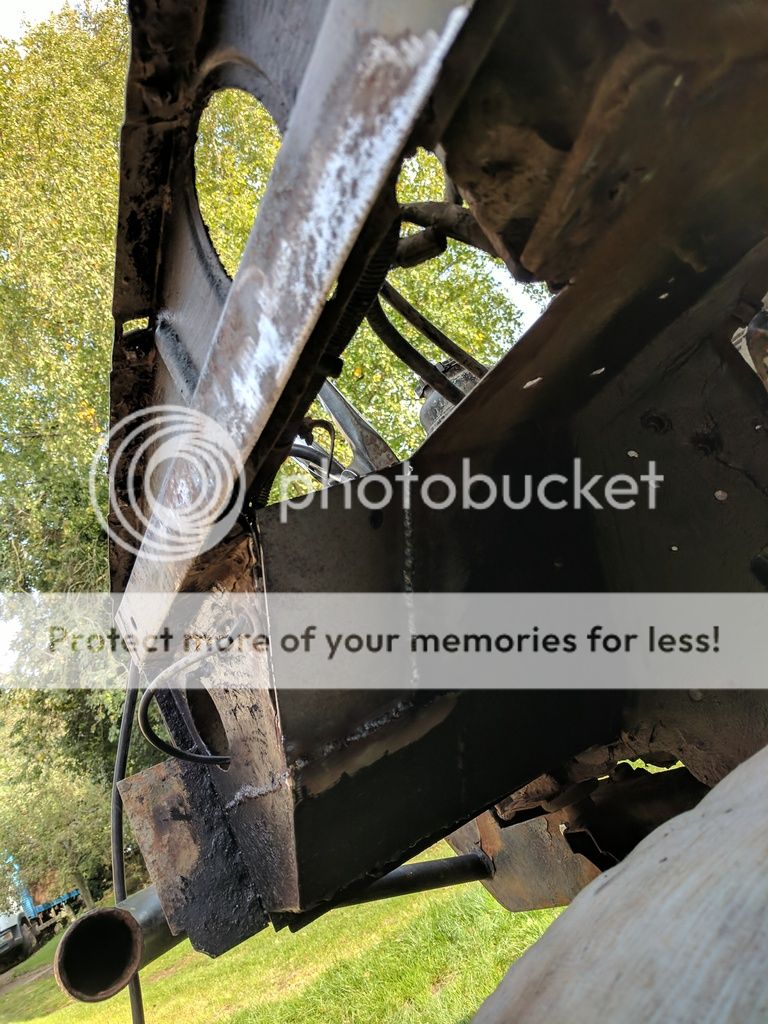
Just some further photo's of the rot to look back on when it's all replaced.

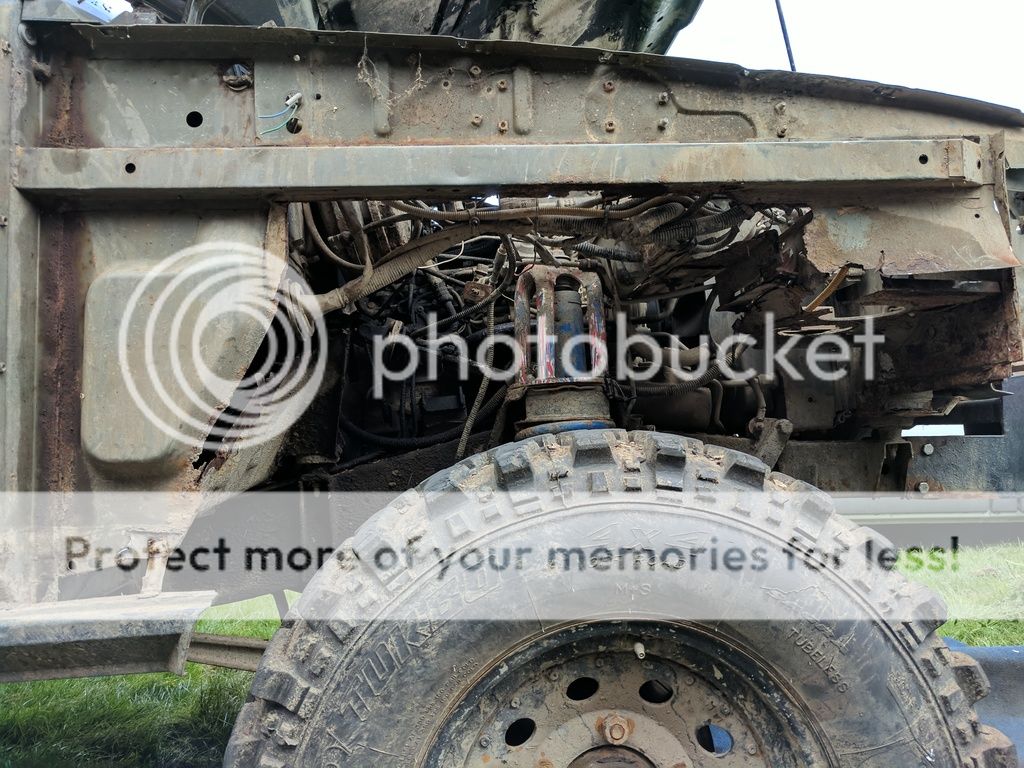
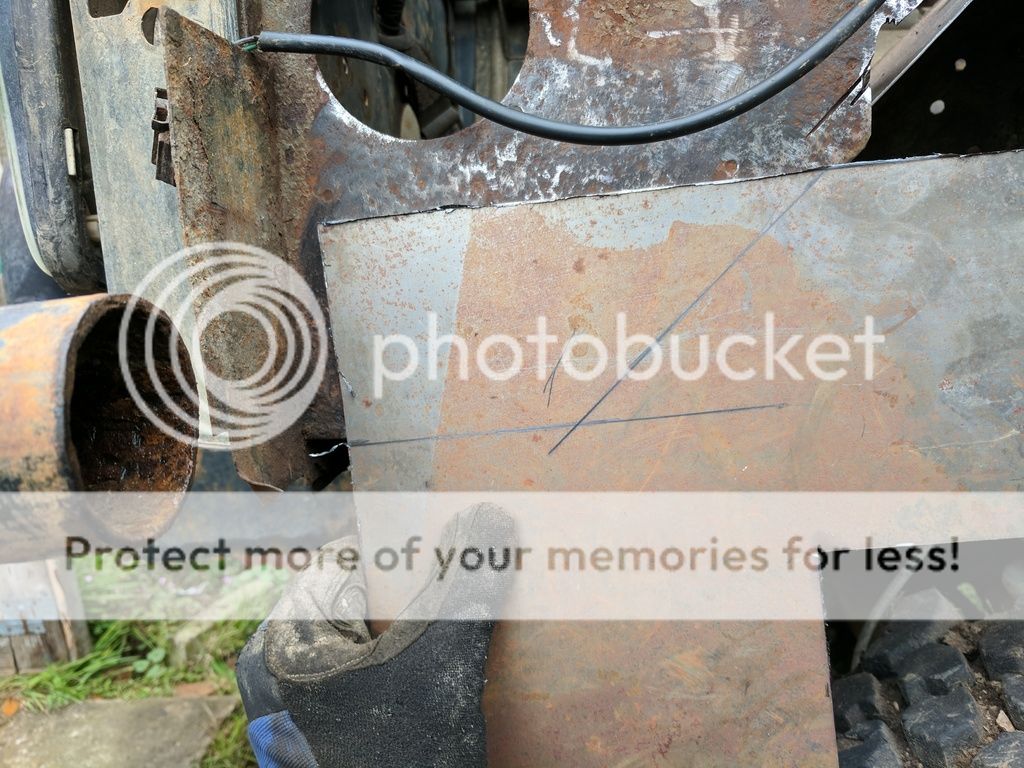
It's also worth noting here now that all the old 'metal' is out (I'd rather call it iron oxide). that I was actually just going to patch the holes up with a few plates here and there as the bulk of the metal was still there. I soon found out that once i started pulling it out that it nearly all turned to dust. SO. I am glad I decided against that.
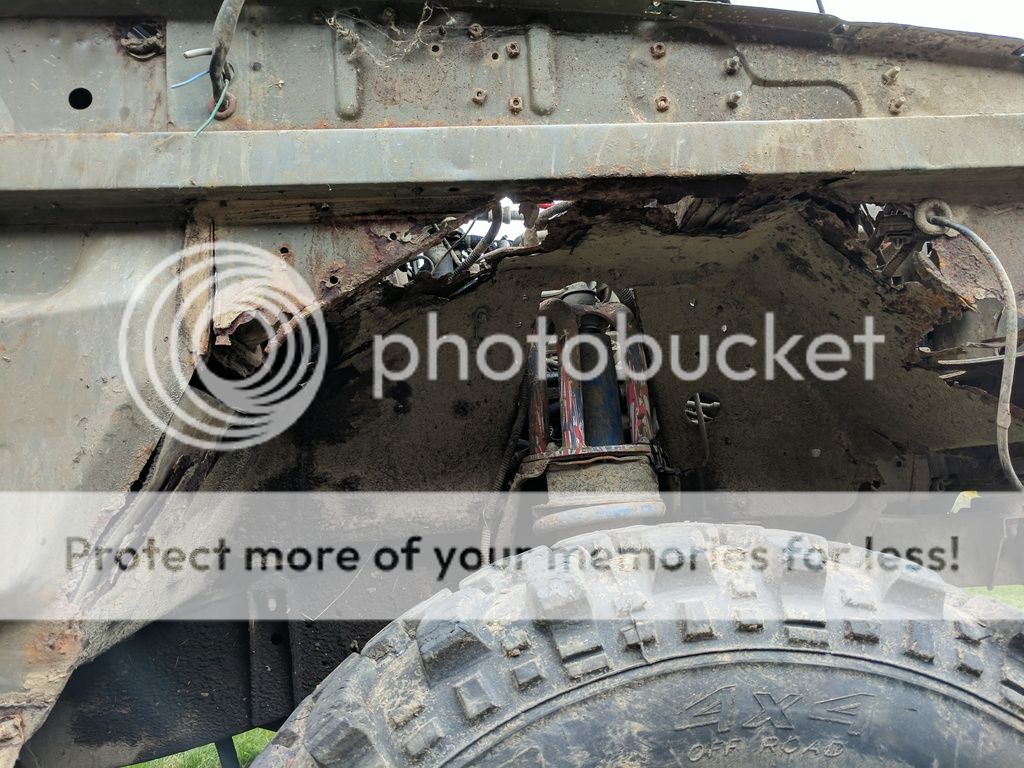
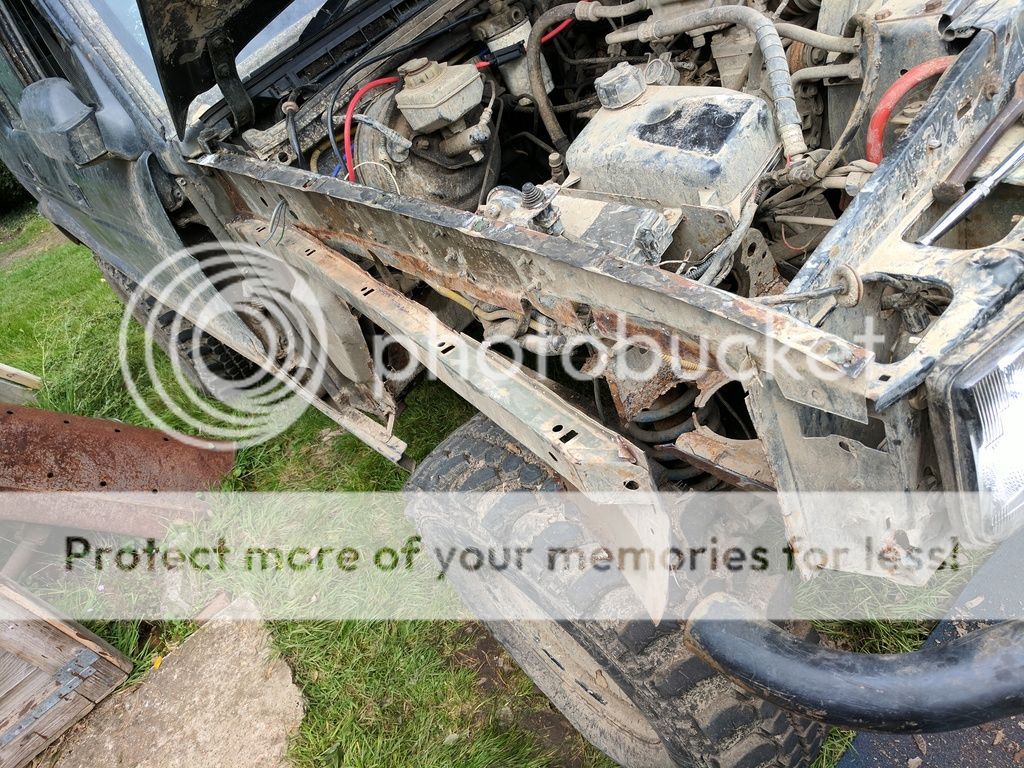
To get the strengthening bar out you have to drill out the spot welds which was each enough, they carefully (involving a hammer, so not that careful at all) pry it off.
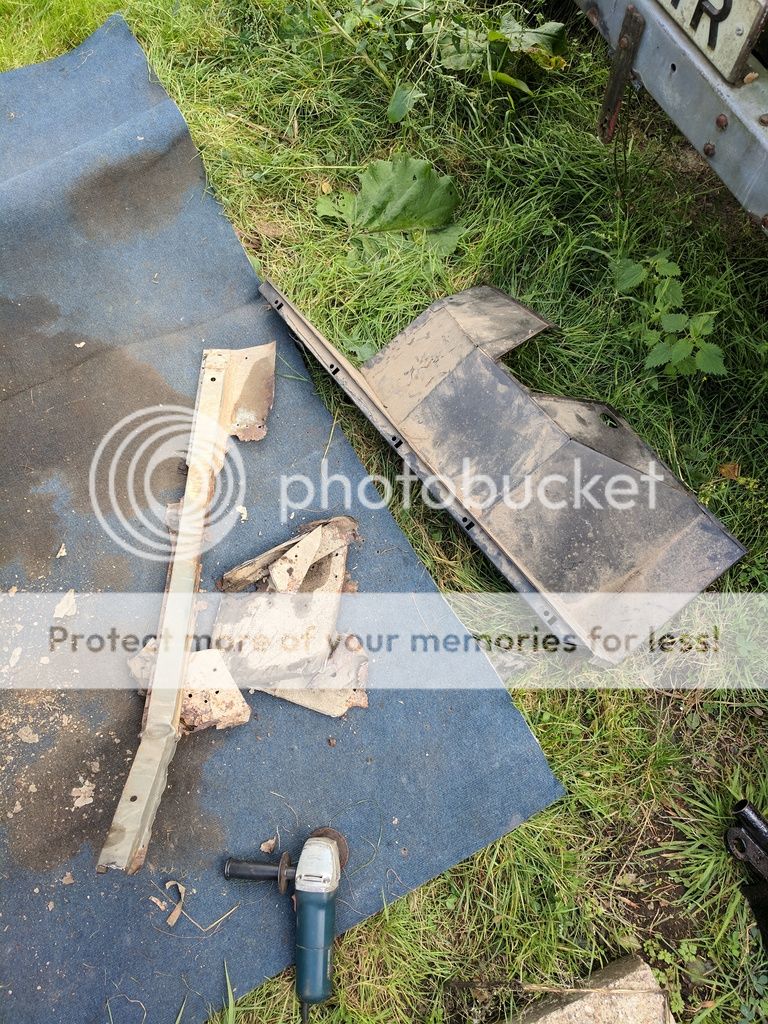
Remember what I said earlier about the metal turning to dust?
This is legitimately all that was left that didn't crumble away. Look at the size difference between new and old! Care of old I loved the idea of weight reduction, now all i seem to be doing is adding weight..
Had to cut a fairly larger than I wanted to section of the footwell but that was just so the shape was easier to weld in, should be simple enough
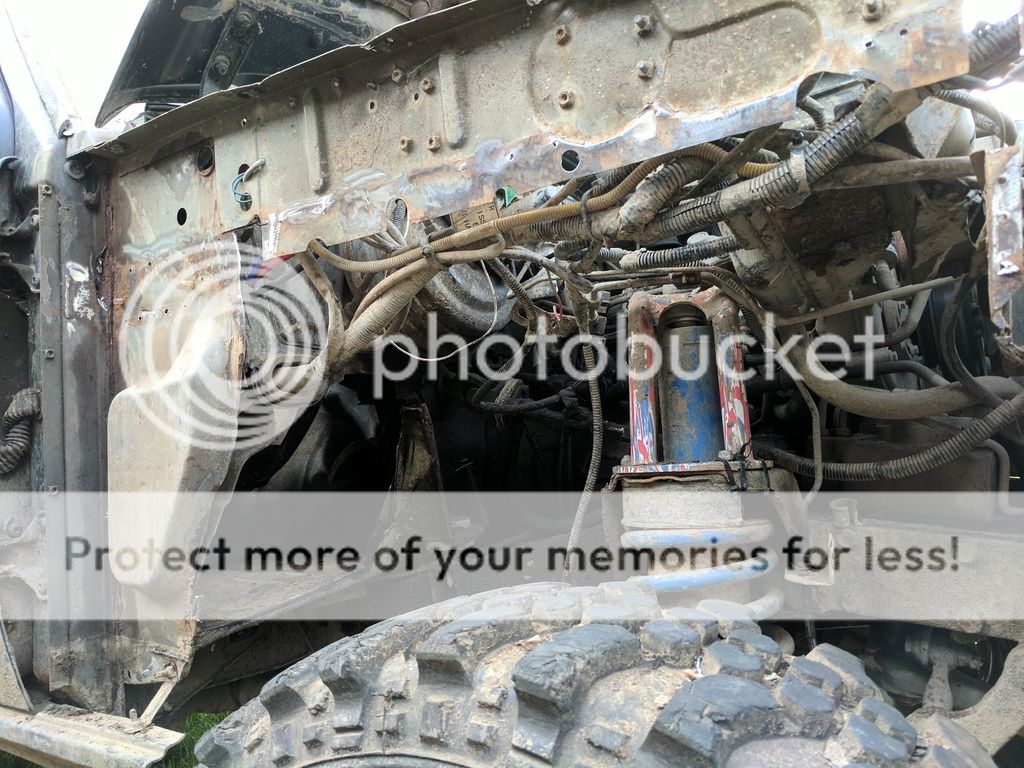
Had to take a notch out of the left hand side to make way for the shape on the existing panel but otherwise everything else is lining up all good. I cable tied it into place for now just so I can size up and measure everything for when i start the welding.
Then got it mostly squared up and level with a bit more fiddling. Was mostly the wires in the engine bay getting in the way. You can also see I took a small notch out of where the brake line goes through. I bent it out the way to allow for it to be slid through, I really couldn't be bothered to bleed the brakes so will weld up that later also.

That was where I left off for the day, will get back on it tomorrow and most of the week as moved my shift to late ones throughout the week so i can work on it during the daylight.
Pretty happy with how its turned out and the satisfaction of not seeing rust and seeing a nice panel is well worth the effort. I haven't finished yet but if yours is doing the same, just give it ago. Really fun.
Got a nice delivery of more electrical goodies,
Got some cool toggle switches with a flip cover, looks awesome. Also has a little LED on the end, will try and wire it up so that the led only comes on when the part is on.
So anyway, the main part of this update is I am finally going to do the last bit of rust on my discovery. It's one of those horrible jobs you really can't be bothered to start as it doesn't really have much gain other than the thing rotting in to ground.. So thinking about it maybe it does have a benefit!
When I bought it almost a year to the day now, it came with brand new repair panels for the front arches. Unsure on the make of them, but they appear to fit well and if they don't, I will make them fit well lol.
Just some further photo's of the rot to look back on when it's all replaced.
It's also worth noting here now that all the old 'metal' is out (I'd rather call it iron oxide). that I was actually just going to patch the holes up with a few plates here and there as the bulk of the metal was still there. I soon found out that once i started pulling it out that it nearly all turned to dust. SO. I am glad I decided against that.
To get the strengthening bar out you have to drill out the spot welds which was each enough, they carefully (involving a hammer, so not that careful at all) pry it off.
Remember what I said earlier about the metal turning to dust?
This is legitimately all that was left that didn't crumble away. Look at the size difference between new and old! Care of old I loved the idea of weight reduction, now all i seem to be doing is adding weight..
Had to cut a fairly larger than I wanted to section of the footwell but that was just so the shape was easier to weld in, should be simple enough
Had to take a notch out of the left hand side to make way for the shape on the existing panel but otherwise everything else is lining up all good. I cable tied it into place for now just so I can size up and measure everything for when i start the welding.
Then got it mostly squared up and level with a bit more fiddling. Was mostly the wires in the engine bay getting in the way. You can also see I took a small notch out of where the brake line goes through. I bent it out the way to allow for it to be slid through, I really couldn't be bothered to bleed the brakes so will weld up that later also.
That was where I left off for the day, will get back on it tomorrow and most of the week as moved my shift to late ones throughout the week so i can work on it during the daylight.
Pretty happy with how its turned out and the satisfaction of not seeing rust and seeing a nice panel is well worth the effort. I haven't finished yet but if yours is doing the same, just give it ago. Really fun.
Other side is similar, I think on the previous page of the thread there is some pictures of the rot there somewhere. Once I've finished this side i'll move onto the next!
Switches will be for my light bar and rear spot lights plus eventually some more stuff that I will fit to it. Might use one of the switches to be connected to a high amp relay to isolate the winch also.
Switches will be for my light bar and rear spot lights plus eventually some more stuff that I will fit to it. Might use one of the switches to be connected to a high amp relay to isolate the winch also.
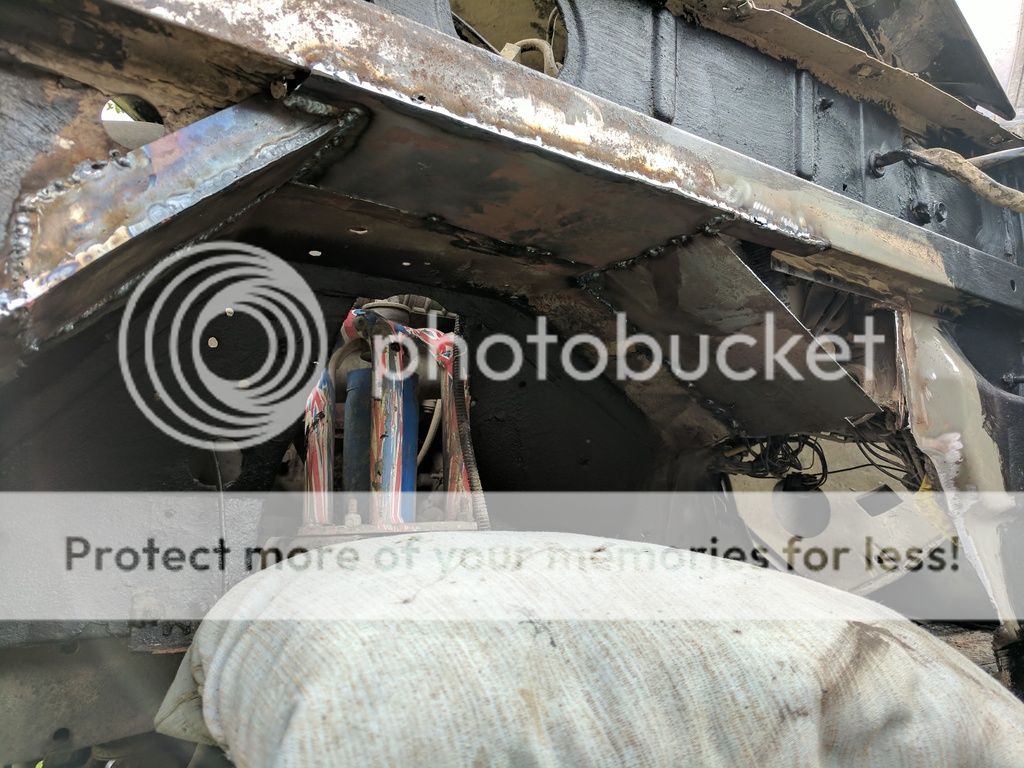
Managed to get the driver side about 90% done today before work. Didn't get that many pictures to start as was just cracking on but here are the ones I got anyway.
Got the footwell panel cut, shapes and welded into place. All that is left to do on it is paint the inside of the car to protect it there.

Arch panel was a little short so welded in a plate to cover up the gap. You can see a small hole in the bottom left, that's the last bit I've got to do but going to plate that from the inside them use some tigerseal or similar to fill it in and smooth the other side.
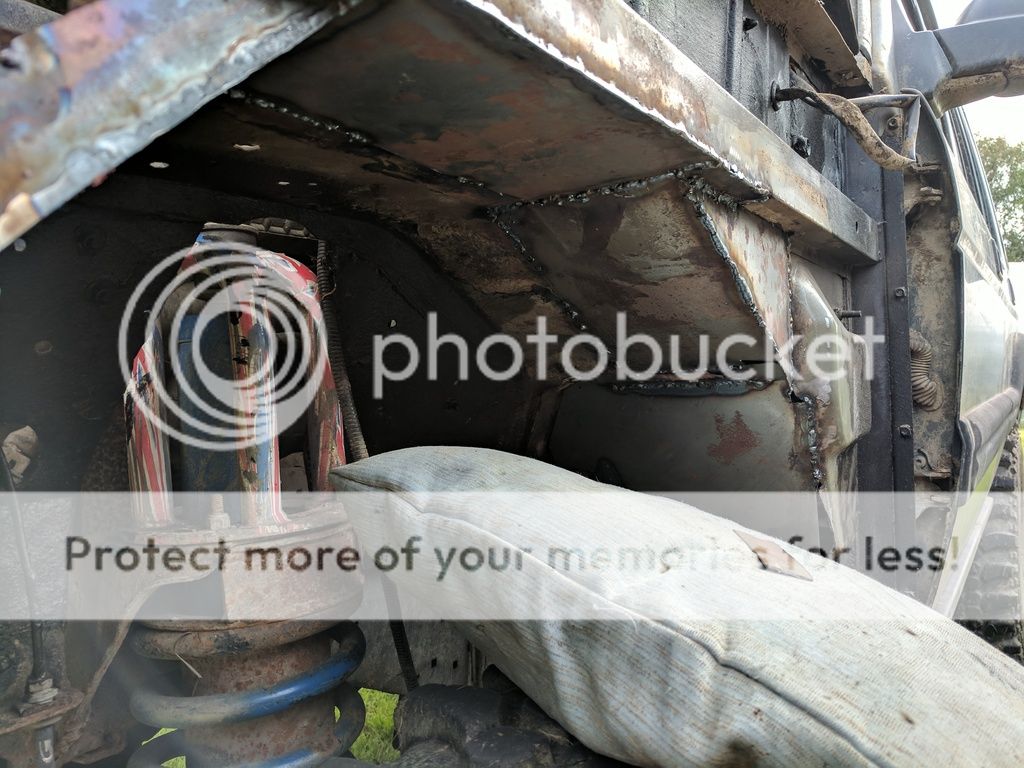
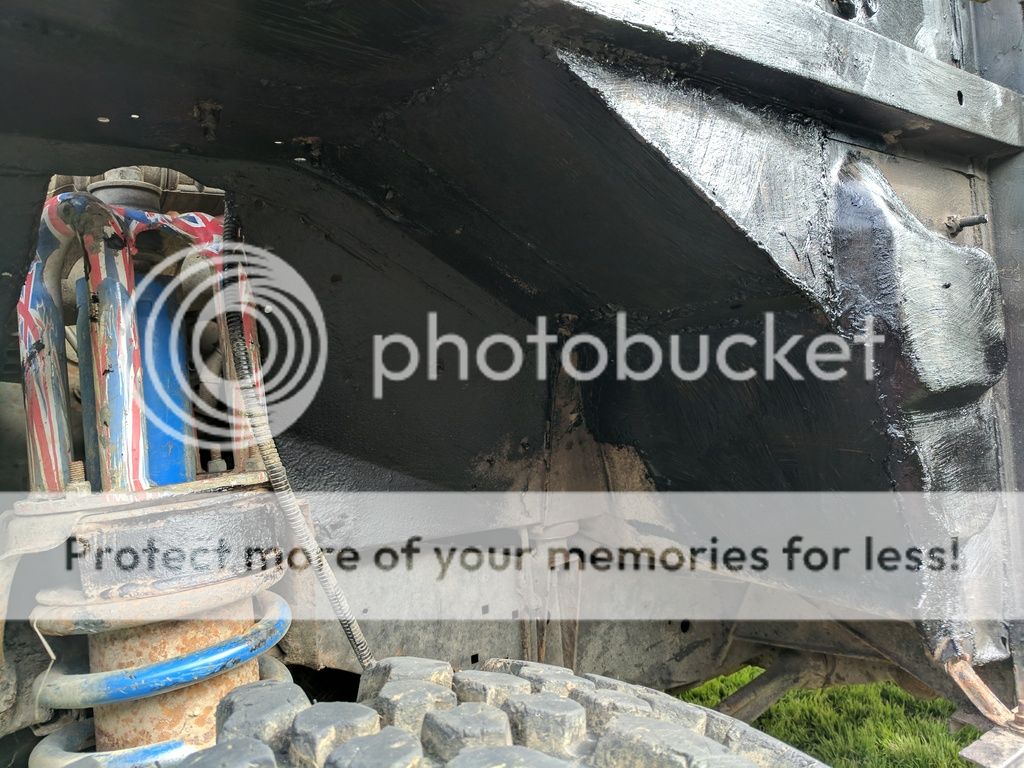
And then I painted it with Waxoyl underbody seal. Will do another coat later on after I've finished the other side.
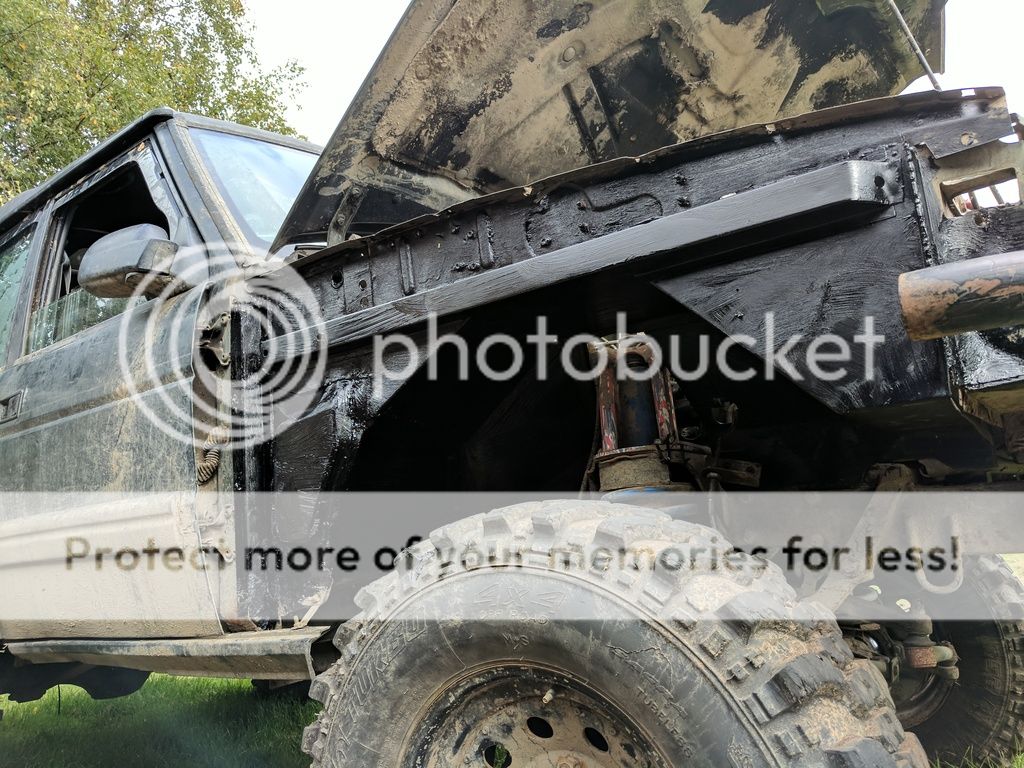
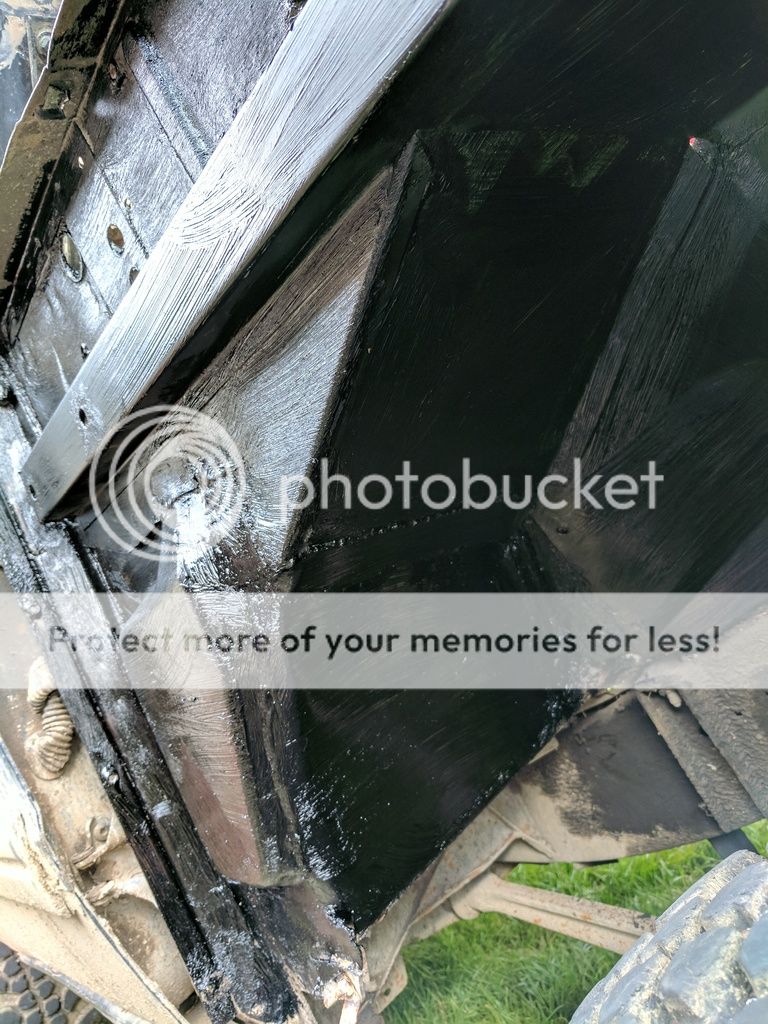
Already looks miles better than before, really happy with the result! Just the few bits to complete which i will do after I've cut out the other side and my order of paint has arrived.
All in all, good 3 hours work or so. I wasn't rushing too much.
Got the footwell panel cut, shapes and welded into place. All that is left to do on it is paint the inside of the car to protect it there.
Arch panel was a little short so welded in a plate to cover up the gap. You can see a small hole in the bottom left, that's the last bit I've got to do but going to plate that from the inside them use some tigerseal or similar to fill it in and smooth the other side.
And then I painted it with Waxoyl underbody seal. Will do another coat later on after I've finished the other side.
Already looks miles better than before, really happy with the result! Just the few bits to complete which i will do after I've cut out the other side and my order of paint has arrived.
All in all, good 3 hours work or so. I wasn't rushing too much.
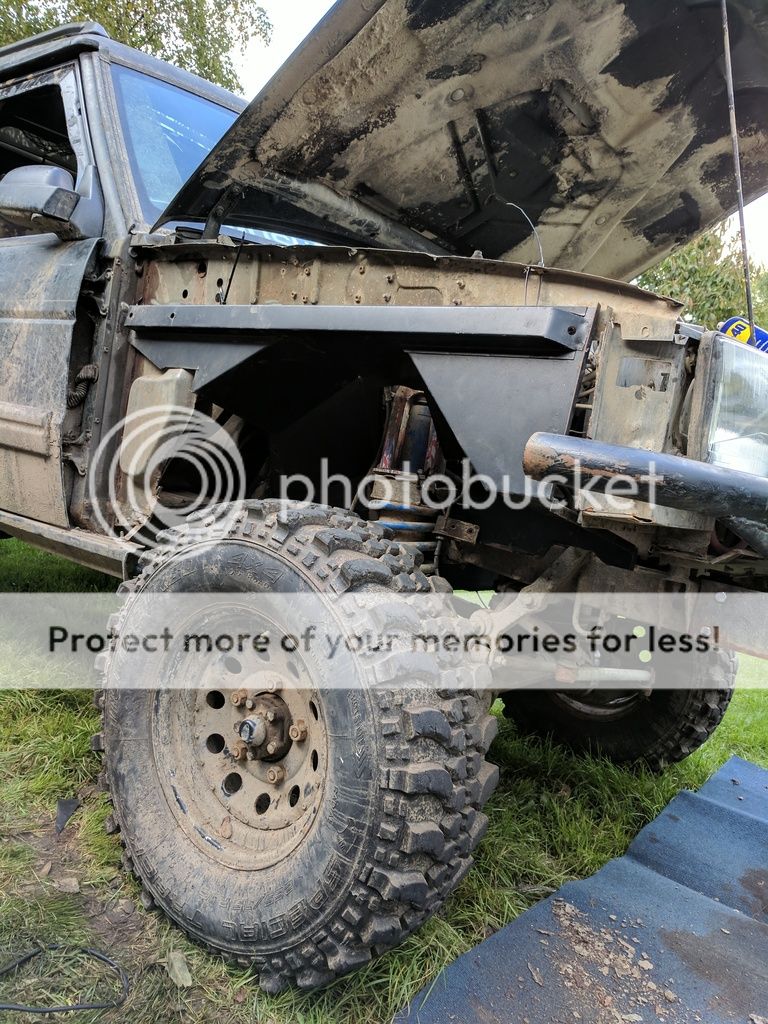
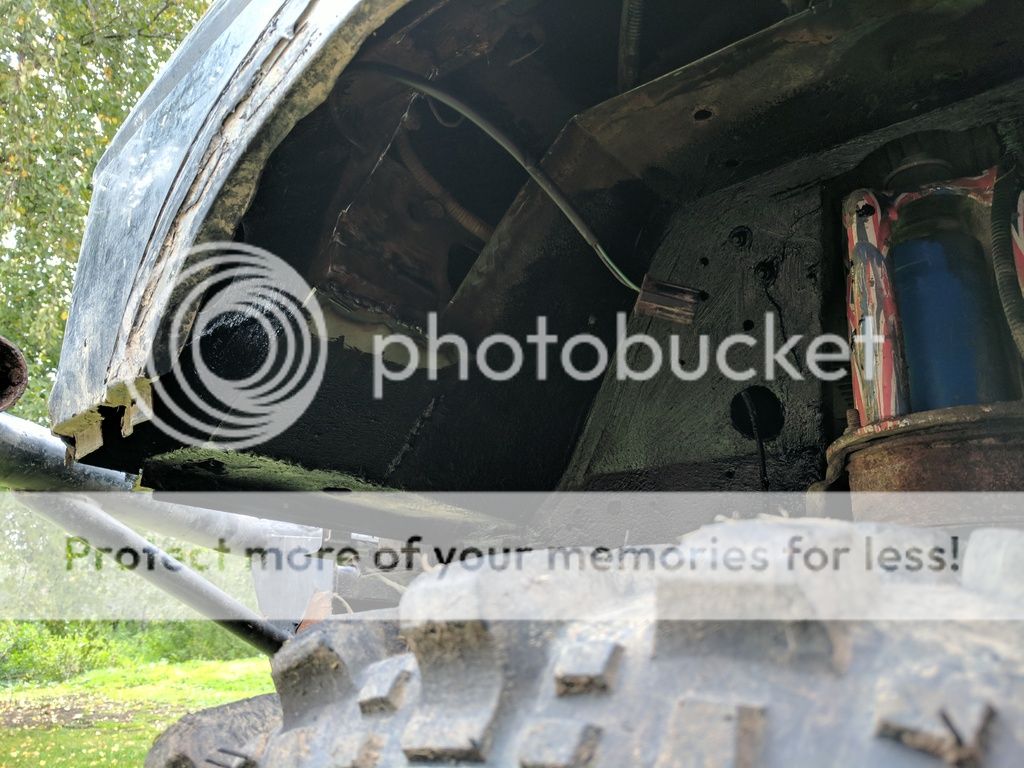
Had a slightly slower day today, still got on and got some bits done though. Stripped down all the bits needed to do the passengers side. Kept umming and urring whether or not to replace the whole inner arch on this side. Main reason was because although it looked bad from underneath, it wasn't once I got it cleaned up with a jet wash. No real issues on the structure on it, just on the outer part of the wing. I then decided after giving it a bit of a clean that I would test my fabrication skills and make up what I cut out. Bit of fun, learn some stuff and saves a lot of effort.
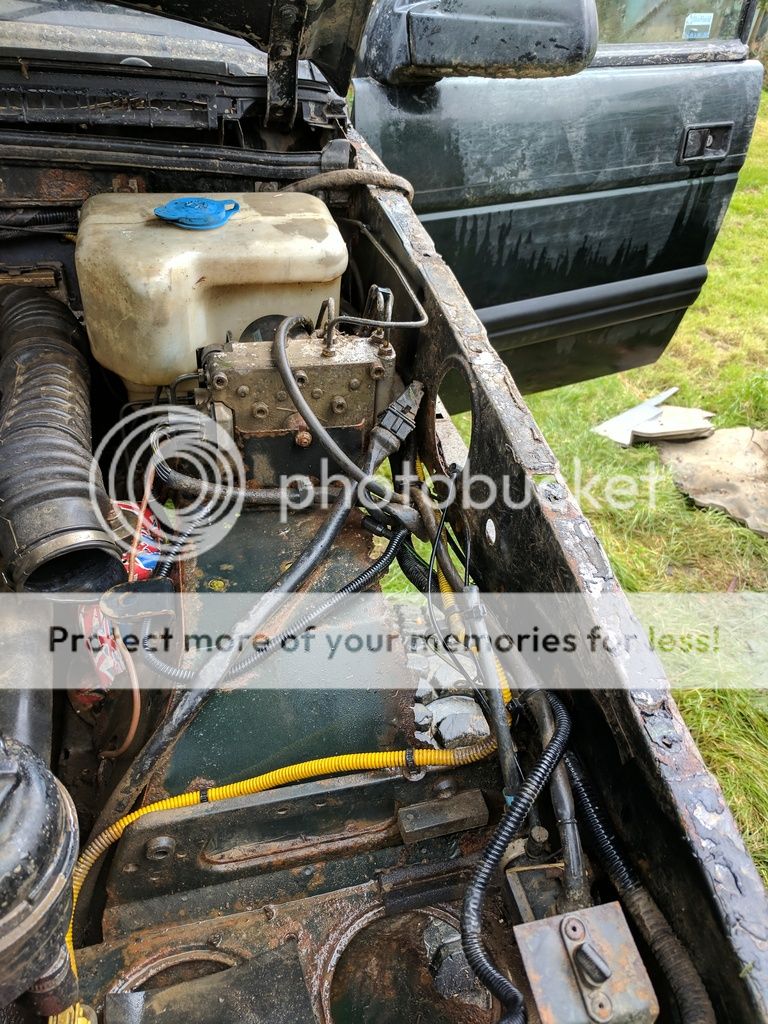
The major driving force behind it was that abs pump and washer fluid bottles needed to be taken out, I really really could not be bothered to do this, plus with the addition of the metal being OK I thought... why not.
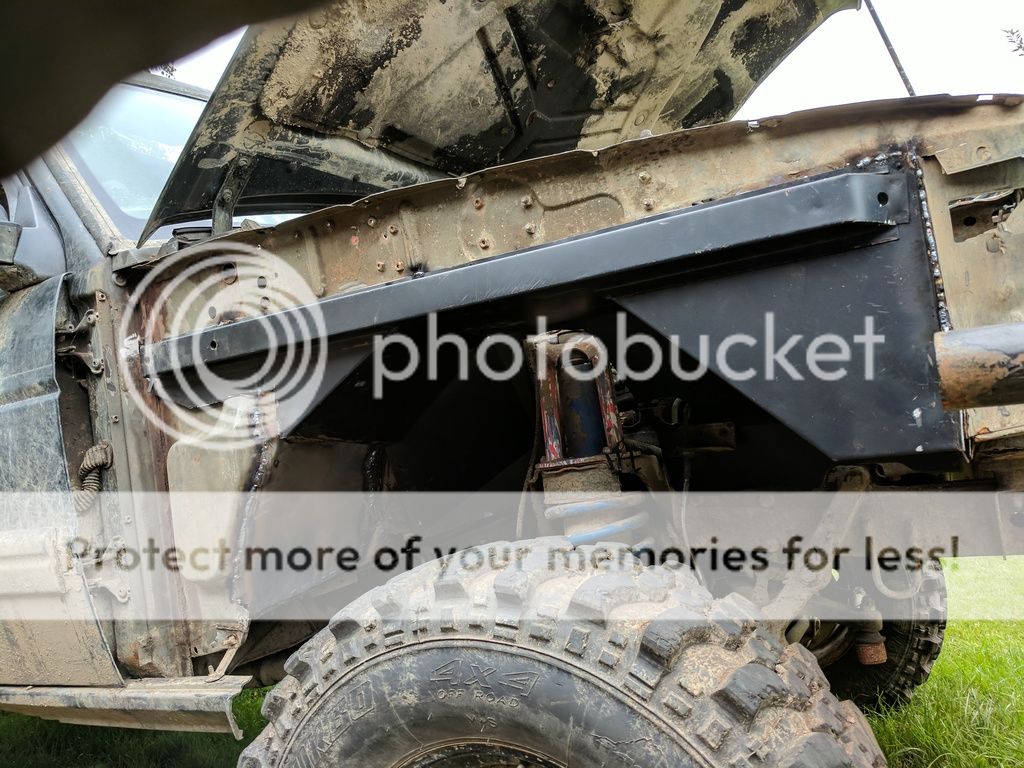
Was a bit more effort but easily done, had to remove the wing along with the snorkel. Was nice to see that it wasn't bodged cut like I have seen other DIY jobs. It almost looks factory which is nice. Probably helped not making it rot so much!
Take note of the left hand side of the metal, later on something funny happens lol
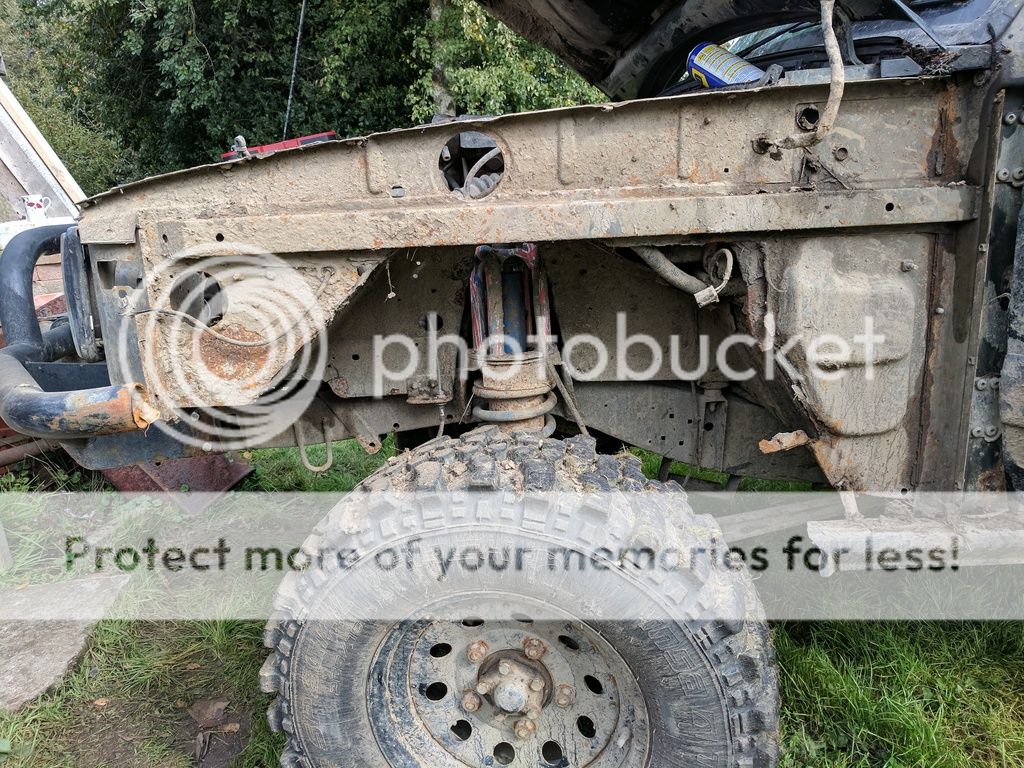
Like I said, looks worse than it is. initially I actually thought this side was worse!
Main issue was the footwell really
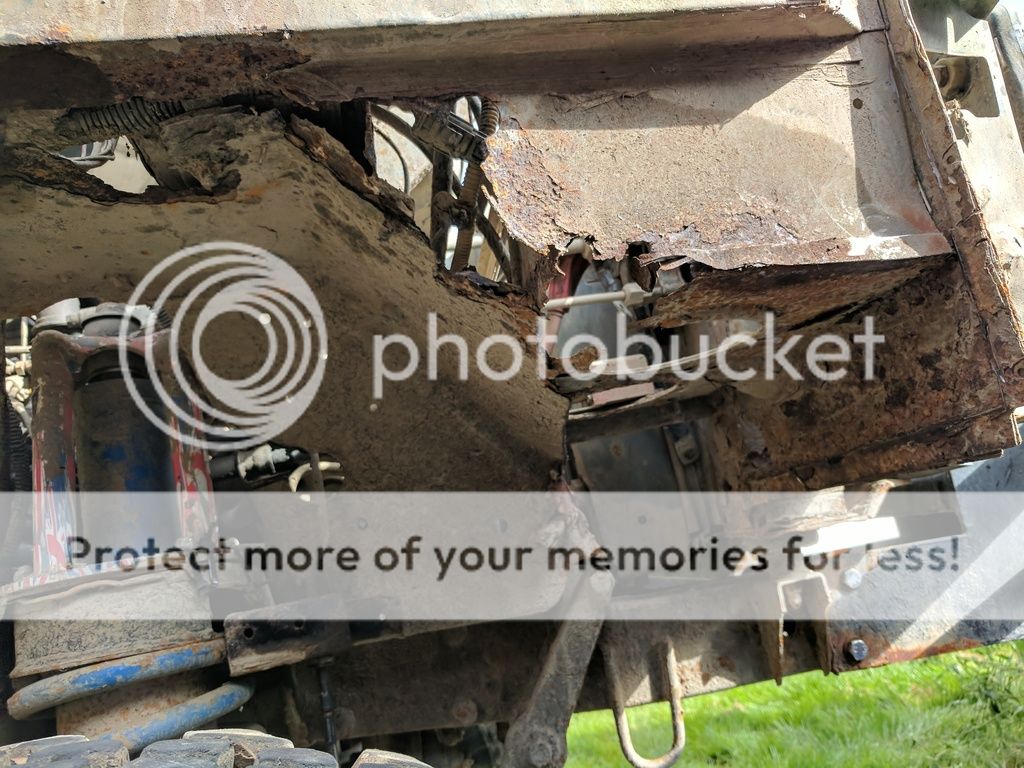
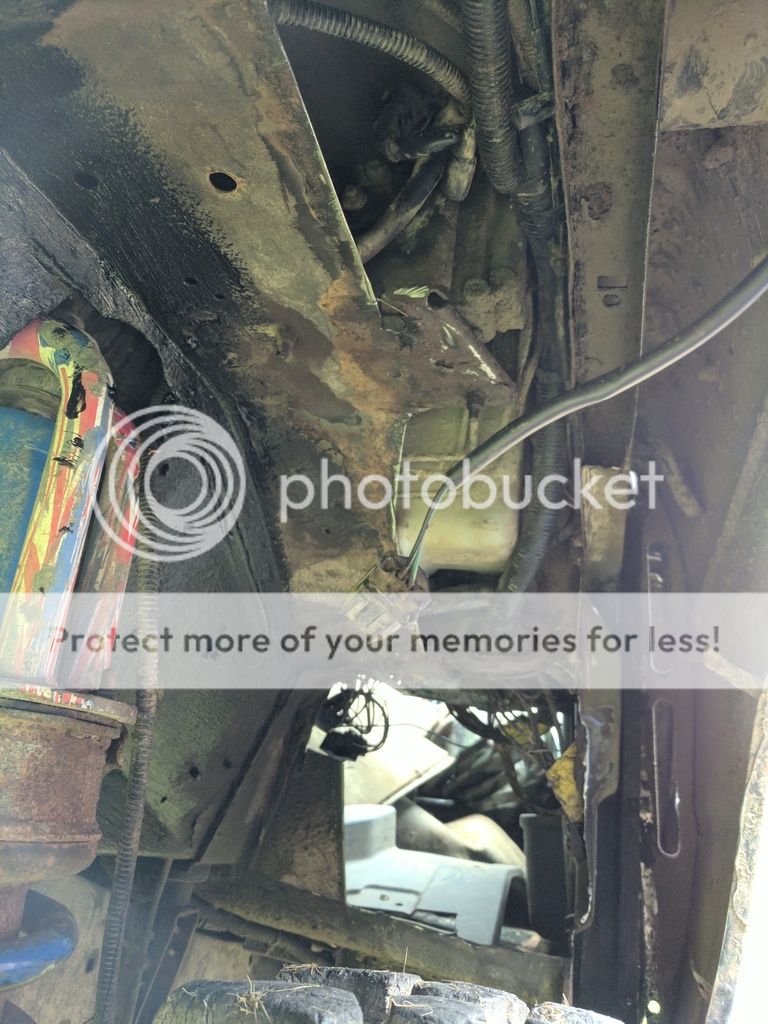
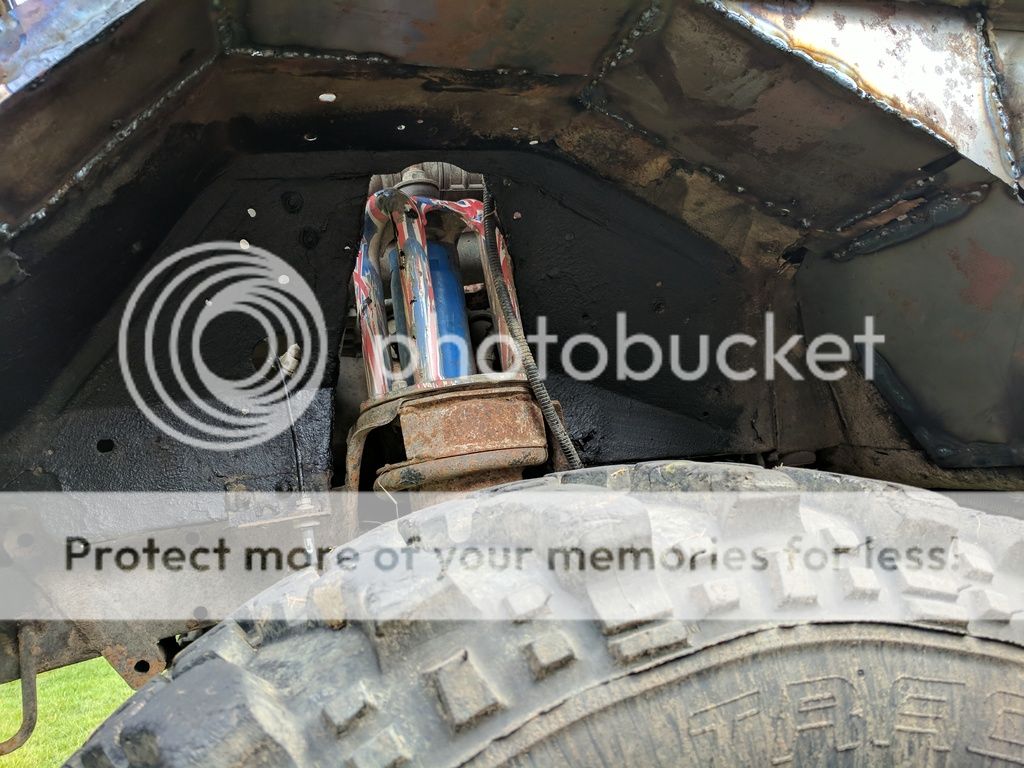
After a REALLY good clean, you can see how mostly good condition it actually is. Was quite pleased actually. Plus I love how mint my chassis looked. (To make sure it stays that way, I've also bought another tin of Waxoyl Under Body Seal, kinda run out) and will go over that at some point.
Also note, after the clean the area that didn't look bad at all, caved in and made a huge hole on the left. Quite funny really! (Where the indicator cable is)
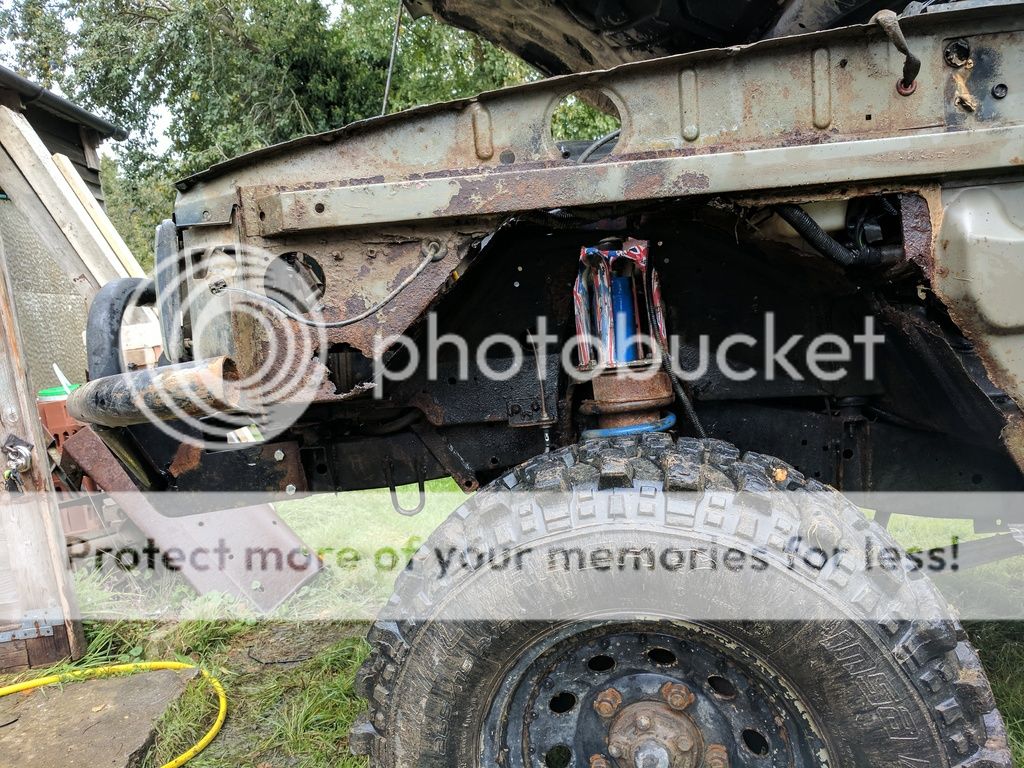
See what I mean? Metal looks brand new! Plus you can see the annoyance of the abs unit.
Then I decided to cut through my gloves. I only just miss cutting my finger off with a grinder due to a kick back. Health and safety boys! Both hands were on the grinder but it kicked back so much it almost turned onto me and flew out my hands. Obviously wasn't holding it firmly enough, lesson learned.

Fabrication time. Thought I'd start with the hole that the Kärcher made.
 [/URL]
Forgot to take as many photos as was too busy measuring and cutting, then realised I had an hour until work so used up the last of my old Waxoyl tin over the bits that I will be keeping, plus leaving a gap so it doesn't get affected much by the heat of the welding.
Bit better photo of what I cut out, the footwell was brittle and I didn't want to weld to thin metal so I cut it all out and will remake it like the other side, plus it'll be far stronger.
...and then done for today.
The major driving force behind it was that abs pump and washer fluid bottles needed to be taken out, I really really could not be bothered to do this, plus with the addition of the metal being OK I thought... why not.
Was a bit more effort but easily done, had to remove the wing along with the snorkel. Was nice to see that it wasn't bodged cut like I have seen other DIY jobs. It almost looks factory which is nice. Probably helped not making it rot so much!
Take note of the left hand side of the metal, later on something funny happens lol
Like I said, looks worse than it is. initially I actually thought this side was worse!
Main issue was the footwell really
After a REALLY good clean, you can see how mostly good condition it actually is. Was quite pleased actually. Plus I love how mint my chassis looked. (To make sure it stays that way, I've also bought another tin of Waxoyl Under Body Seal, kinda run out) and will go over that at some point.
Also note, after the clean the area that didn't look bad at all, caved in and made a huge hole on the left. Quite funny really! (Where the indicator cable is)
See what I mean? Metal looks brand new! Plus you can see the annoyance of the abs unit.
Then I decided to cut through my gloves. I only just miss cutting my finger off with a grinder due to a kick back. Health and safety boys! Both hands were on the grinder but it kicked back so much it almost turned onto me and flew out my hands. Obviously wasn't holding it firmly enough, lesson learned.
Fabrication time. Thought I'd start with the hole that the Kärcher made.
Forgot to take as many photos as was too busy measuring and cutting, then realised I had an hour until work so used up the last of my old Waxoyl tin over the bits that I will be keeping, plus leaving a gap so it doesn't get affected much by the heat of the welding.
Bit better photo of what I cut out, the footwell was brittle and I didn't want to weld to thin metal so I cut it all out and will remake it like the other side, plus it'll be far stronger.
...and then done for today.
Alo tomushh.i had to do my mates disco.it failed on battery tray and around it.he said its only that bit kos he had all inner arch done little while before.they stuck metal with tiger seal or somthing.so i had to do the hole inner arch again.proper this time.he went back to garage and got hes money back andsome.is that all the welding needs doing.im just starting to do some secondhand disco parts.
Currently, yes this is the last that I will do this year. The sills are a bit rotten on mine but only at the back. I was planning on getting some rock sliders at some point so was going to await until then before sorting those.
Mine has gone in all the common places but not as bad as I have seen on some
Mine has gone in all the common places but not as bad as I have seen on some
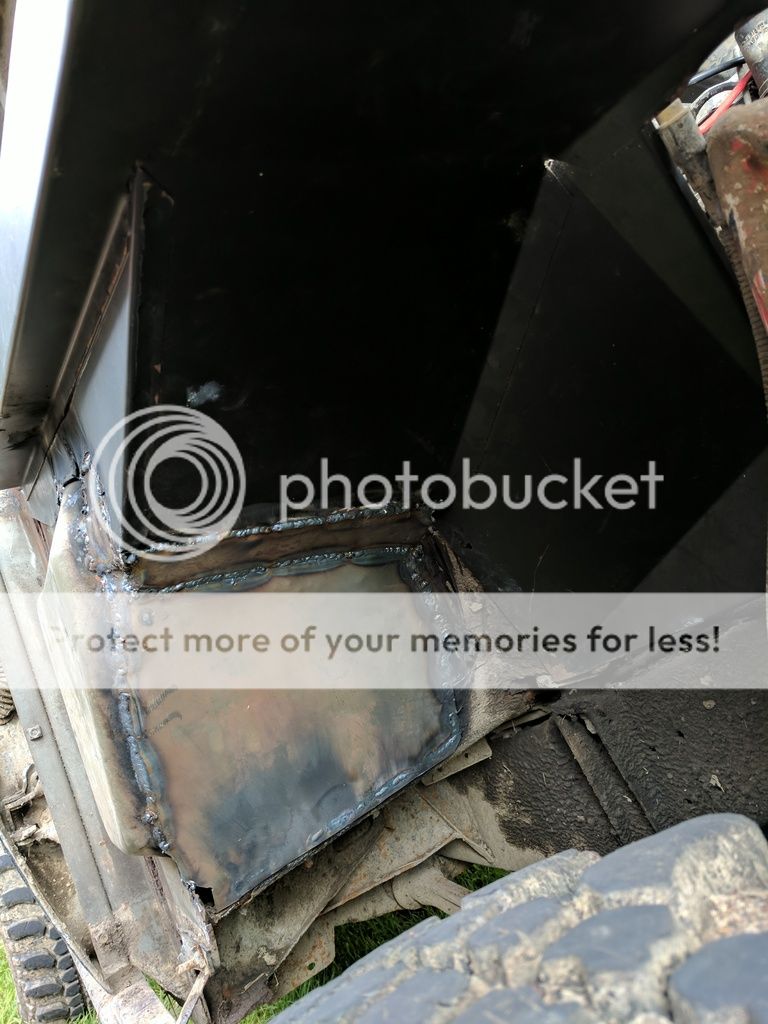
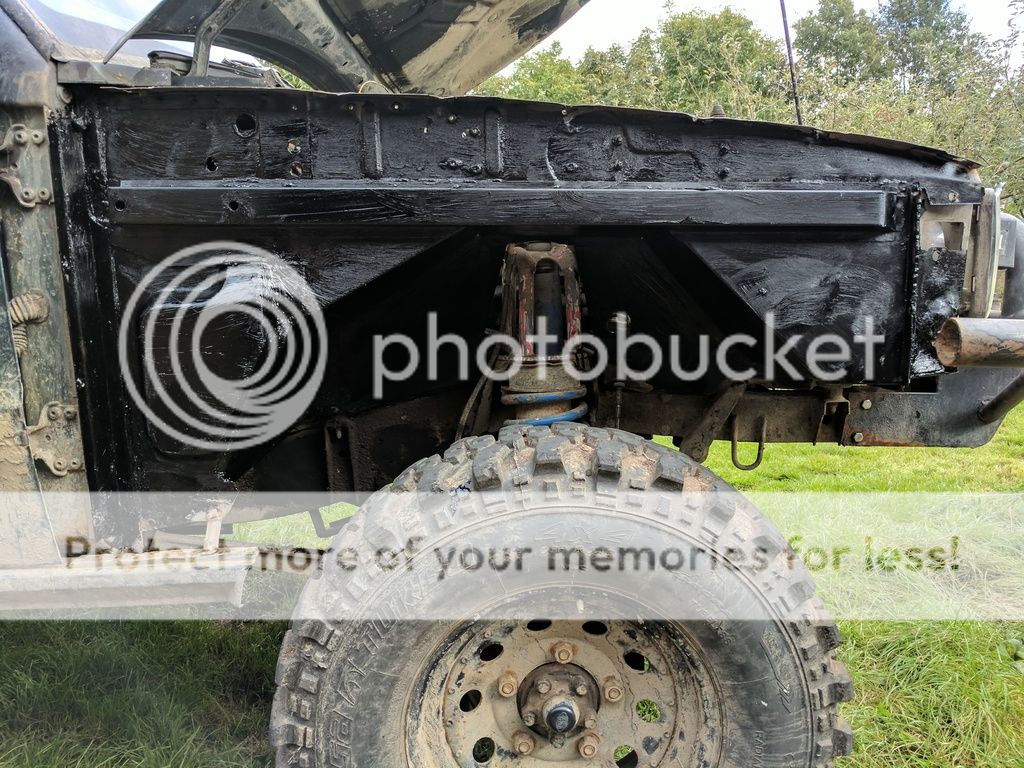
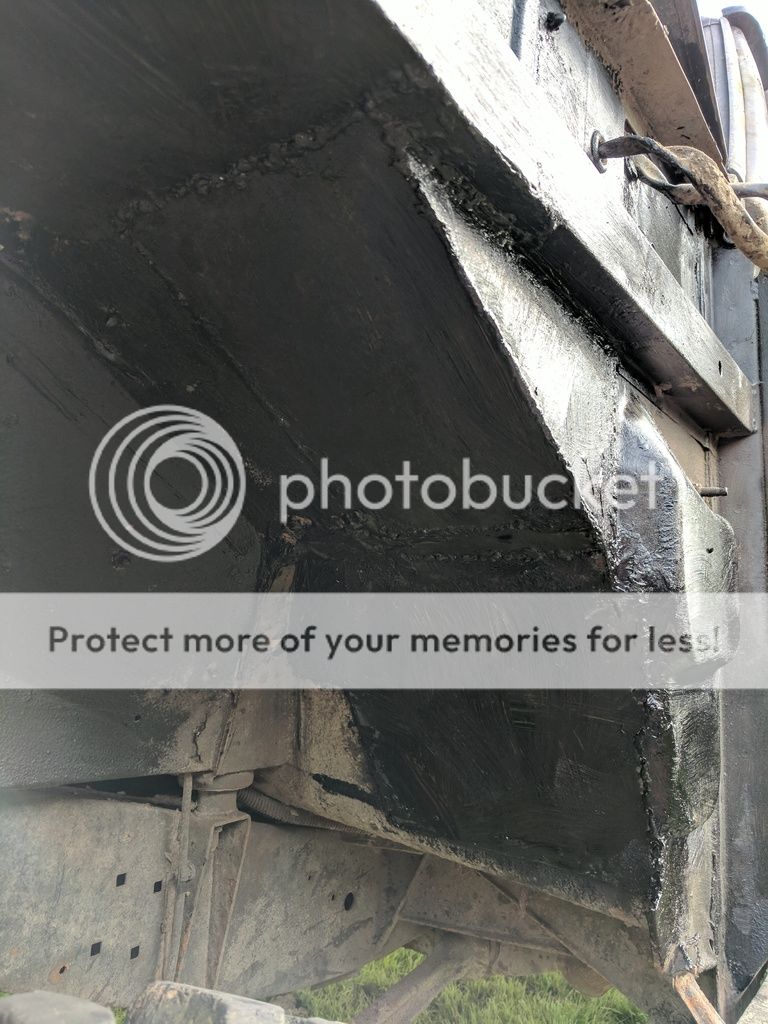
Back on the graft again today. Got all the welding done on the inner arch so it's all watertight now. Finally! When my new tin of Waxoyl arrives will do second coats over everything and might even do it on the chassis also as I'm there. I've got 2.5L to use up.. Also ordered 3 tins of stonechip which I plan on using on the front number to tidy it up and protect it more and might even use some on the roof also because the matte black roof for me isn't working too well, want a tiny bit of gloss!
Everything tacked into place, some bits seam welded. Shaping up nicely!

Then getting on with the seam welding
Got some welding battle scars, and a few down my back where welding upside down haha
Thinned out the last of the underbody seal just to get it to cover the outside, did not want any rust to start until my new tin arrives. Also used tiger seal around the welds and any blowout areas. Plus around the footwell as I welded that from the inside. Didn't want the overlaps to get water ingress or become water traps so sealed them all up.
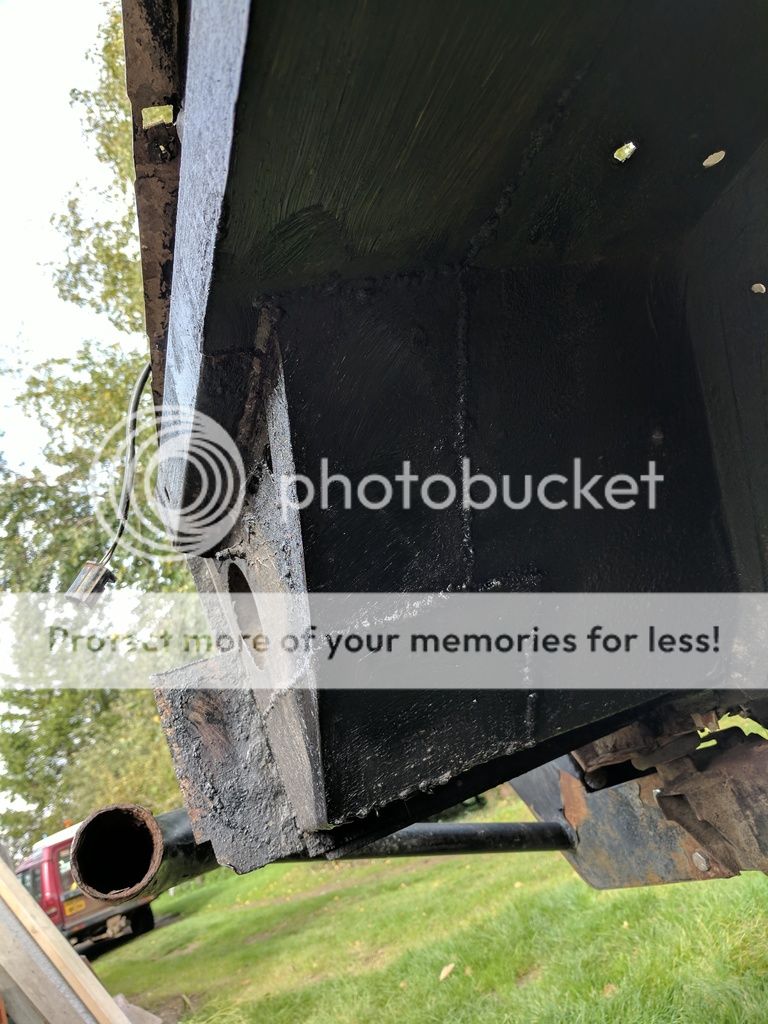
Welding from the inside and some tiger seal over small areas to help seal it all up")
Going to take both from carpets out and also smother with stone chip also. Should look nice! The foam is all removed so it wont hold water, I will refit the carpets once all painted
Jobs a good'n. Hopefully paint arrives tomorrow.
Everything tacked into place, some bits seam welded. Shaping up nicely!
Then getting on with the seam welding
Got some welding battle scars, and a few down my back where welding upside down haha
Thinned out the last of the underbody seal just to get it to cover the outside, did not want any rust to start until my new tin arrives. Also used tiger seal around the welds and any blowout areas. Plus around the footwell as I welded that from the inside. Didn't want the overlaps to get water ingress or become water traps so sealed them all up.
Welding from the inside and some tiger seal over small areas to help seal it all up
Going to take both from carpets out and also smother with stone chip also. Should look nice! The foam is all removed so it wont hold water, I will refit the carpets once all painted
Jobs a good'n. Hopefully paint arrives tomorrow.
DarrenHS3
Active Member
- Posts
- 124
- Location
- north kent
cracking job on the repairs.
i know this is gonna sound a bit party pooper, but have used that brush on hammerite with waxoyl underseal stuff and its not a fantastic product for a top coat on bare steel. as its bitumen based it doesnt set, so can get washed off over the period of months. rust also seems to get at the low spots caused by brush strokes
i know this is gonna sound a bit party pooper, but have used that brush on hammerite with waxoyl underseal stuff and its not a fantastic product for a top coat on bare steel. as its bitumen based it doesnt set, so can get washed off over the period of months. rust also seems to get at the low spots caused by brush strokes
You party pooper..!
I've used it before on my MR2, it never appeared to wash off but I'll see how this goes. I've got the top coat to do next anyway which I tend to do a little thicker on. I also use a dabbing (not the **** stupid arm thing all the cool kids do) technique rather than brushing, helps get it on thicker and prevents the low spots. Thanks for the heads up though!
I've used it before on my MR2, it never appeared to wash off but I'll see how this goes. I've got the top coat to do next anyway which I tend to do a little thicker on. I also use a dabbing (not the **** stupid arm thing all the cool kids do) technique rather than brushing, helps get it on thicker and prevents the low spots. Thanks for the heads up though!
Similar threads
- Replies
- 14
- Views
- 2K