Gearbox removal rear main replacement

This site contains affiliate links for which LandyZone may be compensated if you make a purchase.

Brewedintheuk

New Member
Posts
103
Location
Essex
I tried this yesterday, but it didn't post for some reason.
I've had a few problems with oil leaks from my Discovery 2 TD5 on the 04 plate as seen in the thread:
http://www.landyzone.co.uk/lz/f8/disco-2-td5-oil-leak-rear-main-237357.html
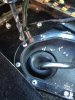
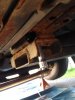
I've replaced the seals shown on that thread but it was still leaking, so I thought I would investigate further by taking the gearbox out as it looked like it was the rear main oil seal to me.
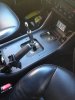
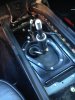
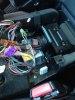
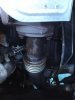
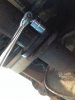
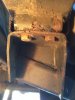
I've done my best to take photos and provide a step by step guide for anyone who was thinking of taking the gearbox out as I couldn't find one.
Hope it helps.
 
First thing I did was to remove the centre console.
Un-clipped the gear stick and transfer box gaiters and unscrewed the gear knobs and removed the rubber trim.
Then unscrew the window switches and remove the cover and switch plate.
 

Attachments

  • image.jpg
    image.jpg
    346.1 KB · Views: 201
Then undo the handbrake by removing the clip and sliding out the pin from the cable and handbrake. This means that the handbrake will lift up to a higher height to enable you to take the centre console out in a bit.
 

Attachments

  • image.jpg
    image.jpg
    351.3 KB · Views: 228
With this removed you can remove the centre console by undoing the few bolts that hold it down, inside the centre console box. This will leave the gear stick extension and air supply pipes exposed.
The gear stick extension can then be undone by removing the bolt.
 

Attachments

  • image.jpg
    image.jpg
    306.8 KB · Views: 272
With this off I then undid both the air pipes that go to the rear and removed both them.
 

Attachments

  • image.jpg
    image.jpg
    372.6 KB · Views: 217
Now that these have been removed and the cover with the insulation on it removed, this exposes the cover to the top of the gearbox and the gear selector plate.
I drilled out the rivets and found that this helped out loads later when getting to the rest of the gearbox.
 

Attachments

  • image.jpg
    image.jpg
    392.9 KB · Views: 199
With this off it leaves you with the rubber cover.
Mine was ripped and in a bit of a bad way, which has left the gear selector plate area covered in mud and other bits.
 

Attachments

  • image.jpg
    image.jpg
    361.2 KB · Views: 192
I've always had a problem since I bought the car that the gear stick would always flop to the left and not stay central and from this photo you can see why.
The gear selector plate has snapped off so the spring had no resistance so it fell to the left making third gear selection hard.
There was a large amount of mud, metal and general muck in there which I cleaned up when I replaced the gear selector.
 

Attachments

  • image.jpg
    image.jpg
    262.7 KB · Views: 270
While I'm here I replaced this ( but did it while the gearbox was on the floor ) but whilst on the subject I removed the our bolts and the two springs do prised these off with a screwdrivers.
 

Attachments

  • image.jpg
    image.jpg
    407.9 KB · Views: 206
When all the bolts are off and the gearshift plate is off I lifted the gear stick up slightly and this will raise the seal up so it can be removed and cleaned. Then after cleaning it all I replaced the gear change plate loosely fitted the rear bolts and fitted the springs back on the lugs.
 

Attachments

  • image.jpg
    image.jpg
    392.8 KB · Views: 220
Again with a screwdriver gently prised the springs back into place and fitted the bolts back.
After this was done, I made sure that all the gears were able to be selected and with a small bit of adjusting ensured this was the case.
 

Attachments

  • image.jpg
    image.jpg
    361.7 KB · Views: 184
Remove the fan cover.
The good book says that you need to remove the fan to protect the radiator.
I didn't bother and with the fan cover removed, placed some tough cardboard between the radiator and the fan to protect it, as later with the gearbox coming out the engine tips up and the fan can damage the radiator.
 

Attachments

  • image.jpg
    image.jpg
    261.4 KB · Views: 175
Remove the under tray.
There are 6 bolts that hold this up.
At this point all I did was remove the bolts and slide the tray back as much as it would go, which isn't far.
Later on I raised the car body up as much as I could by supporting the car on the chassis and with another set of axle stands under the front axle and differential to prevent this from dropping too much.
This separates the two and gives you a much bigger gap between the chassis and axle to work.
I would recommend this from the start if I did it again as it make life a lot easier.
 

Attachments

  • image.jpg
    image.jpg
    330.7 KB · Views: 193
Front pipe to centre box.
You need to remove the centre box but as mine was so rusted I left it where is was.
But as I discovered the gearbox didn't have enough room so it does need to come off if you can.
I did take the centre box and rear pipe off the rubber mounts and move this to the side and slid it back.
I cable tied it up and it was well out the way, however!!!!!
My exhaust snapped as it was so rusted and I didn't support the tail pipe at all, but if you cable tie the centre box and rear tail pipe with it slid back and to the side there is enough room.
 

Attachments

  • image.jpg
    image.jpg
    311.4 KB · Views: 167
Front cross member removed. 8 bolts, I sprayed these with WD40 before and they came off, but were a little rusted.
 

Attachments

  • image.jpg
    image.jpg
    320.9 KB · Views: 177
often those bolts will shear ,in which case the captive nut can be easily chiseled off ,and 8mm flange nut used as a replacement
 
Back
Top