You are using an out of date browser. It may not display this or other websites correctly.
You should upgrade or use an alternative browser.
You should upgrade or use an alternative browser.
Other what have u done on ur disco today
- Thread starter gstuart
- Start date
This site contains affiliate links for which LandyZone may be compensated if you make a purchase.
It wasn't a modern massive tractor. I'd say it's an early 80s tractor.Your lucky it didn't pull the arse off your D1
andyschleckscheshirecat
Well-Known Member
- Posts
- 383
- Location
- Cheshire
I had very light surface rust on my sills, I seen a recent comment on here think it was @gstuart somewhere so I decided tonight to take off the lower trim and and wire wheel the any effected area on the sills and and paid more attention towards the rear arches. These have now been waxoiled and look mint
I took a look at the chassis rails etc and underneath, I think in the coming weeks I will take the wire wheel once again to areas but this time lanoguard the underneath of the vehicle
The D3 is serving me well presently as I am currently using it to commute in and out of Manchester, thank god derv prices are coming down and its returning a respectable 33mpg on the 40 mile daily round trip
Henry_b
Think outside, no box required.
- Posts
- 15,623
- Location
- somewhere else
Been off the road for 2yrs, barn has been cleared so she's going in to have the flexplate done ")
Would be nice to have her on the road again.
Would be nice to have her on the road again.
andyschleckscheshirecat
Well-Known Member
- Posts
- 383
- Location
- Cheshire

Nellysubsea
Member
- Posts
- 27
- Location
- Aberdeenshire
2" Suspension lift, coils and shocker's,
Extended the wheel speed sensors.
Replaced all the brake hoses for longer braided stainless steel ones.
Both rear calipers and pads replaced also. Flushed whole system with new fluid
2" lift blocks not installed as waiting to see if they are required.
Failed MoT
Postion light bulb, one main beam bulb, CV boot retaining clips, and a small hole in the rear arch.
Patched the rear passenger inner wing with the mig and some some sheet metal, buffed and filled (yet to paint). Replacd all the bulbs in the headlights. Fit new retaining clips for the CV boots and goes back in on Monday for retest.
All in all, happy with that very small list of failure points as nothing serious at all.
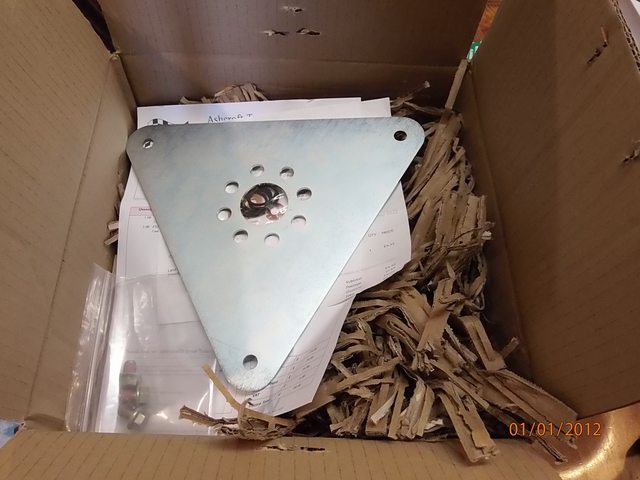
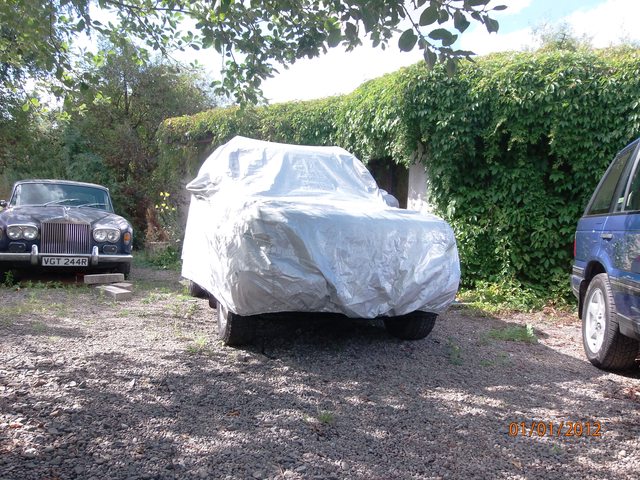
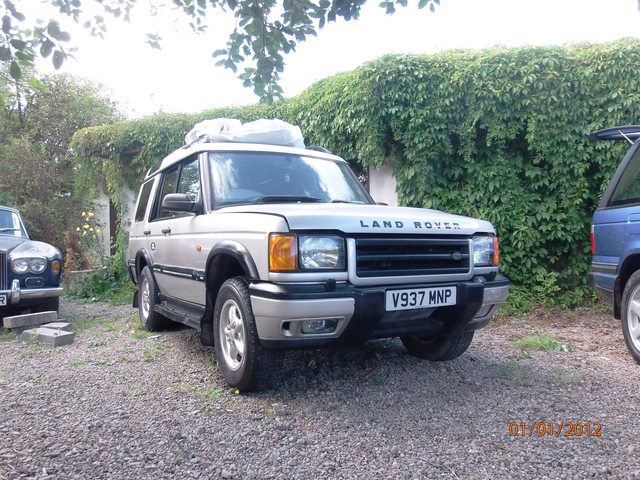
Attachments
Its been a few weeks since I picked up my 1999 d1 v8. I have to say I love it. Compared to my 300tdi d1 is like a rocket. I was slightly worried that I heard the dreaded gurgle behind the dash but, it seems a new expansion tank cap has cured that problem. I had a sniff test and pressure test done just to be safe and all is well. Now the fun can begin of fixing all the inevitable niggles that I find. Happy days. I think I'm going to keep this one looking standard.
- Posts
- 6,871
- Location
- South Bucks
Is it a manual or auto, my 300 TDI auto feels slow, compared to our other vehicles. As it's used, mainly for towing, I don't mind though.Its been a few weeks since I picked up my 1999 d1 v8. I have to say I love it. Compared to my 300tdi d1 is like a rocket. I was slightly worried that I heard the dreaded gurgle behind the dash but, it seems a new expansion tank cap has cured that problem. I had a sniff test and pressure test done just to be safe and all is well. Now the fun can begin of fixing all the inevitable niggles that I find. Happy days. I think I'm going to keep this one looking standard.
On the road to getting my D2 back again.... I welded up the rear chassis next to the spring hanger, and shock mount. All solid with 3mm plate, then painted. Fitted two new rear shocks.. and a new rear wheel bearing set. Pee'd me off, in that I'd bought a front and rear bearing, from Craddocks, and the rear one had the abs sensor and the nut missing out of the box. I didnt check it, which I should have done. Looks like its been returned, minus the sensor... Tw@ts. Got to replace the front o/s bearing, and replace both front axle seals next Sunday... Then after that, drop the tank and weld up the insides of the rear chassis legs. Ive also got to fit new rear mudflap mounts, as both have rotted to dust... Whilst looking at the tank, I found that the vent pipe, from the tank to the filler neck, is kinked and so blocked....
andyschleckscheshirecat
Well-Known Member
- Posts
- 383
- Location
- Cheshire
- Posts
- 24,657
- Location
- In the next Glen
Sold it on Sunday its off to York.
New Terrafirma poly bumpstops arrived today, and were fitted, replacing the four metal plates, where rubber bits should have been attached. New arb drop links and bushes arriving within days, so taking those off tomorrow, wire wheeled and painted to make it look good. Just looking at new steering end joints as I may as well do those as well. Still havent dropped the tank to weld up the rear inner chassis though....
- Posts
- 48,622
- Location
- East Dorset
Recently.......
Disconnected the MAF and all of a sudden it drives a whole lot better.
So those who say "on a 10p engine the MAF only controls the EGR" can go and do the other thing to themselves.
The EGR has been de-EGRed for ages.
Disconnected the MAF and all of a sudden it drives a whole lot better.
So those who say "on a 10p engine the MAF only controls the EGR" can go and do the other thing to themselves.
The EGR has been de-EGRed for ages.
- Posts
- 1,219
- Location
- Worcestershire
On Tuesday i moted the 2002 Discovery, then sold it to a chap half a mile up the road on Wednesday.
Won't be sorry to see it go. It's not because it was a ball ache or money pit, i just never warmed to it.
The question now is do i dig out the D1 whose gearbox went poopy on the way back from picking up a replacement rear axle or attack the '61 S2 that's my avatar?
The last time i was without a Landy on the road was in 2010 when it snowed 'a little bit'...
Last edited:
Fitted a new o/s front wheel bearing, and driveshaft seal.... Fitted the front arb after cleaning and giving it a respray with hammerite smooth black, with new droplinks, and terrafirma bushes...... Found another hole to patch on the chassis....
Tomorrow, strip and fit a new front axle seal on the n/s, and clean off the oil from the old seal leak. If Ive got time, after watching the funeral, I need to replace the rear disks, and pads.
Got to order some new shocks for the front, turrets, with springs, new bolts etc.... but Im thinking of doing that after the MOT, if it passes... Previous owner never spent much in this money pit of a car...
- Posts
- 48,622
- Location
- East Dorset
Topped up the ATF after changing the temp sender.
Crossing my fingers all will be well for our trip back from Frogland towing a trailer with a Pluriel on it, and loads of other stuff like a genny and loads of wine! 550 miles odd.
Crossing my fingers all will be well for our trip back from Frogland towing a trailer with a Pluriel on it, and loads of other stuff like a genny and loads of wine! 550 miles odd.
Nellysubsea
Member
- Posts
- 27
- Location
- Aberdeenshire
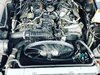
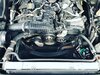
Bit the bullet and took advantage of a few hours of sunshine to install the snorkel I purchased from OffTrek.
As follows.
Removed all the items from the kit, checked that the paper template lined up with the snorkel holes.
Removed the inner plastic guard under the wing (was dreading what I was about to find).
Removed the air box from the engine bay, removed all the air intake hose and plastic that is secured with the 2 plastic nuts to the inner wall of the engine bay.
Cleaned the wing, clay bar, swirl remover 2 on the machine pad, polished with the machine afterwards (not going to be able to do it again once this the snorkel is installed).
Masking taped the wing up.
Secured the paper template with more masking tape.
Pilot drilled the holes with a 3mm drill.
Used a 73mm hole saw for the 2 large holes (the template said to use a 70mm but I didnt have that in my hole saw kit).
Used a 10mm drill for the other holes.
Marked up the straight lines from the outers of the 73mm cut holes & took the angle grinder to that to creat the correct hole shape for the air intake.
Trial fitted the snorkel, the air intake that passes through the bonnet was to long so measured the distance from the inner wing to the outer and then cut the duct to suit.
The adapter that comes with it (cast metal) then became a slight issue due to the shortening of the air intake duct so buffed down edges to make it smooth, and then did the same to the air duct so that it fitted snug. This was measured so that the adapter plate would be pressed tight against the winner wingand the securing of the snorkel would hold it in place.
Plenty of SikaFlex added at this point to all faces.
Installed and bolted up the snorkel until snug. Smoothed off the SikaFlex on the inner via the hole in the engine bay.
The snorkel pipe running up the A-Pillar was slightly off, so with some use of the heat gun and some gentle persuasion got it looking about right.
Removed the door seal and the inner A-Pillar trim. Applied more masking tape.
Bolted on the securing plate and tightened the bolts. Pushed the plate as tight as possible to the seam & marked the 4 holes.
Loosened off the securing plate bolts again, drilled holes, rivited the securing plate in place and tightend the bolts for the last time.
While the little air intake pipe was off gave it a clean (I was looking for a silicone version but cant find a part number or a replacement) wrapped it all in self-emalgamating tape and then some electrical tape.
Some more SikaFlex on the duct that is installed on the inner wing and every is back together.
K&N installed and away we go.
Most likely the next thing I do will be to remove the plastic inner wings and weld up all the rot that I found
Attachments
Similar threads
- Replies
- 4
- Views
- 2K
- Replies
- 9
- Views
- 6K
- Replies
- 5
- Views
- 2K