Tonks4x4 Defender 6x6 Expedition Camper

This site contains affiliate links for which LandyZone may be compensated if you make a purchase.
it looks great ,what a machine that is going to be, keep up the good work, what type of air springs did you use ,as i need 4 for my 6x6 170?

Sorry not logged on for a while....

The air bags are firestone bags... Part number 1T26D-7 if anyone wants the spec sheet I can eMail it.
 

Attachments

  • AirBagSpec.jpg
    AirBagSpec.jpg
    80 KB · Views: 828
This thread is excellent - Ive always wanted a Burstner Argos 6 birth M/home but due to a full and terminal LandRover Defender illness i have to pull a Burstner tin-tent with the 110. Really looking fwd to your internal solutions - Gauging by the standard of your work so far - its going to be special.
 
hi, am loving the attention to detail, this is going to be an exceptional machine, not sticking to normality ie 12" wider!!! BRILL!!!, so greeeeeeennnnn!!
 
hi what type of compressor are you using for the air bags

Not sure yet, have been looking at a digital read out and control unit from air systems.

:nothingtoadd:

Sorry been busy doing a full nut and bolt rebuild for a customer...

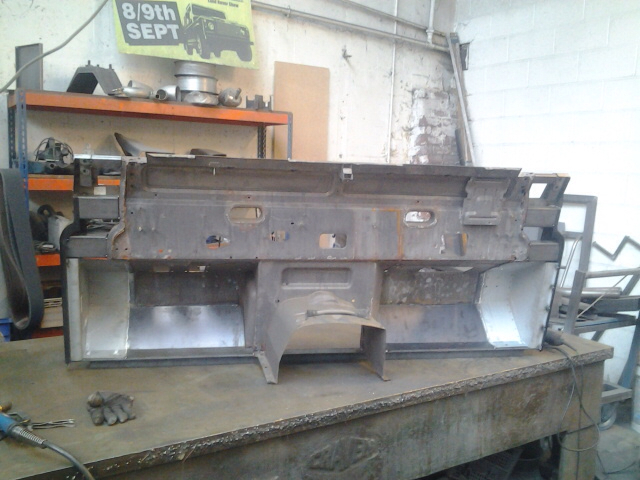
However there has been some progress made on the bulkhead stretch.

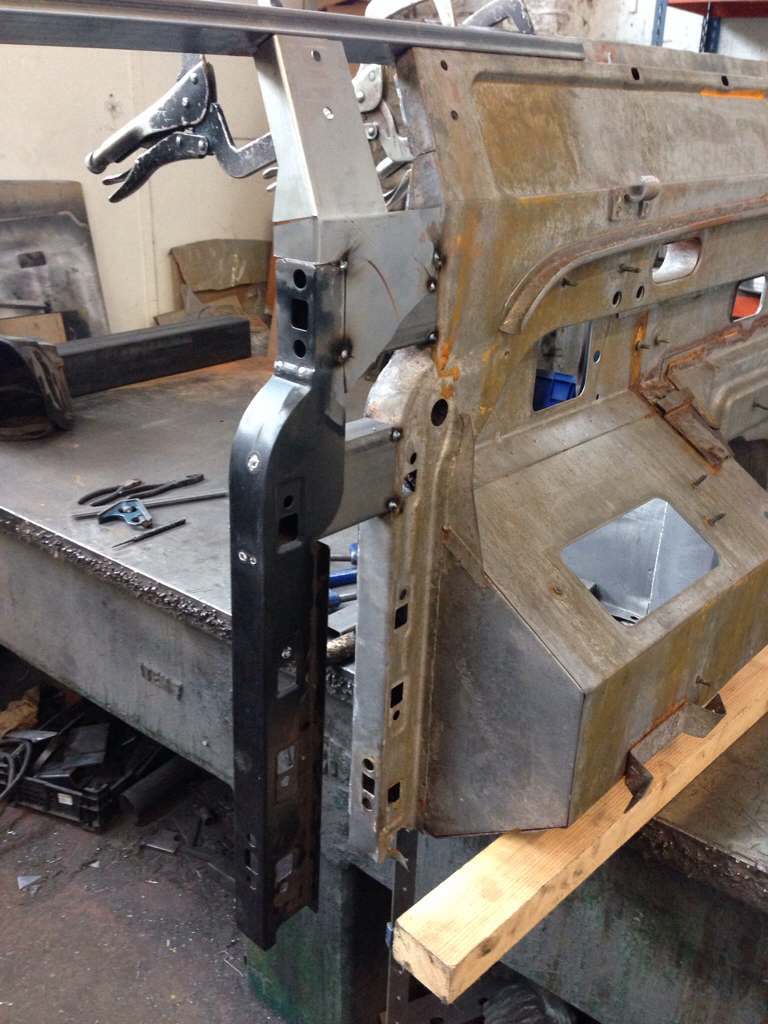
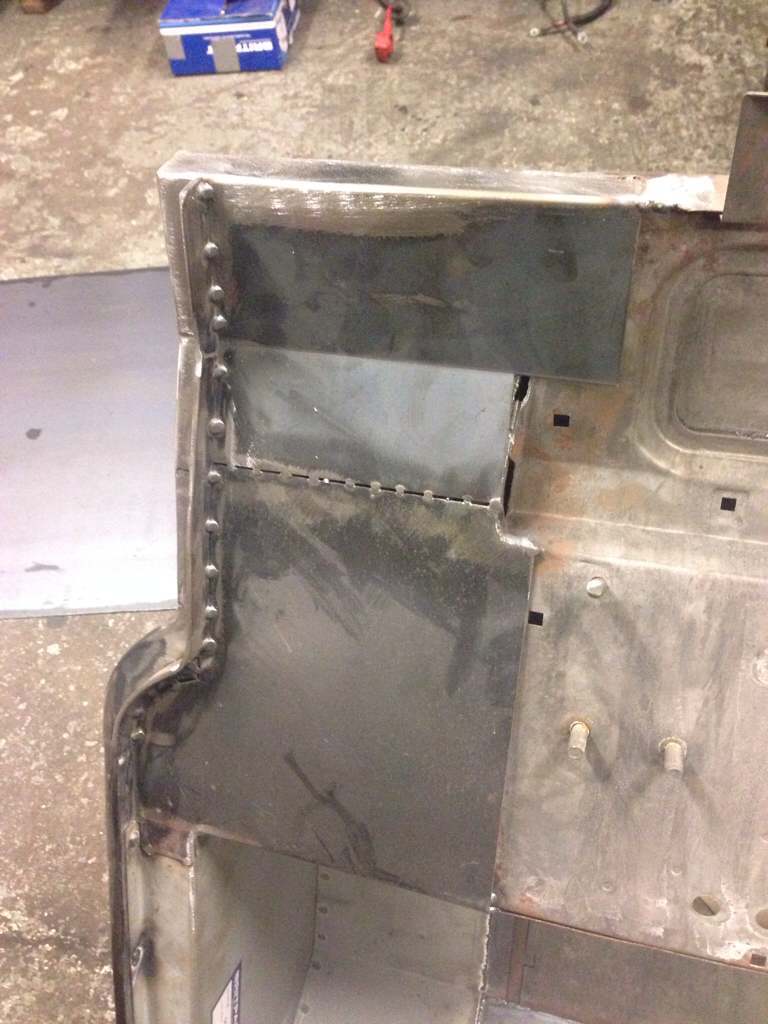
First the replacement pillars were offered up, jigged and tack welded into position
a3aba2e8.jpg


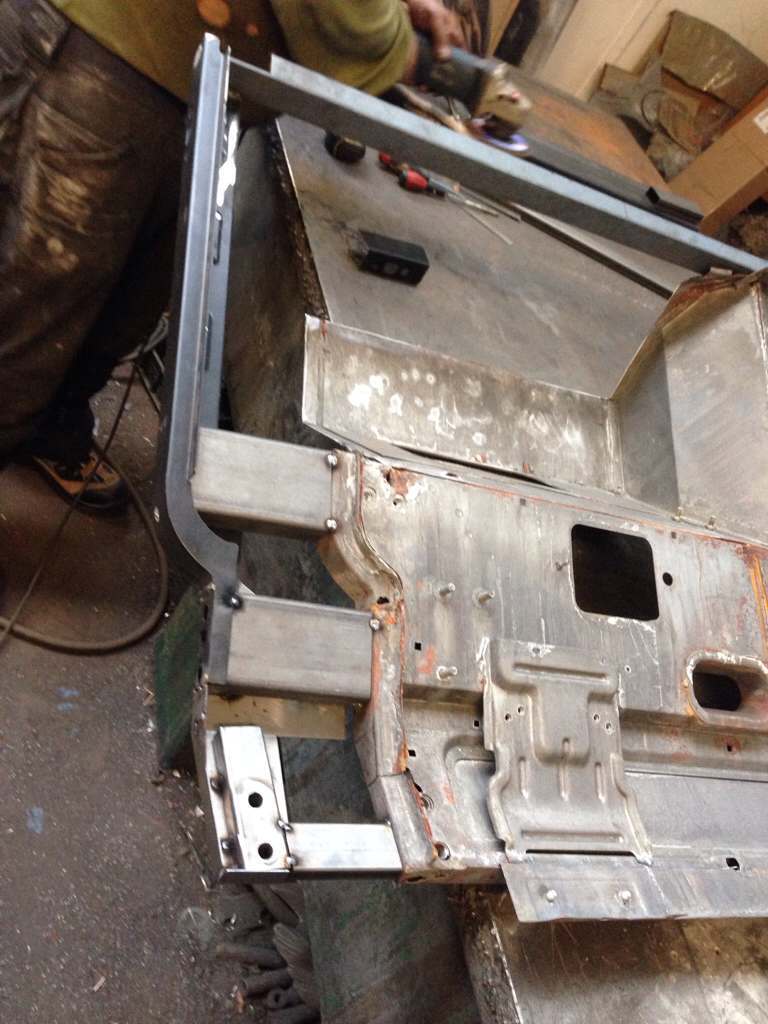
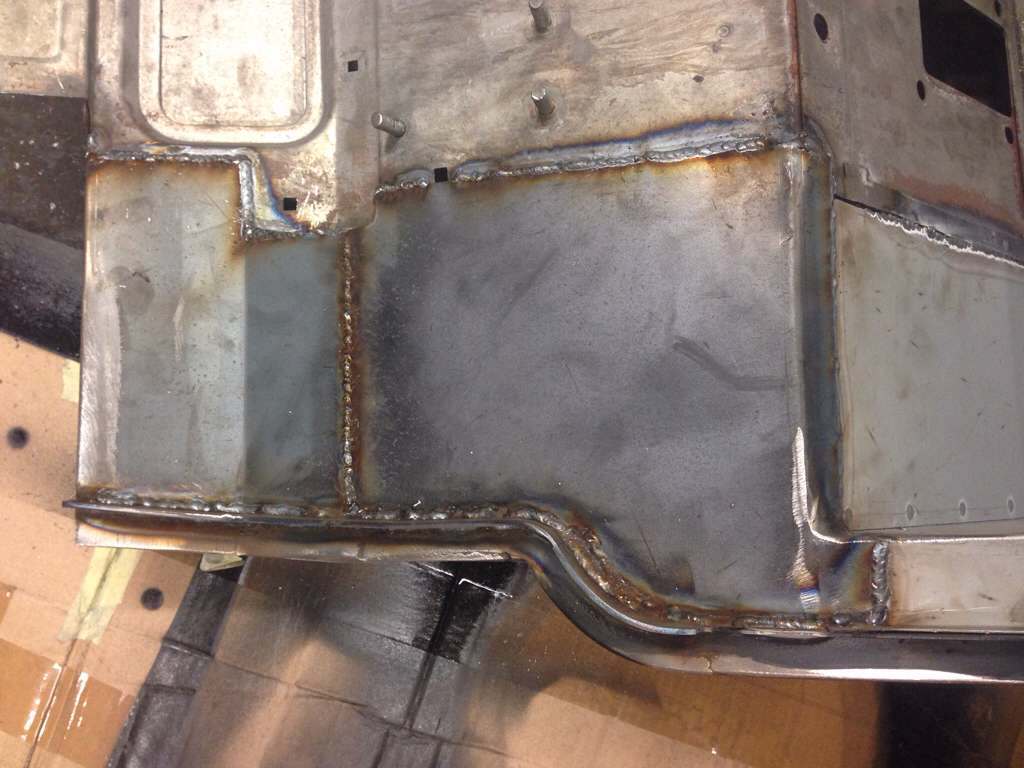
Then the very poorly footwells were cut out along with the lower part of the original door pillar.

A 5mm thick brace bar has been welded along the length of the bulkhead between the new pillars and welded at the bottom of the transmission tunnel either side.
This is to keep everything square and will remain on the finished bulkhead.

Only the section crossing the transmission tunnel will be trimmed out.

The bulkhead mounting points will also be welded to this so the chassis will remain without any modification.

Also extra strength has been added for the windscreen mounting points with new crush tubes inside the box section that has been added.

ubumy5yg.jpg


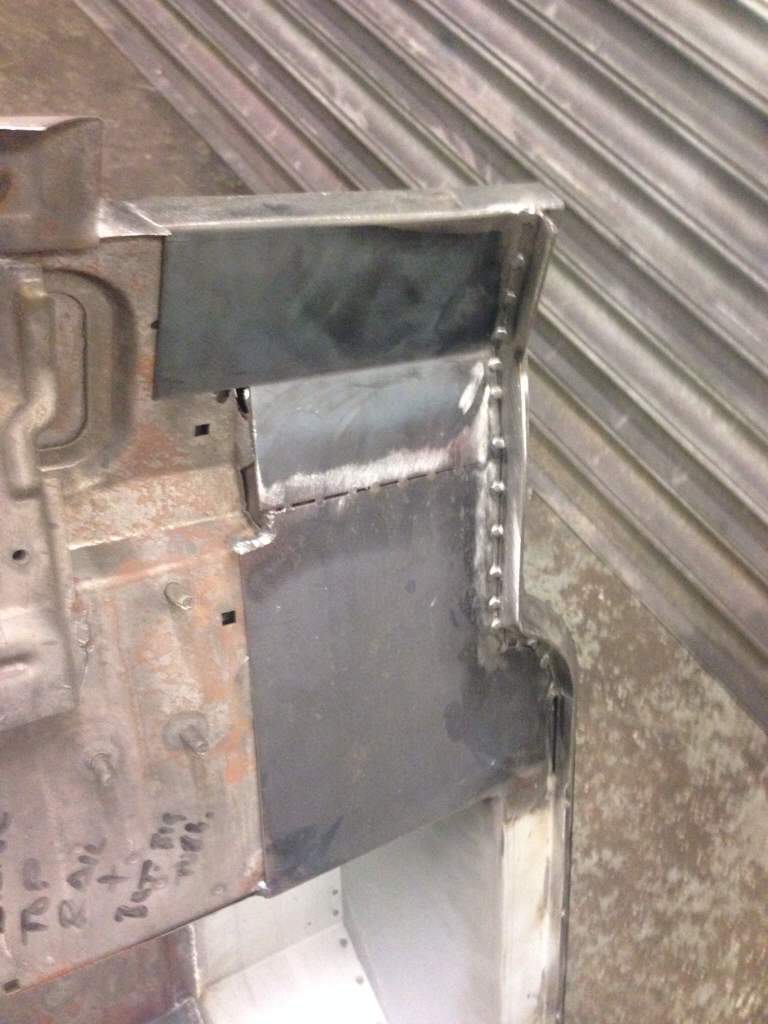
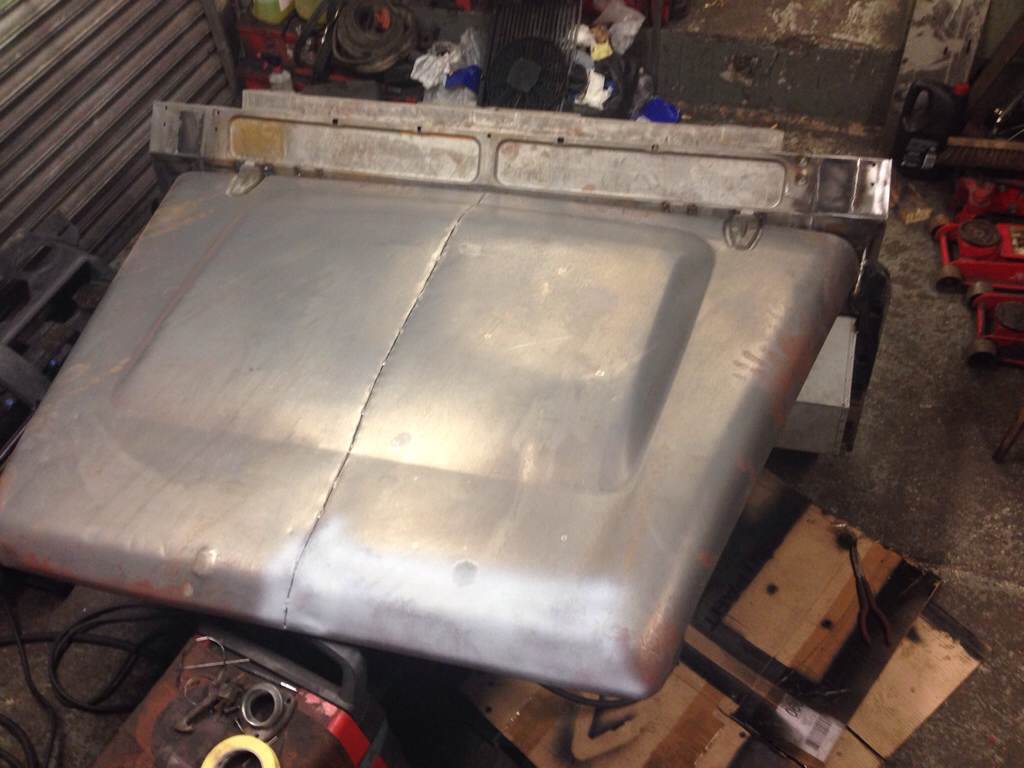
Then A replacement footwell was cut down to extend the well, this will give an extra 6" of space to put my size 11's on long journeys ;)

pysajyvu.jpg


Then more steel has been cut to size and folded to finish off the footwell either side.

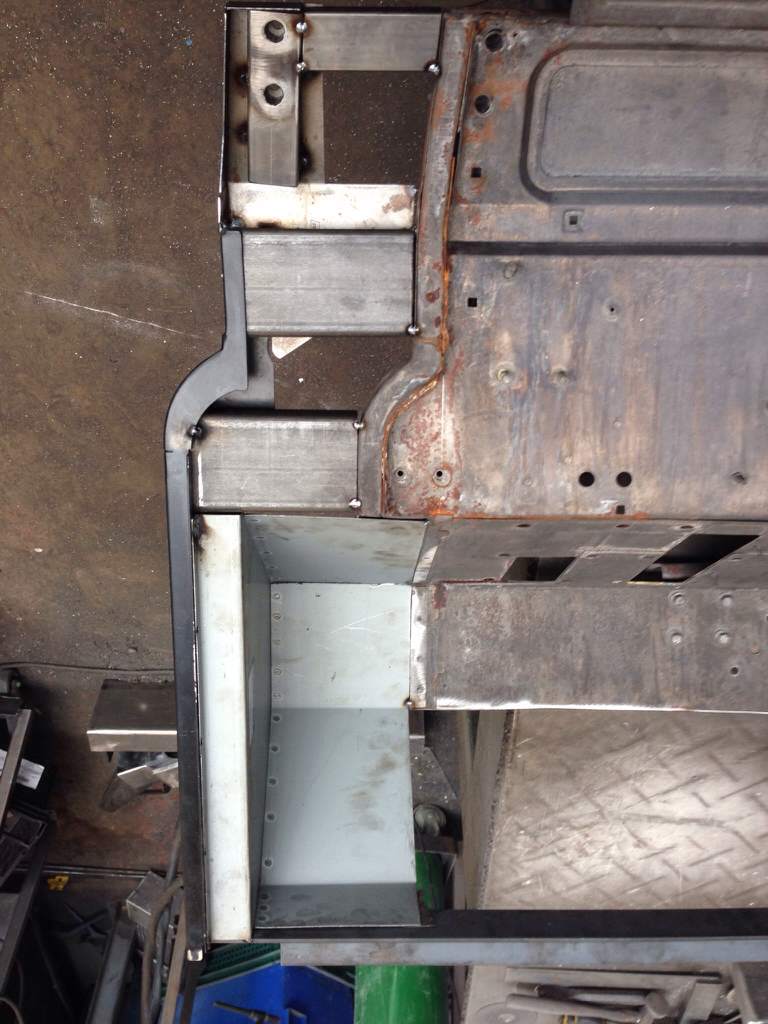
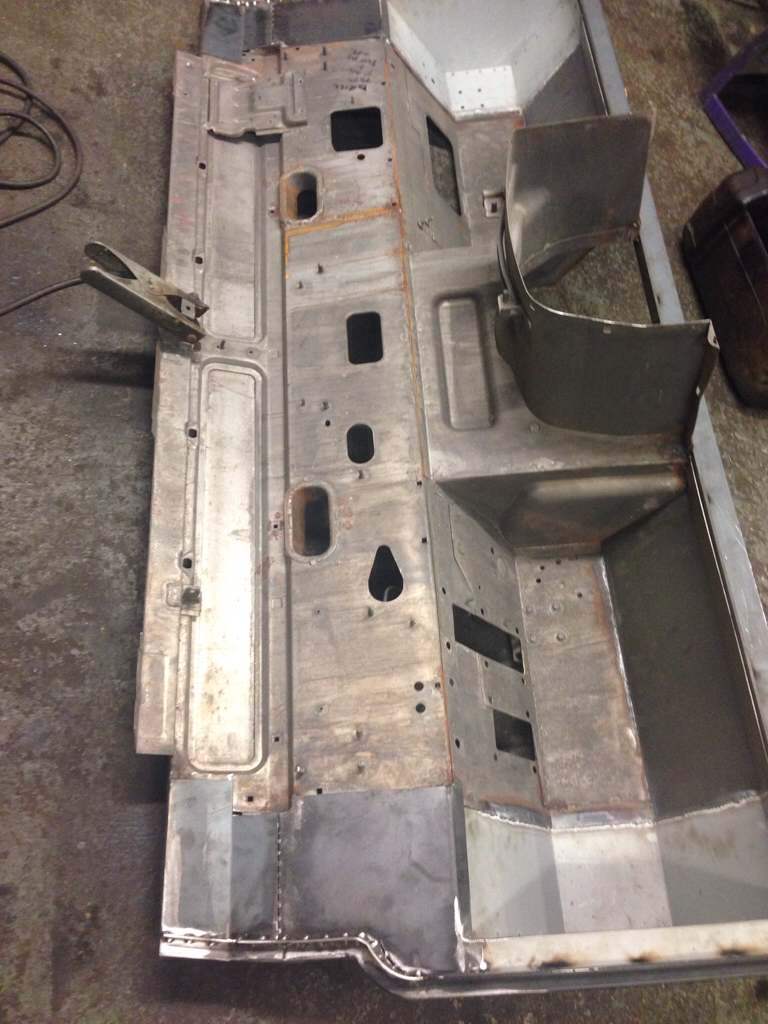
Both sides have now been completed to this point. All that remains is to cut out the old door seal lip and cover in the frame that has been added. Add the new door rubber lip to both sides and then to make a few more minor repairs on some further rot.

u3u8u5yv.jpg
 
So are we going to be seeing a custom dash to fit then?

No, I have decided on the extension to be done like this so that there is no modification to the dash required. The pedals, and steering geometry will all be the same. There will just be 6" of extra space down either side of the dash which can be carpeted with the rest of the footwell to suit.
It is a TDCi bulkhead so will have a modern up to date look to it and a decent heater ;)

Seems the best way to go. It's not like a Defender dash is originally a lovely fit against the doors anyway :p

The extra space down the drivers side might be a good spot for a satnav or something too.
 
No, I have decided on the extension to be done like this so that there is no modification to the dash required. The pedals, and steering geometry will all be the same. There will just be 6" of extra space down either side of the dash which can be carpeted with the rest of the footwell to suit.
It is a TDCi bulkhead so will have a modern up to date look to it and a decent heater ;)

space for vivaro style drinks holders lol
mYp6QzcZXAHDgV-43F6yqhg.jpg
 
.....So as that was not enough of an engineering challenge the decision has been made to stretch the width of the front end of the body work to bring it closer to the width of the intended rear end.

This will mean stretching the width of the bulkhead by 10" overall......

So if you're making the cab 10" wider what about the windscreen?
 
10" was the first intended extension.
After looking at how I am going to modify the front wings it was apparent that 12" overall extension would work out better. All will become clear later when I get to that point.

The windscreen will be done in the same way as the bonnet. I will use 2 screen frames and join them in the middle so there is only one joint to TIG weld back together.

Laminate glass made to order in a flat panel is easy to sort.

I like the idea of the cup holders!! :)
 
Collected the bulkhead back from my friends. He was struggling to find the time to finish it.

It is pretty much tack welded together everywhere it needs to be

ypadytav.jpg

pugura6u.jpg

ebevypur.jpg


So I started at 6:00pm Saturday afternoon and worked through until 2:00am new time.
I started by seam welding all the panels together
rytyzuve.jpg


I then removed the bonnet hinges and relocated them to accept the new wider bonnet
me3u2eqa.jpg
 
Back
Top