KISSMYAURA
Well-Known Member
- Posts
- 2,916
- Location
- KENT
@dieseldog69 cheers DD weather warming up so more time to play etcNew Rear ARB, BJ and Bushes fitted today, feels a bit better on corners less body roll etc.
@dieseldog69 cheers DD weather warming up so more time to play etcNew Rear ARB, BJ and Bushes fitted today, feels a bit better on corners less body roll etc.
Tenner!Aftermarket Anodised Ali Fuel cap cover. I like it....
View attachment 173486
Middle Seat Under Tray Paint update:
- Upol Etch primer
- Epsom Green / Lacquer (Halfrauds)
- Stone Chip & Matt Black (ECP optima)
View attachment 173485
View attachment 173482 View attachment 173483 View attachment 173484
That tray is the bomb and the relay and fuse boxes look to be right at home.
What bushes did you fit? Poly or OEM rubber?

Rubber, you can see em in the last tray pic.......
IMO you just cant beat rubber, its cheap so I change it often.
Poly is good, but the ride is jarring and if its the two part poly a ridge can form between the two halves after a while etc.
I know 1000+ peeps will say different but I prefer rubber
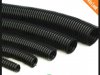
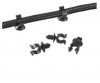
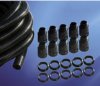
I am looking at new bushes in the front radius arms and panhard rod, deliberating over poly or metelastic rubber as per original? Choices are end less...... What do you think of that expandable braided cable protection stuff? New looms on the horizon and I'm planning in advance
Got SFA done today.
Had to fit new rear disc n pads to the VW caddy,
Its an 07TD@135K runs like a dream..... still prefer to working on the landy.......
Cheers!What a great list of changes you've made. Really interesting to see.
I'm also Kent was was thinking of a Stage 2 remap from those guys in Margate so will watch with interest when you get round to going that.
Are you thinking stage 1/stage 2 ? and will you be changing other components ?
Our 90 already has a stage 1 remap but from back in 2010 and not sure who did it.
Liking the updates I fitted an middle seat for all of about 24 hours and never realised how much space there was as ive only seen it in photos !
I cant have a middle cubby, the middle seat is perfect, as i feel like a T-REX in a phone box at the best of times driving me fender.
Ashford, Junction 10, M20.Cheers!
Where abouts in kent r u?
I quite like thatPre full spray job later in the year, still deciding on colour scheme and finish, so popped this on for a look-see.
Used 1mm self adhesive rubber on rear to stop noise.....
View attachment 174657 View attachment 174658 View attachment 174659
I quite like that
I Just dont know!
1) Epsom Green (as is) and Matt black (roof)
2) Raptor* v dark grey / Matt Black roof
3) Raptor* v dark grey / White roof
* or some sort of texture (fine grade) I quite like the black against white offset in the pic, which was an unintended surprise, so thats put a 'UN' type two tone option into the mix, bas of white or cream with black furniture etc ? To be honest all today has done is widen my options!, so in summery no idea need more cider n chin scratching.
Raptor & white roof sounds the bomb, 20" rims an 2" lowered with limo tints an we be rollin big stylee
Welcome To LandyZone, the Land Rover Forums!
Here at LandyZone we have plenty of very knowledgable members so if you have any questions about your Land Rover or just want to connect with other Landy owners, you're in the right place.
Registering is free and easy just click here, we hope to see you on the forums soon!