battenberg
Well-Known Member
- Posts
- 2,101
- Location
- Birmingham UK
have you got a part number for the seals?
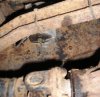
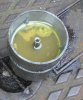
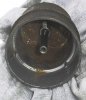
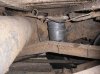
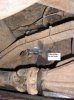
The head on the top bolt of my sedimentor has corroded and rounded off.
If I manage to get a replacement bolt and grind off the head of the one already in the sedimentor does anyone know whether the unit will open up, or would it still be threaded together with the shaft of the bolt??
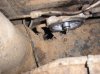
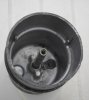
Thanks, if you're 100% sure on that will lop it off this eve..If you grind off the 11mm bolt head off the top of the sedimentor the bowl will come off as normal.
Undoing the 11mm bolt usually allows you to withdraw it if you wish before undoing the bowl.
Thanks, if you're 100% sure on that will lop it off this eve..
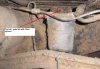
Don't both with that daft plastic tap, always take the whole unit off and clean.
if you grind off the bolt then you might as well throw the lot away, just under the head of the bolt is a hollow with a rubber seal on it,if you grind off the 11mm bolt head off the top of the sedimentor the bowl will come off as normal.
Undoing the 11mm bolt usually allows you to withdraw it if you wish before undoing the bowl.
To be honest I've done this several times on each of the 4 TDI Discos we've had and I never replaced any of the seals - and never had any leaks afterwards.
Cheers
Dave


") - Q now - will it leak - if so - its a trip to Keith Gott for seals n stuff (they will post).
- Q now - will it leak - if so - its a trip to Keith Gott for seals n stuff (they will post).Welcome To LandyZone, the Land Rover Forums!
Here at LandyZone we have plenty of very knowledgable members so if you have any questions about your Land Rover or just want to connect with other Landy owners, you're in the right place.
Registering is free and easy just click here, we hope to see you on the forums soon!