Freelander 1 Say hello to new friend ! TD4 needs new engine.

This site contains affiliate links for which LandyZone may be compensated if you make a purchase.
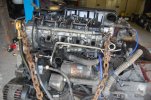
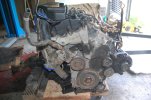
Failed engine now out of car and on trolley with good IRD removed ready to fit to replacement engine and then pop the whole lot back in the car.

Found a broken gearbox connector, 1st or reverse switch so fitted a spare plug to the loom.

So the only ancillaries I left in the vehicle that is being repaired are the power steering pump which I removed and placed on the inner wing. This saved draining fluid. Also the air con compressor which I removed and tied out of the way in front of the bottom valance. This saved de gassing the system.
 
Replacement engine with working IRD now in car. Just have to connect it all up and rebuild the front subframe and wishbones, driveshafts etc. If I did it again I would remove the bolts holding the manual gear lever link arms on the bulkhead. These fit to the rods with the press fit ball ends. With the link arms still fitted there is a tendency for the link arms to catch on the coolant hose at rear centre of engine. Some mm precision trolley moving required !! The alternator prevents moving it forward too much.

Took some photos in the engine bay while engine was removed. Not normally seen and may be useful in the future to locate component fixings etc. Will post shortly.
 
Here you go - engine bay shots, the bits that you can't easily see with the engine in place. Photos taken standing inside the engine bay with some key components listed to allow you to work out where you are looking ! TD4 Manual Facelift vehicle.

DSC_0003.JPG
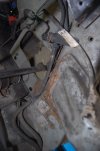
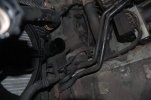
Looking up at LH end of steering rack, top is the fuel cut off button, facelift car so fuel pressure sensor seen at bottom in the fuel line run. Steering rack rod goes out through inner wing.

DSC_0004.JPG
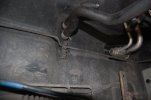
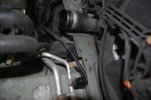
Same corner moving around to show air con connectors.
DSC_0005.JPG
Interior heater matrix pipes going into car.
DSC_0006.JPG
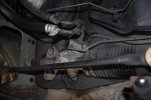
RHS of steering rack (where the RHD column fits to rack) brake servo and power steering pipes.
DSC_0007.JPG
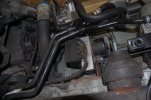
RH side engine mount (TD4) ABS unit (modulator and pump), screen wash filler pipe and a loose temporary power steering pump sitting awaiting refitting to new engine.
DSC_0008.JPG
Moving around to show the intercooler and fan, also horn.
DSC_0009.JPG
LHS of intercooler, air con pressure sensor, another horn.

DSC_0010.JPG
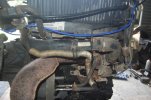
Rear of engine and gearbox (with IRD) before fitting. Exhaust manifold and pipe bottom left, turbo on right and intercooler pipe.

DSC_0011.JPG
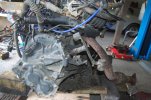
Gearbox end before fitting.

DSC_0012.JPG
Front of engine (chain attached for support when fitting - purely to support and provide small amount of lift and tilt, major alignment done with trolley and packing blocks under engine and gearbox. Safety really !

DSC_0013.JPG
Serpentine belt end of engine, obviously no belt and power steering pump and air compressor not yet fitted. Thermostat next to top left pulley. Much easier to change with engine on the floor ! Alternator at right hand end of photo.

If anyone has a question about any component or what they are - fire away !!
 
Here you go - engine bay shots, the bits that you can't easily see with the engine in place. Photos taken standing inside the engine bay with some key components listed to allow you to work out where you are looking ! TD4 Manual Facelift vehicle.

View attachment 342109
Looking up at LH end of steering rack, top is the fuel cut off button, facelift car so fuel pressure sensor seen at bottom in the fuel line run. Steering rack rod goes out through inner wing.

View attachment 342110
Same corner moving around to show air con connectors.
View attachment 342111
Interior heater matrix pipes going into car.
View attachment 342112
RHS of steering rack (where the RHD column fits to rack) brake servo and power steering pipes.
View attachment 342113
RH side engine mount (TD4) ABS unit (modulator and pump), screen wash filler pipe and a loose temporary power steering pump sitting awaiting refitting to new engine.
View attachment 342114
Moving around to show the intercooler and fan, also horn.
View attachment 342115
LHS of intercooler, air con pressure sensor, another horn.

View attachment 342116
Rear of engine and gearbox (with IRD) before fitting. Exhaust manifold and pipe bottom left, turbo on right and intercooler pipe.

View attachment 342117
Gearbox end before fitting.

View attachment 342118
Front of engine (chain attached for support when fitting - purely to support and provide small amount of lift and tilt, major alignment done with trolley and packing blocks under engine and gearbox. Safety really !

View attachment 342119
Serpentine belt end of engine, obviously no belt and power steering pump and air compressor not yet fitted. Thermostat next to top left pulley. Much easier to change with engine on the floor ! Alternator at right hand end of photo.

If anyone has a question about any component or what they are - fire away !!
This is invaluable info!
Well done for documenting it…
 
Here you go - engine bay shots, the bits that you can't easily see with the engine in place. Photos taken standing inside the engine bay with some key components listed to allow you to work out where you are looking ! TD4 Manual Facelift vehicle.

View attachment 342109
Looking up at LH end of steering rack, top is the fuel cut off button, facelift car so fuel pressure sensor seen at bottom in the fuel line run. Steering rack rod goes out through inner wing.

View attachment 342110
Same corner moving around to show air con connectors.
View attachment 342111
Interior heater matrix pipes going into car.
View attachment 342112
RHS of steering rack (where the RHD column fits to rack) brake servo and power steering pipes.
View attachment 342113
RH side engine mount (TD4) ABS unit (modulator and pump), screen wash filler pipe and a loose temporary power steering pump sitting awaiting refitting to new engine.
View attachment 342114
Moving around to show the intercooler and fan, also horn.
View attachment 342115
LHS of intercooler, air con pressure sensor, another horn.

View attachment 342116
Rear of engine and gearbox (with IRD) before fitting. Exhaust manifold and pipe bottom left, turbo on right and intercooler pipe.

View attachment 342117
Gearbox end before fitting.

View attachment 342118
Front of engine (chain attached for support when fitting - purely to support and provide small amount of lift and tilt, major alignment done with trolley and packing blocks under engine and gearbox. Safety really !

View attachment 342119
Serpentine belt end of engine, obviously no belt and power steering pump and air compressor not yet fitted. Thermostat next to top left pulley. Much easier to change with engine on the floor ! Alternator at right hand end of photo.

If anyone has a question about any component or what they are - fire away !!
Great post this is. Some very useful pics there Andy
 
Driveshafts and subframe back on. Wishbones cleaned and painted with Poly boots on ball joints.

IRD and Gearbox filled with oil. A good tip, easier to fill gearbox before fitting subframe if you have it removed for any reason.

Anti roll bar repaired with collars to replace the rusted rings that stop it sliding sideways.

This is going to be a nice motor !! Needs a headliner and a cream velour driver's seat and it would be mint. Anyone got a seat ??

Should finish the top end connecting up tomorrow then see what happens 😅
 
So we have a running engine. Haven't fitted the inlet or intercooler hoses yet as I want to clean the intercooler out first but turbo is whistling on reving and no leaks !!

It has a bit of TD4 clutch syndrome.
New slave fitted and the master worked when driven in on starter motor. But then I have never disconnected and reconnected the quick release on a TD4 and got a working clutch back !! Bled it a couple if times and bite point has appeared in the carpet !! I have messed around previously trying to improve things but have found that leaving it alone with pedal held down for a few hours is the answer. Air appears to be able to escape at the top.

So other than that, cleaning the intercooler and a manifold, egr etc, looks like it's done.

Now got an oily mess of scrap engine to take to pieces when the above is finished. Photos will be posted and root cause should be obvious.
 
Clutch appears to have sorted itself. I think if the master cylinder is open, pedal down, the air finds its way up. See how it goes. Then other technique I have used in the past is to remove the master cylinder, take the push rod off and compress the piston fully. The LR push rod has an plastic skirt on it which can, I think, prevent full compression and hence an air lock. Just a theory !!

Looking forward to turbo activation and test run.

Brakes need a looking at first. Air in there as well !! Pumped and fine, then need to be pumped again !!
 
Just the failed engine to do an ortopsy on now !
Started this morning. I think I'll turn it into a competition to see what peeps think happened. Although of course, I don't know !!

So I know compression was bad across all cylinders and oil was probably full of diesel and massively over full.

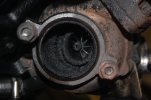
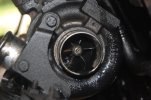
Will post photos later but all orifices of turbo drenched in oil. Impeller has loads of wobble and is clogged solid. However this shouldn't stop it from running especially as I had all boost hoses off. I think it might have 'run away'. But why ??

Stripped all goodies for saving off the engine including gearbox and DMF. Starter, alternator etc.

Gearbox bell housing and rear crank oil seal soaked in oil.

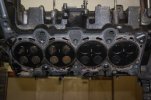
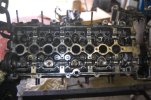
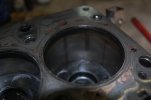
Head off, much diesel in bores and mysterious scribe lines in cylinder walls. 3 or 4 in each cylinder. Suspecting broken ring or more??

My theory so far is, massive over fuelling due to clogged inlet and egr and / or failed injector(s). Oil diluted and over full. Turbo seal damaged by pressure build up, turbo had a melt down and over revved engine. Resultant broken rings or massive over revving and thus scribe lines in bores.

Not got a piston out yet.

Any other theories out there ??

Any which way, head looks good. Block and turbo scrap.

Shout if anyone wants any TD4 engine components. Also have labelled all nuts and bolts and will, when time permits, produce a list of all bolt sizes and spanner sizes for engine bits and bobs.

At least the oil lube all over the outside made disassembly easy !!
 
Some photos:
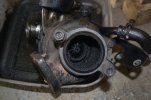
Turbo didn't look very well.

DSC_0010.JPGDSC_0011.JPGDSC_0017.JPGDSC_0018.JPG

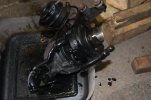
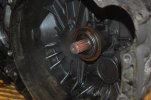
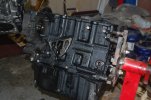
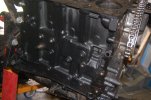
Bellhousing, engine both soaked with oil. Head looks ok, scores in the bores !!!

DSC_0012.JPGDSC_0013.JPGDSC_0014.JPGDSC_0015.JPGDSC_0016.JPGDSC_0019.JPG

Looks like cylinder 1 and 2 have had a prolonged wash !!
 
Back
Top