jai_landrover
Well-Known Member
- Posts
- 13,409
- Location
- Luton
A Rough Guide how to Remove and Replace a Salisbury Differential.
First off.
Undo the Drive flange member bolts x 5 and extract both half shafts.
Undo the drain bung and drain the old diff oil into a tray and dispose of.
Jack your Landy up enough to let the axle hang freely and support the chassis using 2 high axle stands in a safe manner. (Do not put axle stands under the axle.)
Once your Landy is supported and safe for working on you can tackle the diff pan.
Undo all the 17mm bolts that secure the diff pan to the diff housing. It should then look like this:
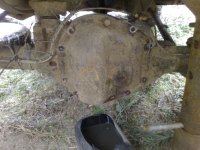
When all of the bolts are removed you need to prise off the diff pan from the housing. This can take some time to break the seal always making sure not to damage the pan or the housing surface.
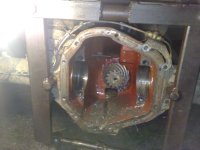
When its off you should see the diff:
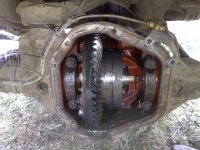
Now undo the bearing caps and release the pressure on all four bolts before removing either of the caps. Note which bearing cap is for the off side and near side they must go back exactly as they were taken off.
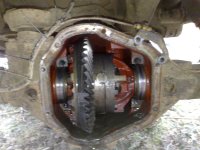
Now its time to spread the axle casing slightly to release the pressure on the bearings,
Clean out the holes in the axle thoroughly and hammer the tool in place.
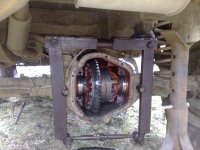
Once you are satisfied that the tool is inserted correclty take up the slack by hand until you feel pressure onthe tool. Then you can start to spread the axle one flat at a time do not overstretch the Axle. Mine took 5 flats to give me enough to gently leaver out the diff Assembly. Warning this Diff is extremely Heavy! The bearing runners will also want to go flying so make sure you catch them and note which is LH side and RH side. Once your diff is extracted release the tention on the spreader.
You should have somthing like this:
More info when I get time Soon to come soon Jai
First off.
Undo the Drive flange member bolts x 5 and extract both half shafts.
Undo the drain bung and drain the old diff oil into a tray and dispose of.
Jack your Landy up enough to let the axle hang freely and support the chassis using 2 high axle stands in a safe manner. (Do not put axle stands under the axle.)
Once your Landy is supported and safe for working on you can tackle the diff pan.
Undo all the 17mm bolts that secure the diff pan to the diff housing. It should then look like this:

When all of the bolts are removed you need to prise off the diff pan from the housing. This can take some time to break the seal always making sure not to damage the pan or the housing surface.
When its off you should see the diff:

Now undo the bearing caps and release the pressure on all four bolts before removing either of the caps. Note which bearing cap is for the off side and near side they must go back exactly as they were taken off.

Now its time to spread the axle casing slightly to release the pressure on the bearings,
Clean out the holes in the axle thoroughly and hammer the tool in place.

Once you are satisfied that the tool is inserted correclty take up the slack by hand until you feel pressure onthe tool. Then you can start to spread the axle one flat at a time do not overstretch the Axle. Mine took 5 flats to give me enough to gently leaver out the diff Assembly. Warning this Diff is extremely Heavy! The bearing runners will also want to go flying so make sure you catch them and note which is LH side and RH side. Once your diff is extracted release the tention on the spreader.
You should have somthing like this:

More info when I get time Soon to come soon Jai
