Rear sunroof mechanism issue

This site contains affiliate links for which LandyZone may be compensated if you make a purchase.

bmwhacker

Member
Posts
14
Location
USA - AZ. / MT
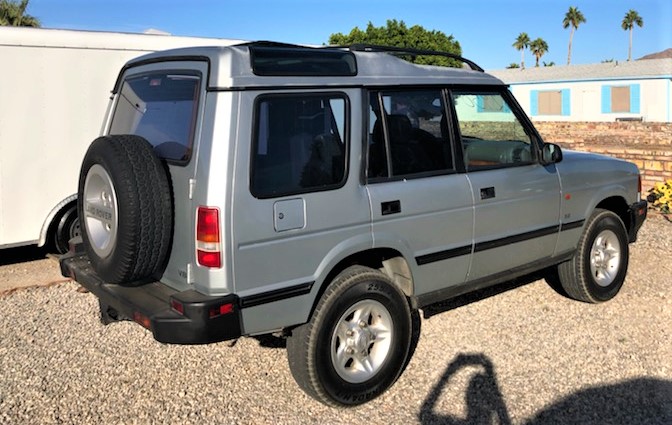
"New to me" 1997 Discovery 1. The rear sunroof will not close entirely and bottoms out a couple inches shy of closing....the motor works. Appeared to be binding / crooked. I was able to remove the glass panel to have a look-see. The right hand track is ahead of the left hand track, causing the problem. I lubricated mechanism with silicone thinking maybe it was just dry, but then realized things were out of alignment. I don't have access to any manuals so do not know how the assembly / mechanism functions. Been looking on-line but nothing of detail found yet. Any way to adjust the mechanism? Any help or suggestions would be greatly appreciated.
20181116_164531_resized%2B%25281%2529.jpg
 
That’s quite a bit out, so look to see if there’s any thing broken, as there is a few nylon/plastic bits on the side of the track, both tracks are the same so easy to compare.
The track mechanisms are independent so with the motor you should be able to move the mechanism back to line up, you may need a screw driver to turn the drive cog on just the one side which I had to do. (make sure the glass is in the closed position when u refit the motor and the dots on the motor are aligned) that bit of info I’ve seen somewhere and it is important.

As in quite a bit out u may have to remove the sunroof and to get to the track fixing screws and remove both tracks.

A few years ago I repaired my mates disco sunroof that would close fully, well it was rebuilt after taking it completely apart. I found that there a few black nylon sliders plus some other plastic bits that had broken so we purchased a replacement sunroof off eBay just to find that was also broken.
So after completely stripping two sunroof roofs we now finally had a fully functional one, and putting the surplus blinds and the motor back on eBay we made a bit of profit, and end up with a bag plastic bits and screws for any future repairs whatever.
Then as I was on a roll I tackled the other sunroof that my mates disco had, again removing and completely striping and rebuilding :)

Thank you very much for the reply.
I will access the motor and take a good look at what is going on.
Sure wish I had some sort of schematic showing the mechanism and entire assembly.
Do you know of any such "on line" schematics / descriptions?
I don't have a garage but thankfully I'm in the desert with no rain in the foreseeable future.

We had been looking for an off road capable rig for the desert. Prices in this area for old 4X4 Suzuki's / Trackers / Mitsubishi's / Jeeps and similar small rigs are outrageous here....$3500.00 - $5500.00 for a beat up, well worn rig.
Found this 2nd. owner Rover for $2500.00 which I thought was a good deal. Rig is very clean inside & out. Since it has been in a desert climate its' entire life there is zero rust and no apparent water leakage / intrusion. The Interior is near perfect with just typical wear for its' age. Needs a few odds and ends (one missing visor clip, broken seat actuator lever, missing drivers door bin, one broken sunroof shade clip, little things...etc.) but over all looks good. Just got to get that sunroof working...or at least permanently closed.
IMG_1419.jpg


IMG_1418.jpg
 
Last edited:
Looks a nice D1 does that - we run two - both of them born in 97 too :eek: , and find them very good indeed.

I'm jealous of the V8 too - not for the power, but for the smooth silky burble of the thing, they are lovely :)

Got any more pics, we likes piccies :D

Have you downloaded the RAVE manual for your D1 - I would have thought the sunroof "stuff" would be covered in there ... but, given Mr Discool didn't mention it.... I am guessing it isn't :(

Oh, And Welcome Aboard the good ship LZ :)

No...haven't located the "Rave" manual. Think I saw something about it when I signed up. I'll look again.


front:
IMG_1412.jpg


I do not like photos of myself....:)
IMG_1416.jpg
 
OK....accessed the manual crank mechanism....ran it in / out a few times (with glass removed) and the track's equaled themselves out.
So now things are not binding and both sides equal...but the track mechanism comes to a "dead stop" right at the point that the glass is supposed to drop down.
It needs about 1.5" of travel more to lower down into position.
What could be holding it from traveling the final little distance?
I can't tell if only one side is "fouled"....or if both "foul" simultaneously?

I reinstalled the glass in the case I somehow get it to drop into place. Have ran it in & out numerous times but nothing seems to change.
Looking over headliner removal....gosh, don't even want to do that.

Final place where mechanism stops:
20181117_114111_resized.jpg
 
Well...SUCCESS!
Once I had the slider as far forward as possible, I used a long punch and gave the left side a slight "love tap" on the metal lower section and it moved....went to right side and did the same...it also moved forward. So then just cranked it closed as it is supposed to work. I guess lack of lube?.....or maybe just bound up?....anyway no headliner removal!...Yay!
Amazing what you can achieve with a hammer!...:eek:
 
Indeed... LR number 1 special tool = hammer ;) ... if number 1 special tool fails, then get number 2 special tool .....


A BIGGER hammer :D ( repeat as necessary ;) ) :confused:

When I looked the rig over prior to purchase something in the engine bay caught my eye....down next to the starter, the large starter heat shield
was loose and just laying in there between the frame / starter.
VERY close to the main starter hot lead. Amazing that it never shorted against the lead and burned it down.
I made the seller aware of the situation. When I bought it I only had 2 miles to drive home so I made sure it was in a somewhat safe spot.
First thing done was battery disconnect and reposition the shield back in it's proper place. Have to admit that now a piece of
"mechanics wire" has also been added to assure "non-movement".
 
Back
Top