Rear door bottom repair

This site contains affiliate links for which LandyZone may be compensated if you make a purchase.
IMG_0985.JPG
Paint on, now just wiating for new skin to come
 
new skin finally arrived, good fit , I fine sanded it, degrease and 2 coats etch primer and then rolled on the top coat, original was
IMG_0987.JPG
worse than I first thought

I had to bend back the folded edge near window to allow it to slip under the window sides. to stop it rattling, and rusting I put some body sealant adhesive where the frame and panel meet, it should be better than original which wasn't even painted.
IMG_0991.JPG


IMG_0994.JPG


I used rubber mallet, bits of wood and the welding pliers to get the seam back flat

IMG_0998.JPG


I'll keep it loaded up overnight until the adhesive goes off then tomorrow see about getting the panel riveted around the door lock. i'l
IMG_0999.JPG
l need to use the old one as a pattern for a couple of holes, then get the window back in
 

Attachments

  • IMG_0988.JPG
    IMG_0988.JPG
    157.1 KB · Views: 240
Drilled out hinge holes last night 5mm and rivetted with 4.8mm rivets skin through the frame, only 2 of the holes can be drilled from the frame side the other 2 are hidden so i used the original skin
IMG_1008.jpg
and lined up the two holes and drilled the hidden 2 from skin side
IMG_1007.jpg

onto Plan B with the window couldnt find the dum dum so bought some glazing sealant and made some epdm strips for seals
 
Last edited:
IMG_1016.JPG
IMG_1011.JPG
IMG_1013.JPG
Window glass in
first a squirt of sealant all around , place the glass in , layout the rubber strips which stops the claggy getting on the aluminum retainers. then turn it over and run a bead of sealant around the joint, the sealant should be good for 10-20 years and works well with a wet finger ran over it
 
Been putting a bit waxoil in the sections today, bit cold so warmed up on the gas for a bit and then wonder how to get it in ? I used a bit pvc tube , and a
IMG_1052.JPG
shampoo bottle had the exact hole size for tight fir of tube and a bit of brake pipe drilled 4 holes in at 2mm dia, this was not tight so glued it in, drilled bottom channel to get along the bottom and up the sides but the hinge tubes stopped it , but the tube went all the way round to the top hinge
IMG_1051.JPG

The rubber blocks are the buffers out of the slider slot, I measured them at 18.5 x 10mm with lengths 25 and 37mm, the longer one been getting a hammerin when door right open and chewed up rubber

I made a nylon bit about 10mm so this hits the arm first so as to
IMG_1053.JPG
protect the rubber


The waxoil went in quite quick under gravity the holes in jet might have been better at 1.5mm ! I turned the door over and did it again using the full bottle (or half in and half on the floor lol), I had the keep the tubes warm in the pan of hot water to stop it setting in tube , it did do this once but just drop in the water again and it goes back to liquid


IMG_1056.JPG


with it all in and stay arm connected its not opeing fully 90 deg so may need to trim the nylon, ill see how it goes but I thin
IMG_1058.JPG
IMG_1059.JPG
k its not gonna hit the fog light anymore, last job is just to clean off excess body sealant and paint over the areas where its showing on inside and at folded edges. job for another day
 
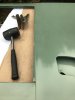
. My door has a sheet of ally on the inside, its fixed to the door frame with screws. The bottom corner is cut away to clear the arm.

Hi Rob
What thickness ally did you use, are you hanging anything off it , with it being a camper, did you insulate behind it , would that be a benefit if the rest is not insulated , only ask as a nice piece of stiff foam came with the door skin
 
Hi Guys!
Here is an update on my rear door bottom check rod and channel challenge.
Here is how I re-installed my rear door check.

This is a 1970 Series IIA. The rear door had an aluminum chequerplate sheet over it , so I had no access to the original channel for the door check rod. That channel is not available as a part and is integrated into the door frame (as shown in the pics above from Mark Frewin).

I bought a new rod, and then figured out that I could buy a ready made channel for it by getting one that is made for the Defender. It fit perfectly!

I bolted it on using a hex head bolt, lockwasher and nut on the closest hole because there was already a hole through the door for this (holding on the aluminum chequerplate).

I used hex-head sheet metal screws for the other attaching points because I did not want to drill all the way through the door in order to use bolts. The stress on the channel is sideways, so I feel that the sheet metal screws are sufficient.


Let me know if you cannot see the pictures. I also posted this here:
https://alexatesting.blogspot.com/2019/01/rear-door-check-series-2a.html
Thanks all-
Mike
 
That looks good, I guess you did a bit of experimenting to make sure it stops in the right place, did you put some rubber bump stops in channel
 
Hey Steve -
I ordered the bump stop and it's on back order. Cost me more in shipping than for the little piece of rubber.
I think you only need one bump stop at the door hinge side. When the door is closed, I don't think you need one on the far end.
I noticed that the inside frame definitely gets dinged when the door check rod hits it, so the bump stop is important.

You did a great job on that door. Came out really nice.
Thanks for your comments.
Mike
 
Hi Rob
What thickness ally did you use, are you hanging anything off it , with it being a camper, did you insulate behind it , would that be a benefit if the rest is not insulated , only ask as a nice piece of stiff foam came with the door skin
I think I used 1.5 mm, I also cut some of the foil bubble wrap to fit inside. mine has a folding tabel on the inside fixed to the frame uprights.
 
68E2AAFB-8B36-4FB0-8B55-FB196C29B137.jpeg
I used some 3mm 5251 spec a bit stronger and harder than normal ally, spend a few quid on some stainless fittings, it does rattle at tickover as does a lot of bits on the diesel , I’ll put some foam seal on door bottom fits my 2 burner stove nicely. Just need to keep it in open position now undecided whether to go for gas strut or simple fixed steel
C8F4262B-F505-413B-9709-09825C8D227C.jpeg
rod
 
I’ve sorted a fixed door stay. I used a bit of stainless 6mm bar and a few kitchen connector blocks, picked an existing hole in roof drilled out 6mm+ , bent the steel over and set the door block so door is fixed at about 90 deg.
The bar secured with a push on star washer with a block above and below the gutter which helps avoid the door seal , when not in use it is retained by the inside roof gutter,
FABAE8FB-6FAD-4E8E-B43F-CF56BF09B812.jpeg
09AF718F-CF03-468D-8138-D01EC8925FDD.jpeg
about £9 all in
 
Back
Top