Rattler n Son S11a Restoration Project

This site contains affiliate links for which LandyZone may be compensated if you make a purchase.
Hi guys
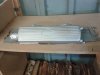
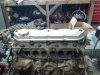
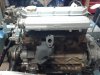
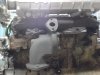
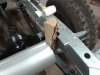
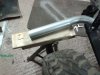
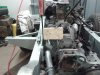
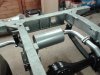
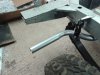
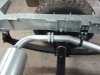
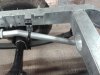
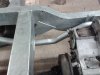
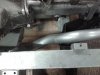
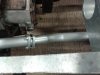
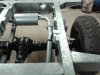
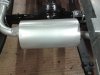
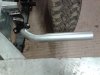
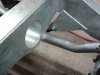
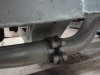
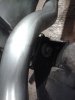
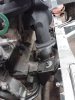
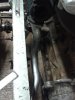
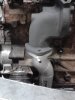
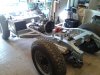
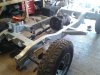
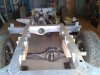
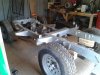
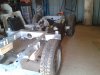
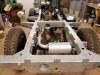
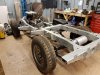
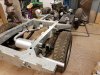
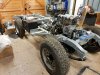
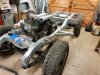
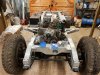
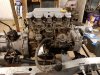
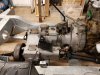
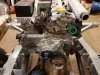
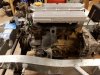
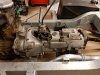
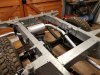
Back on the old 2a again, this weekend it began with cleaning up the rocker cover and inlet manifold ready for painting then once they was done I did the same with the new to me 300tdi exhaust manifold, then once everything was dry I fitted them then today I fitted the new S.P. exhaust system a bit fiddly but got there in the end.

I know its a bit of an a** about face way of doing it but I plan to paint the engine in B.M.C. engine Green but I wanted to get everything fitted and there is still room to get round everything with a brush, anyway here's the pic's of the manifolds being done :D
 

Attachments

  • 2012-03-19 03.11.38.jpg
    2012-03-19 03.11.38.jpg
    131.4 KB · Views: 292
  • 2012-03-19 03.11.30.jpg
    2012-03-19 03.11.30.jpg
    123.4 KB · Views: 306
  • 2012-03-19 03.11.24.jpg
    2012-03-19 03.11.24.jpg
    173.2 KB · Views: 344
  • 2012-03-19 05.58.05.jpg
    2012-03-19 05.58.05.jpg
    134.4 KB · Views: 291
  • 2012-03-19 05.58.23.jpg
    2012-03-19 05.58.23.jpg
    128.9 KB · Views: 266
Fitting the exhaust was a bit fiddly as I was on my own so had to resort to getting a of piece of wood to keep the exhaust away from the gearbox mount with the aid of a pry bar and to keep the tail pipe from sticking out to much using a piece of log jammed between the chassis and silencer and some more timber sat on an axle stand to keep it from hanging down for finally tightening everything up :)
 

Attachments

  • 2012-03-19 03.21.56.jpg
    2012-03-19 03.21.56.jpg
    162.4 KB · Views: 246
  • 2012-03-20 03.22.56.jpg
    2012-03-20 03.22.56.jpg
    128.9 KB · Views: 288
  • 2012-03-20 03.48.31.jpg
    2012-03-20 03.48.31.jpg
    134.8 KB · Views: 332
  • 2012-03-20 02.33.57.jpg
    2012-03-20 02.33.57.jpg
    156.1 KB · Views: 278
These pics are of the exhaust fitted
 

Attachments

  • 2012-03-20 04.13.43.jpg
    2012-03-20 04.13.43.jpg
    145.6 KB · Views: 279
  • 2012-03-20 04.13.36.jpg
    2012-03-20 04.13.36.jpg
    160.3 KB · Views: 296
  • 2012-03-20 04.13.30.jpg
    2012-03-20 04.13.30.jpg
    132.2 KB · Views: 342
  • 2012-03-20 04.13.25.jpg
    2012-03-20 04.13.25.jpg
    134.6 KB · Views: 301
  • 2012-03-20 04.13.13.jpg
    2012-03-20 04.13.13.jpg
    132.1 KB · Views: 291
A few more
 

Attachments

  • 2012-03-20 04.12.57.jpg
    2012-03-20 04.12.57.jpg
    134.1 KB · Views: 258
  • 2012-03-20 04.12.51.jpg
    2012-03-20 04.12.51.jpg
    121.3 KB · Views: 281
  • 2012-03-20 04.12.45.jpg
    2012-03-20 04.12.45.jpg
    119.6 KB · Views: 265
  • 2012-03-20 04.12.40.jpg
    2012-03-20 04.12.40.jpg
    128.2 KB · Views: 305
  • 2012-03-20 04.12.34.jpg
    2012-03-20 04.12.34.jpg
    133.6 KB · Views: 251
Some more I didn't realise I took so many :)
 

Attachments

  • 2012-03-20 04.12.16.jpg
    2012-03-20 04.12.16.jpg
    124.5 KB · Views: 276
  • 2012-03-20 04.12.10.jpg
    2012-03-20 04.12.10.jpg
    130.3 KB · Views: 273
  • 2012-03-20 03.49.17.jpg
    2012-03-20 03.49.17.jpg
    122.6 KB · Views: 325
  • 2012-03-20 03.49.08.jpg
    2012-03-20 03.49.08.jpg
    114.3 KB · Views: 269
  • 2012-03-20 03.48.55.jpg
    2012-03-20 03.48.55.jpg
    130.7 KB · Views: 277
  • 2012-03-20 03.23.49.jpg
    2012-03-20 03.23.49.jpg
    116 KB · Views: 255
The last ones sorry :)
 

Attachments

  • 2012-03-20 03.23.28.jpg
    2012-03-20 03.23.28.jpg
    124.9 KB · Views: 285
  • 2012-03-19 06.42.06.jpg
    2012-03-19 06.42.06.jpg
    159.3 KB · Views: 321
  • 2012-03-19 06.41.55.jpg
    2012-03-19 06.41.55.jpg
    138.5 KB · Views: 252
  • 2012-03-19 06.40.50.jpg
    2012-03-19 06.40.50.jpg
    154.2 KB · Views: 266
Now is as good a time as any to check the front prop clearance where the oil drain tube from the cyclone breather is welded to the sump, I had to re position mine as there was a real danger that on full bump they would clash
 
Sorry for the late reply as I don't get the chance to get on here much at the moment, anyway yeah I've checked the clearance and there is quite a bit or room between them but I will keep an eye on it but don't think there will be a problem as there wasn't with my last 200tdi 2a :)
 
Just trying my new phone camera out :)
 

Attachments

  • 2011-08-24 05.54.59.jpg
    2011-08-24 05.54.59.jpg
    187.7 KB · Views: 305
  • 2011-08-24 05.55.12.jpg
    2011-08-24 05.55.12.jpg
    199.8 KB · Views: 288
  • 2011-08-24 05.55.31.jpg
    2011-08-24 05.55.31.jpg
    172.2 KB · Views: 300
  • 2011-08-24 05.55.45.jpg
    2011-08-24 05.55.45.jpg
    194.2 KB · Views: 282
  • 2011-08-24 05.55.58.jpg
    2011-08-24 05.55.58.jpg
    184.7 KB · Views: 292
Sorry wrong pic's
 

Attachments

  • 20180122_113245.jpg
    20180122_113245.jpg
    326.5 KB · Views: 334
  • 20180122_113256.jpg
    20180122_113256.jpg
    373.8 KB · Views: 293
  • 20180122_113316.jpg
    20180122_113316.jpg
    377.5 KB · Views: 299
  • 20180122_114008.jpg
    20180122_114008.jpg
    391.5 KB · Views: 306
  • 20180122_114019.jpg
    20180122_114019.jpg
    394.8 KB · Views: 330
  • 20180122_114026.jpg
    20180122_114026.jpg
    380.7 KB · Views: 281
  • 20180122_114554.jpg
    20180122_114554.jpg
    367.2 KB · Views: 293
  • 20180122_114600.jpg
    20180122_114600.jpg
    328.3 KB · Views: 319
  • 20180122_114608.jpg
    20180122_114608.jpg
    311.1 KB · Views: 299
  • 20180122_114614.jpg
    20180122_114614.jpg
    298.7 KB · Views: 311
  • 20180122_114619.jpg
    20180122_114619.jpg
    296.4 KB · Views: 304
  • 20180122_114634.jpg
    20180122_114634.jpg
    306.3 KB · Views: 277
Back
Top