Well I mean everything is rotten but I think engine loom is mainly just in taters other stuff is bad but repairable, gunna take a leaf out of your book and take her off the road and give her a part restoration, what do you have planned for the 90 this weekend then?
You are using an out of date browser. It may not display this or other websites correctly.
You should upgrade or use an alternative browser.
You should upgrade or use an alternative browser.
Project 1989 90 (Bruce)
- Thread starter Defender-Sam
- Start date
This site contains affiliate links for which LandyZone may be compensated if you make a purchase.
- Posts
- 10,639
- Location
- Oxfordshire
Why did you choose the custom mount over moving the existing mount?
Defender-Sam
New Member
- Posts
- 358
- Location
- Burton Upon Trent
Well I mean everything is rotten but I think engine loom is mainly just in taters other stuff is bad but repairable, gunna take a leaf out of your book and take her off the road and give her a part restoration, what do you have planned for the 90 this weekend then?
good choice, umm not sure whats going to get done this weekend probs get the engine in and maybe rad mounted well see.
Why did you choose the custom mount over moving the existing mount?
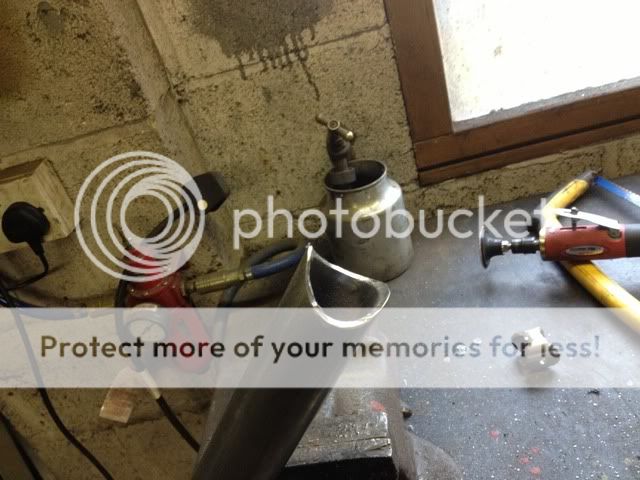
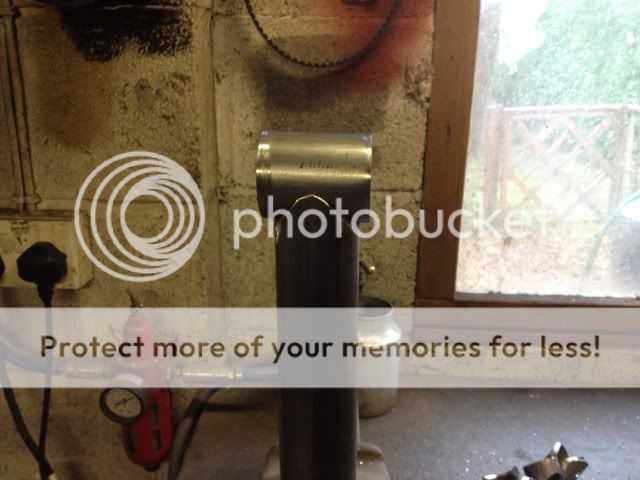
unsure what you mean by that, having a galvanised chassis to fit the engine to my gearbox would mean welding new chassis mounts which i certainly had no intention of doing as it would comprimise the galvanised. another option was to use a 2.5/2.5td/v8/200 tdi mount but as the oil filter housing is in a different location on the 300 it wouldn't fit so i had to get creative and make this mount which uses the holes that the disco mounts use along with one of the standard holes using this design which bridges around the oil filter.
Defender-Sam
New Member
- Posts
- 358
- Location
- Burton Upon Trent
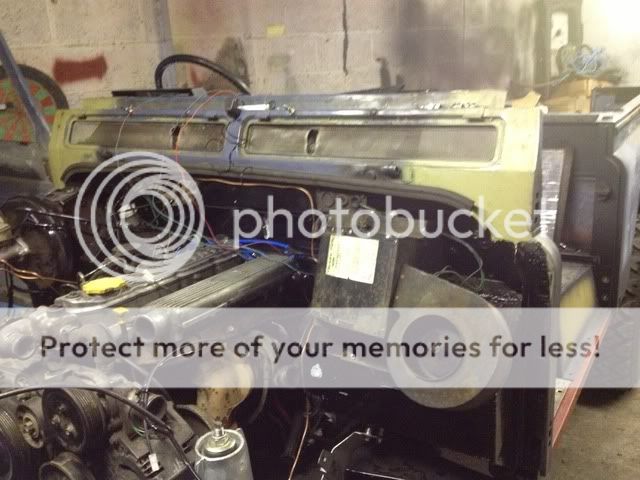
I have made a little progress. finally got the engine in on tuesday evening, it went in a lot easier the second time around.
spent today making up an exhaust down pipe which is made from the original 2.5td down pipe turned upside down and with flanges welded on.


engine in,

mount does its job nicely


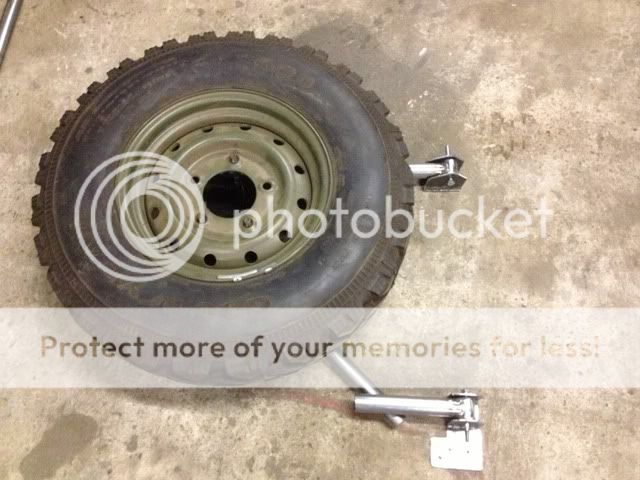
a task i have set myself over christmas is to make a spare wheel carrier, i got some steel when i got the mount stuff the plan make the frame out of tube and use some 3 or 4mm flat to mount it to the tub, just need to sort out some way of securing it to the door? so this evenings task is to trawl the net looking at current designs and how they open with the door.

the old door has about had it, its had some abuse with the standard steel on it and the wolf wheels I'm using are a damn site heavier so don't fancy ruining a new door (paddocks thursday hopefully) onto the pics (i do apologise if I've already shown these)

mmm... rust


seems most the welds have cracked on the frame around the wheel support

:tea: thanks for looking Sam
spent today making up an exhaust down pipe which is made from the original 2.5td down pipe turned upside down and with flanges welded on.
engine in,
mount does its job nicely
a task i have set myself over christmas is to make a spare wheel carrier, i got some steel when i got the mount stuff the plan make the frame out of tube and use some 3 or 4mm flat to mount it to the tub, just need to sort out some way of securing it to the door? so this evenings task is to trawl the net looking at current designs and how they open with the door.
the old door has about had it, its had some abuse with the standard steel on it and the wolf wheels I'm using are a damn site heavier so don't fancy ruining a new door (paddocks thursday hopefully) onto the pics (i do apologise if I've already shown these)
mmm... rust
seems most the welds have cracked on the frame around the wheel support
:tea: thanks for looking Sam
defender11069
AKA Mr cool...
- Posts
- 8,616
- Location
- up sh*t creek with out a paddle
nice work keep the pic's coming mate
Defender-Sam
New Member
- Posts
- 358
- Location
- Burton Upon Trent
nice work keep the pic's coming mate
thanks chap, got a bit more done today had to mock up the wings and bonnet to check the modified radiator bracket would fit. all seems well, had been told that the chassis mounts needed to be cut but wasn't happy to do that, so cut the extensions from the bottom of the rad/intercooler cage and welded some bolts so it sits flat on the chassis mounts rather than the extension pieces. seems ok could get my hand between the top of the rad and the bonnet. Also made a start on plumbing in the engine but need to track down some fuel pipes to extend the filter lines to the injection pump and lift pump. does anyone Know what size pipe it is?
Cheers Sam
DEFENDER90-DAZ
New Member
- Posts
- 3,239
- Location
- Scotland - Houston
Should be 8mm id fuel pipe for a 300tdi ")
Defender-Sam
New Member
- Posts
- 358
- Location
- Burton Upon Trent
Should be 8mm id fuel pipe for a 300tdi
thanks Daz got some ordered, so all being well i can make some new pipes using the old connectors and just to make sure i got some pipe clamps as well.
- Posts
- 8,093
- Location
- East Midlands
I think I can see a Milwaukee cordless impact wrench in one of those pictures. I don't envy your door but I do envy your tools.
Another thing. I see the filter cartridge is a rather snug fit in the engine mounting bracket. Is there enough room there to get it on and off?
Another thing. I see the filter cartridge is a rather snug fit in the engine mounting bracket. Is there enough room there to get it on and off?
Last edited:
Defender-Sam
New Member
- Posts
- 358
- Location
- Burton Upon Trent
I think I can see a Milwaukee cordless impact wrench in one of those pictures. I don't envy your door but I do envy your tools.
Another thing. I see the filter cartridge is a rather snug fit in the engine mounting bracket. Is there enough room there to get it on and off?
yes there is plenty of clearance for the filter, the plan is slacken it from the top then unscrew and it drops out the semi circular cutout shown before in the "making" pics. Thats the theory anyway
yes it is a milwaukee impact wrench been pretty useful on the project mostly when stripping it down, if it wasnt an important bolt it was sheered off and if it was important it was wound off. its gone an insane amount of torque only bolts it struggled on were the towbar bolts but the thread protruding past the nuts had rusted so needed to be cut off. yeah i guess I'm quite lucky with the tools but before i went out and brought a landy i made sure i had most the stuff i was likely to need.
SamDefender-Sam
New Member
- Posts
- 358
- Location
- Burton Upon Trent
Right then, spent the best part of today and yesterday at the garage. just been trying to get some of the small jobs done tiding up cables in the engine bay, completed the wiring on the 300, put the radiator together and checked to see if either the intercooler pipes were long enough and the oil pipes both of which are too short so need to sort them out, the power steering pipes are long enough and so connected them to the steering box and p clipped them to the chassis. today i started reinstalling the dash which is a complete arse of a job if like me you don't know which order it goes together in, but i got there in the end. wired up the stereo and the raptor dash its starting to come together now.
radiator,

heater box,
dash waiting for some vinyl to recover the top rail,

sidelights,


back lights working nicely,

cheers for looking Sam :tea:
radiator,
heater box,
dash waiting for some vinyl to recover the top rail,
sidelights,
back lights working nicely,
cheers for looking Sam :tea:
Defender-Sam
New Member
- Posts
- 358
- Location
- Burton Upon Trent
Onto the wheel carrier today, started with a rough idea in my head about what i want it to look like
notched some tubing,
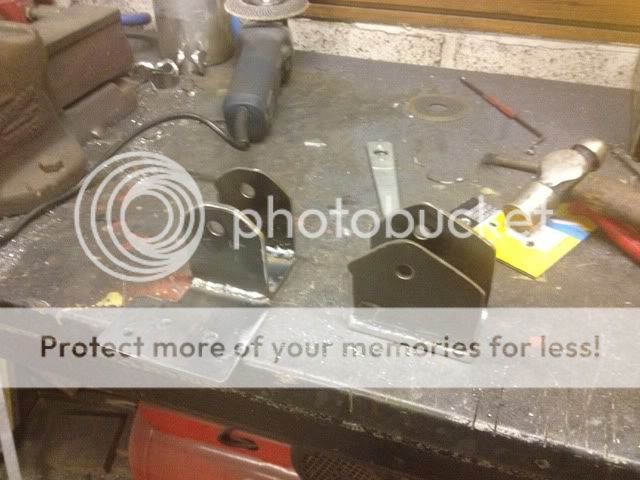
one of the hinging parts,
the top bracket starting to come together,


bottom bracket,

top and bottom bracket,
frame,

the plan is to utilise the original carrier removed from the door,

with wheel,
hope fully get some more done on it tomorrow, been at it all day so thought i would give the tools and the neighbours some peace and quiet.
cheers Sam :beer2:
notched some tubing,
one of the hinging parts,
the top bracket starting to come together,
bottom bracket,
top and bottom bracket,
frame,
the plan is to utilise the original carrier removed from the door,
with wheel,
hope fully get some more done on it tomorrow, been at it all day so thought i would give the tools and the neighbours some peace and quiet.
cheers Sam :beer2:
Rawly86
Active Member
- Posts
- 571
- Location
- Bedfordshire
Thats brilliant, I need to learn how to weld.
- Posts
- 8,093
- Location
- East Midlands
yes there is plenty of clearance for the filter, the plan is slacken it from the top then unscrew and it drops out the semi circular cutout shown before in the "making" pics. Thats the theory anyway
yes it is a milwaukee impact wrench been pretty useful on the project mostly when stripping it down, if it wasnt an important bolt it was sheered off and if it was important it was wound off. its gone an insane amount of torque only bolts it struggled on were the towbar bolts but the thread protruding past the nuts had rusted so needed to be cut off. yeah i guess I'm quite lucky with the tools but before i went out and brought a landy i made sure i had most the stuff i was likely to need.
Oh good - you don't have to lift the engine every time you want to change a filter. I've been looking at those Milwaukees with their advertised 610Nm of torque and drooling but they seem to be around the £400 mark so haven't got one yet. The spare wheel device looks like it's coming on nicely too . . .
Defender-Sam
New Member
- Posts
- 358
- Location
- Burton Upon Trent
Thats brilliant, I need to learn how to weld.
me too....
thanks yea its getting there now,Oh good - you don't have to lift the engine every time you want to change a filter. I've been looking at those Milwaukees with their advertised 610Nm of torque and drooling but they seem to be around the £400 mark so haven't got one yet. The spare wheel device looks like it's coming on nicely too . . .
finished the main carrier today just got to make a load plate for inside the tub,


stop/start needs some work obviously,

a little better,


slightly off square at the bottom but i can live with that,


wheel seems huge when its up there, ohh well too late now,
sticks out a fair way too.

just the opening to sort out now and make the load plate then i can get some paint on it.
Sam :tea:
Defender-Sam
New Member
- Posts
- 358
- Location
- Burton Upon Trent
will the tub be strong enough to take the weight where is fastened on
yes its mounted using the same locations as the ones you can buy so i can't see why not. the weight is spread between the tub and the chassis should be oright.
yes its mounted using the same locations as the ones you can buy so i can't see why not. the weight is spread between the tub and the chassis should be oright.
sorted i was just wondering
Defender-Sam
New Member
- Posts
- 358
- Location
- Burton Upon Trent
Looks great that sam, did it cost alot for the metal to put it together?, guessing it took some time though
thanks its cost me £40 for 4mm sheet steel and £27 for the tube, I've over engineered it tho so by reducing the thickness and getting smaller amounts it could be done for a lot less. I'm left with plenty of spare left over as its amazing how many "friends" come out the woodwork when they realise you can weld and are able to fix/make things.
got a little more done on it this morning starting with redhands suggested Improvements,


the hole saw decided it had had enough or tube notching,

almost finished,

only problem now is that I'm thinking of levelling that support out and making a stand for the high lift jack....:scratching_chin:
Similar threads
- Replies
- 43
- Views
- 5K