- Posts
- 24,668
- Location
- In the next Glen
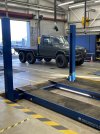
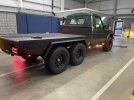
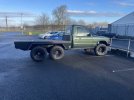
Hi folks. My build is coming along. Slow at times but I’m blaming that on the pub being open again. I rebuild the engine, Box and transfer box. And it’s back in and running now. Came up with a plan to use a newage 1:1 transfer box to get the drive to the back axle. Wasn’t sure at first. But then found a lad who had do the very same. And reckons they are perfect. I’ve change the setup I’d done with a panhard arm on the middle axle and made a centre carrier for the prop using the front transfer box output shaft. The splines are the same on both ends to take the flanges. Welded the inside one one. And turned the dog gear off so a bearing slid over. Going to make some new trailing arms now with Johnny joints. I’m pretty please with proportions. Put a 2” body lift on too to help clear the cradle for the other transfer box. Just got 1 prop to sort as it has a 1480 series joint on it. I shortened a prop for between the two transfer boxes. I’ve run it up without the half shafts in. And it’s all good. Still a bit to do. But there’s light at the end of the tunnel
View attachment 242759
View attachment 242760
View attachment 242761
View attachment 242762
View attachment 242763
View attachment 242764 View attachment 242765
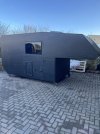
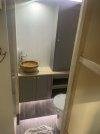
Ah and making a liner for the back of the cab. I put stuck carpet protector the the body panels first. The used expanding foam. I’ve cut it and sanded it roughly to shape, I’ll take it back out now. It’ll be in 4 sections. I’ll finish it off. Then spray glue 0.3 fibreglass mat to both sides. Then use 4 way stretch fabric on the face.
Awesome I love this. Good job sir.
")