next time the 15A fuse blows - duz the horns work?
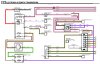
there are also take-offs for the Steptronic switch and the Automatic Transmission ECU.
It sounds like the symptoms you are having are consistant with the Automatic transmission cable being incorrectly set.
This is covered below by warranty recall....
Bulletin Number - 0016
Issue - 1
Date - 10.01.2001
Model - Freelander
Affected Range - All 2001 Model Year derivatives with automatic transmission VIN range 1A 576764 to 599999 and VIN 1A 300001 onwards.
Re-Issue Information -
Problem -
GEAR SELECTION PROBLEMS - VARIOUS
The customer may report one, or a combination of, the following conditions:
* Instrument pack Liquid Crystal Display (LCD) flashing F and 4 alternately. The customer may also detect that automatic shifts are inhibited and only fourth gear is available.
* Gear selection feeling vague in gear detent positions.
* Loss of drive when Sport / Manual mode is selected.
* Engine stalls when Park or Neutral is selected.
* Sport light flickers on.
Using TestBook Diagnostic Disc DRGTL20, the message ‚GEAR (X) OUT OF RANGE will be displayed, where (X) will be replaced by a specific gear (e.g. 2, 3, 4 etc) in the Testbook message.
Cause
Automatic transmission selector cable incorrectly set.
Action
Where a customer complaint including any of the above is confirmed, reset the selector cable using the revised procedure described below.
1. Remove underbelly panel, Workshop Manual repair number 76.10.50 refers.
2. Loosen trunnion nut securing inner cable to selector lever, (circled in illustration).
3. Move gear change lever into P position. Push fully forward to ensure correct position and release lever.
4. Rotate selector lever on gearbox fully clockwise to engage P.
5. Using pliers, pull the inner cable as far forward as possible and release.
6. Tighten trunnion nut to 6 Nm.
7. Refit the underbelly panel.
8. Move the gear change lever through its full range from P to 2 and back to P, confirming that all gear positions are correctly selected.
9. Confirm that the engine will only start in P and N positions and is inhibited when all drive positions are selected.
The revised process is now used during vehicle assembly and should be used for all future repairs where the selector cable is disturbed.
Parts Information
Not applicable
Warranty
Use Complaint Code: 4F3A
Use S.R.O.: 44.30.04
Time allowance: 0.40Hrs