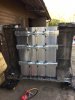
Good use of self isolation - that looks like you're making great progress there! Unfortunately I've been using a mate's garage so any hope of getting a rolling chassis by April has gone out of the window. And as I've got a job where I can work from home I've actually got less spare time as I'm having to juggle work with looking after the kids, who think their holidays have come early. I did manage to retrieve a couple of Landy based jobs to do at home, so as some Exmoor Trim covers have just arrived I'm going to restore the seats, and also try and get the brake calipers resprayed and fitted with stainless steel pistons.
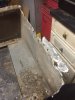
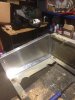
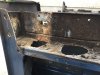
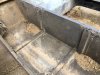
I've also been wondering about how much of mine is going to be original as it's got a new chassis, probably a new bulkhead, new door skins, parts of the rear tub skin, radiator, plastic trim... and my seat box although not as bad as yours is going to need a bit of fettling. It's going to be down to the engine and axles at this rate!