thequeenscheese
Well-Known Member
- Posts
- 1,487
- Location
- Greater Manchester
Very Nice,
I just hope mine will fit in there with just as good a look..
Thanks for sharing..
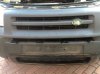
There pretty pointless as ligbts tho tbh but spose make me make more visible i might swap the bulbs for nightbreakers to give a boost, when you remove the screws there a rubbish plastic insert in bumper mine fell out but i used 8mm wall plugs or 10mm cant remember now.
Id previously had 4" round spots (they ended up in the back of a zafira lol) but really they were 2 big to be just right and the depth can be an issue with the stone grill without some mods..
How much was the bar by the way with post etc? Id be interested maybe ses88 would fancy making a batch maybe even improve the desivn for the freebie..?