2.0_hippo
Well-Known Member
- Posts
- 6,069
- Location
- Hertfordshire
Hello all,
just thought id share some info on my recent work done to my TD6 L322.
as some may know, the td4 engine (fitted to the freelander) and TD6 engine as fitted to the L322 often suffer from blocked PCV / crankcase breather filters... mostly often due to poor service and maintenance. and because the filter change was never really noted down on the service procedure list !!
so they very rarely get changed ! and once clogged up they will quickly kill your turbo...
early signs are excessive black smoke / soot from the exhausts and pressure within the oil system. ie if you remove your oil dipstick with the engine running and oil squirts out, the chances are your breather filter is blocked.
anyhow, i have done this mod to my old freelander with the TD4 engine as was experiencing the early signs of the blockage. since owning the l322 i had wondered if they also had the same problem.....
well they do. infact the td4 and td6 are pretty much identical engines par the 2 extra cylinders on the td6. so most of the parts are interchangeable
so as there doesnt seem to be any info regarding the L322 upgrade i thought id write a page to help any other TD6 owners
basically BMW has introduced a crankcase filter upgrade... basically replaces the cotton type filter with a plastic cyclone type filter.
the new type filter is maintenance free, so never needs changing, unlike the crappy cotton type that gets blocked over time.
the upgrade is very easy to do and shouldn't take more that 20 mins to complete.
good luck
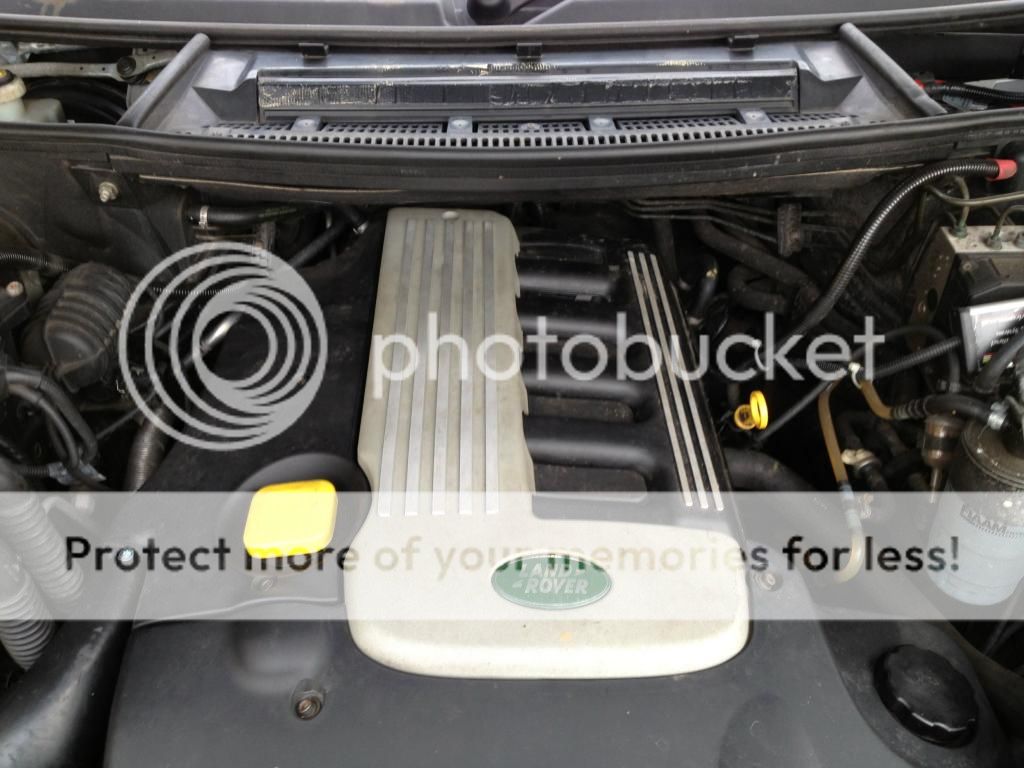
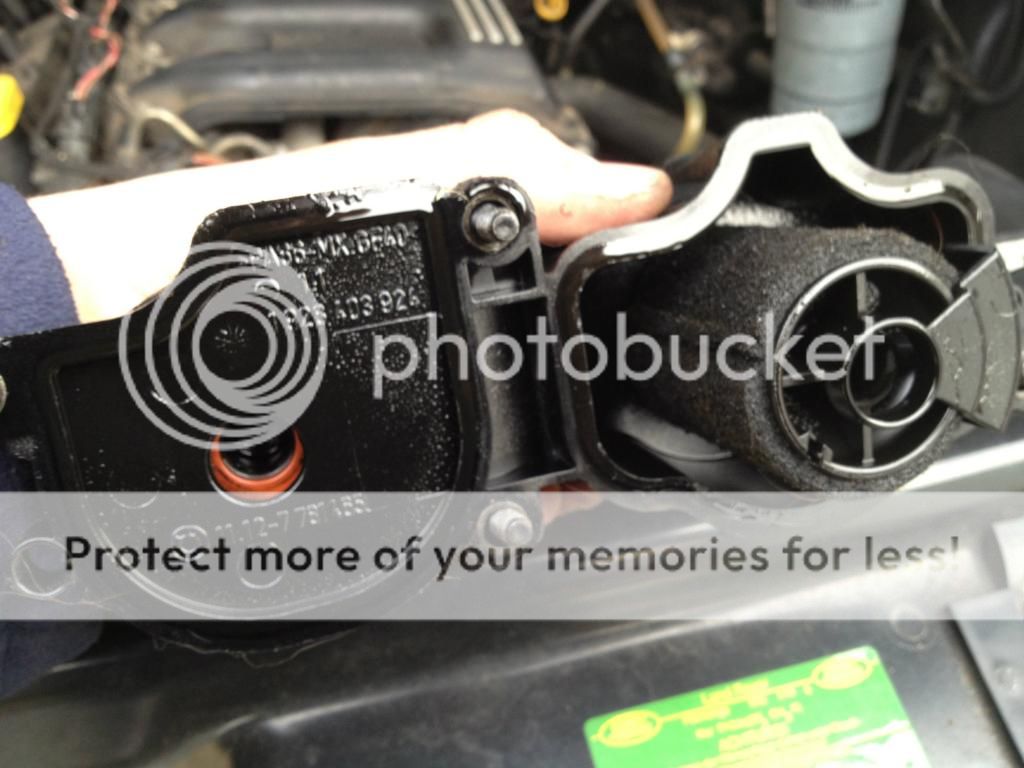
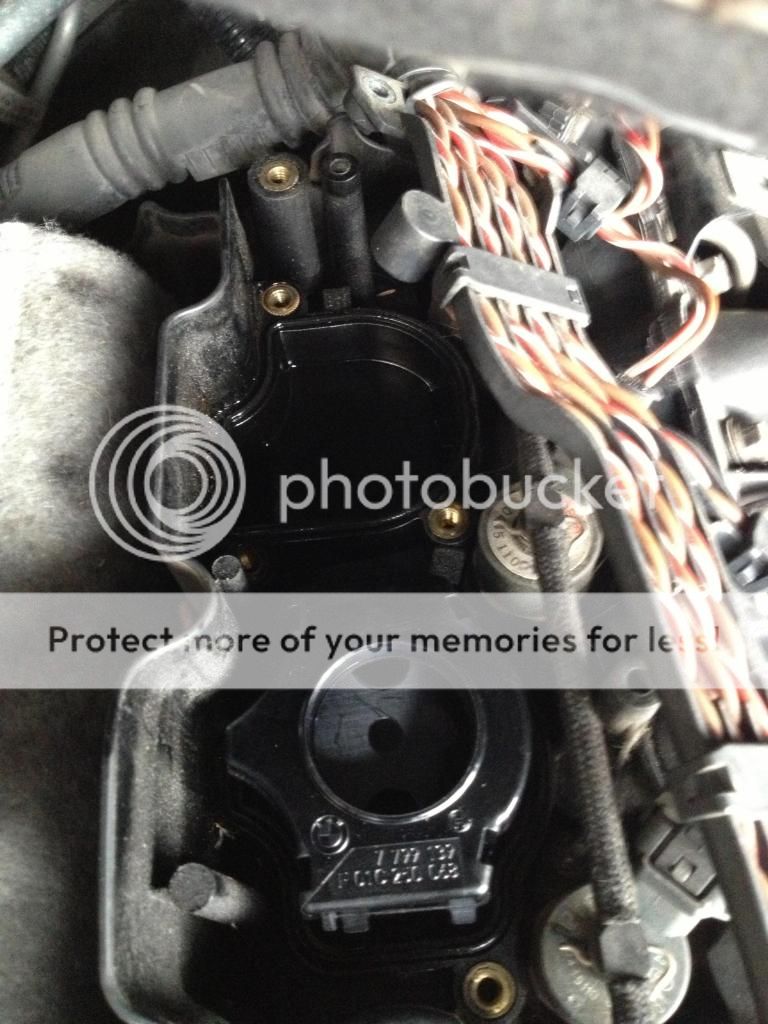
first things first. remove the engine cover's to gain access to the crankcase breather unit that is located in the far, back left hand side of the engine as pictured. (next to the air intake filter)
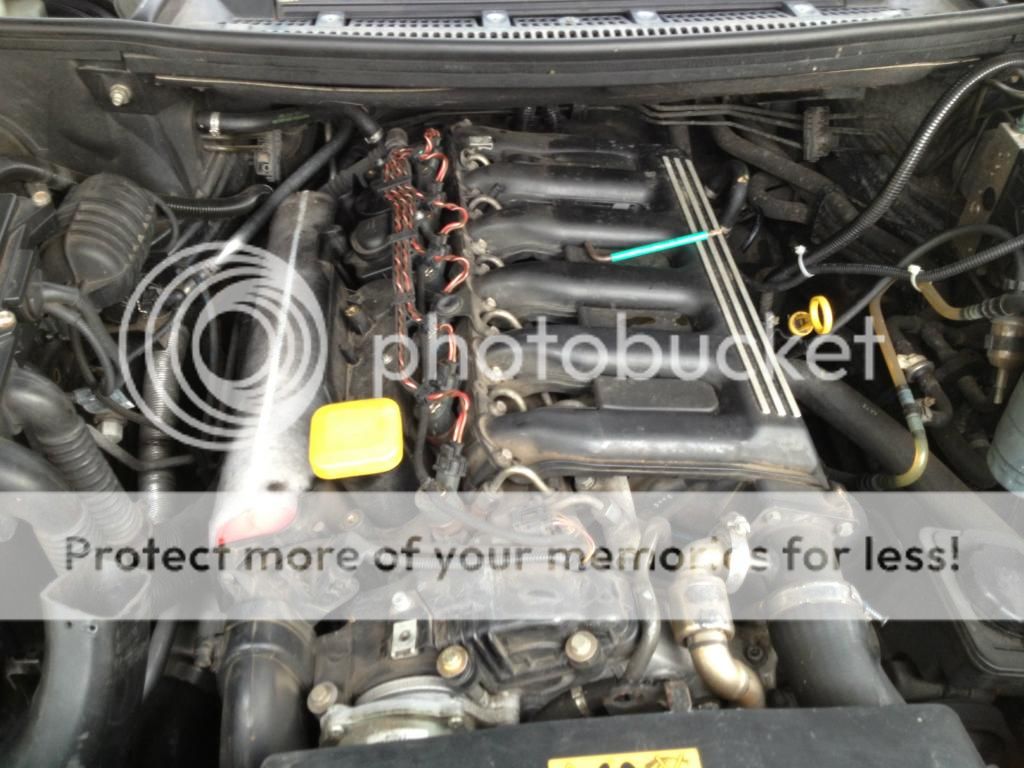
next, remove the 3 star shaped screws that secure the injector wiring harness, this will give you enough space to remove the breather valve casing.
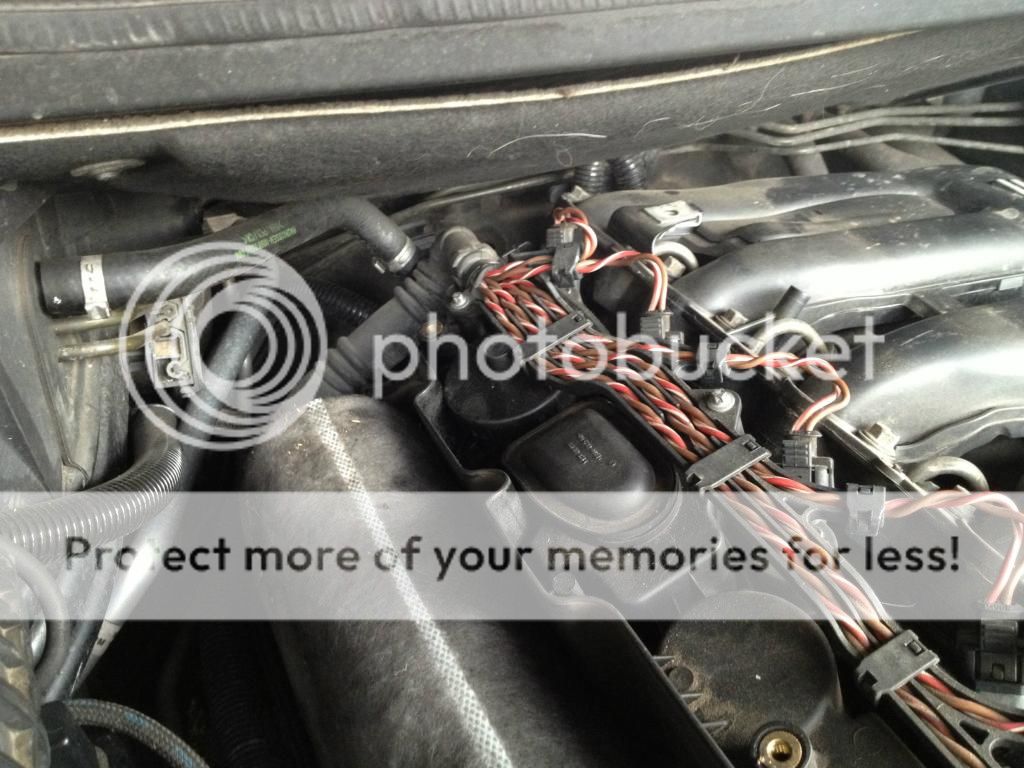
next undo the 4 allen key screws securing the breather casing to the top of the engine.
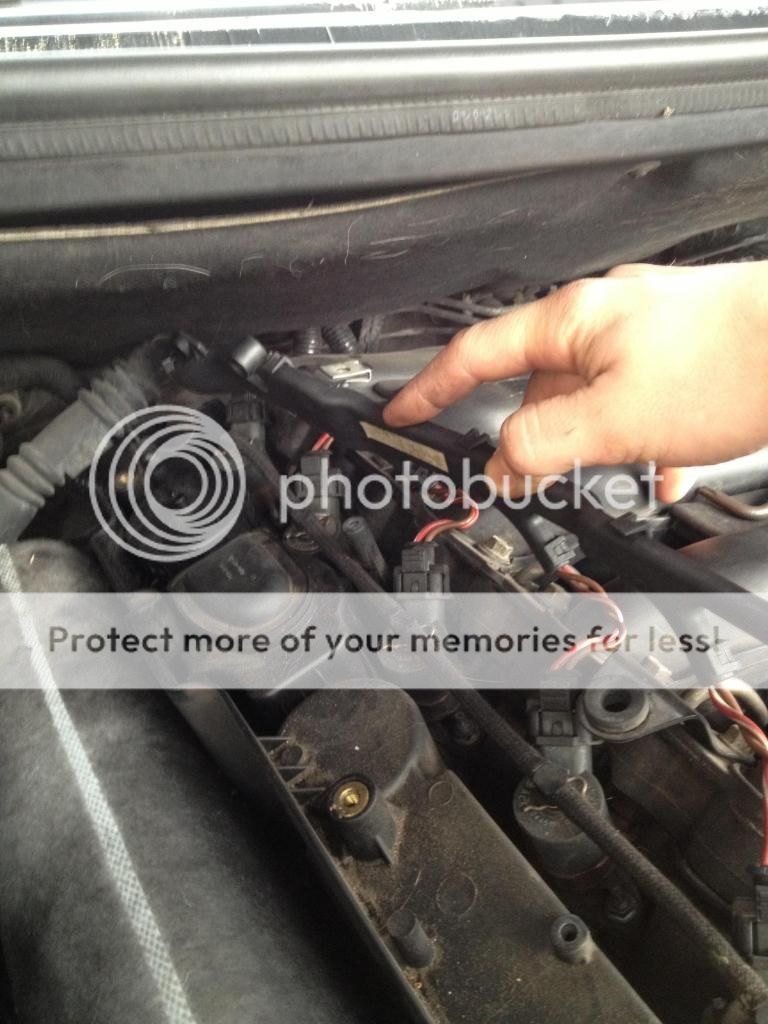
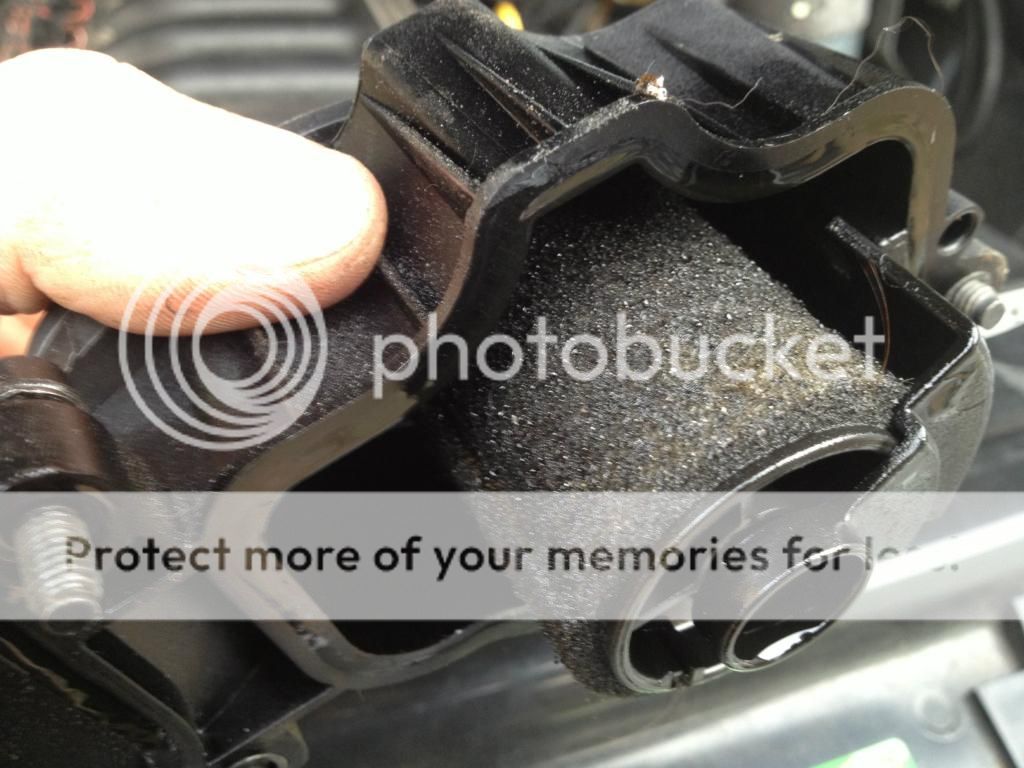
you can then remove the filter to inspect the condition of your filter...
mine wasn't actually that bad, i have seen worse. never the less, it was being changed !
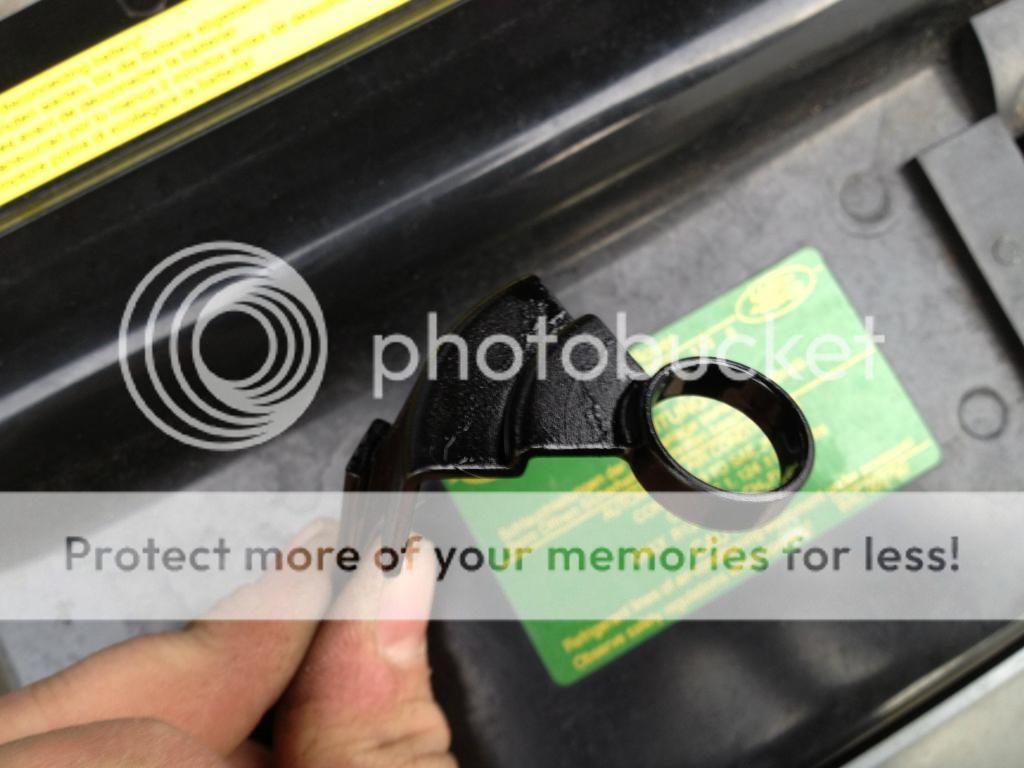
next, remove the sponge type filter and then remove the plastic securing clip as pictured. (the clip will just slide out)
this will allow the new, bigger upgraded cyclone filter to fit.
next, fit the new rubber seals that have been included with the new filter.
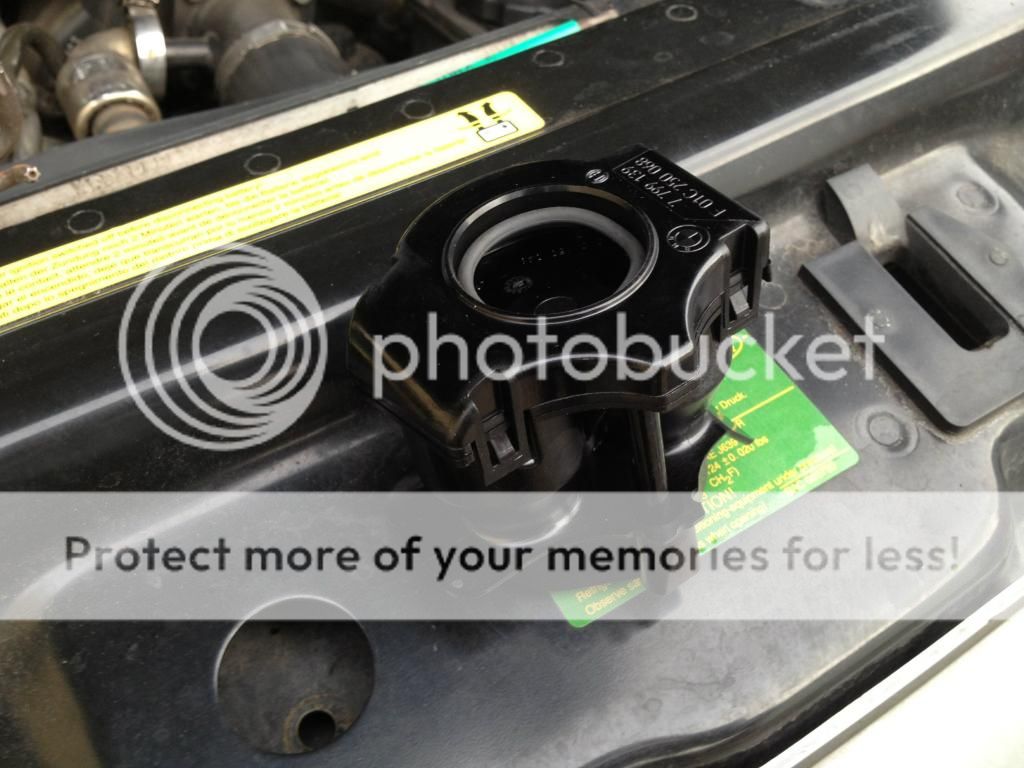
lastly fit the new filter into the housing and refit parts as you removed them previously.
this is the BMW part number you will need for the new filter...

around £25 at a dealers or £22 on ebay.
this is the ebay link: BMW Genuine E46/E90/E60/E83/E87 OIL SEPARATOR/CRANKCASE BREATHER - 11127799367 | eBay
one of the best £20 spent IMO.... one less thing to worry about going wrong
Hope this helps some of you lot
cheers
just thought id share some info on my recent work done to my TD6 L322.
as some may know, the td4 engine (fitted to the freelander) and TD6 engine as fitted to the L322 often suffer from blocked PCV / crankcase breather filters... mostly often due to poor service and maintenance. and because the filter change was never really noted down on the service procedure list !!
so they very rarely get changed ! and once clogged up they will quickly kill your turbo...
early signs are excessive black smoke / soot from the exhausts and pressure within the oil system. ie if you remove your oil dipstick with the engine running and oil squirts out, the chances are your breather filter is blocked.
anyhow, i have done this mod to my old freelander with the TD4 engine as was experiencing the early signs of the blockage. since owning the l322 i had wondered if they also had the same problem.....
well they do. infact the td4 and td6 are pretty much identical engines par the 2 extra cylinders on the td6. so most of the parts are interchangeable
so as there doesnt seem to be any info regarding the L322 upgrade i thought id write a page to help any other TD6 owners
basically BMW has introduced a crankcase filter upgrade... basically replaces the cotton type filter with a plastic cyclone type filter.
the new type filter is maintenance free, so never needs changing, unlike the crappy cotton type that gets blocked over time.
the upgrade is very easy to do and shouldn't take more that 20 mins to complete.
good luck
first things first. remove the engine cover's to gain access to the crankcase breather unit that is located in the far, back left hand side of the engine as pictured. (next to the air intake filter)
next, remove the 3 star shaped screws that secure the injector wiring harness, this will give you enough space to remove the breather valve casing.
next undo the 4 allen key screws securing the breather casing to the top of the engine.
you can then remove the filter to inspect the condition of your filter...
mine wasn't actually that bad, i have seen worse. never the less, it was being changed !
next, remove the sponge type filter and then remove the plastic securing clip as pictured. (the clip will just slide out)
this will allow the new, bigger upgraded cyclone filter to fit.
next, fit the new rubber seals that have been included with the new filter.
lastly fit the new filter into the housing and refit parts as you removed them previously.
this is the BMW part number you will need for the new filter...
around £25 at a dealers or £22 on ebay.
this is the ebay link: BMW Genuine E46/E90/E60/E83/E87 OIL SEPARATOR/CRANKCASE BREATHER - 11127799367 | eBay
one of the best £20 spent IMO.... one less thing to worry about going wrong
Hope this helps some of you lot
cheers