Brewedintheuk
New Member
- Posts
- 103
- Location
- Essex
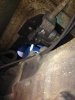
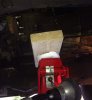
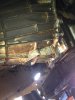
With all that removed and a blanking bolt in the hole, I removed the 4 bolts holding the transfer cable to the gearbox.
There are 4 long bolts you can see in the picture and this holds the metal bracket on to the gearbox and also metal clamp that all the cables clip onto. I removed all of this. Also at the top of the picture there is a small 10 mm bolt that clamps a cable on to the gearbox. This needs to be removed too. With this off, I pulled everything up through the hole by the gear stick and cable tied them up and out the way.
personally id leave all that on and let come out with box
")
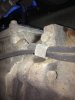
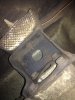
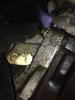
From this picture you can see the bolt at the top right, it was hidden under the gearbox sound insulation cover, so was a bit tricky to get to as this cover kept falling back over it.
The photo shows the bolt under the cover, on the top above where the starter motor went.
Welcome To LandyZone, the Land Rover Forums!
Here at LandyZone we have plenty of very knowledgable members so if you have any questions about your Land Rover or just want to connect with other Landy owners, you're in the right place.
Registering is free and easy just click here, we hope to see you on the forums soon!