Fuel Rail Pressure sensor & Harness change

This site contains affiliate links for which LandyZone may be compensated if you make a purchase.
Ladies/Gents. You are a savvy of geniuses.


After having problems with my TD4 for 6 months, and numerous garages taking a look (unable to ascertain the problem), I continued to have running problems, irregular stalling issues, refusal to start, loss of power, etc. I changed the fuel pump and filter - no change.


Then I saw this post and bought the official LR repair kit to the pressur sensor switch. Have now changed this and the damd thing only goes and runs like a bloody dream !! It feels like a different car.


Awesome post - awesome pics from Zoolander - Awesome advice. Thank y'all so much.


Right, discs, pads, rear brake pipes and exhaust box next ....... :) :)


... M


Great stuff

How about a smaller stainless steel exhaust box. See the exhaust guard thread..... We need more takers.
 
OK, so maybe I was too hasty.

After changing the loom the beast ran fine for a couple of months, but last week started to do exactly the same thing. Juddering, lurching, idle speed fluctuating and cutting out at lights, roundabouts, etc. Seems that pulling out the plug from the sensor and replacing (watch your fingers - there are hot things down there !) fixes the problem temporarily. Another 10 miles and we're back to square one. I've checked the cables as they fit into the ECU and they're fine, but I haven't checked the actual sensor itself as it's a little difficult to access unless you have an hour to remove and replace the stuff above it.

I'm now thinking that I need to replace the sensor itself as I understand the contacts may be worn/corroded (or maybe getting moisture in - WD40 fix ??).

Forgive me if there's another thread, but has anyone had experience of this ? I believe that removal of the sensor will result in spurting of fuel and a loss of built up pressure, leading to a difficult restart. Is this correct, anyone know ??

Cheers ...
... M

PS, Epicuser - I changed the back box for a standard one I'm afraid. Maybe should have visited the site beforehand. Doh !
 
At the risk of flogging a dead horse, I thought I'd write up the success I had at the weekend, along with a few more pictures for anyone else attempting this fix.

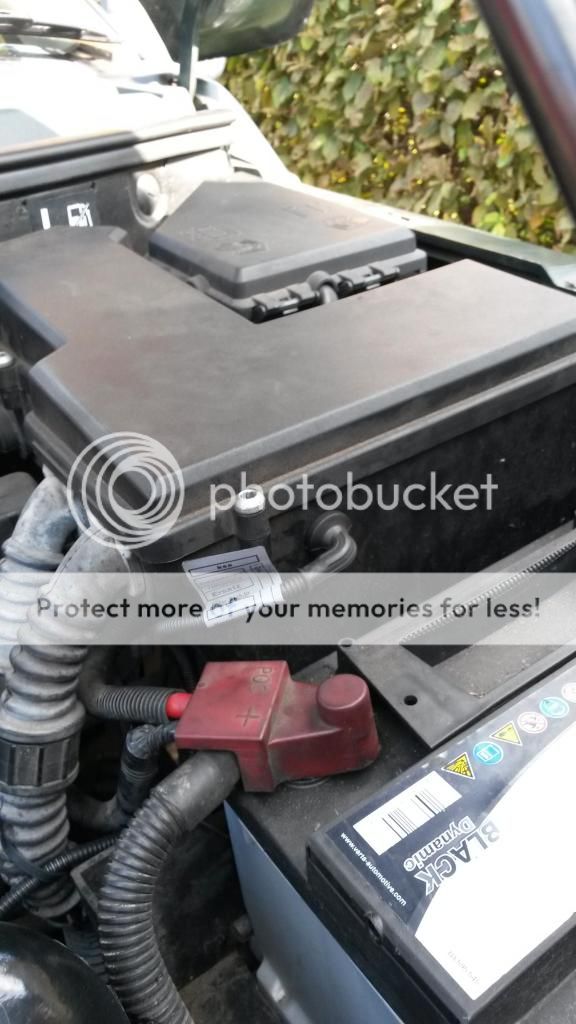
So, firstly, I checked the wiring where it enters the ECU box. The small harness on the front of the box is where I drilled the hole and fitted the reapir kit through the plastic.


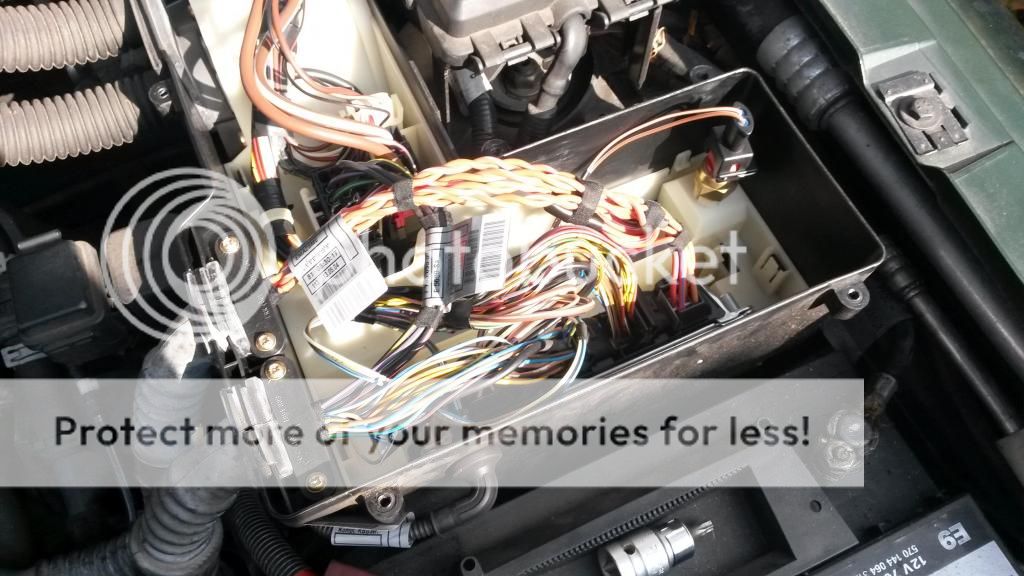
I thought that maybe the small wires had either come loose or maybe the plug assemblys weren't fitted snugly, but all was well. If you want to take these out as I did to check the small wires then you need to remove the large plug on the right first with the brownish cables, then the next one, then the next one. The wires for this fix all fit into the third one you remove (this has 2 seperate blocks inside it - the three wires go 1 into one block and 2 into't'other).


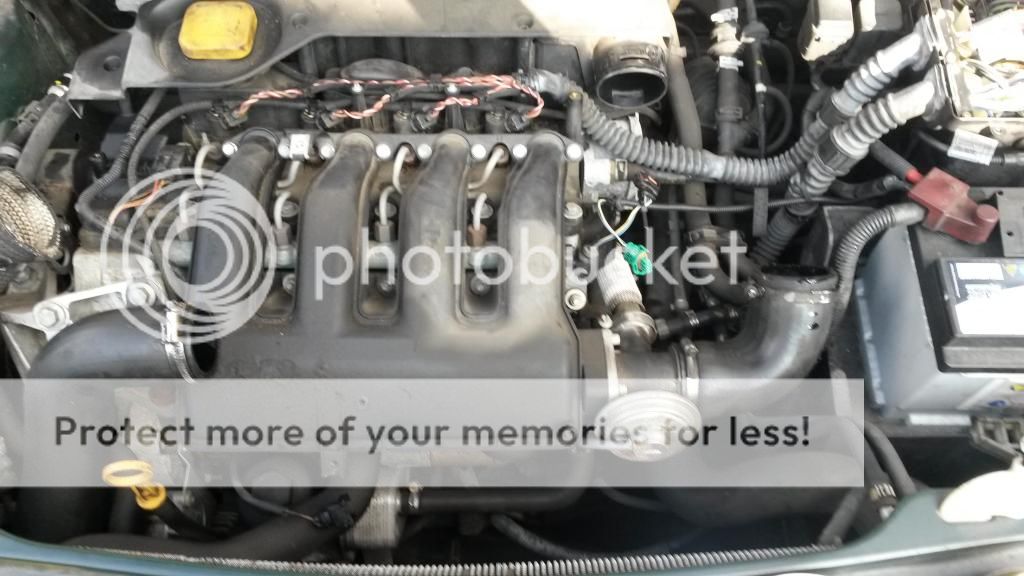
That then leaves the harness itself and the sensor, so off with the air ducting for easier access (this is just a couple of screws and some jubilee clips. Keep your eye on the collar on one of the screws - it's necessary to tighten up the screw later on and will lead to much head scratching if you inadvertently let it slip off the screw and a right royal chore if you lose it). The picture below shows the green clip of the harness repair kit already taken off the sensor (you may need pliers to press in the clip beneath the plug for removal). You can trace the path of the new harness from the green plug to the ECU box on the right.


I was then in a position to take a look at the sensor itself, and especially at the contacts:


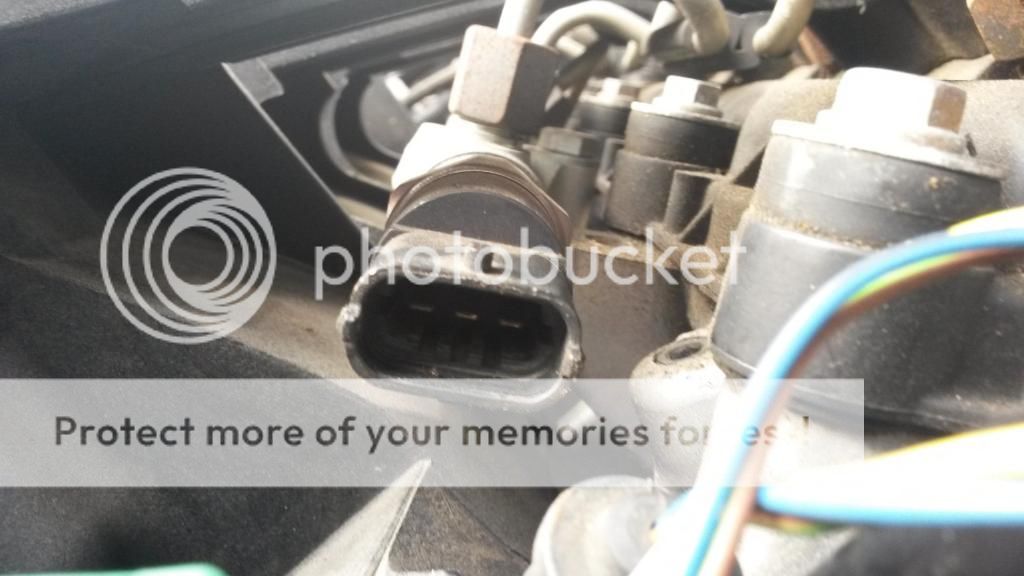
They didn't look too bad, and I have no reason to believe I need to replace the sensor as yet (maybe that will come if I continue to get the same problem). I cleaned up the sensor contacts with some xylene dabbed on a cotton bud and did similar with the plug contacts on the harness. I tried to get the sensor out in order to have a proper look at it but I didn't have the required socket (a deep 24mm or 26/27mm socket which must be big enough in the recess to surround the plastic shroud), so I decided to leave it there instead.

I then reconnected everything, gave it all a good clean to remove some of the oil residues hanging around on the plastics and gave it a go. Et, voi la - perfecto. Now it's driving great once again (although I said this following the harness mod fitting, and it's spannered up on me again).

One further thought - if you look at the green plug you will see that the wires are unprotected for the first 100mm or so, before being surrounded by a sheath for the rest of the route to the box. Are these wires susceptible in any way ? Would it help, do you think, if I were to wrap these in insulation tape to keep them in place and prevent any movement of the wires where they enter the plug assembly ? I'm tempted to get some heat shrink shrouding stuff and try that.

Still, currently it's working fine, so fingers crossed it will stay that way.

.... M
 
Last edited:
.....

One further thought - if you look at the green plug you will see that the wires are unprotected for the first 100mm or so, before being surrounded by a sheath for the rest of the route to the box. Are these wires susceptible in any way ? Would it help, do you think, if I were to wrap these in insulation tape to keep them in place and prevent any movement of the wires where they enter the plug assembly ? I'm tempted to get some heat shrink shrouding stuff and try that.

Still, currently it's working fine, so fingers crossed it will stay that way.

.... M

I would have thought that rather than preventing movement it is worth adding protection to prevent moisture entering the plug and corroding the terminals.
 
Right - further update - It started cutting out again !!

Turns out, when it took it back to the LR garage where I bought the harness, that the problem is in the plug in the harness. There are 3 sprung metal clips that grasp onto the contacts - these were too far apart. The bloke took the rubber shroud of the plug, squeezed the pins together to minimidse the space between the 2 ends of each, replaced the shroud and hey presto - works a bloody treat now (but how many times have I said that ..... )

M
 
Hi All,
I have just joined the forum to post this. I have just replaced my Fuel Pressure Switch wiring harness and reading the various posts on here were most helpful, particularly the ones with photos so thanks all for taking the time to post.

That said I entered the job with a certain trepidation as there were still questions unanswered. Like others I wondered how to remove the existing wires from the connector block, and I also wondered what was to be done with the old and now redundant cable?

So I tackled the job and can now I think successfully answer those questions:-

How do you remove the pins from the ECU connector block? - Very Carefeully using a very small, fine screwdriver, apply pressures to the metal part of connector to release the spring clip and withdraw the cable. To fit new one line it up and push it in.

What do you do with the old cable? - Well I am still not sure on this one?! It is impractical to remove it as it forms part of the wiring loom. I merely disconnected it and taped it up put of arms way, (it is no longer connected at each end so is now redundant).

So has changing the cable cured the fault (lumpy idle, misfire, blue smoke...)? Well not sure yet. It seems smoother, but the uneven running is still present with very light throttle application so on to the next steps.....

Cheers

Marcus
 
The first plug nearest the right side can just be pulled out. The others have kind of locking clips on them. Slide the clip downwards and the plug can now be gently pulled to remove....
 
I know its an old thread but what do people use to get the pins out of the ECU plug thanks

The Pins have a little hook type end, press the hook down with a small screwdriver and pull the cable out with not much effort. The black and grey blocks slide out of the end of the plug and with an electron microscope you can just make out the start and finish numbers on the plug body number although the repair kit cables are the same colour as the originals.
I have just done mine although I think the actual problem lies with the springs
in the connector block on the fuel pressure sensor rather than anything else causing a dry joint type of problem. I was going OK with the job I got all of the cables out of the connector blocks first before I did anything else, then as I was drilling the hole in the ECU the drill decided to carry on wizzing around and going into the wiring loom! fortunately not doing too much damage. It goes OK again now but not ant different than it was in cleaning the contacts on the plug end. I don't know why people moan about these motors any members out there ever tried replacing a cam belt on a Lotus Esprit! The people who call the Freelanders Gaylanders ! I pass this team regularly doing the weekend warrior bit when I drive pass them towing a Ton and a half Trailer load of gear my motor is a working motor, having driving most types of Trucks motors and motor cycles for over fifty years I have a vast experience of driving. Just to add when my uncle was in Malaya they had their Yank Jeeps taken of them and replaced by Land rovers a sad day for them by far an inferior job. I like my 05 HSE Auto 102 K hardly any probs ten times the motor of a four wheels and a board transit but not like a Perkins 4236 dodge truck 300K no probs.
You just need some good lighting and glasses as you get on in years.
 
Last edited:
Job done and running well, oh and I found out what the plastic part was for, its used to clean the terminals on fuel sensor if not fitting new,
 
I'm about to attempt changing the fuel rail sensor and wiring harness on my 2006 TD4. I'v read all through this post and find the information very helpful. I'v got the new sensor and harness but the only problem i'v got are with the sensor. There are two other bits that came with the sensor that I dont know what they are for so would be grateful if anybody can tel me what they are for. Picture below.

 
Well Ive just changed the loom and all fixed - MIL off car running fine.
Got a good discount from a Land Rover dealer in Kent cost £32.34. The new loom is shorter than the original so has to go directly to the ECU box. Probably the proper way to install this would be to drill a hole in the side of ECU box and install thru there. I made a small cut in the top of one of the rubber shrouds carrying cables into the box and inserted the new cable there instead, wrapping the shroud in insulating tape.
The 3 new wires went into a plug at the front of the box. This is the third plug from the right - I removed the other two to enable access to the plug to be worked on.
The plug you need has one black block and one grey block. Each block is numbered with 4 rows of 13. The two blocks can be slid from the holder to enable fitting the new wires shich are a push fitting.
pin 20 is brown/green
pin 33 is blue/black
pin 35 is white/yellow

So the money Ive saved is going down the bookies for Man Utd to beat Barca 2 -1 :)
 
Just changed the harness on my Td4 - but my connection blocks are numbered 1 - 12
Not 13 in a row and no 30 etc.
Am I missing something or does a later Td4 (2005) have a different harness or connecting blocks,
Wire colours on my car are different as well.
Help please
 
Later TD4 has a different harness. I'll look at my 05 replacement harness tomorrow evening for reference if you can wait.
 
Last edited:
Later TD4 has a different harness. I'll look at 05 replacement harness tomorrow evening for reference if you can wait.
Thank you for fast reply - I can wait - I will do a few further checks tomorrow. The cars old lead is badly damaged, I might try and repair it.
I need to check that the pins are in the right place.
Cheers
T
 
Later TD4 has a different harness. I'll look at my 05 replacement harness tomorrow evening for reference if you can wait.
Hi! Im about to do the same job on my 05 freelander and thought id ask the same question as below since i cant find a description anywhere else. Could you please tell me where the wires in the ecu connects?
 
It is a easy job to do - but please read the instructions carefully - I messed up and it took my wife to spot the deliberate mistake.
Please make sure you are working on the correct block connector (NOT the one with only three wires connected).
This is the mistake i made and the reason my wiring was colour coded differently.
If you are working on the right block the wiring colours will be correct (location numbers will match).
You can find the wiring diagram in the back of the Haynes manual (Later Td4 Version).
When taking the wires out of the block, only change one at time, you will need a small flat blade Screwdriver.
When you look at the connections you will see the pin you need to remove, push down gently on the first opening and pull gently on the wire attached, then repeat for the second opening, then insert the correct replacement wire/pin by pushing gently, it will only go in one way.
repeat for the remaining wires/pins.
If you are changing the Sensor at the same time (I have and the car feels smoother - with more poke).
When you take it apart make sure you fit the o ring and new jet (which are pictured else where in this post).
Also use Thread Lock when refitting (make sure it is suitable for fuel applications).
Good Luck and if you require any further help please get back to me.
Regards
T
 
Realise this is an old post but I have a 2005 Freelander TD4 and trying to fit the harness at moment. I have been trying to fathom out how to remove the pins and still not seeing how they come out. Is the 2005 a different plug setup ? I tried to insert micro thin screwdriver and push up from bottom of plug whilst pulling on wire but opening is absolutely tiny and wire not for budging.. Anyone advise where I'm going wrong ?
 
Back
Top