lil-landy
New Member
- Posts
- 473
- Location
- Near Sheffield
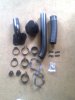
Any tips before I have a crack at fitting my snorkel tonight?
Its a paddocks one for a TD5 by the way...
Its a paddocks one for a TD5 by the way...
 .
.So do I fit part by part? Or put it together and then bodge it on?
Put it off for another night because I've only got clear silicone at the moment, I want to do a proper job with black silicone.
So....this is what I'm gonna do:
Step 1: Get together drill, bolts, spanners, ratchet, black sealer and the magic green tape.
Step 2: Swear
Step 3: Loosely (dry) assembly
Step 4: Swear
Step 5: Remove the cover on the air intake thats there already
Step 6: Swear
Step 7: Get it in position and mark holes
Step 8: Swear
Step 9: Go mad with drill
Step 10: F*ck it and go have a fag
Step 11: Fix bottom part to the hole in the wing and seal
Step 12: Seal next part upwards, repeat to top
Step 13: Bolt it all in place
Anyone seen any problems yet? I'm sure theres loads
Welcome To LandyZone, the Land Rover Forums!
Here at LandyZone we have plenty of very knowledgable members so if you have any questions about your Land Rover or just want to connect with other Landy owners, you're in the right place.
Registering is free and easy just click here, we hope to see you on the forums soon!