Freelander 1 Engine bay fuse box

This site contains affiliate links for which LandyZone may be compensated if you make a purchase.

Hippo

Lord Hippo
Posts
51,588
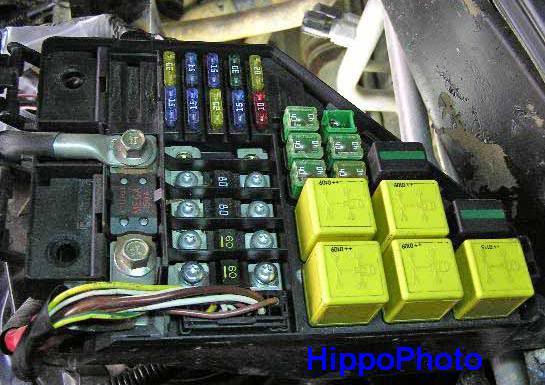
Has anyone taken their engine bay fuse box apart?

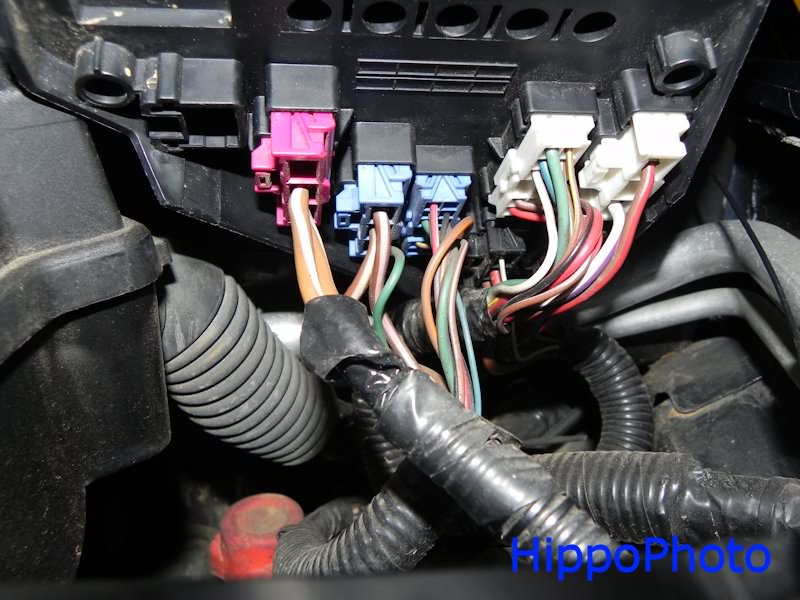
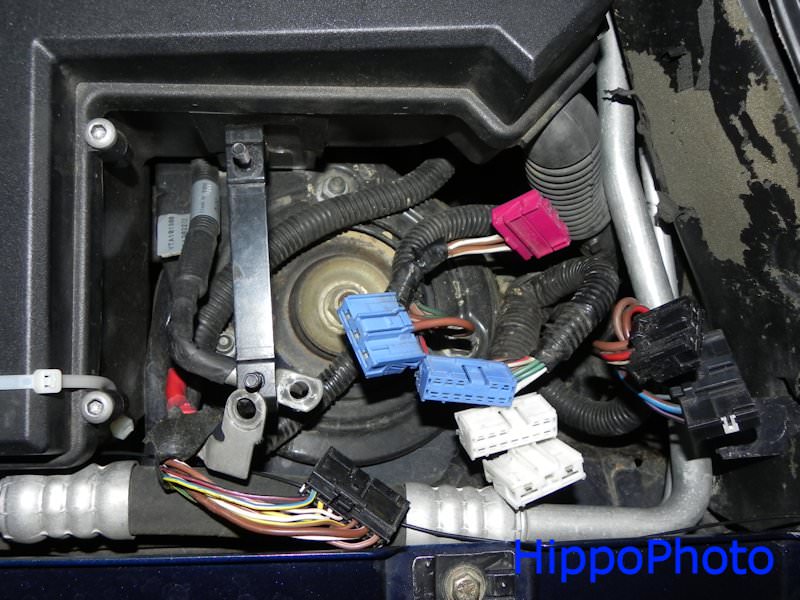
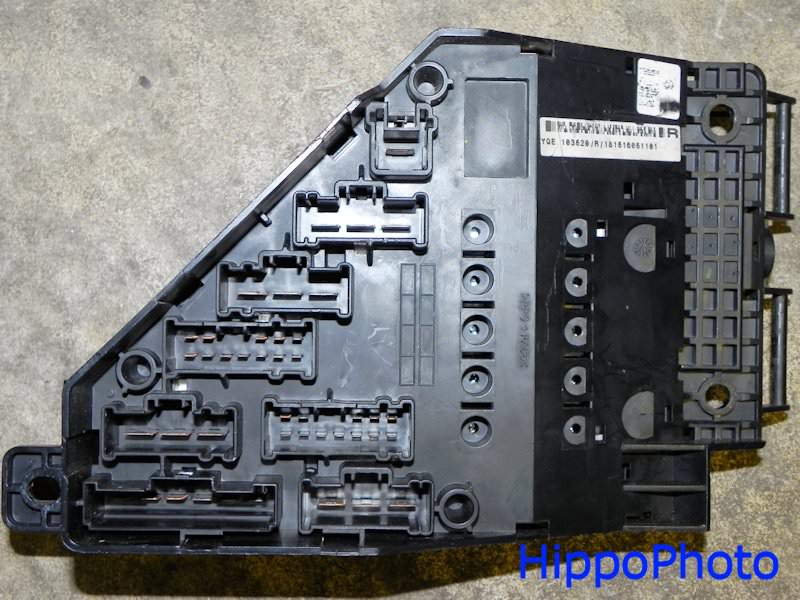
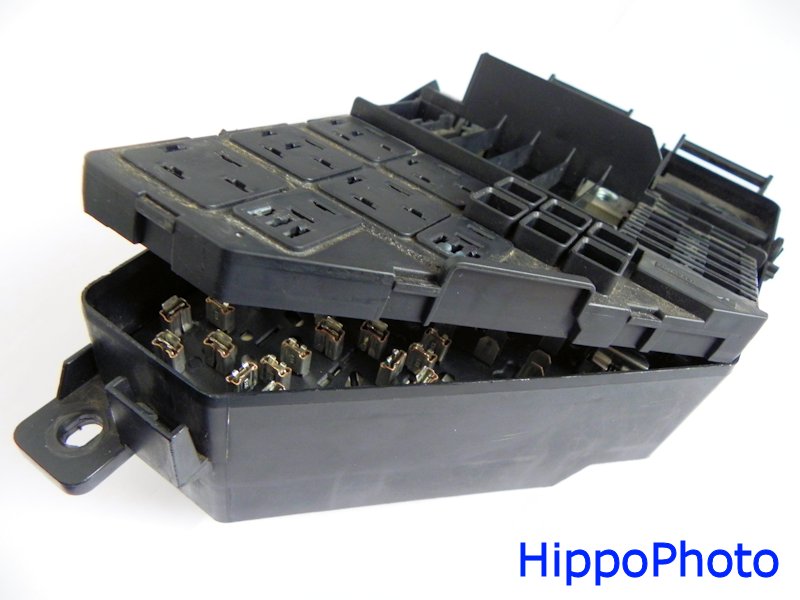
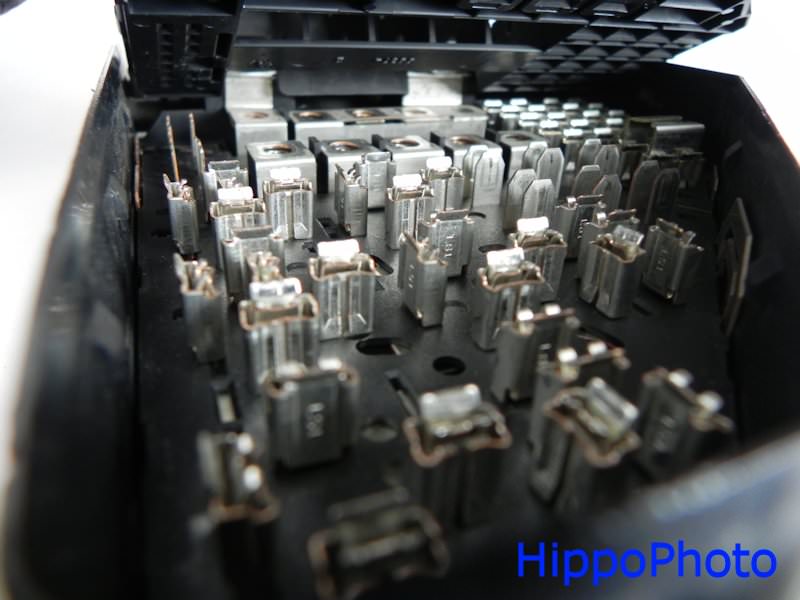
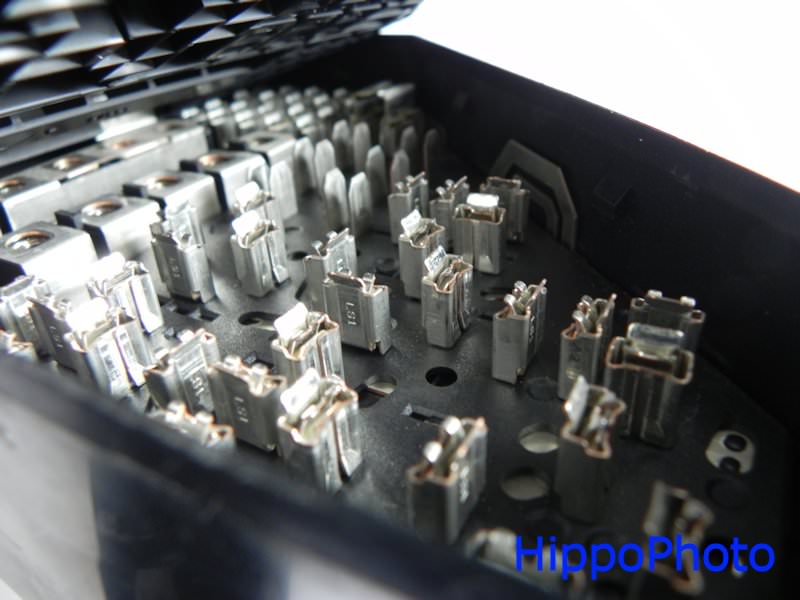
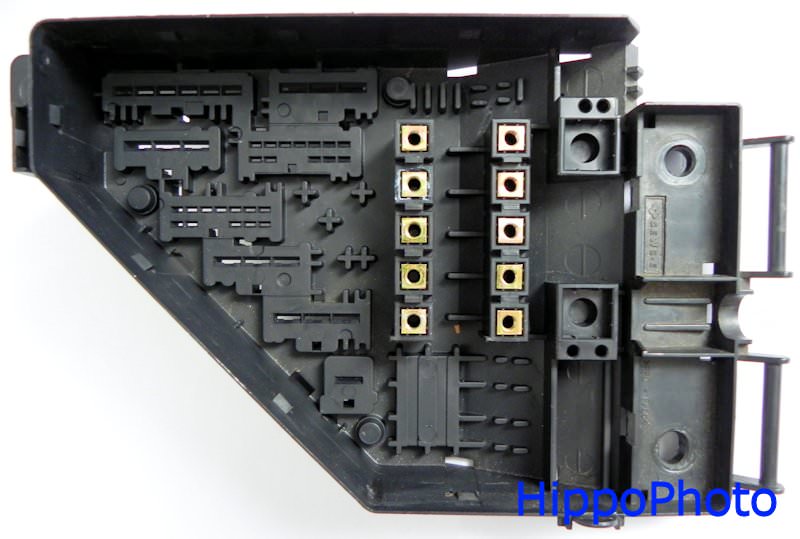
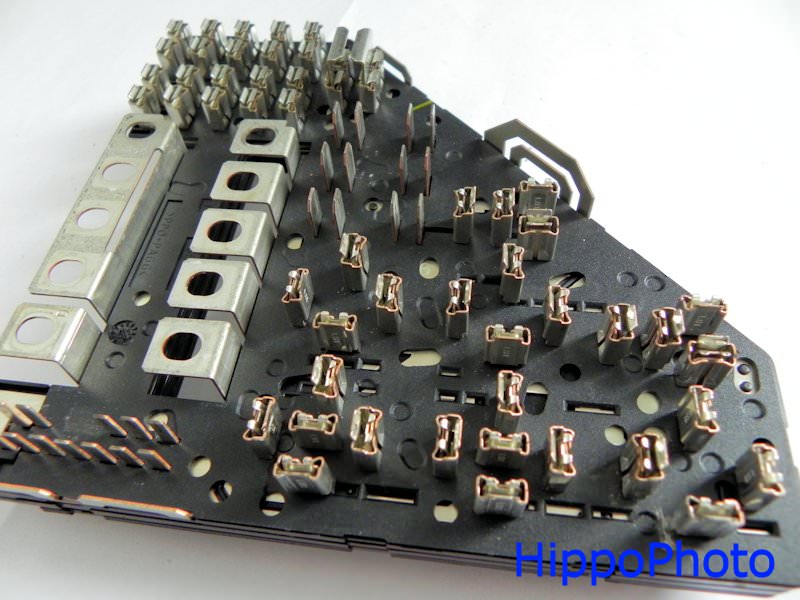
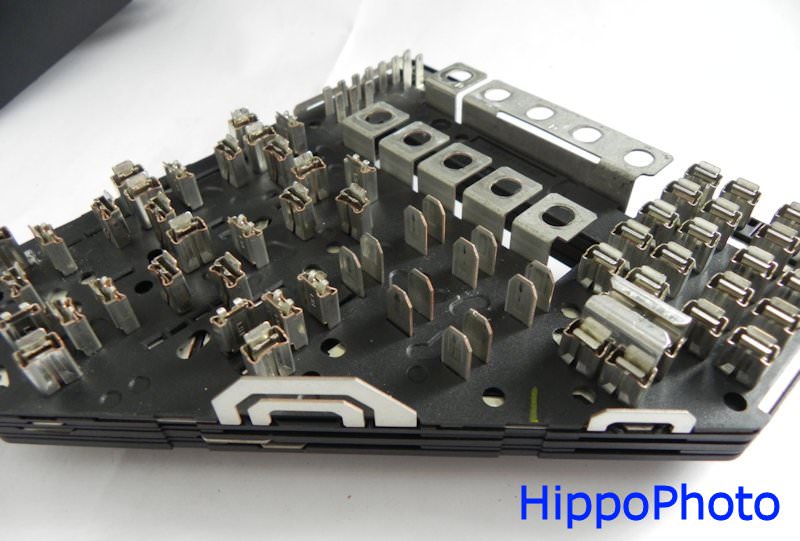
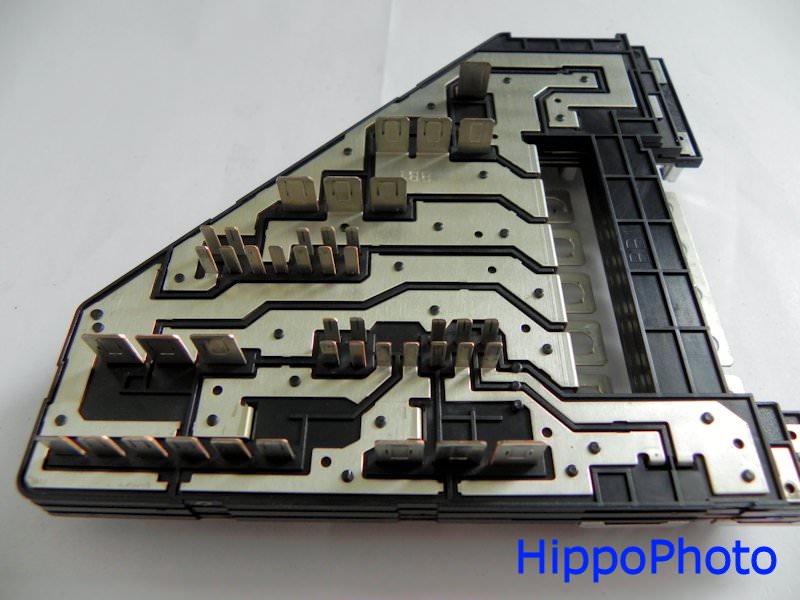
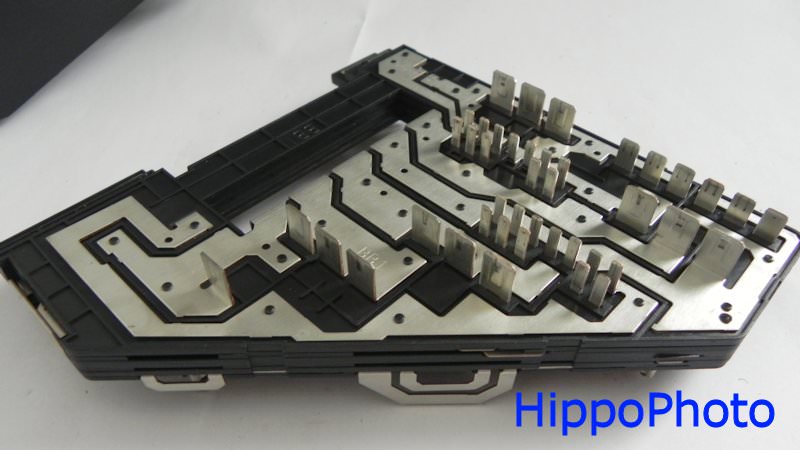
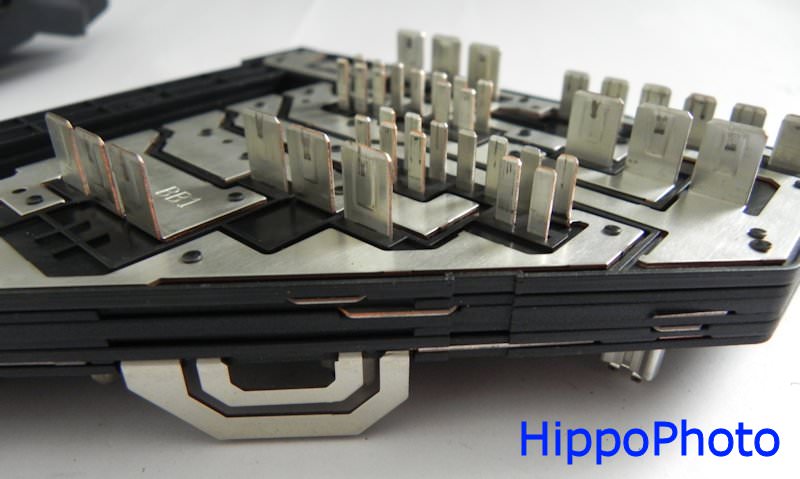
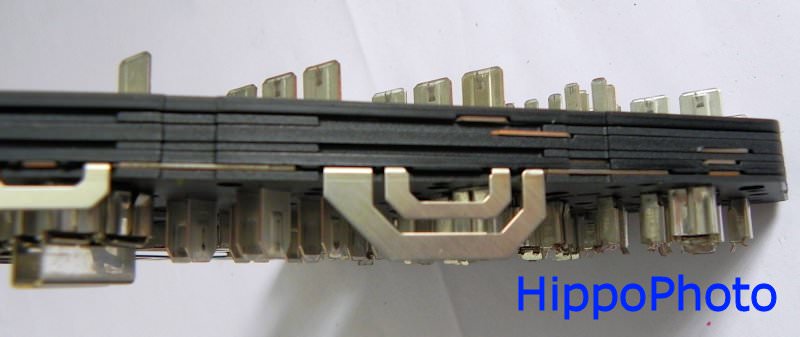
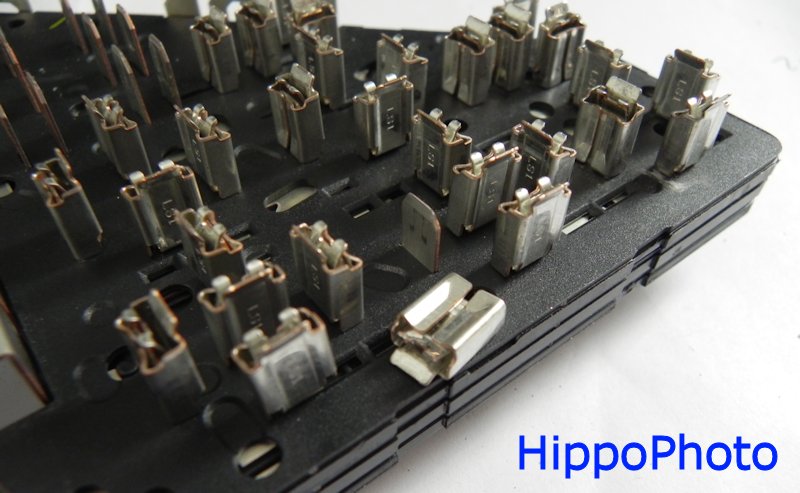
I've had the fuses/relays out and disconnected the cables/plugs connecting to the rear and had a look at it. I want to know what's inside but don't want to take it apart if it's going to break apart. It looks like there's some clips to take it apart - they release the inner section when all the fuses/replays are removed I'm guessing. I'm wondering if there's a pcb inside or similar. I know the tracks on a pcb won't take the current involved but there must be something inside as the cable plugs on the rear don't match the fuse/relay mounts on the top.

yn4O1o4.jpg

P8171568 yn4O1o4
 
Last edited:
If the P38 fusebox is anything to go by, there are two PCB's, one above the other which are linked by single strand heavy gauge copper wires soldered to the boards. The main problem with this type of fusebox is that the receptacles (Terminals) for the relays and fuses tend to overheat and burn in time which causes numerous problems which are wrongly diagnosed as BECM or CCU problems. The usual faulty connections are to the heater blower fan relays.
A good initial check is to remove the relays and look for signs of burning around the receptacles and also get your snout in there and check for any smell of burning. There is a fair amount of info on Rangerovers.net if you are interested.
:)
 
Thanks. That's eggsactly what I wanted to know. I now feel confident to take mine apart. The one thing I didn't want to have to do was realign all the pins so they poke through both side of the plastic again on reassembly. That may sound daft but I couldn't see inside and it's part of a LR so anything it possible.

Interesting site rangerover.net. Lot of helpful stuff and well laid out as a bible for rr owners. They could do with a bit more on Freelanders though.

Ere's the fuse bit I found.

Fuse Box Repairs
 
Last edited:
Hi Hippo...Pleased to hear you found it interesting. The site just goes to show how Land Rover generally tend to complicate things to an extent where it makes diy repairs extremely difficult to say the least. i tried to repair one of those fuseboards and despite experience and having the equipment available, the quality of the components made it a major exercise which at the end of the day I did not feel 100% confident that the work I had done resulted in a permanent fix.
Fortunately, it seems that the Freelander electrics do not suffer from Gremlin attacks to the same extent as the P38 and it appears, later Rangies do !!
:)
 
I took my engine bay fuse box apart and can't find anything wrong with it. No burnt bits or broke'd connections. It doesn't have a pcb like the P38. It looks like it has metal strips sandwidged together to pass volts to the correct pins/connectors. I did pull all the clips oft and squeezed them a bit to make sure they grip the fuses/relays when they're put back. Not sure if any of this has solved my intermittent gearbox problem but it is happening less often now. Time will tell I guess.

You need to disconnect the battery if you take the fuse box apart or tinker with it.

Engine fuse box with all fuses/relays fitted:

yn4O1o4.jpg

P8171568 yn4O1o4

Cable connections under the engine bay fuse box:

amj0LEN.jpg

DSCN4038 amj0LEN

Cables with the engine bay fuse box removed:

i2uxovU.jpg

DSCN4034 i2uxovU

Rear cable connection pins:

jQhNXYW.jpg

DSCN4037 jQhNXYW

If you carefully push the plastic holding tabs to one side the inner plastic section will come out. Bit of a fiddle to get it out but it's easily possible if yer careful. I did mine this end first:

CrS1de9.jpg

DSCN4051 CrS1de9

A peek inside at the connections. These are the connections the fuses/relays push into:

IUN2ZhL.jpg

DSCN4053 IUN2ZhL

ChObwQn.jpg

DSCN4057 ChObwQn

When the inner plastic bit comes oft yer left with the connections:

9HYGywR.jpg

DSCN4061 9HYGywR

The connection section comes oft too. Push the plastic tabs to one side to remove and yer left with this:

qHDC0nB.jpg

DSCN4062 qHDC0nB

Below is the heart of the engine bay fuse box. The fuses/relays plug into clips mounted on pins. These clips are designed to push onto one pin, and allow the pin from a fuse or relay to push into the other side. I pulled my oft and gave them a bit of a squeeze to make sure they have a tight grip on the fuses/relays after it's all put back together. Fuse/relay side:

SFYMw4e.jpg

DSCN4064 SFYMw4e

Nq6Sko3.jpg

DSCN4071 Nq6Sko3

Rear connector side:

JbB0709.jpg

DSCN4067 JbB0709

TTWr0LZ.jpg

DSCN4073 TTWr0LZ

3kDy3IE.jpg

DSCN4075 3kDy3IE

This is the side view of multiple metal strips sandwidged together to form layers. The strips travel though the middle using different paths through the different layers:

Pmkbt7t.jpg

DSCN4068 Pmkbt7t

One of the clips removed:

QgVfaiB.jpg

DSCN4077 QgVfaiB
 
Last edited:
Just to revive this thread. I need to get to the suspension top nuts. I undid the engine bay fuse box. I could not lift it off. Having looked at your photo hippo, I can see why. How did you get to the cables connectors to undo them please?

Thanks

DSCN4038.jpg
 
Just to revive this thread. I need to get to the suspension top nuts. I undid the engine bay fuse box. I could not lift it off. Having looked at your photo hippo, I can see why. How did you get to the cables connectors to undo them please?

Thanks

DSCN4038.jpg
When yer lift the fold up lid oft the fuse box, you will see the fuses. Look for 3x nuts which hold the fuse box in place. Disconnect the negative on the battery first, then undo the nuts. Think that's how I did it. When yer lift the fuse box after undoing the nuts, the cable connectors come out by pushing in the lever on each connector. Look at the pink one on the left, push in lever is on the left of it.
 
Back
Top