RangeRoller dt
Well-Sprung Member
- Posts
- 14,849
- Location
- Trapped inside my head @ LZ asylum
splendid job
your ocd serves you well")
your ocd serves you well
Stop showing off
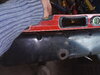
I see you have the recommended Range Rover repair kit, Big hammer, small hammer and pliers
....I see you have the recommended Range Rover repair kit, Big hammer, small hammer and pliers
All good here thanks, how's it with you? Got your residents card yet??Ey up @Datatek , nice to see you, how's it all going?
All good here thanks, how's it with you? Got your residents card yet??
Good luck with the driving licence, I did mine years ago when my UK licence was going to expire long before it was all computerised. Apart from queuing at the prefecture, it was easy. Be aware, if you have any classes apart from B such as C or D you need to make them aware you wish to keep those categories or they will not append them to the French licence.Yes thanks, I got the EU one last year after a lot of faffing about, then of course had to change it for the "after brexit" one. That at least was easy.
Now just about to start jumping through hoops to exchange my driving licence.
Thanks for that, yes I am aware of that, and that is one reason it may not be quite so straight forward.Good luck with the driving licence, I did mine years ago when my UK licence was going to expire long before it was all computerised. Apart from queuing at the prefecture, it was easy. Be aware, if you have any classes apart from B such as C or D you need to make them aware you wish to keep those categories or they will not append them to the French licence.
Welcome To LandyZone, the Land Rover Forums!
Here at LandyZone we have plenty of very knowledgable members so if you have any questions about your Land Rover or just want to connect with other Landy owners, you're in the right place.
Registering is free and easy just click here, we hope to see you on the forums soon!
_LI.jpg")