Disco rebuild project

This site contains affiliate links for which LandyZone may be compensated if you make a purchase.
Bloody good stuff that fertan! I must have gone through litres of that stuff when I did mine, keep up the good work itll all be worth it in the end
Cheers pal, never used Fertan before but it gets good reviews so I thought it was worth a try

Hi Rob,
You deserve a pat on the back as it's a lot of work...all for the love of it....lol
Well done.
Thanks Mike, it feels like the right thing to do as any Disco of this age will potentially need some of this work doing any way so better to stick with the one I know

looking good, will be watching this as i think mine will need doing soon, hopefully not to that extent, will find out when i take wing off for snorkel :)
Trust me I have done patches before that just haven't lasted so decided for the cost of replacing the wing it would give me so many more years of life. Good luck with yours mate
 
Good work mate I'll be keeping an eye on this thread, I would love to do this to my disco but time, money and the wife are stopping me lol!!

Will be worth it all in the end as you will have one tidy solid truck in the end, keep the updates comeing please m8 well done top job ;-)
 
Quite a job you got on there . Am interested to know why you changed from 10" rims (1st photo) to 7" rims (3rd photo) were there issues with the 10s? The reason I ask is am about to fit 10s to my truck. Good luck with the rest of your rebuild.
 
Quite a job you got on there . Am interested to know why you changed from 10" rims (1st photo) to 7" rims (3rd photo) were there issues with the 10s? The reason I ask is am about to fit 10s to my truck. Good luck with the rest of your rebuild.

Hi. Thanks for the comments.

When I first got the motor it had those wheels on they where hangkook dynapro MT 33/12.5/15's and I really hated the way it drove. It felt like I was driving on balloons and when the mud got sticky they seemed to sit on top of the mud instead of cutting through to find grip.

I ended selling them and fitting some second hand Grizzly Claws and then after a few years running them went for the Maltesa Kaimans in 265/75/16 fit and have been really pleased with them
 
Weekend update...

The weather held out long enough today for me to make some progress.

Finished painting chassis rail

Light box / body mount bolted back on. Plug welded, dressed back and sprayed with Zinc rich primer
2012-06-10145700.jpg


New inner wing clamped into position
2012-06-10145733.jpg

2012-06-10145759.jpg


Found this is a really good way to clean up plug weld holes prior to welding
2012-06-10145836.jpg

2012-06-10145905.jpg

2012-06-10150024.jpg


Top rail plug welded into place
2012-06-10160259.jpg

2012-06-10160251.jpg

2012-06-10160251.jpg


Dressed welds with flap disc and primed with zinc primer
2012-06-10201224.jpg

2012-06-10201239.jpg

2012-06-10201231.jpg


Autobox oil cooler bolted back in place
2012-06-10201216.jpg

2012-06-10201209.jpg


Looking a bit healthier now
2012-06-10201257.jpg


Rain stopped progress at this point so packed up
 
Looking very good, Rob, thanks for posting and making ****ty work look interesting!!

PS, I don't mean your work is ****ty, I mean the job of removing wings/panels etc ... ;)
 
Fantastic photographs, looks like you're doing a great job!
Cheers Colin, Never done this amount of structual work before so its a learning experience. As they say life is a discovery!

Looking very good, Rob, thanks for posting and making ****ty work look interesting!!
PS, I don't mean your work is ****ty, I mean the job of removing wings/panels etc ... ;)

Thnaks Paul, I know it's not going to be the most glamorous thread on the forum but when I was searching for info I couldn't find the detail I wanted so thought I would try to capture the detail for anyone else that wants to have a go themselves
 
doing a great job there m8, reminds me of when i did mine a few years back - wish id thought of cleaning up the chasis then.
keep up the thread + pics
 
doing a great job there m8, reminds me of when i did mine a few years back - wish id thought of cleaning up the chasis then.
keep up the thread + pics

Well I only intend to do this once so thought I would try and do as much as possible as I went

doing a proper job matey, keep the pics coming!!

Cheers Matt

Picked up one of those pop up gazebo's this week so I can try and get some more done this weekend even if it rains. Will do more pics this weekend as I go
 
Update.... The weather held so made some progress

Onto the home straight for this stage now.....
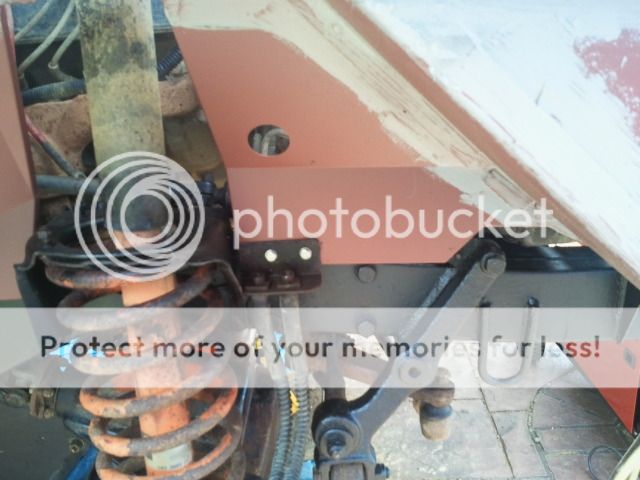
Support bar plug welded and dressed back
2012-06-16141350.jpg

2012-06-16141335.jpg


Zinc Primed
2012-06-16150708.jpg


Brake pipe bracket fitted
2012-06-16150713.jpg


All joints seam sealed
2012-06-16150717.jpg

2012-06-16150744.jpg


Another coat of primer on top
2012-06-16164346.jpg

2012-06-16164352.jpg


Brake pipe back on
2012-06-16164406.jpg


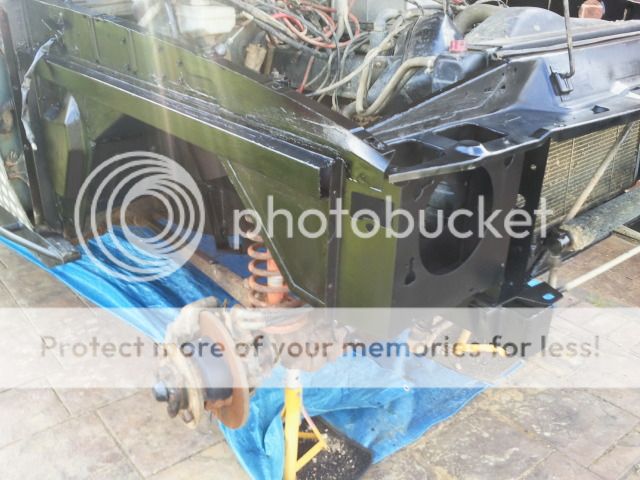
Gave the whole lot several coats of gloss black
2012-06-16174236.jpg

2012-06-16174244.jpg

2012-06-16174257.jpg


Battery tray and expansion bottle in
2012-06-17155932.jpg


Washer reservoir and winch solenoid in
2012-06-17155946.jpg


300 shape headlamps on though not sure about the fixing at the moment
2012-06-17191401.jpg


Range rover tailgate gas struts for the bonnet
2012-06-17194637.jpg


Feel like something is missing here??
2012-06-17202247.jpg


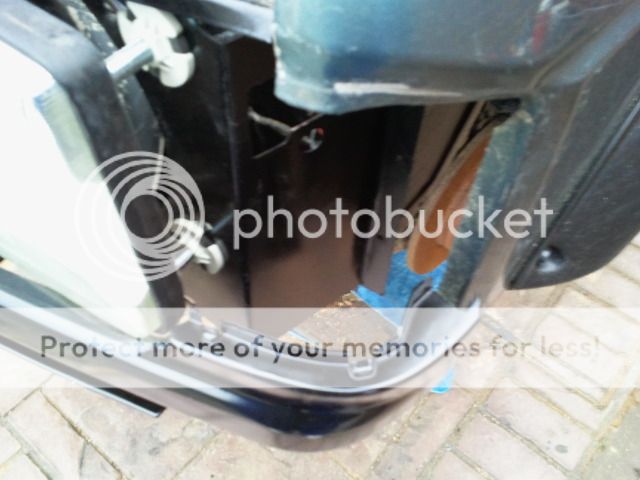
Wings back on and re sprayed grill fitted
2012-06-17205316.jpg


Even fitted a new black/silver LR badge normally fitted to supercharged Range Rovers
2012-06-17205325.jpg


Thanks for all the comments so far.
I won’t be doing any more for a few weekends but will be making a start on the sills next.
 
Back
Top