Disco 200TDi into 2.5TD Defender progress

This site contains affiliate links for which LandyZone may be compensated if you make a purchase.

richardjeaton

New Member
Posts
198
Location
Wetherby, Leeds, West Yorkshire
Well after a few weeks away I've eventually got started on the engine conversion to put a Disco 200TDi into my Defender after the 2.5TD engine died...

On Saturday I got everything disconnected and tried to pull it with the engine crane but it wouldn't budge. Found the culprit - 2 top bellhousing bolts I'd missed :doh: Came out pretty easily after I removed them :rolleyes:

DSCF6618.jpg


Then on Sunday I towed/shuffled the cars about which was a right pain with no engine in the 90. I'm not looking forward to swapping them over again when neither of them have an engine!


DSCF6629.jpg


I was just going to remove the bullbar so I could still shut the garage door but an hour later had removed most of the front end :D

DSCF6642.jpg


Anyway, tonight I spent an hour and a half removing most of the bits and pieces so it's ready to pull. So now I just have the engine mounts, bellhousing bolts, and exhaust downpipe to remove which look like fun. :confused:

Any tips for these as the downpipe bolts are rusted solid and even with a large breaker bar aren't budging? One of the bolts started to malform when I really gave it some welly :(

Also any tips for getting access to the bellhousing bolts? On the 90 I removed the engine mounts and lowered the engine onto the chassis so I had easier access to them. Can you do something similar?

Cheers for any advice

Richard
 
single hex sockets and plenty of double tt spray as wd40 is crap
 
Take the gearbox out withit in one go...then disconnect at lesuire.

Oh and cut the down pipe if you cant undo it. then when its out use heat on the nuts.
 
gt85 good too, locktite freeze spray fecking useless as is plus gas crap
 
Remove the exhaust downpipe at the pinch bolt that holds it to the end of the downpipe from the turbo. You'll need a 13mm spanner if I remember correctly. Lift the engine and box out in one lump after chopping the front panel out of the disco with a grinder. The bellhousing bolts are a pain to get at. Otherwise you'll have to remove the engine mounts, drop the engine down as far as it'll go, and get at the top bellhousing bolts through the hole from inside the car with long extensions. The one good thing is they're never very tight.
 
Gosh you all make it sound like such hard work!

Firstly you can't get engine and box out in one lump unless you want to butcher the front of the Disco (remove grill panel etc)

If you remove the trim around gear lever and drill thru the pop rivets holding the metal cover on you will be able to access the top bell housing bolts with a deep socket (15mm) and a couple of extension bars. Crack it off with breaking bar and then use ratchet (air one if you have that) The nut will travel up into the deep socket and then you can retrieve it. The other can be reached from underneath.


Just read above reply. You don't have to drop engine down off it mounts to do bell housing bolts. Also if the clutch has never been done you will find that bell housing bolts are mental tight; hence breaking bar recommendation. :)
 
I managed to undo all the Disco bellhousing nuts and bolts with a socket, UJ and 2 long extender bars. The 2 on top the the bellhousing are hardest to reach so it's best to get someone to guide the socket onto the nut from above with you under neath.

Oh and Plus-gas rules in my garage :p
 
lol Defenders all are easy just take off the floor and tunnel covers. When i did the discovery i lowered the back of the gearbox down slightly and i mean slightly. Undone most of the bell housing bolts from the top. Then got the last few from the bottom. Real land rovers are easy to work on lol!
 
Cheers for all the advice and I made some good progress at the weekend :D

DSCF6649.jpg


DSCF6650.jpg


DSCF6654.jpg


DSCF6656.jpg


In the end it actually wasn't too bad to get the Disco engine out and here is how I went about it...

1. The seized downpipe bolt wasn't budging so I disconnected the clamp that the exhaust mounts to the downpipe with instead. Once the engine was out then I hammered a smaller socker onto it and using a mahoosive bar managed to get it off.

2. Once I'd cut the front panel out of the disco with the angle grinder (this really should be a bolt in panel!) it made it much easier to get a breaker bar on the engine mounts and loosen them off.

3. All the bellhousing bolts were accessable from underneath and weren't too bad (not as bad as the Defender). Luckily for me the top centre bellhousing stud didn't have a nut on it :D:D:D

So now I'm to the next stage which is to do some bits and pieces to the engine while out and give the 90's engine bay a spruce up before putting the engine back in.

Here's my "to do" list - have I missed anything obvious?

1. Bellhousing matching up. It looks like there are a few options here. Swap TD bellhousing into TDi? Cut some studs off Tdi? Put transfer box from disco into 90? Which is easiest/best?

2. Change clutch - Even though it looks fairly new I reckon it's probably worth changing anyway.

3. Cambelt - I found a "how to" change it (I've never done one before) and it looks a pain in the arse especially when out of the car. Defender 200TDI timing belt change - LR4x4 - The Land Rover Forum Should I wait until the engine is back in or will that be even more awkward?

4. Fit new exhaust downpipe - Use M10 x 20mm (socket head) bolts

5. Cut and re-weld new radiator mounts.

6. Fit old TD engine mounts to TDi

7. Fit engine to 90

8. Reconnect everything else to engine!!!

Cheers

Richard
 
When you do the clutch do the output shaft seal behind it. If that starts leaking oil after you've put it all together you'll be crying. It's dead easy and cheap when the engine is out.
 
i think the seal patman is talking about is the Rear Crank Oil Seal.

Make sure you fit it properly, unlike mine. It must go all the way in. If you can get hold of some strong adhesive type stuff to stick it in, even better. :)

When i pulled my 300 out of the disco it took me about 3 hours to get all the bellhousing bolts off, in the end i got me mate to rip out the soundproofing of the disco bulkhead and guide the socket on.

I didn' cut the disco slam panel out either, i took the wheels off the disco to drop it lower :D
 
Sorry for the lack of updates so here is the last couple of weeks worth in one large post...

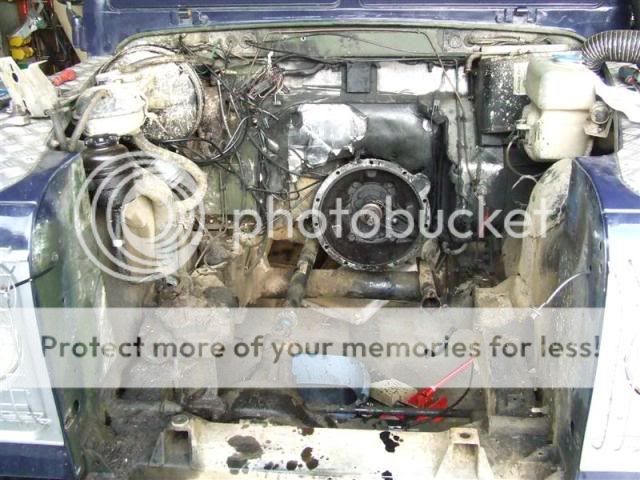
With the 200TDi out of the car I removed the flywheel cover and fitted the old TD flywheel cover instead. This avoids any headaches with non-matching studs/bolts and I reckon is much easier than redrilling tapping etc. IMHO

There was a small leak so I decided to change the rear crank oil seal. This turned into a bit of a nightmare (there's another thread about this somewhere!). The Britpart one I bought was awful quality compared to the genuine Land Rover one so I'm now really glad I used an original part - I don't want to be pulling this engine out again for a while!!!

Other things I did while the engine was out were: Fit the old TD engine mounts (use the rear block mounts under the alternator) leaving the rubbers loose, fitted new oil filter, mounted the new modified exhaust downpipe, replaced rocker cover gasket, replaced fan and PAS belts with new ones.

Once that was all done and the clutch refitted etc (by the way I've found the perfect clutch allignment tool - one of those small spark plug spanners is the perfect size for the Landy clutch) then the 200TDi engine was ready to go in.

There are then a few bits and pieces I'd recommend to do to the Defender while it has an empty engine bay. I fitted the new clutch release bearing as well as a heavy duty clutch arm, remove exhaust front section, moved clutch pipe to allow new downpipe to fit, cleaned up the engine bay and painted all exposed chassis areas, cut down and (badly) rewelded the radiator mounts by 3cm so the bonnet won't foul the top of the Disco radiator.

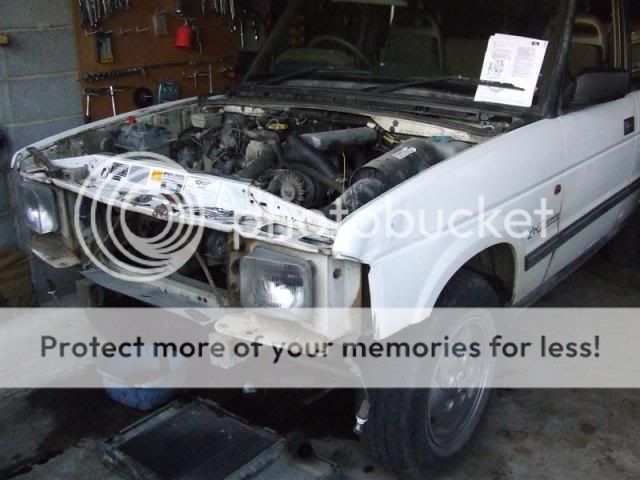
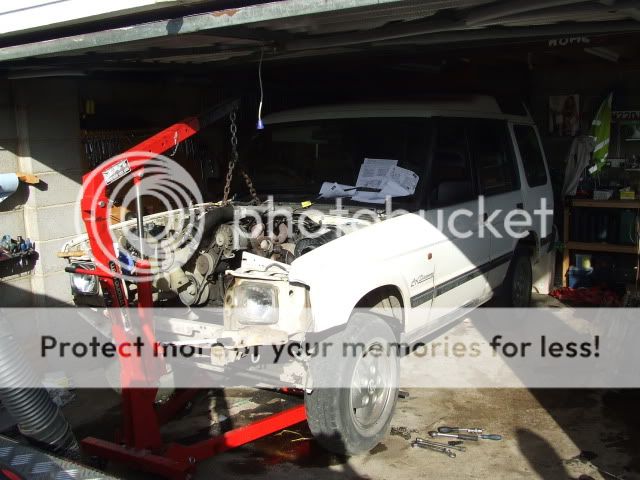
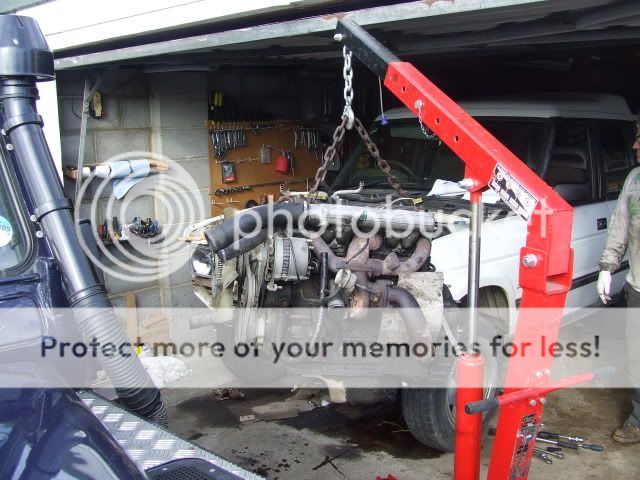
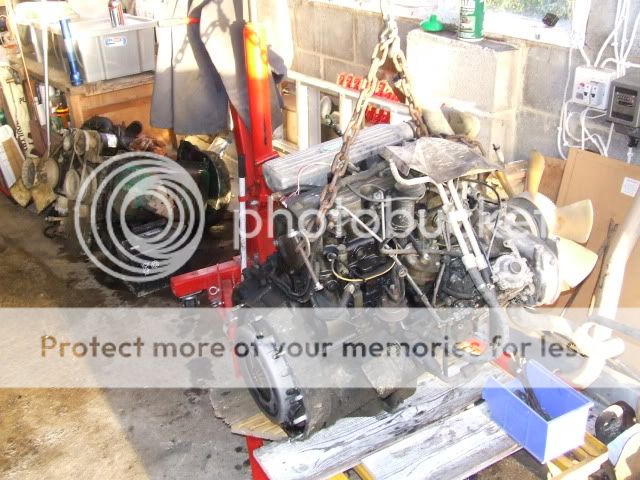
Once all this was done the engine was then hoisted into position. I then attempted to line up the bellhousing which was impossible by my self. I got a mate to come round to help and we managed to get it into position and the top 3 studs were lined up and through the housing. No matter what we did we just couldn't get it to go far enough in though as the bottom wouldn't line up. We think it was to do with the angle and tried lifting the front of the engine to try get round this. We didn't have one but I'd recommend one of those adjusting bars on the hoist to make this much easier. In the end we tried it from the other end and jacked up the gearbox which corrected the angle so I could close the gap and bolt it all together :)

Once the engine was bolted in then I connected the starter motor wires (in hindsight I'd have left the exhaust shield off to make this bit easier!) and connected the earth lead to the chassis. I then fitted the engine mount rubbers which was a real pain to get enough clearance but I managed in the end.

At this point I tackled the wiring. I didn't realise but you need to fit the old TD loom to the 200TDi which would probably have been easier when out of the car. All the colours are the same so it isn't too bad and there are only really the alternator wires which need to be cut and new connectors fitted. Once the loom is in place connect the glow plug system, fuel stop solenoid, attach and adjust throttle linkage (using Disco cable).

My next nightmare was the oil cooler pipes. The Disco ones are too short and my old TD didn't have an oil cooler. Apparently some TD's too and you can use those pipes if you swap over the connectors from the old TD radiator to match. I spoke to my local Landy guy who ordered me some and said there'd be a week at the latest. Sure enough a week went by and I hadn't heard anything even though I'd said it was urgent and I'd missed 2 weekends worth of spanner time. He said they could be another week and after an argument which ended in me telling him to shove his oil cooler pipes up his arse I decided to get them elsewhere - I really
don't know how these people stay in business!!! :mad: Anyway, in the end I drove down to my local Pirtek (I didn't realise they were a national franchised chain until I looked into it) with the pipes and they extended them by 30cm then and there. Even though it was 70 quid it was worth it for lack of hassle and I wouldn't have wasted 2 weeks!

I then fitted the 200TDi radiator/intercooler and the oil cooler pipes with no bother. The internal heater pipes (steel pipe feeds rear, pipe nipple feeds front) using the old ones from the Disco. I know that I have to swap the temperature sensor on front of engine with the old TD one and wire this up but the sensor looks different so I'll do this at a later date. The oil pressure sensor was then connected up too.

The PAS pipes aren't too bad to fit but you need to use a combination of the TD and Disco ones. The low pressure one from the TD is ok but you need the high pressure one from the Disco. The TD one still fits in the brackets on the back the front crossmember but the Disco one is the wrong shape so is slightly further back - it still seems solid and not in
the way so I'm going to leave it like that for now. I filled the PAS tank then so I wouldn't forget later!

I then fitted the water expansion tank from the Disco as the pipework isn't long enough from the TD and header tank. Even the Disco one isn't perfect as the connection to the bottom of the engine block is at more of an angle than I'd ideally like. I'll also have to make up a proper mount for this later.

Next up was the intercooler pipes which were a doddle to connect and the rest of the radiator pipes were then connected. I then filled the header tank with water and so far no leaks.

The fuel filter was my next job which I hadn't been looking forward to as it looked quite involved. You basically use the 200TDi fuel filter as this system is simpler and quite different to the TD system. I needed to cut off old connectors and use the old Disco ones and then temporarily bodged these together with some spare pipe I had to at least be able to prove I'd got it done right.

I then fill the engine with oil (about 6 litres) and primed the fuel system with hand pump on lift pump. The fuel solenoid wire was disconnected and the battery connected back up. I then turned the key to run the starter to prime fuel and oil system which I'm was pleased to hear turn over so I must have got the wiring vaguely right!

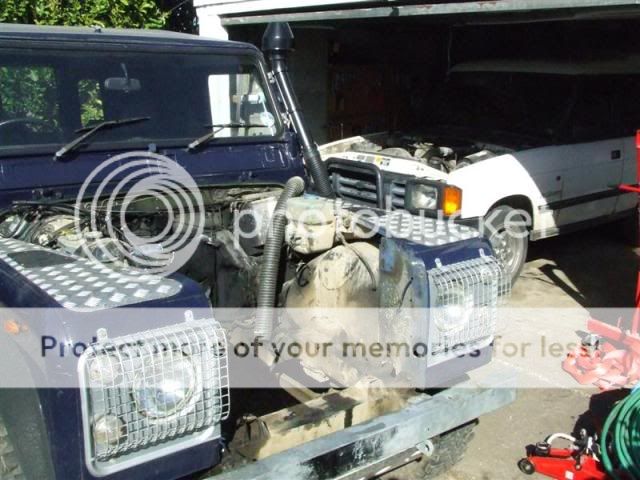
It was then the moment of truth!!! I reconnect the fuel solenoid and with fingers crossed turned the key to the starter again and it fired up on the first crank :D:D:D:D:D The Landy is alive again!!!

I let it run up to temperature while keeping an eye on things and could hear a strange squirting noise. It turned out that I hadn't tightened up the oil cooler extensions so oil was firing out of them. This was soon fixed and all looked well again.

So now I just have the following to do and the Landy is ready for the MOT man, typically it expired between the TD dying and getting the 200TDi up and running :(

1 Fit/modify the exhaust.
2 Mount and fit the air filter and snorkel
3 Test clutch/transmission
4 Refit bonnet/bumper/guards

So I'm getting there, slowly!!! :)

:cool:

P.S. I'll add some pics when I grab them off the camera...
 
Did you change the timing belt? I found it a dodle once i got the crank pully off! (it's tightend to something like 320ft/lb!) I ended up taking the outer belt pully off and making a tool to hold the crank, then used a 3/4 drive 30mm socket on a T'bar with a4ft pipe! replacing the belt you need an 8.5mm drill inserted smooth end into the pump pully( at about 11 o'clock), cam pully lines up with a pionter on the casing as does the keyway on the crank pully, simples ;)
I'd never buy hydraulic hoses from the dealers, as I have access to a swageing machine at work and make up all of my own, but that said £70 seems a bit expensive, any hydraulic hose firm can make these on site in minutes.
 
Back
Top