- Posts
- 6,334
- Location
- North Perthshire
Introducing my 2002 Disco 2. Being a big, green, mean machine, the family naturally christened her “Hulk”. We have had her since 2012 and with only 112k miles, she is barely run in. She is, however, a D2…and as such has a few problems in the chassis department.

The fun began in 2014 when the MOT threw up a rot issue with one of the rear (n/s) suspension mounts. Got it welded…and moved on.
2015 MOT – another n/s suspension mount, same rot. Welded…and moved on.
2016 MOT rot moved to the offside. Thought about it….consulted the finances….got it welded….and moved on.
Note – there were also the usual other reasons for failure – corroded brake pipes, ball joints getting old, etc, but these were dealt with year on year.
And so we came to the test in Nov 2017 and that’s where it got serious.
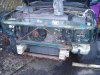
· Nearside Front Body or chassis has excessive corrosion, seriously affecting its strength within 30cm of the body mountings (6.1.B.2)
· Offside Front Body or chassis has excessive corrosion, seriously affecting its strength within 30cm of the body mountings (6.1.B.2)
· Nearside Rear Body or chassis has excessive corrosion, seriously affecting its strength within 30cm of the body mountings (6.1.B.2)
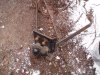
· Nearside Suspension component mounting prescribed area is excessively corroded centre chassis (2.4.A.3)
· Nearside Rear Suspension component mounting prescribed area is excessively corroded chassis (2.4.A.3)
· Offside Rear Suspension component mounting prescribed area is excessively corroded outrigger (2.4.A.3)
· Rear Brakes imbalanced across an axle (3.7.B.5b)
· Nearside rear brake excessively fluctuating (3.7.B.3)
· Nearside Headlamp insecure (1.7.3)
· Offside Headlamp insecure (1.7.3)
· Offside Headlamp aim too high (1.8)
· Service brake: efficiency below requirements (3.7.B.7)
Advisory notice item(s)
· Offside Front Seat belt damaged but webbing not significantly weakened (5.2.2a)
· Nearside Front Radius arm rubber bush deteriorated but not resulting in excessive movement rear bush (2.4.G.2)
· Offside Front Radius arm rubber bush deteriorated but not resulting in excessive movement rear bush (2.4.G.2)
· Nearside Rear Radius arm rubber bush deteriorated but not resulting in excessive movement front bush (2.4.G.2)
· Offside Rear Radius arm rubber bush deteriorated but not resulting in excessive movement front bush (2.4.G.2)
· Central Exhaust has a minor leak of exhaust gases (7.1.2)
· Nearside Front floor corroded and holed
· Offside Front floor corroded and holed
Decision time – scrap her…or seriously invest and get a new chassis? The very fact of this thread shows that we (I) chose the new chassis route. Hulk was parked up in the corner of the garden, and a Honda CR-V bought to keep herself and the kids on the road. Once Hulk is finished, I will dispose of my little runaround (Peugeot 307) and she will become my daily drive. (fingers crossed!)
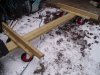
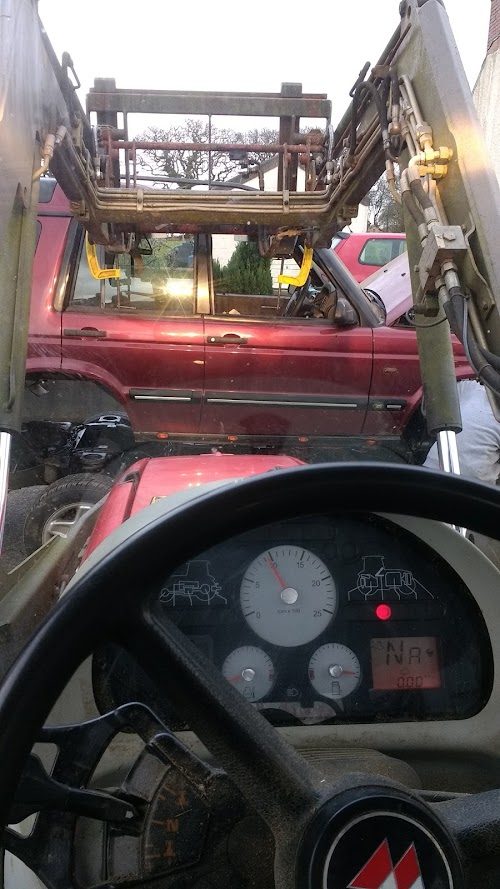
Now I have neither the skills or the facilities for carrying out a re-chassis job myself – but I do just happen to drive Recovery trucks for my local garage, so it is my intention to strip Hulk down as far as I can, obtain and paint the new chassis, and then transfer the whole kit and caboodle to the workshop for the heavy lifting part. Other work will also be undertaken on the : if I can I will, if I can’t then they will….basis. To that end, the rear discs, pads, calipers etc have already been replaced to clear the imbalance problem. The headlights will be sorted when the front end is reassembled, and obviously all brake pipes will be replaced.
Let battle commence!
The fun began in 2014 when the MOT threw up a rot issue with one of the rear (n/s) suspension mounts. Got it welded…and moved on.
2015 MOT – another n/s suspension mount, same rot. Welded…and moved on.
2016 MOT rot moved to the offside. Thought about it….consulted the finances….got it welded….and moved on.
Note – there were also the usual other reasons for failure – corroded brake pipes, ball joints getting old, etc, but these were dealt with year on year.
And so we came to the test in Nov 2017 and that’s where it got serious.
· Nearside Front Body or chassis has excessive corrosion, seriously affecting its strength within 30cm of the body mountings (6.1.B.2)
· Offside Front Body or chassis has excessive corrosion, seriously affecting its strength within 30cm of the body mountings (6.1.B.2)
· Nearside Rear Body or chassis has excessive corrosion, seriously affecting its strength within 30cm of the body mountings (6.1.B.2)
· Nearside Suspension component mounting prescribed area is excessively corroded centre chassis (2.4.A.3)
· Nearside Rear Suspension component mounting prescribed area is excessively corroded chassis (2.4.A.3)
· Offside Rear Suspension component mounting prescribed area is excessively corroded outrigger (2.4.A.3)
· Rear Brakes imbalanced across an axle (3.7.B.5b)
· Nearside rear brake excessively fluctuating (3.7.B.3)
· Nearside Headlamp insecure (1.7.3)
· Offside Headlamp insecure (1.7.3)
· Offside Headlamp aim too high (1.8)
· Service brake: efficiency below requirements (3.7.B.7)
Advisory notice item(s)
· Offside Front Seat belt damaged but webbing not significantly weakened (5.2.2a)
· Nearside Front Radius arm rubber bush deteriorated but not resulting in excessive movement rear bush (2.4.G.2)
· Offside Front Radius arm rubber bush deteriorated but not resulting in excessive movement rear bush (2.4.G.2)
· Nearside Rear Radius arm rubber bush deteriorated but not resulting in excessive movement front bush (2.4.G.2)
· Offside Rear Radius arm rubber bush deteriorated but not resulting in excessive movement front bush (2.4.G.2)
· Central Exhaust has a minor leak of exhaust gases (7.1.2)
· Nearside Front floor corroded and holed
· Offside Front floor corroded and holed
Decision time – scrap her…or seriously invest and get a new chassis? The very fact of this thread shows that we (I) chose the new chassis route. Hulk was parked up in the corner of the garden, and a Honda CR-V bought to keep herself and the kids on the road. Once Hulk is finished, I will dispose of my little runaround (Peugeot 307) and she will become my daily drive. (fingers crossed!)
Now I have neither the skills or the facilities for carrying out a re-chassis job myself – but I do just happen to drive Recovery trucks for my local garage, so it is my intention to strip Hulk down as far as I can, obtain and paint the new chassis, and then transfer the whole kit and caboodle to the workshop for the heavy lifting part. Other work will also be undertaken on the : if I can I will, if I can’t then they will….basis. To that end, the rear discs, pads, calipers etc have already been replaced to clear the imbalance problem. The headlights will be sorted when the front end is reassembled, and obviously all brake pipes will be replaced.
Let battle commence!
")