You are using an out of date browser. It may not display this or other websites correctly.
You should upgrade or use an alternative browser.
You should upgrade or use an alternative browser.
Blood, sweat & beers ! 1984 Defender 90 restoration
- Thread starter UpandOver
- Start date
This site contains affiliate links for which LandyZone may be compensated if you make a purchase.

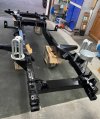
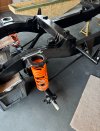
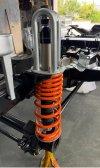
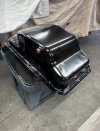
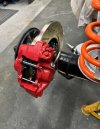
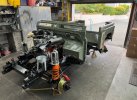
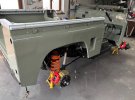
Well the 2000 piece jig saw begins! First off I decided to spray the chassis and axles again but this time with a semi gloss 2k Selamix paint, the jotun paint was good but did start to look a bit chalky. Now dry and the trusty spray booth dismantled its build time. First on is the galvanized Terrafirma heavy duty front strut turrets. Whoooo suit you sir !
Attachments

Forrest Gump
Well-Known Member
- Posts
- 743
- Location
- Edinburgh
Great work..take your time and enjoy it. Can’t wait to see the finished Land Rover.Well the 2000 piece jig saw begins! First off I decided to spray the chassis and axles again but this time with a semi gloss 2k Selamix paint, the jotun paint was good but did start to look a bit chalky. Now dry and the trusty spray booth dismantled its build time. First on is the galvanized Terrafirma heavy duty front strut turrets. Whoooo suit you sir !

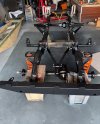
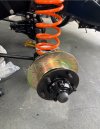
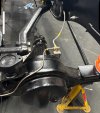
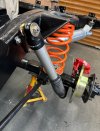
Rear hubs back on with some drilled and grooved discs, had to order some different caliper bolts as they arent the same as the front  the early def had 7/16 unf bolts unlike the m12 fine front ! Have to pause the front hubs as I need to order some swivel to axle bolts and remembered when building the 300tdi theres one of the seven bolts that’s a dowel locator the bolt has a wider chamfered shoulder to stop any rotation of the swivel housing and putting the caster out of alignment. Hey this is what google recons and does make sense… bet for a minute there you thought I knew what talking about
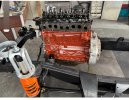
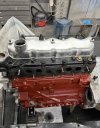
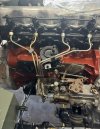
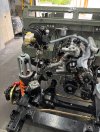
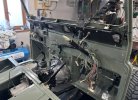
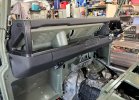
Axles abandoned for today I thought I’d get the engine in, stripped it of water pump and timing casing I de-geased and painted the block terracotta red, had the paint left over from painting the series 3 5mb engine.
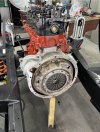
Clutch inspected and measured with digital calipers its only beded in, as suspected looking at the thrust bearing its as new. Cleaned the pressure plate and flywheel with some emery and the clutch is back on.
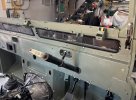
Came across a temperature sticker on the back of the head which must have been installed when the engine was refurbished by Turner Engineering, glad to report its not gone over temp.
the early def had 7/16 unf bolts unlike the m12 fine front ! Have to pause the front hubs as I need to order some swivel to axle bolts and remembered when building the 300tdi theres one of the seven bolts that’s a dowel locator the bolt has a wider chamfered shoulder to stop any rotation of the swivel housing and putting the caster out of alignment. Hey this is what google recons and does make sense… bet for a minute there you thought I knew what talking about Axles abandoned for today I thought I’d get the engine in, stripped it of water pump and timing casing I de-geased and painted the block terracotta red, had the paint left over from painting the series 3 5mb engine.
Clutch inspected and measured with digital calipers its only beded in, as suspected looking at the thrust bearing its as new. Cleaned the pressure plate and flywheel with some emery and the clutch is back on.
Came across a temperature sticker on the back of the head which must have been installed when the engine was refurbished by Turner Engineering, glad to report its not gone over temp.
Attachments

Lazy day in the office, despite being pebble dashed in old engine oil, oh ye! Forgot that I hadn’t drained the oil out of the engine before taking the flipping sump off. Despise knocking the sump with the 13mm socket before starting it bloody sounds empty and tinny
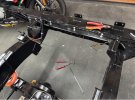
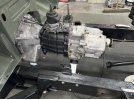
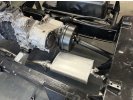
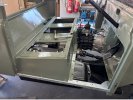
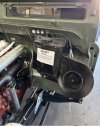
After a good clean up just found out that I’ve got a r380 box, result. Gearbox attached and painted, I’ve fitted the bulkhead again with YRM stainless bolt kits. New chassis loom from Autosprarks installed and clipped to the rear chassis cross member with some stainless p clips. Then its brake lines and braided flexible hoses, again clipped with stainless P clips.
Attachments
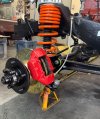
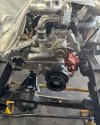
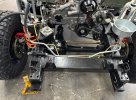
Todays sitrep, timing kit fitted, new thermostat and water pump fitted. New fuel injector pipes and front hubs all assembled, along with drilled and vented discs and a set of heavy duty steering arms. All in all a very productive Sunday.
Attachments
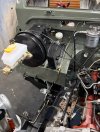
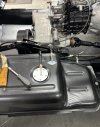
Well it would be rude not to spend some time in the garage on my day off, its amazing the amount of things getting crossed off the needs fitting list, exhaust, rear shocks, handbrake shoes and drum, brake lines, front calipers, clutch pedal box, brake pedal box, brake servo and master cylinder, fuel tank, alternator, water pump pulley, YRM stainless steering stop kit, fuel filter housing and 2 of 4 pipes, throttle pedal and cable… wow Im sure theres a few bits Ive missed off but as you can see its been a productive day, same again tomorrow sir !
Attachments
Don’t suppose anyone has a set of knackerd front plastic arches that they are thinking of throwing? I need a set to trim down to fill the gap between the outer wing and inner steel wheel arch as the extended plastic arches dont have this bit, stupidly Ive thrown mine away thinking I wouldn’t have a need for them
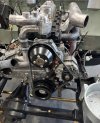
The power steering pump fitted, steering box seals changed cleaned and painted, with new pipes on order. Steering column fitted with some new uj’s. New fuel lines fitted along with a new galv fuel tank bracket and YRM stainless fitting kit.
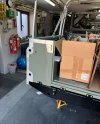
Rear tub fitted and bolted on
Rear tub fitted and bolted on
Attachments
Last edited:
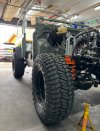
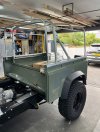
You’ve built a monster truck! That’s what my lad said when he stuck his head into the garage, and to be honest he isn’t far wrong.
Tyres fitted to the new rims, rear extended arches fitted, new power steering pipes in, fuel pipes fitted to the tank and the galv roll bar and canvas hoops fitted.
Tyres fitted to the new rims, rear extended arches fitted, new power steering pipes in, fuel pipes fitted to the tank and the galv roll bar and canvas hoops fitted.
Attachments


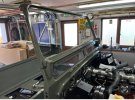
Busy few days, finished off fitting the galv capping on the tub, re aligned the tub to chassis and bolted down, fitted the heater fan box, fitted a one piece BRT motorsport braided clutch pipe, painted the vent flap fly screens black and re riveted them onto the bulkead. New galv side rails bolted in and seat box attached. Windscreen bolted in place with some YRM plasic spacers.
Attachments
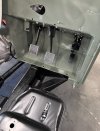
Started on the least favorite job, getting the dash back together ! Oh and ordered a set of black billet aluminum door hinges from exmoor trim, saw them in the Newak show and they looked well made and with show discount relatively cheap in comparison to other brands
Attachments
Hicap phill
Well-Known Member
- Posts
- 17,216
- Location
- Wiltshire
I thought you would have upgraded the glass fuses.
( I do have the glass fuses and they can be finicky but are easily sorted)
( I do have the glass fuses and they can be finicky but are easily sorted)