Another 90 Rebuild

This site contains affiliate links for which LandyZone may be compensated if you make a purchase.
OO er, not cheap. These pipes I've got are supposed to last a very long time. If they turn out to be too long I'll look at getting some made. I don't think its worth spending that amount on what I've got left to do.
 
al203 you prob took it off because the ally rivets would have disappeared in the galv process ,and you put it in "a safe place" lol
 
Ref the pipes, local motor factors sometimes make pipes to length for you, maybe you could take them their and see if they will cut a little bit out and re-flare.
Or someone on here might be able to come and do it for you, I could do it if you send me the pipes, or I could borrow you my flaring tool if you felt comfortable doing them, they really aren't difficult to do mate.
 
On another note, maybe the pipes are for a different model/year.
As your pipes enter into the side of the caliper, some enter in the bottom which would account for the extra couple of inches you have.
 
They look fine to me. I remember mine being a nightmare of a job and I'm still ashamed to show people the brake pipes, it looks kind of like some spaghetti!
 
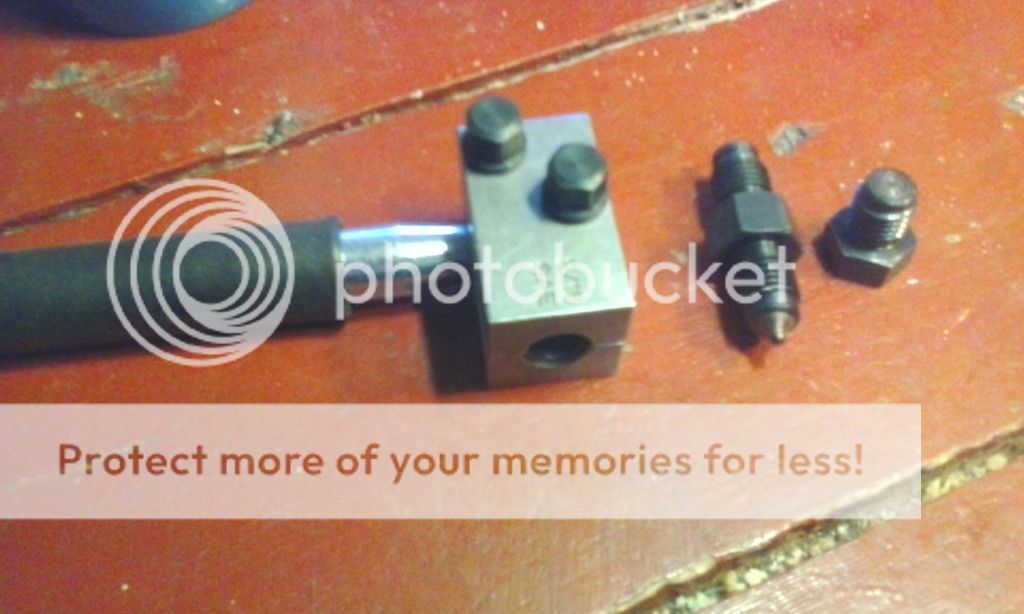
Personally, I've found making my own a lot easier than trying to fit the supposedly correct pre made pipes I've ordered. I got a cheap Machine Mart one because I needed something in a hurry and that was all that was available within walking distance (because the Land Rover's brakes were in pieces) but the clamp tends to chew up the pipe surface. Then I got a more expensive one more recently that makes the most beautiful little pips:

Almost like a factory finish!
Here it is:

I wish I could remember where I'd put it
 
Ha you too, wish I could have back the part of my life I have spent tearing the garage apart while effing and blinding.

By the way I have one like the one in the picture, you are welcome to use (just nort of Harrogate)
 
Last edited:
al203 you prob took it off because the ally rivets would have disappeared in the galv process ,and you put it in "a safe place" lol
Well, I've tidied the garage up and no luck yet. I'll have a look on LR Direct and Paddocks later to see if they still do them.


Ref the pipes, local motor factors sometimes make pipes to length for you, maybe you could take them their and see if they will cut a little bit out and re-flare.
Or someone on here might be able to come and do it for you, I could do it if you send me the pipes, or I could borrow you my flaring tool if you felt comfortable doing them, they really aren't difficult to do mate.
On another note, maybe the pipes are for a different model/year.
As your pipes enter into the side of the caliper, some enter in the bottom which would account for the extra couple of inches you have.
Cheers, Aaron. Thanks for the offer. I think the pipes might be off a slightly different model given they're a bit too long on the calipers and the valve to master was too short! The Mrs was driving in to town this afternoon, so I've had a new piece made up today for the master to valve. I've go the option now of altering the caliper pipes or getting this place to cut some off and re-flare.

They look fine to me. I remember mine being a nightmare of a job and I'm still ashamed to show people the brake pipes, it looks kind of like some spaghetti!
Mine's not pretty, but it's not that bad. It's got to be a bit busy around the valve area anyway. :)

Personally, I've found making my own a lot easier than trying to fit the supposedly correct pre made pipes I've ordered. I got a cheap Machine Mart one because I needed something in a hurry and that was all that was available within walking distance (because the Land Rover's brakes were in pieces) but the clamp tends to chew up the pipe surface. Then I got a more expensive one more recently that makes the most beautiful little pips:

Almost like a factory finish!
Here it is:

I wish I could remember where I'd put it

Pleased I'm not the only one with an intermittent memory. :)

Ha you too, wish I could have back the part of my life I have spent tearing the garage apart while effing and blinding.
By the way I have one like the one in the picture, you are welcome to use (just nort of Harrogate)
Iv got one similar to the picture above. Works great.
If your anywhere near Leeds you can borrow it if needs be.
Thanks for the offer gents, I'm way further North though. Not far from the border. Sorted now though and with a plan for the caliper pipes.
Thanks everyone, awesome support :)
 
Personally, I've found making my own a lot easier than trying to fit the supposedly correct pre made pipes I've ordered. I got a cheap Machine Mart one because I needed something in a hurry and that was all that was available within walking distance (because the Land Rover's brakes were in pieces) but the clamp tends to chew up the pipe surface. Then I got a more expensive one more recently that makes the most beautiful little pips:

Almost like a factory finish!
Here it is:

I wish I could remember where I'd put it
That's the same as mine and is the one I listed a link to.
But I just remembered, last year I needed to flare the clutch pipe as I had to replace it in my MGF. It is 1/8"" so the new £50 flaring tool I had bought was no use. :(
So I bought one of these and If I remember correctly it did the job very well too, and for a lot less money.
http://www.ebay.co.uk/itm/Sealey-AK...288224?hash=item1c5e0238e0:g:LZoAAOSwoudW3sOi
 
Got a little more done tonight.
Sound proofing on the seat box.
DSC_0208_zpsueln0a50.jpg


DSC_0209_zps51pob0wg.jpg


Fitted the new front wing stays.
DSC_0213_zpsks3hdfdu.jpg


I'd temporarily fitted the floor plates, but had to drill more holes along the front as the existing ones didn't line up with the holes in the new bulkhead. Had to cut out a hole for the wing stay bolt head too - the dinitrol patch gives it away.
DSC_0212_zps5kaf8gkd.jpg


Got the gear box tunnel refitted after sorting out the sound proofing that had fallen off the underside.
DSC_0211_zpsrm0ptycl.jpg
 
Got a little more done tonight.
Sound proofing on the seat box.
DSC_0208_zpsueln0a50.jpg


DSC_0209_zps51pob0wg.jpg


Fitted the new front wing stays.
DSC_0213_zpsks3hdfdu.jpg


I'd temporarily fitted the floor plates, but had to drill more holes along the front as the existing ones didn't line up with the holes in the new bulkhead. Had to cut out a hole for the wing stay bolt head too - the dinitrol patch gives it away.
DSC_0212_zps5kaf8gkd.jpg


Got the gear box tunnel refitted after sorting out the sound proofing that had fallen off the underside.
DSC_0211_zpsrm0ptycl.jpg
Looking great mate.
I have the Bermuda Triangle garage too. :D
 
Wet and miserable week this week so nothing done after work. Ordered some new 7/16 UNF seat belt bolts and they arrived ready for the weekend.
DSC_0215_zps42jk2cad.jpg

I bought some more brake line clips for some of the pipe work around the front of the bulkhead. I'll have to make some aluminium plates to help glue them to the bulkhead as I've accidentally ran the brake line across at the wrong height. :oops:
The spreader plates came up in the bolt searches on ebay, so bought a pair to replace these.
DSC_0222_zpsdo48tleq.jpg

They are the originals from the rear seat belt bar and I got them galvanised. However, they had been quite corroded and had thinned, so when I saw those new ones at £4 each I thought best to get some.
Got the front seat belts mounted to the new YRM galvanised steel tub reinforcement section.
DSC_0223_zpsdrze267k.jpg

Then fitted the rear ones. Loosely anyway as I need to get someone under the wheel arches to hold a spanner :rolleyes:
DSC_0226_zpsfgrl1c3a.jpg

And then the other sides of the belts.
DSC_0225_zpsdbq3lwym.jpg

Got a bit more sound proofing in, but ran out of double sided tape. :(
DSC_0224_zpsqnez01y0.jpg

I just need to get some sound proof panels in between the three lids and I'll be able to get the seat box carpet stuck in. Then the hand brake and seats can go in.
 
Off to Wales this coming weekend with a bit of luck. I've got to mend my friend's Defender. It's the one whose clutch wasn't working a few weeks ago, and which I restored with a change of fluid and a pressure bleed. Well, it's happened again, so the black fluid I bled through must have been because it was dissolving its seals. I've got a master and slave cylinder and flexible hose on order. Gone are the days when I mess about with little rubber rings and so-called repair kits. I shall just replace the whole lot and give it a pressure bleed.
 
Back
Top