border
Well-Known Member
- Posts
- 3,517
- Location
- North East. UK
Well here we go again. Don't know what the hell Ive done this time.
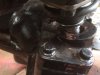
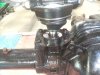
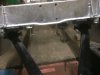
Trying to fit A Frame, finally got bolts in the Brackets through arms, not much room for nut on other end unless Ive got wrong bolts in.
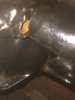
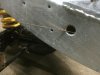
Anyway its a mile off the hole on top of Chassis.
Any Ideas Please.
Trying to fit A Frame, finally got bolts in the Brackets through arms, not much room for nut on other end unless Ive got wrong bolts in.
Anyway its a mile off the hole on top of Chassis.
Any Ideas Please.
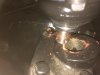
 .... it might feel like it doesn't want to simply because of the geometry of the setup ... but it will go - and, it doesn't look too far out in your pics