- Posts
- 16,475
Well, Friday before the Bank Holiday weekend was the day penned in for the matrix change.
Decided the BH weekend as it would potentially give me 4 days to do the job if my shortcut method didn't workout and I would have to strip the interior!
LR book this job at 16.7 hours to get the HEVAC unit out and that is with trained guys with all the tools and toys to do the job!.....I gave myself the weekend to do it.
The full procedure is to remove the interior, including the seats, steering wheel, centre console, gear selector, handbrake, wheel arch (to get the loom out) etc....read RAVE, it is quite an intense bit of work....then remove the HEVAC unit complete and then strip that to get at the heater matrix from underneath the unit.
I had a plan....a shortcut if you like, that I detailed in a previous thread of mine....
My plan was to see if it was possible to remove the heater matrix through the side of the unit in a similar manner to how you can do the P38 matrix. I did loads of googling and research, looking at photos, reading what very little there is out there about removing the HEVAC unit.....in the whole of the internet, I have found very sparse to no information on how this is done....maybe I am looking in the wrong places, but I found close to naff all.....
Roll on to Friday.....
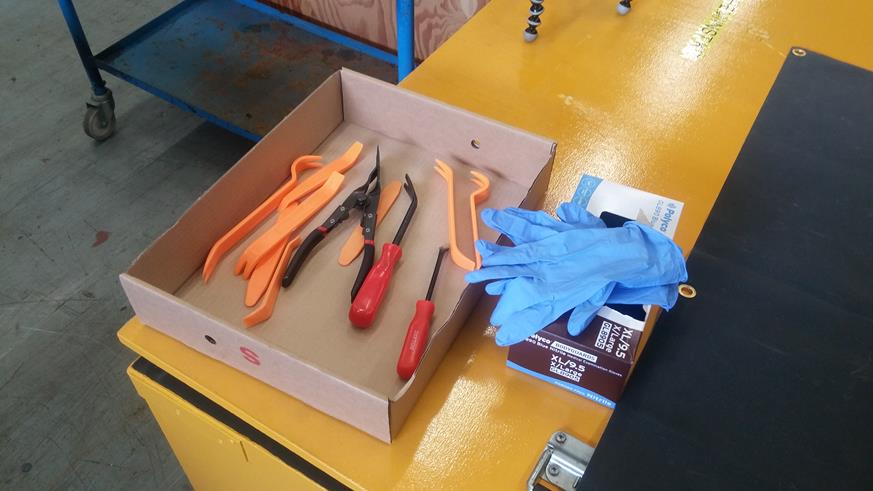
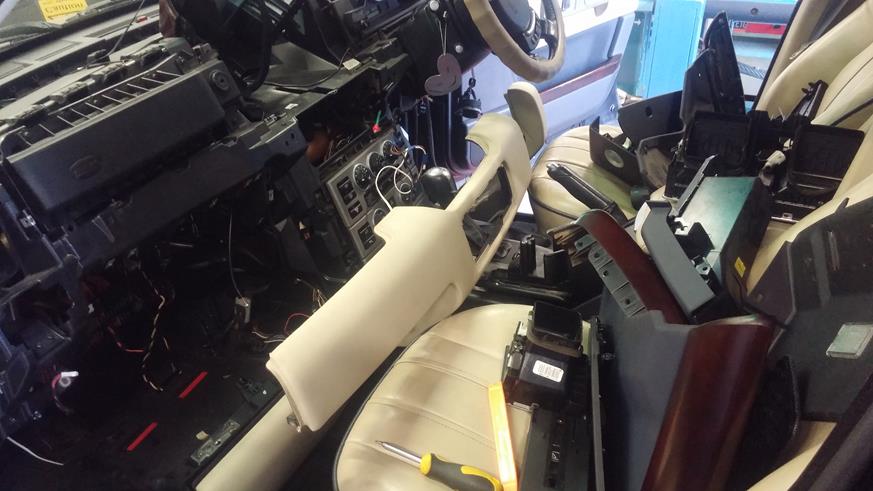
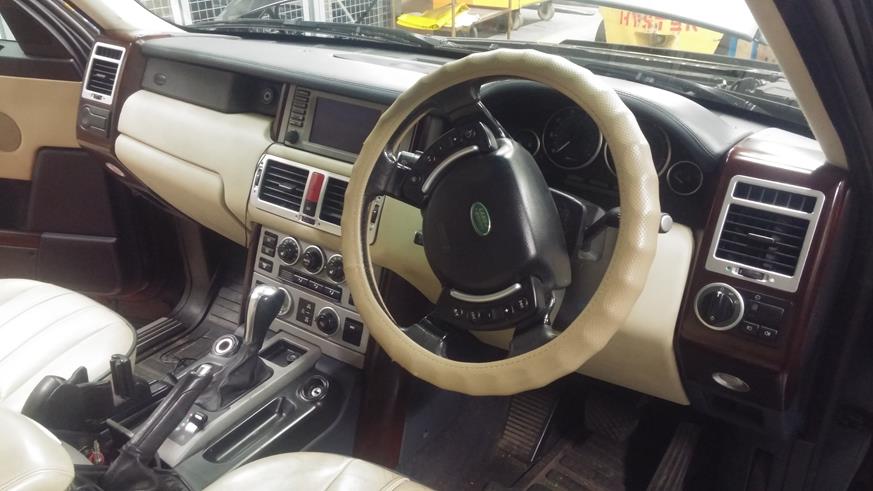
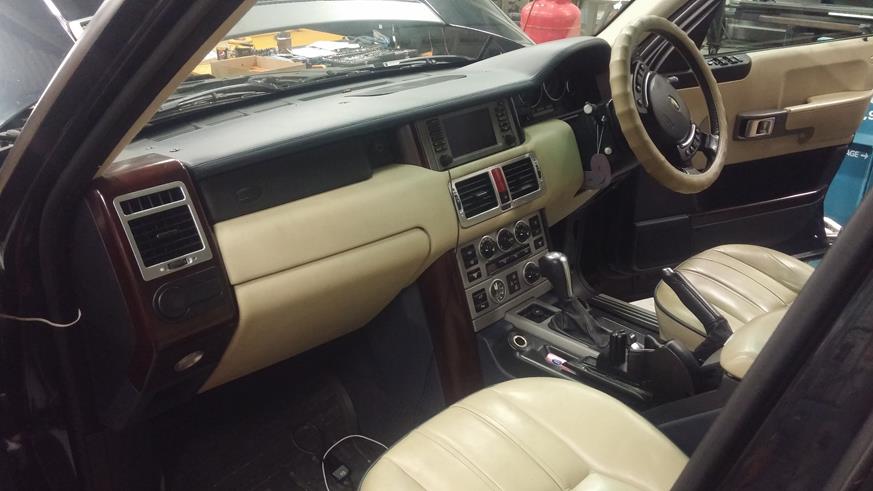
Armed with trim removal tools and clean gloves (when working with interior parts (esp. white parchment) it is advisable to change gloves regularly to prevent marks on the trim panels) the plan started....
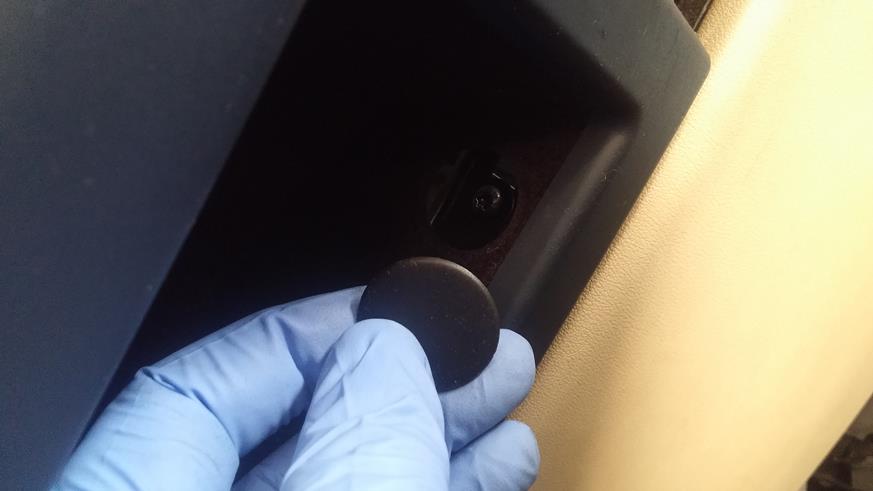
First up was to remove the tranmission tunnel side pieces
By removing the single torx screw....
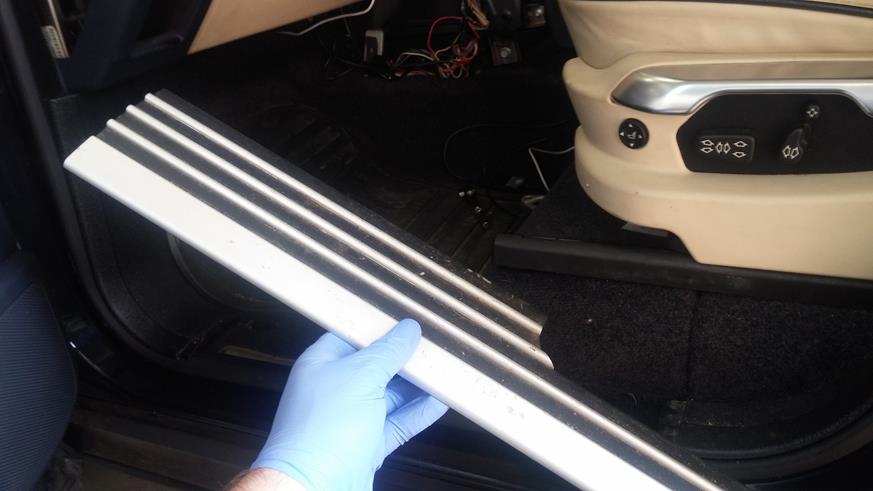
And then carefully pulling the wooden end to the side and then rearwards to release the panel
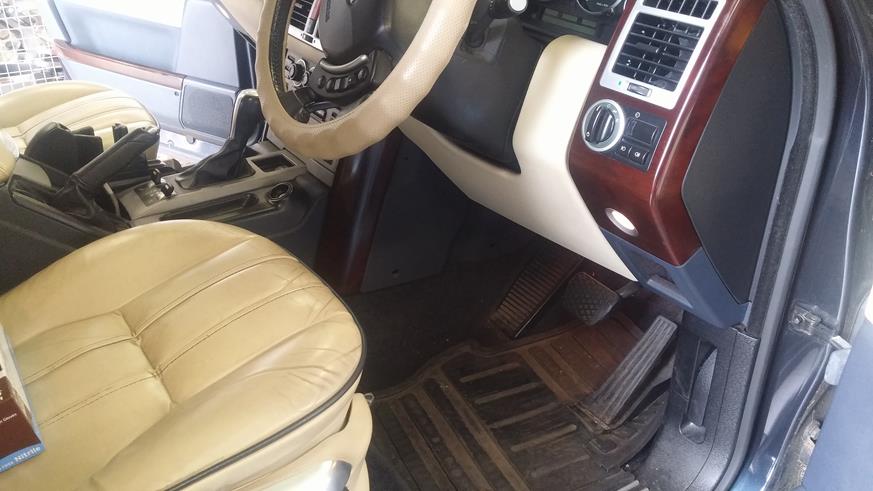
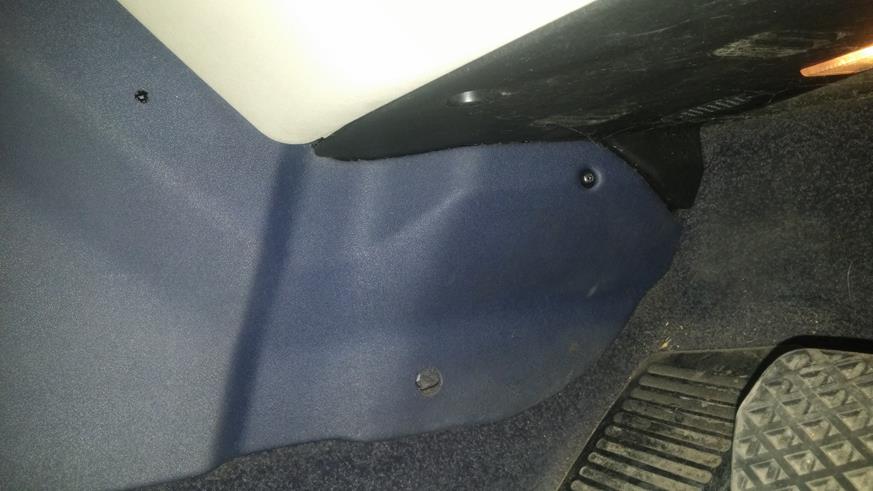
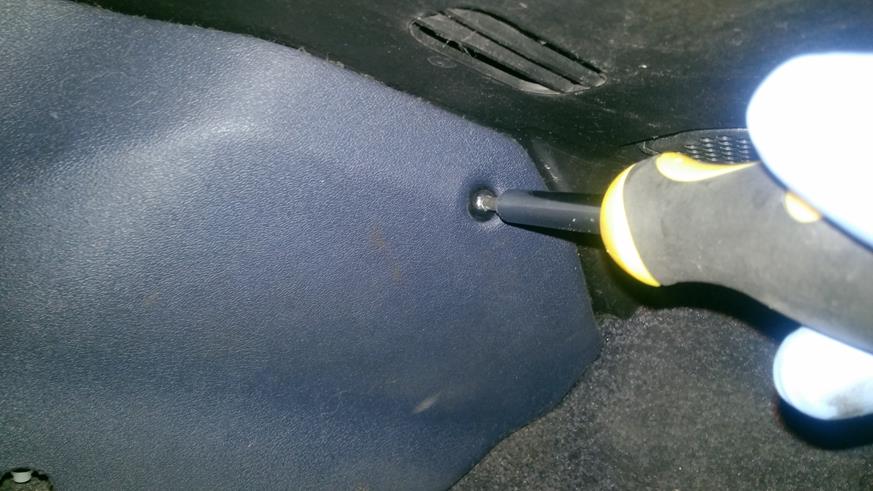
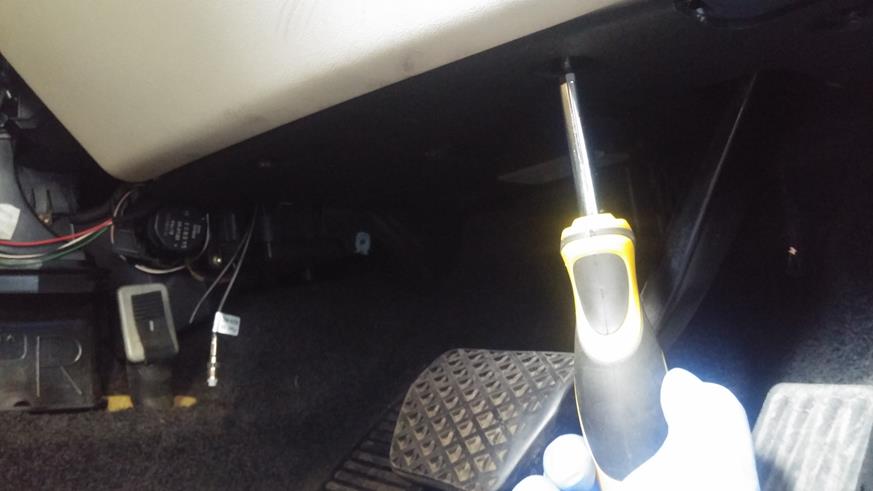
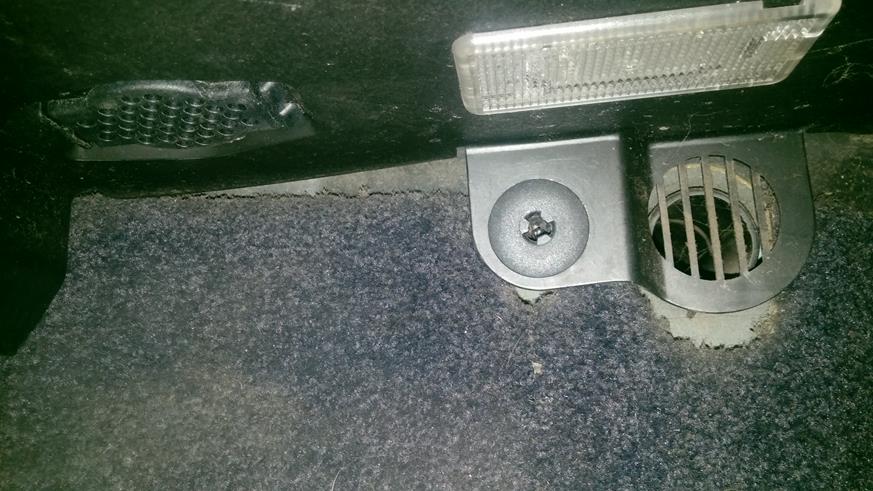
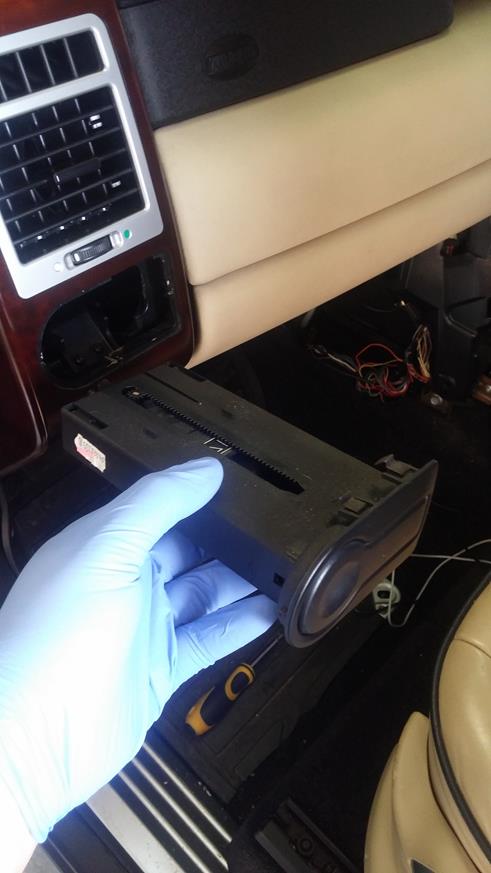
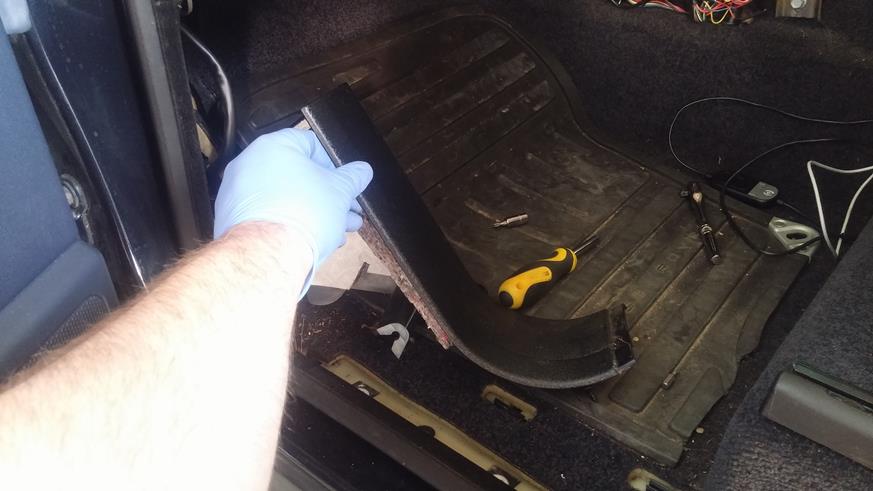
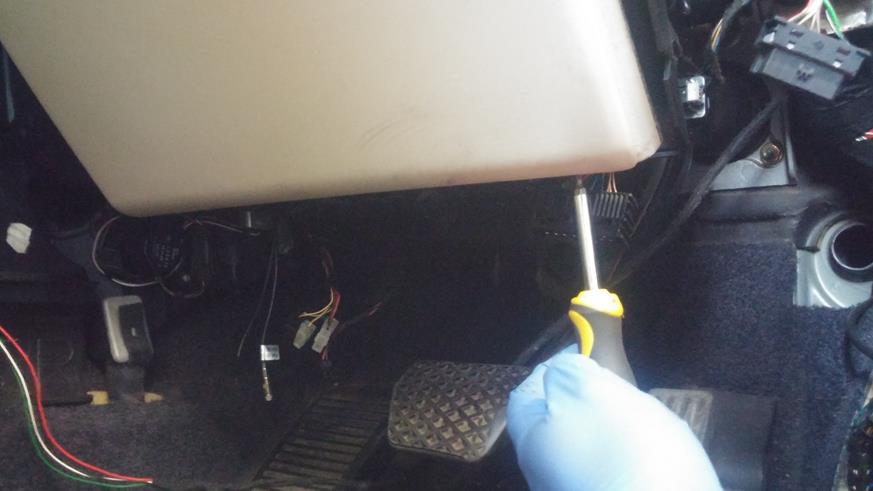
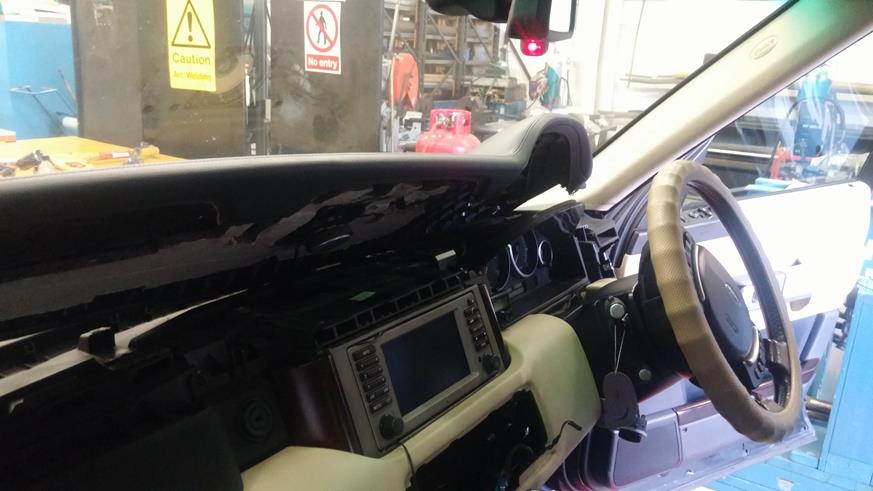
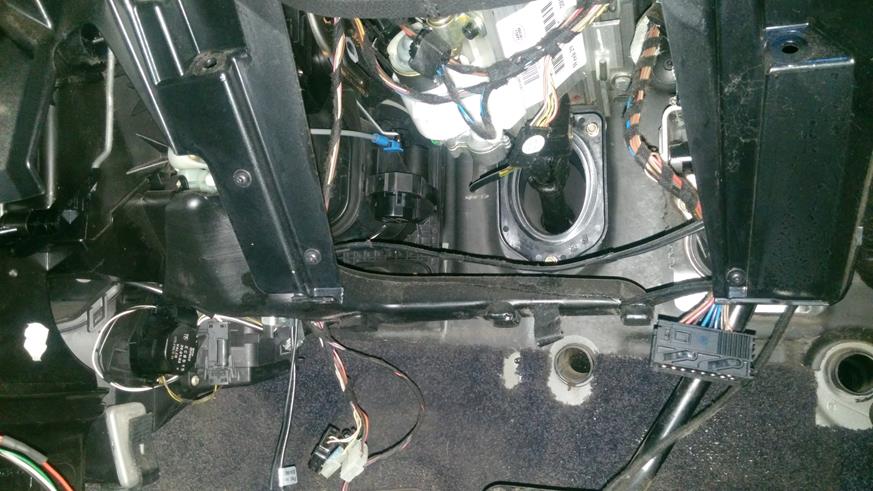
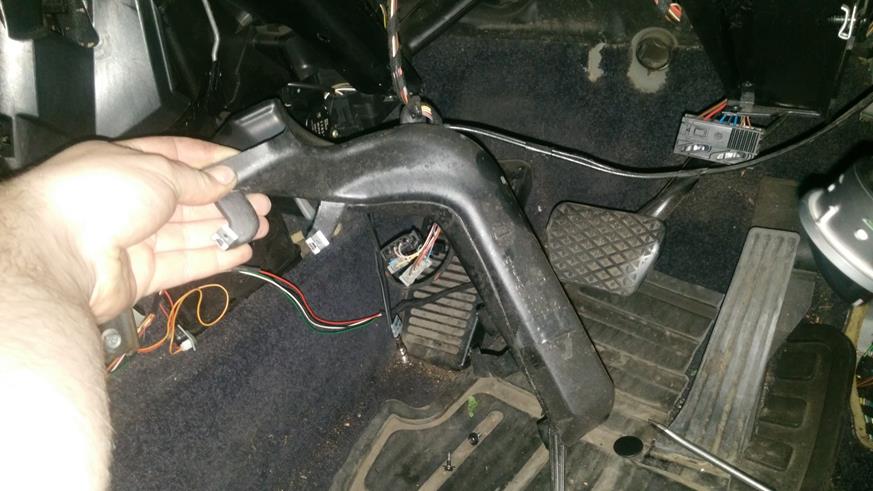
Next is to remove the under dash trim panel...two torx bits on the front edge and a weird plastic thingy on the bulkhead behind the brake pedal....
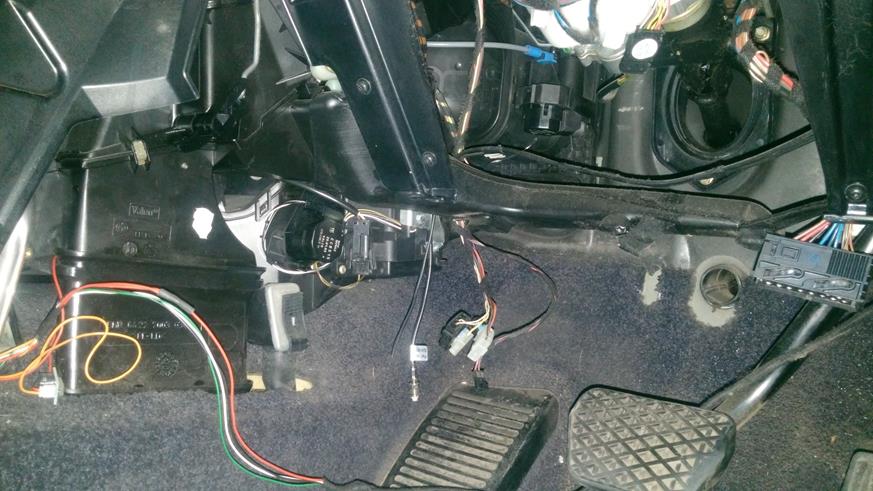
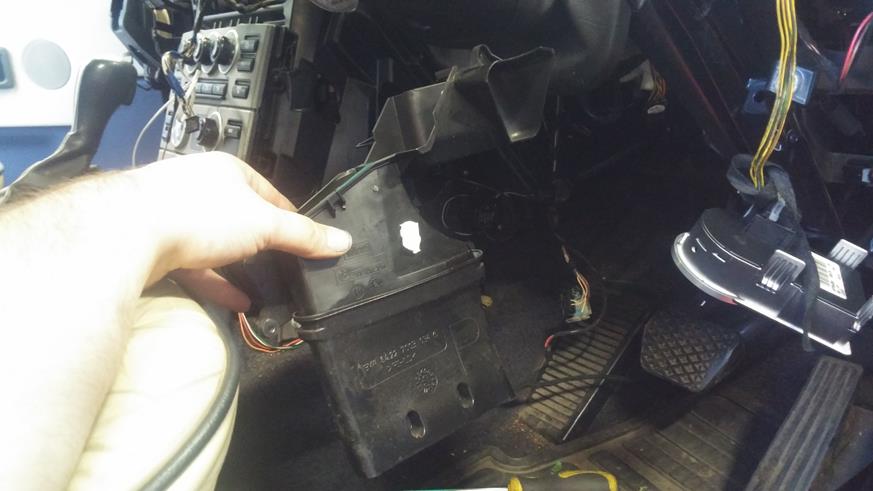
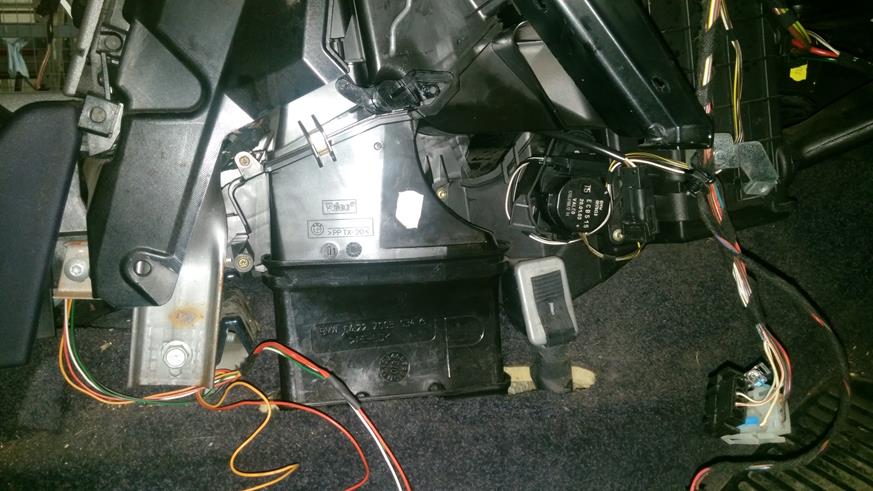
Drop the panel down and remove the connections to the speaker unit and the footwell lamp
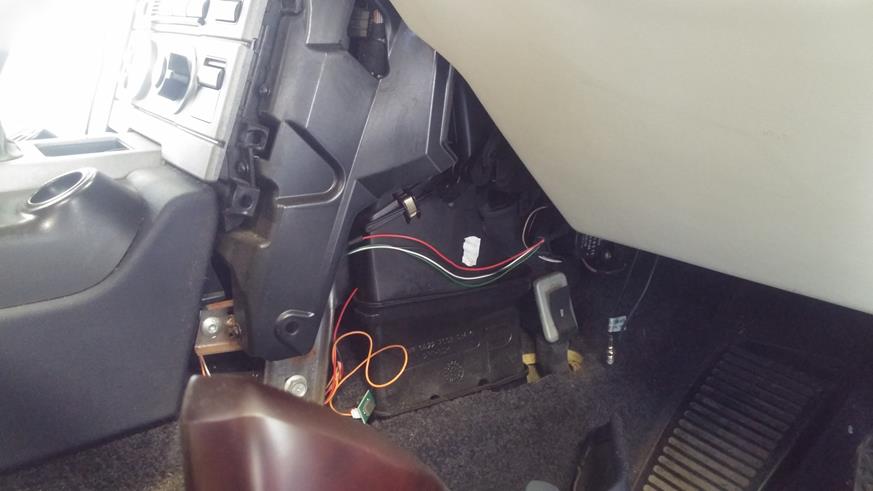
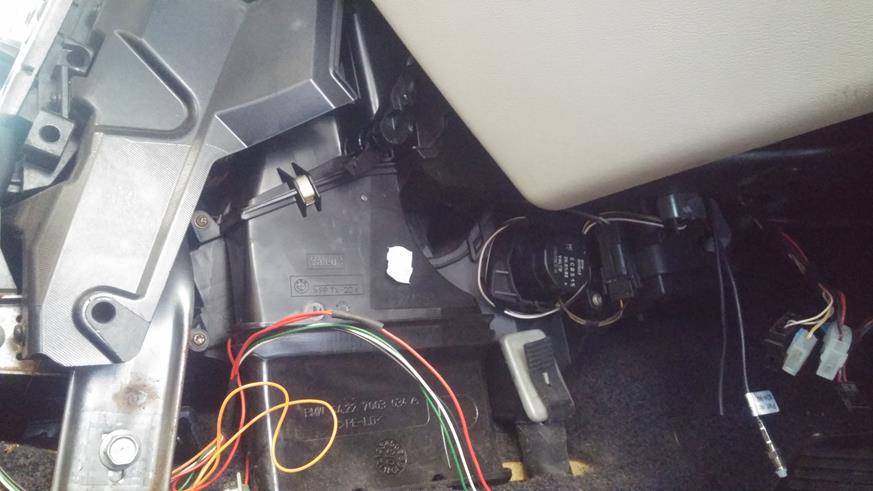
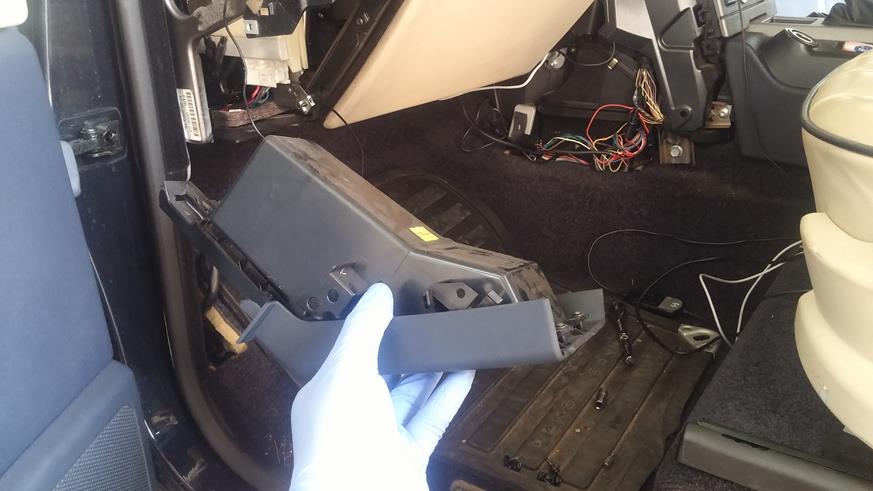
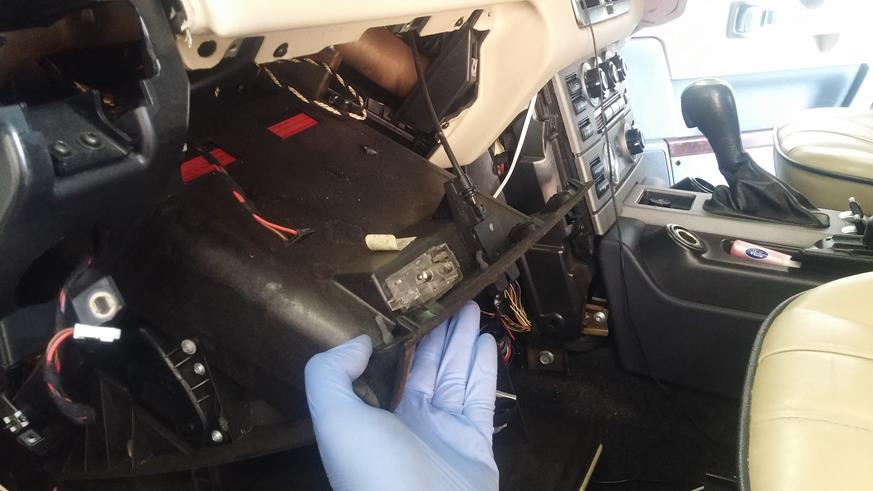
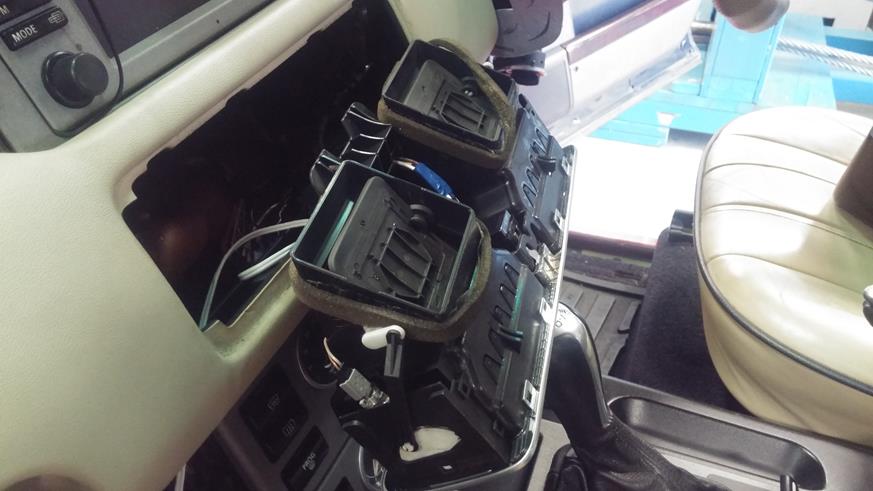
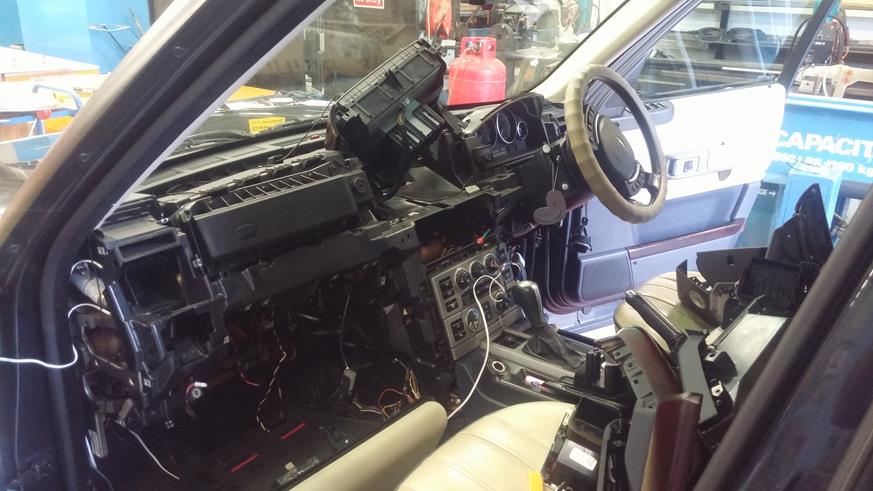
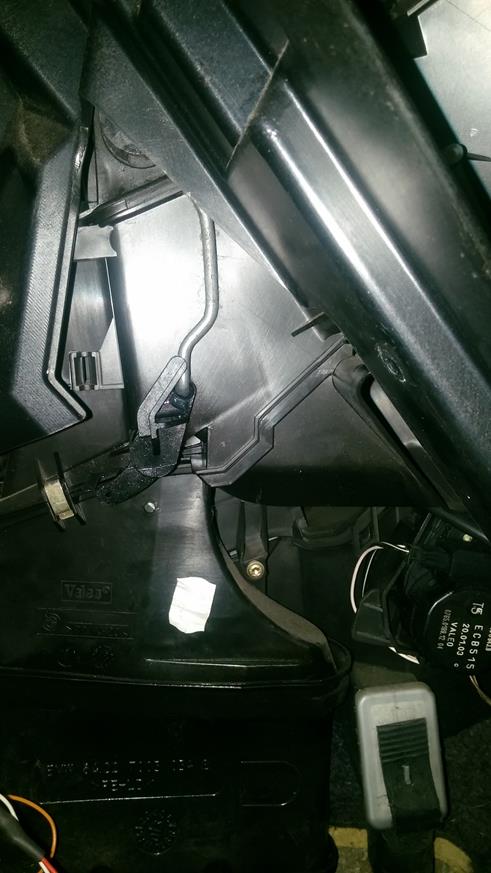
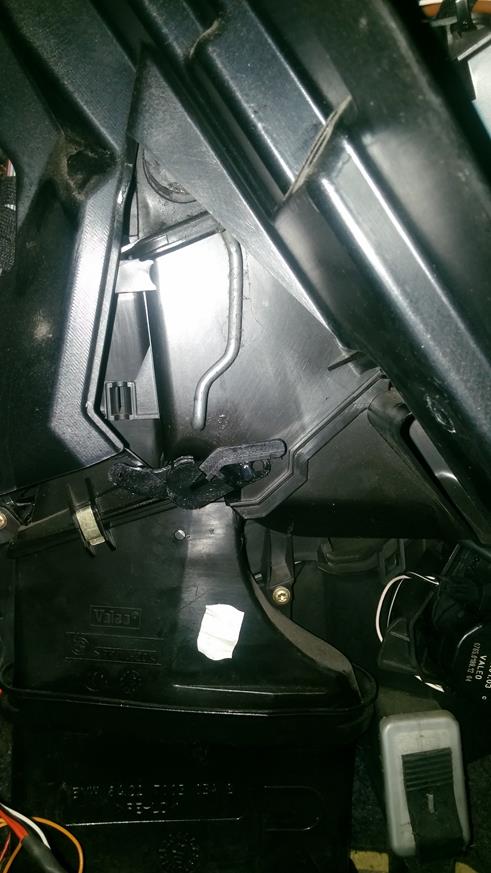
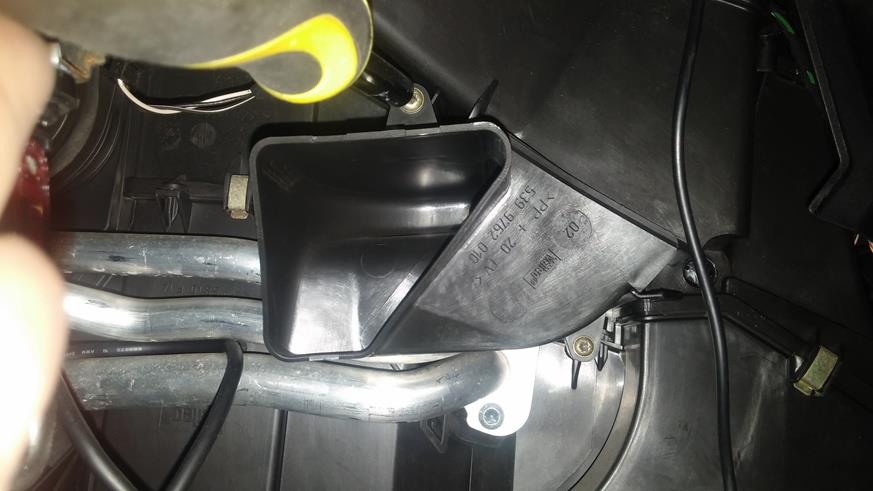
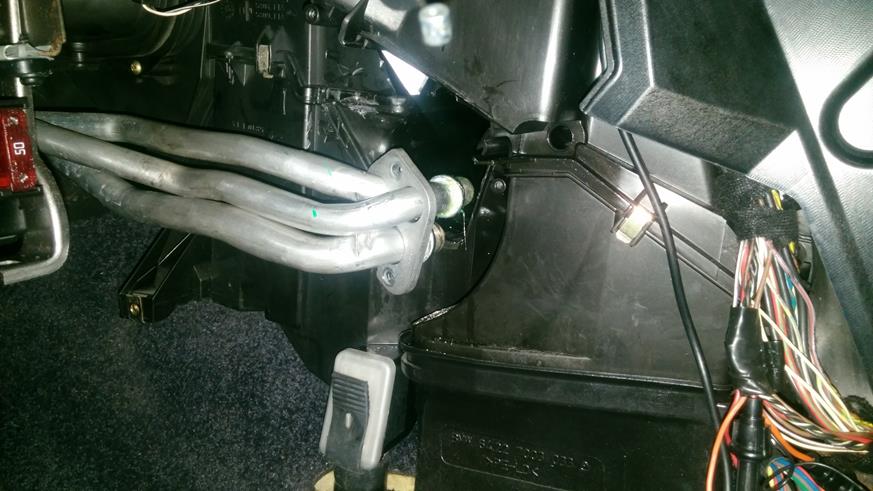
The side of the heater unit is shown here. The part that needs to be removed is the outlet horn that goes into the floor for the rear footwell heaters and also it goes to the front footwell heaters.....
My plan was to see if this part could be removed without removing the dash lower fascia panel (the white/cream part)......alas the part is buried quite a way up under the dash...so my first idea of a shortcut method was not going to work.
So I made a coffee and tended to my metaphorical wounds.
After a few minutes, I decided that I still didn't need to strip the whole interior out, all I had to do was remove the lower dash fascia panel......lets read RAVE on how it is done.....looks reasonably simple enough, although RAVE says to remove the steering, wheel, rotary coupler and steering column shroud....sod that, I don't think it was necessary so I decided to crack on and if I need to, I will...
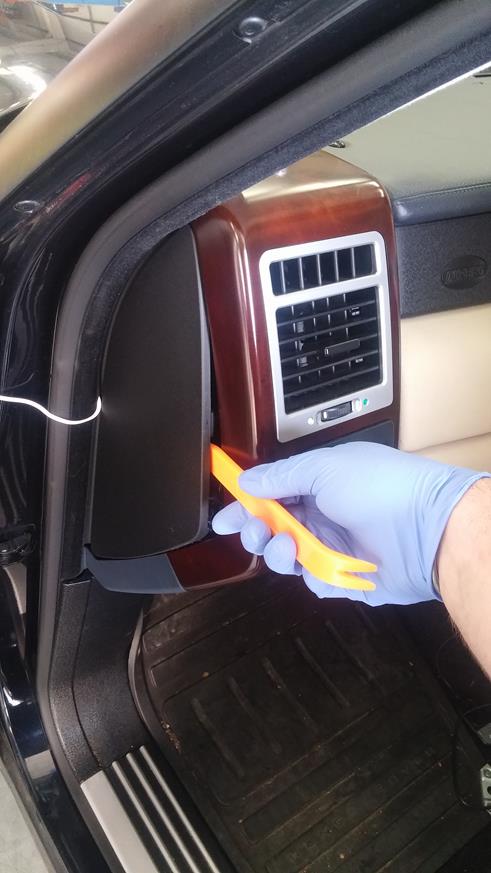
First is to remove the upper and lower dash side trim pieces....
Lever off the side panel
On the passanger (UK) side, remove the drinks holder
And the torx screws holding the side panels on
Remove the side air vents. There are tabs that arre visible when you look inside the air vents, these need to be levered inwards and then withdraw the side vent.

The final torx screw on the upper trim piece is hidden under the air vent!!
With a tug, the upper side trim piece comes off, remove the connection to the lamp.
The lower side trim piece has a torx screw hidden under a plastic gromet, remove this screw, the sill panel, the A pillar cover....this uncovers a crew that holds the lower side trim panel in place.....then withdraw the panel.
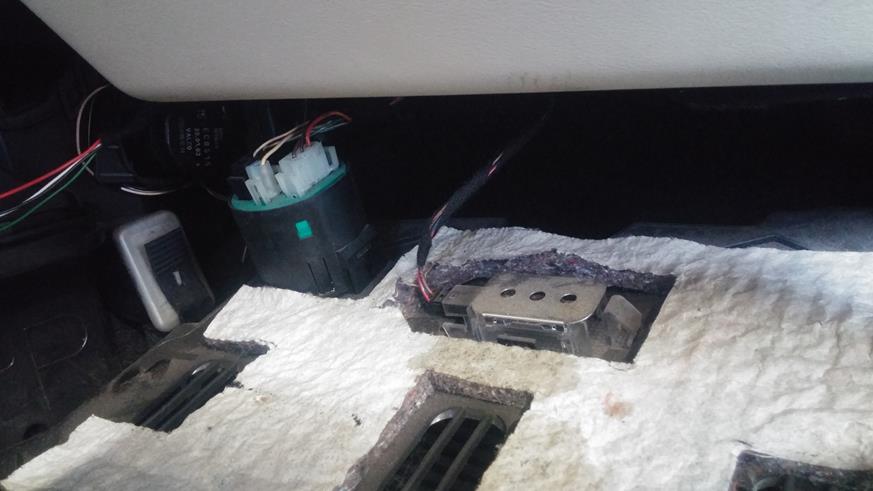
Next, undo the fixings holding the under dash panel on the passanger side and remove, don't forget to undo the lamp connection!
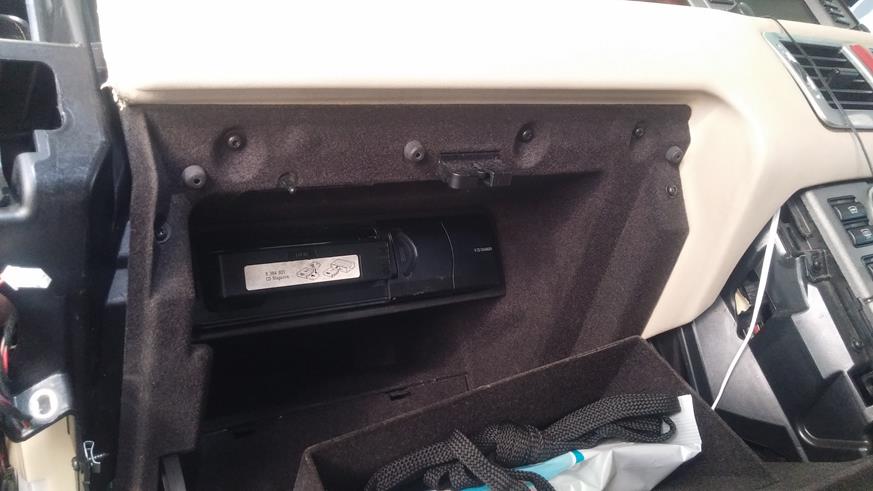
Now open the glove box and undo the 5 torx screws on the upper edge, and undo the two screws under the glove box, then withdraw the glove box as a whole unit including the CD player!
Release the glove box lock release cable
Now do the same on the drvers side dash end trim pieces....remove the connections to the headlamp switch and the diagnostic socket....
To get the diagnostic socket out, first open the socket cover, then slide the clip sideways and wiggle the socket out of the holder.
Plug the headlamp switch back in as if you still have the battery connected, the headlamps come on when it is removed (this is a failsafe....if the switch was to fail, the headlamps will come on regardless, this allows you to atleast drive at night if the switch pack fails at night!)
Remove the centre vents in a similar manner to the side vents, remove the connection the hazard lamp switch, the cable to the air temp control and the two connections to the lamps.
Now undo the torx screws around the glove box opening (there are 5 of them - 3 on the front edge and two underneath the top lip)
Now undo the 3 torx screws on the drivers side. Two underneath and one on the side near the top of the fascia panel.
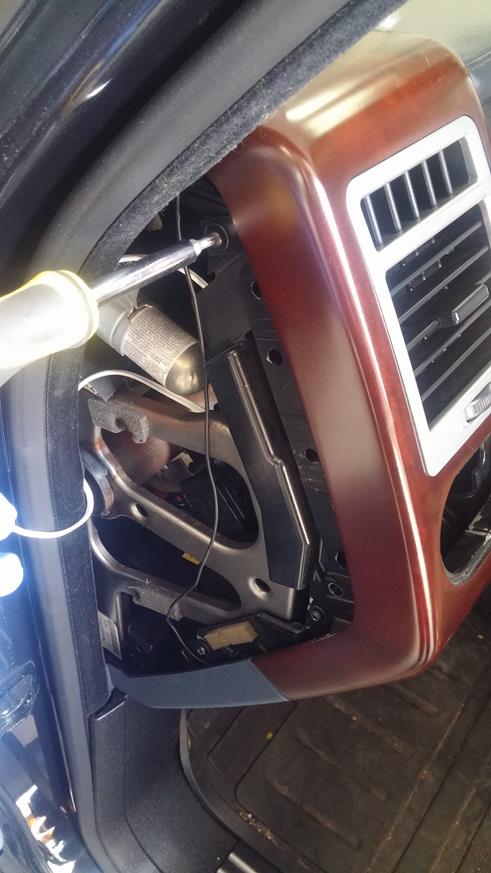
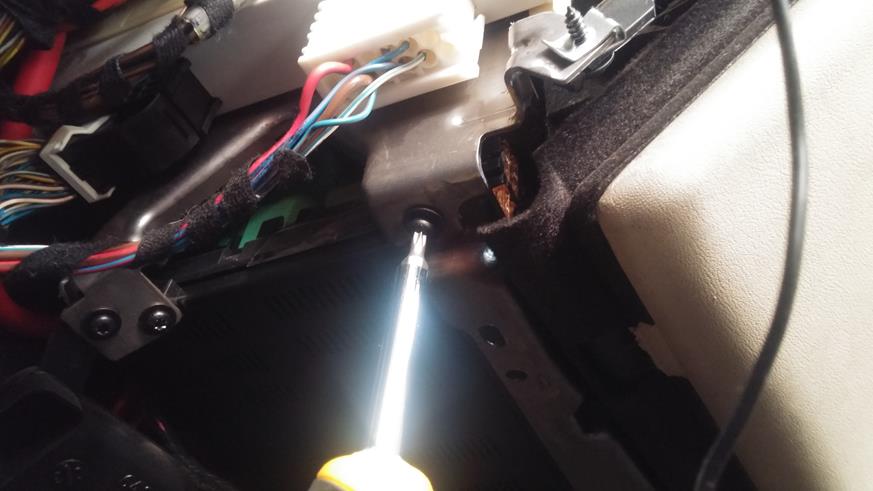
NOW........RAVE doesn't make mention of a final torx screw in the centre......I pulled at the fascia for a few minutes wondering why it wouldn't unclip from the centre section......(there are trim clips that hold the fascia panel onto the dash framework as well as the screws).......
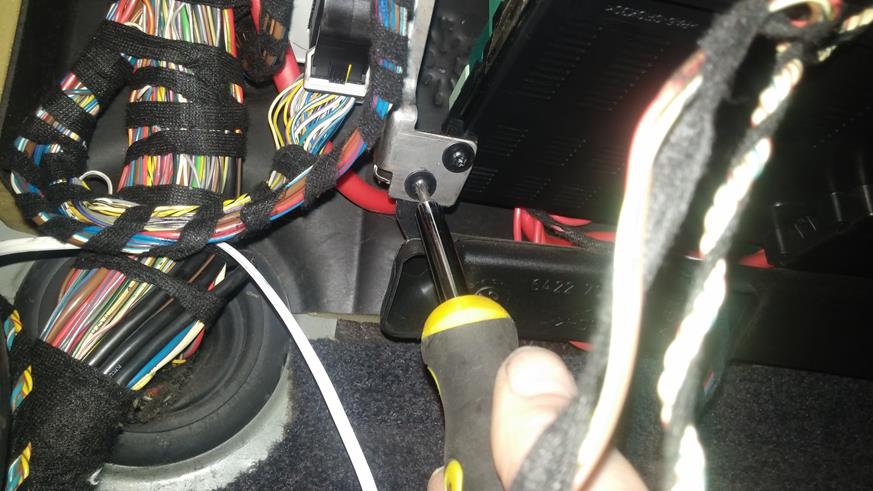
To get this final torx screw out, you have to remove the Sat Nav (Vogue etc) or the MID (HSE etc) to get at it!
Sooooo......undo the torx screws on each end of the upper fascia panel

Then the 7 torx screws that hold the top panel on (I took the speaker grill out, but there is no need to do so)
Now slide the fascia panel rearwards and then up
There are 4 torx screws that hold the Sat Nav (etc) unit in place
Lift the unit out

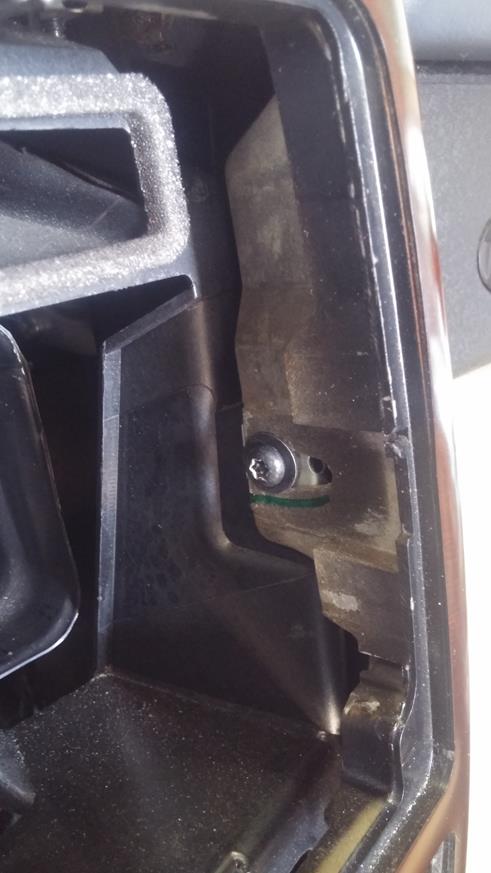
You can now get to the final torx screw
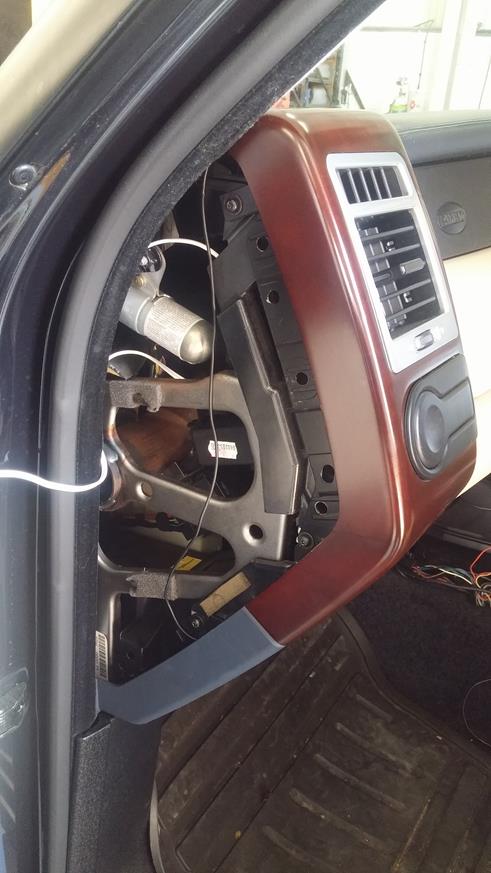
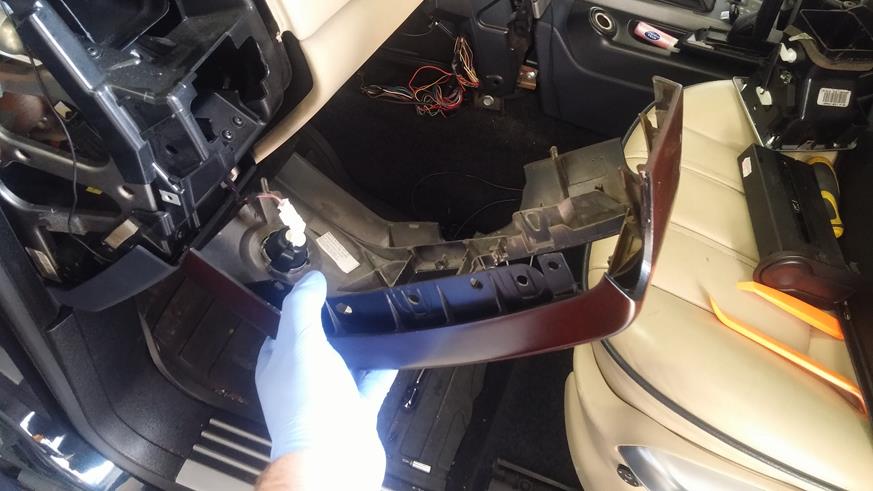
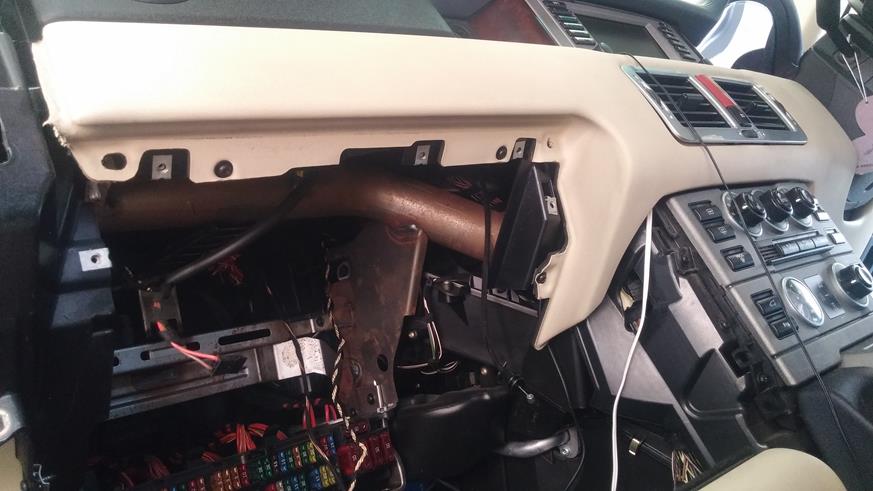
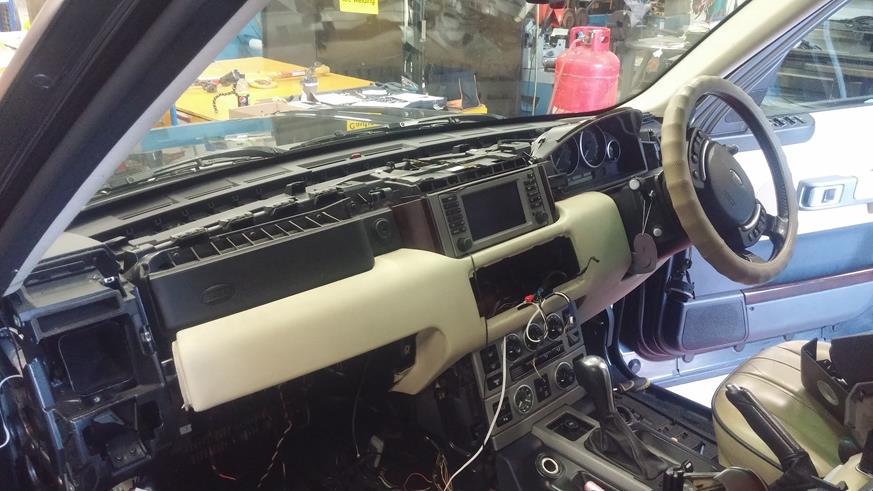
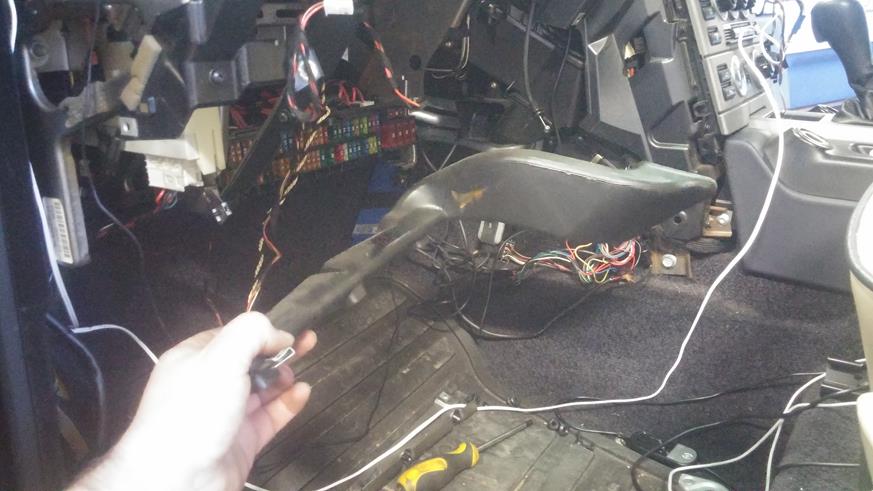
You can now pull the lower dash fascia panel off
And remove from the car
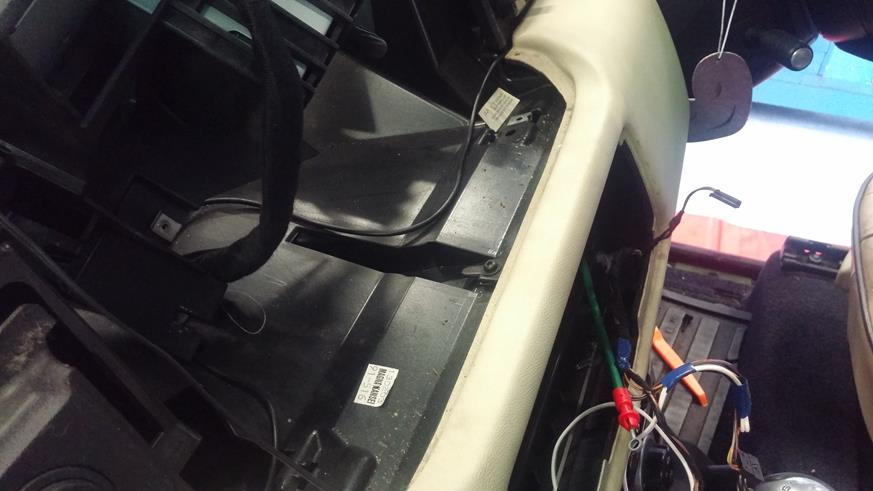
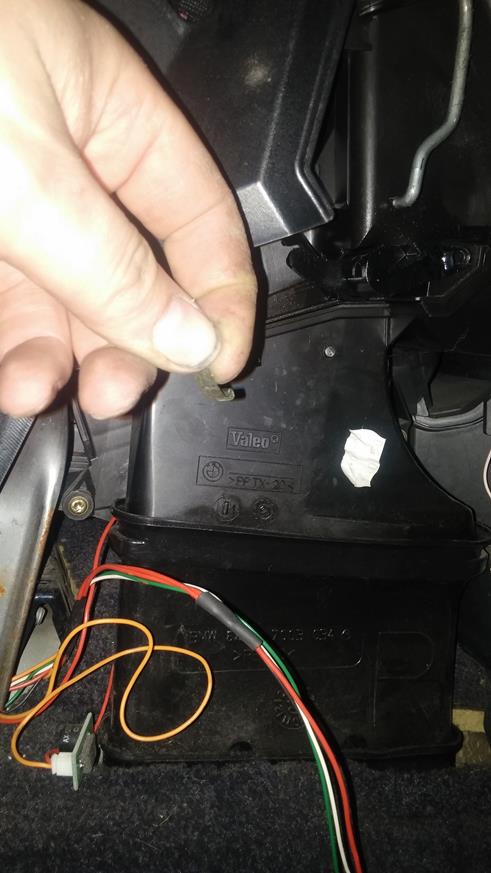
The glove box CD player wiring is surprisingly long and can be put outside the car as you will need access in the foot well.
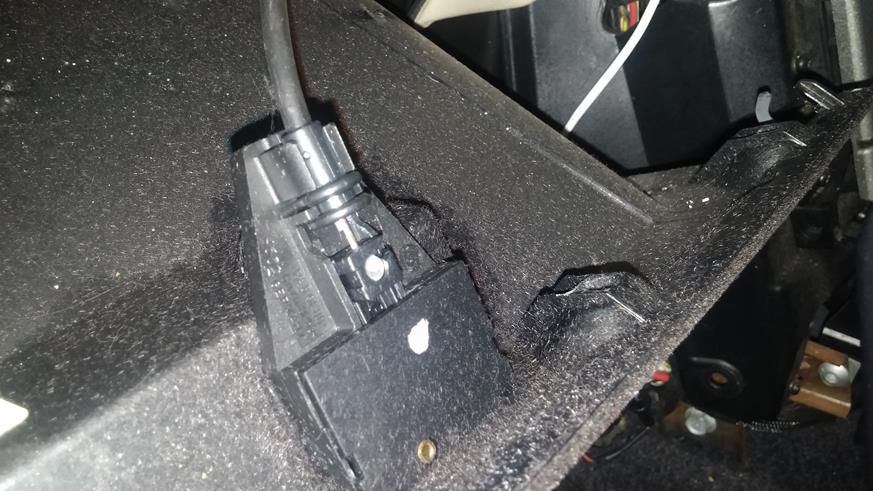
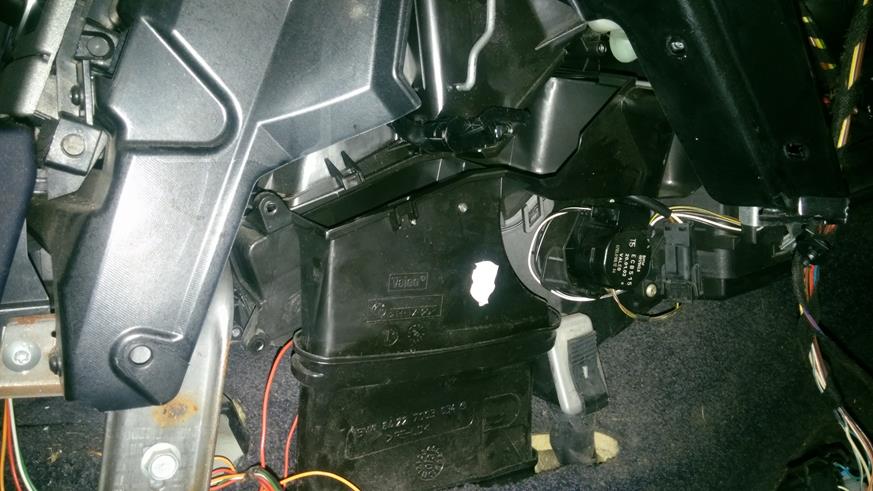
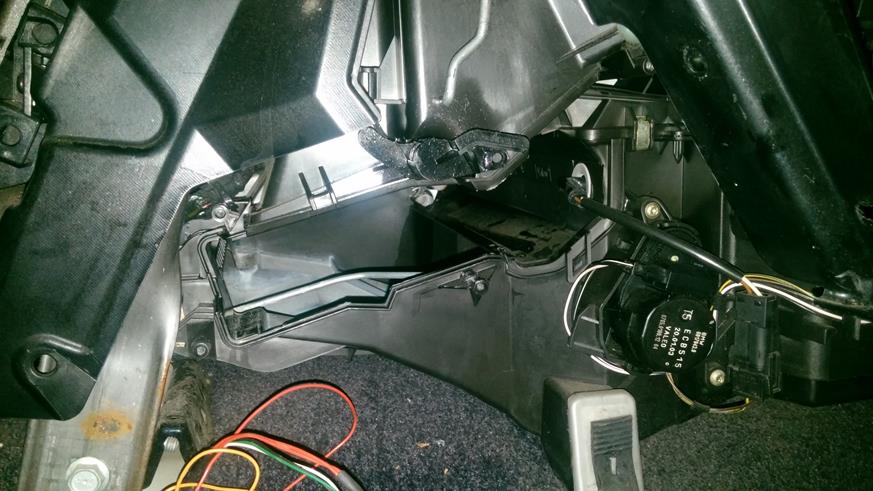
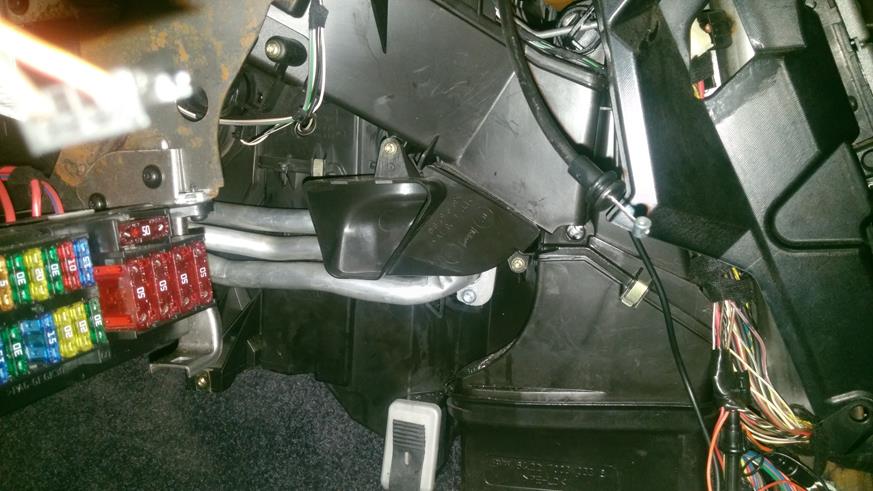
OK....from the passanger side, this is the part that needs to be removed to gain access to the heater matrix pipes.
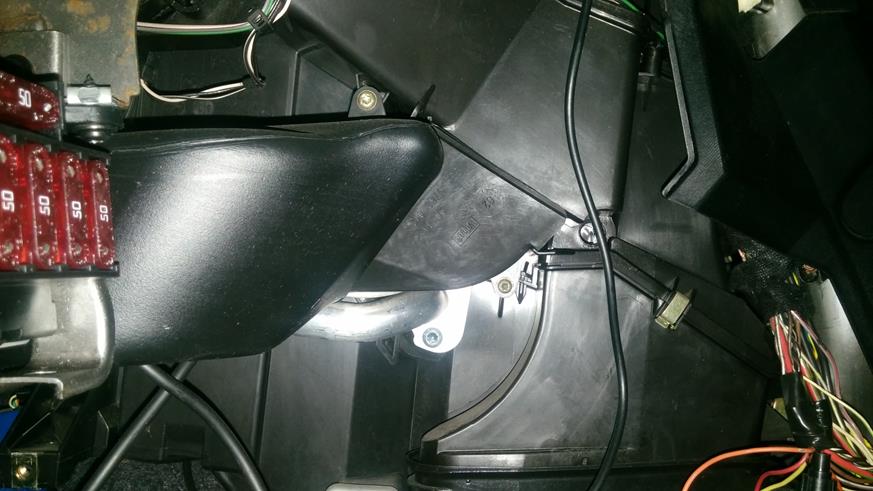
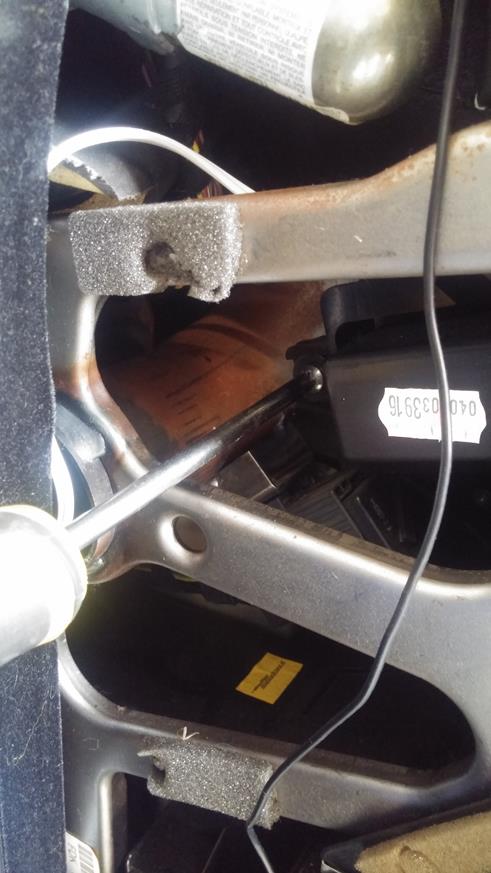
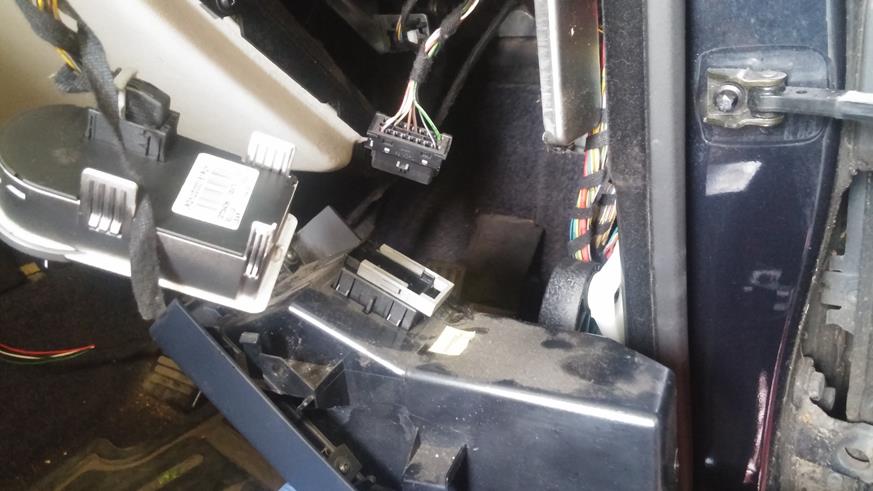
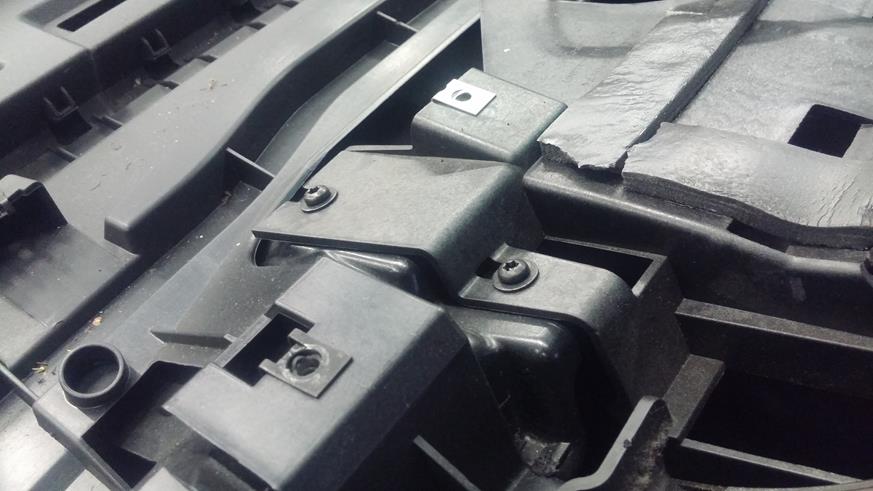
On the drivers side, the part that needs to be removed to access the heater matrix is obscured slightly by the piece of dash support framework...but this is only plastic and can be moved slightly to gain access!
Now we need to remove the footwell air duct that connects to the parts we need o take off....
Simple on the drivers side, two (or was it 3 ) torx screws and the duct comes off
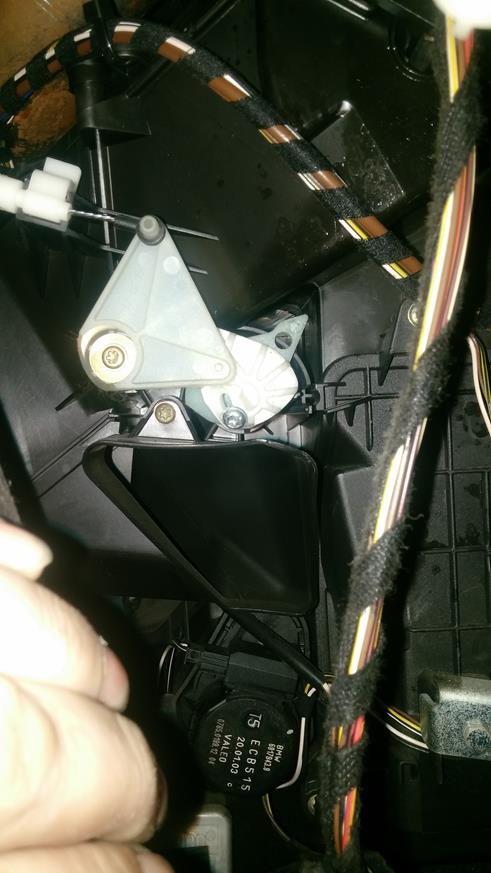
Now we need to remove the control rod to the vent flaps, carefully remove the rod from the actuator and rotate the actuator up so the flap is closed.
Next is to remove the clip....
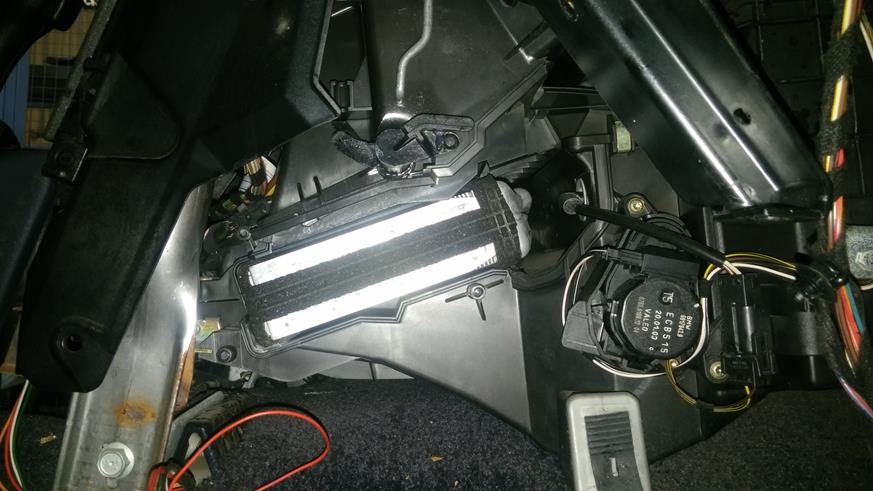
The 4 torx screws that hold the piece on....the forth is hidden up unde rthe dash by a white control quadrant
Slide the piece out sideways
And then wiggle past the dash support frame (that can be moved slightly to get the panel out)
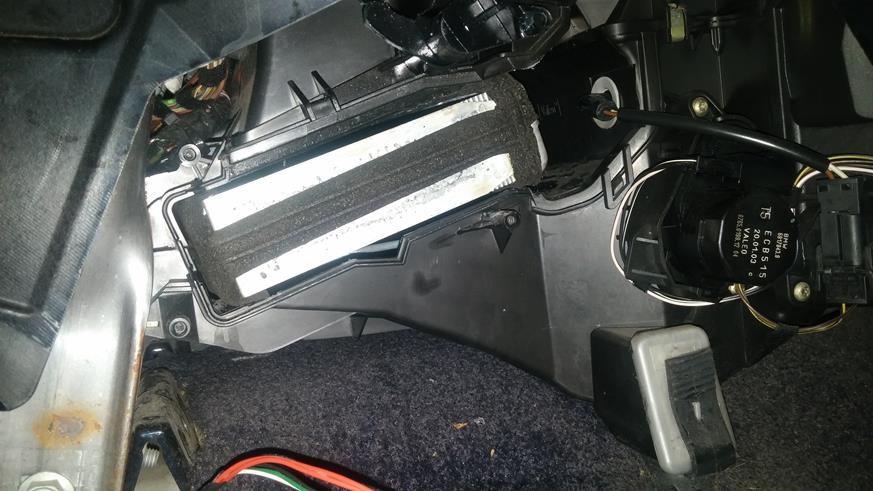
And there is the heater matrix in all its glory....
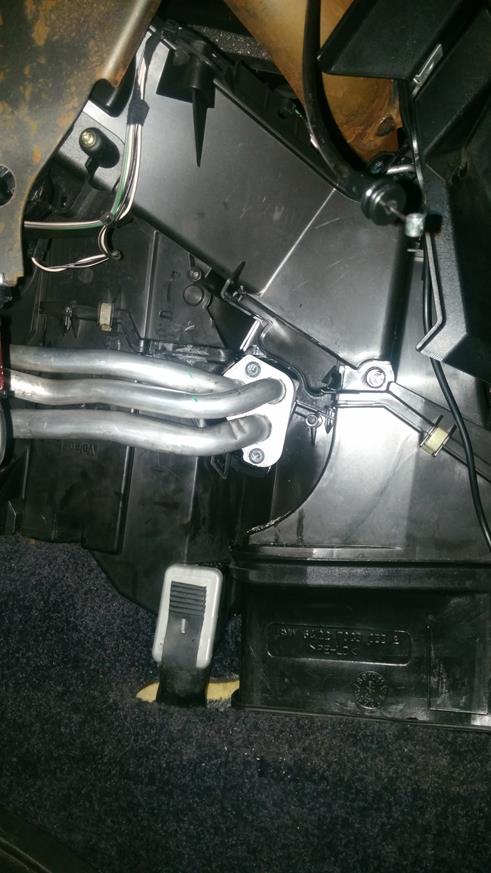
Now to the passanger side. Remove the foot well ducting, there is only one torx screw and then remove.
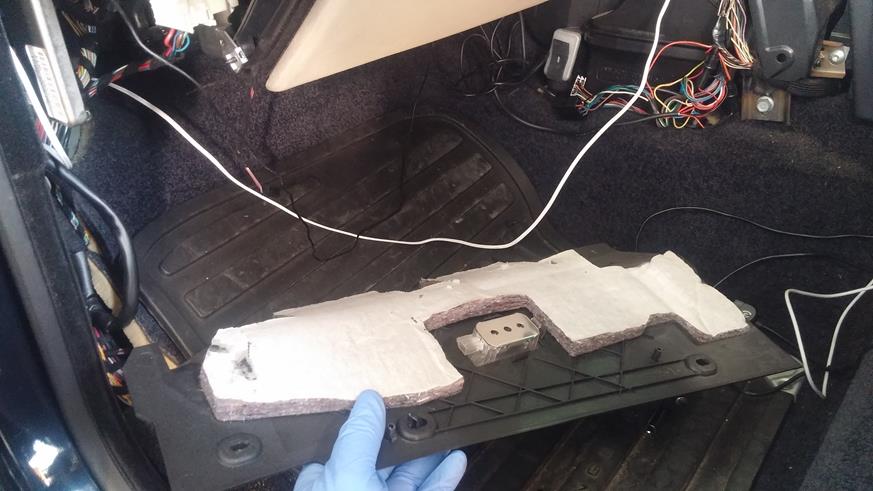
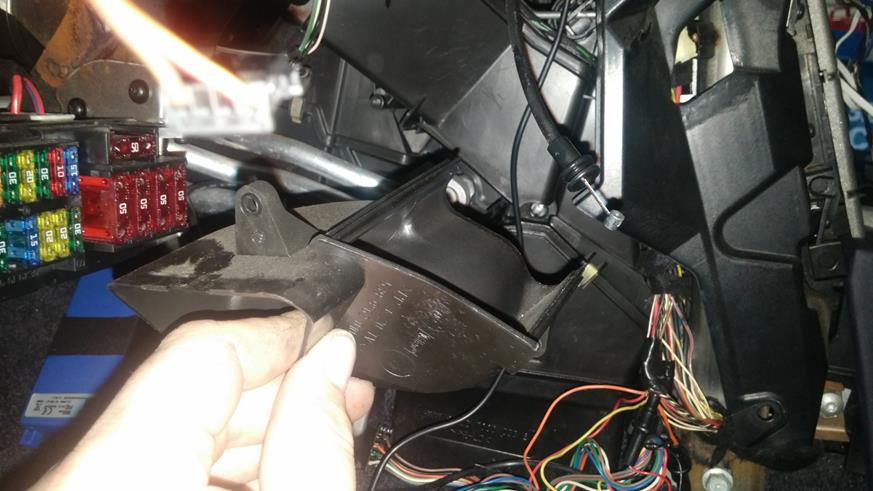
This is the air outlet horn that needs to be removed, only 2 torx screws and slide it out sideways
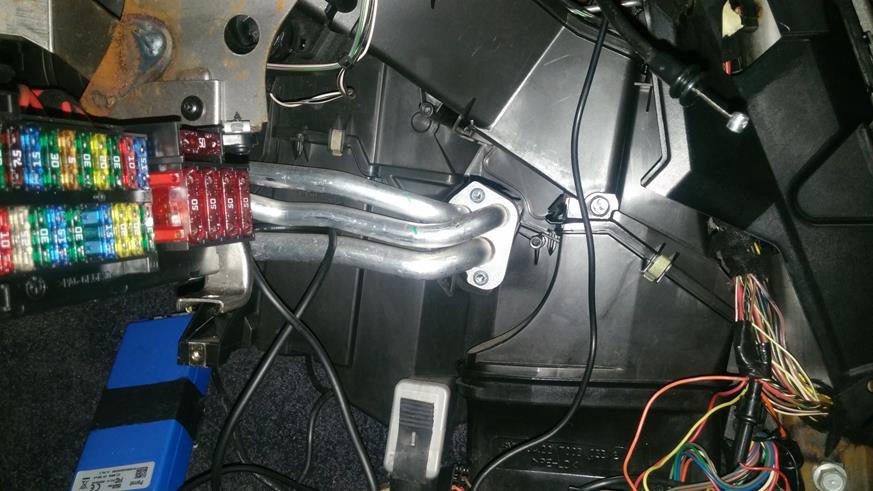
The heater pipes are now visible
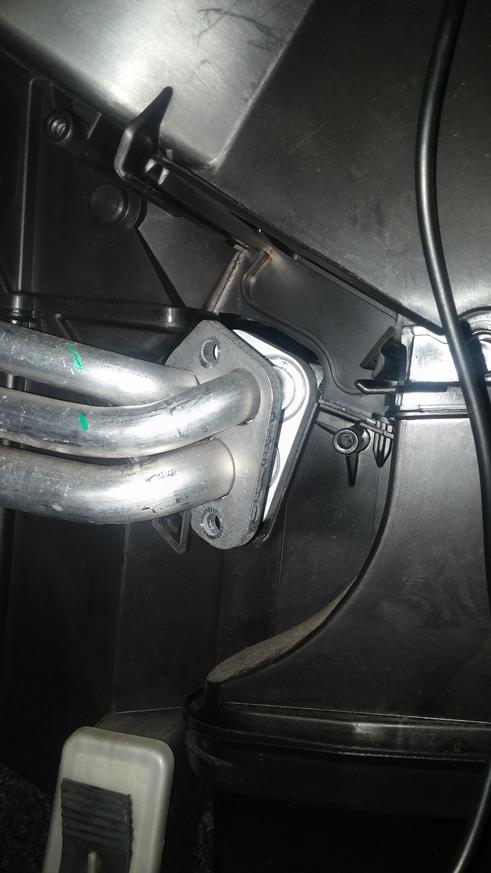
Undo the two torx screws holding the pipe clamp plate in place
Now comes the fun........the pipes can be (as mine were) sodding tight to get out....they idealy need to come out directly sideways to prevent them binding....but as the pipes are still fixed into the bulkhead, when pulled they will pivot at the bulkhead end and start binding....you just have to be careful and paitient.
This was for me the most time consuming part.....I used penetrating oil to get into the join and lube up the O rings and the ports.....gave them a wiggle, more spray, more wiggle...and slowly they came out.....they can put up a fight so be prepared for it.

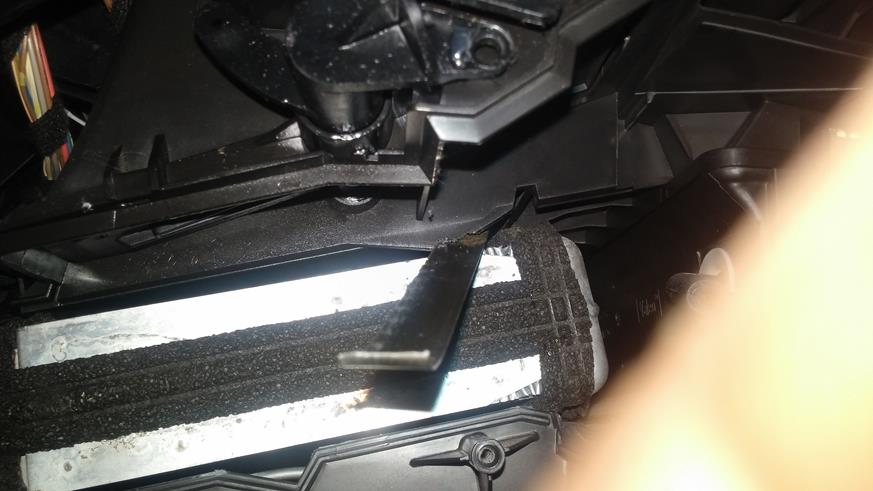
Now on the HEVAC housing there is a small plastic protrusion that prevents the matrix from being slid out sideways.
Taking a section of hacksaw blade, carefully trim this back to allow the matrix to slid out.
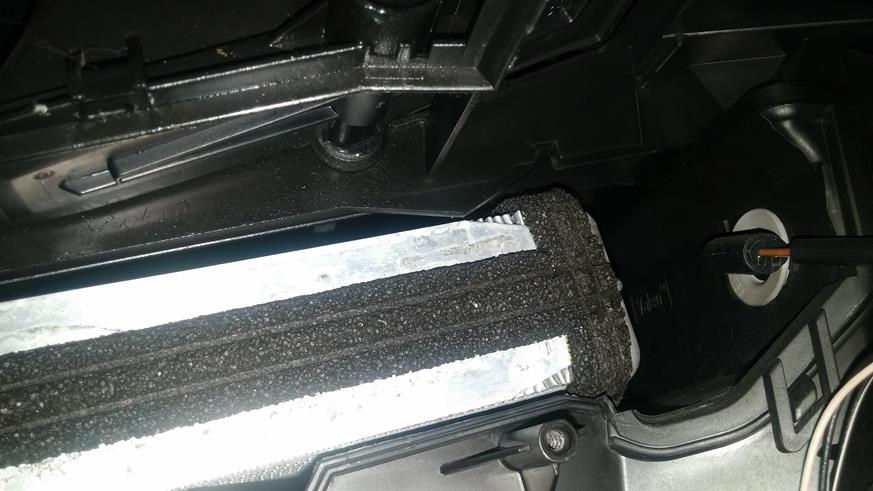
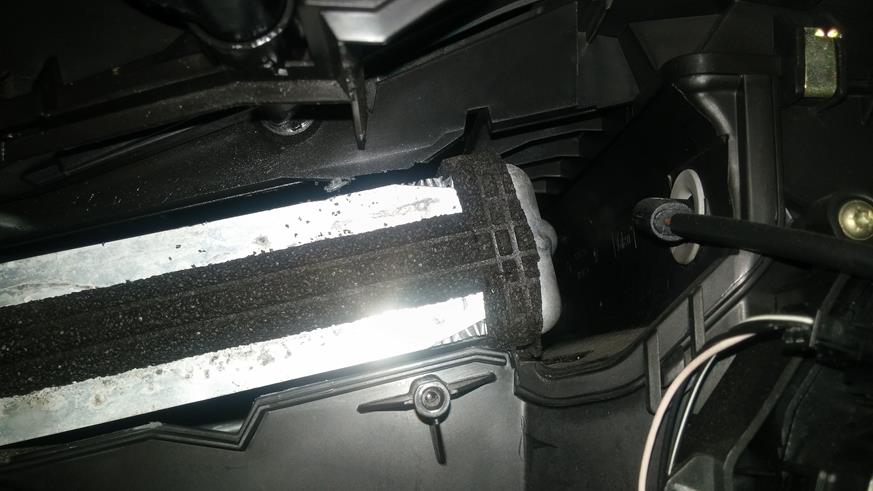

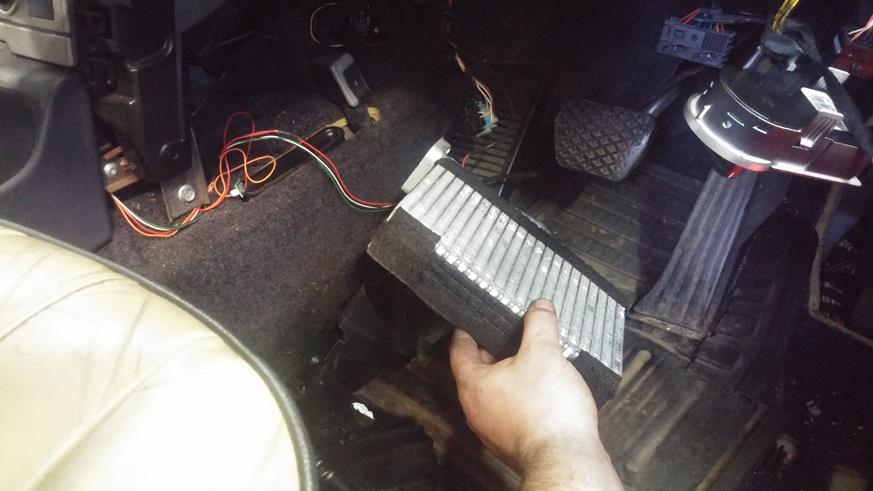
BINGO....the little fecker is out......
Using a spare set of pipes from the spare HEVAC unit I bought, I piped up and put in the sink to see if I could spot the holes!
Vid above shows the holes in the matrix!!
OK, time for reassembly.
Always use new O rings and lube them up before refitting. Our workshop does hydraulic fitting work so we have seal and O ring lube abound!!
This is where the replacement matrix will slide into
Slide in the replacement matrix carefully
And start putting the side air outlet horns back into place. To help get the screws back in, use a blob of vaseline, O ring lube, grease or similar to help the screw stick to the end of the bit and refit.

Put the air outlets back
Refit the pipe s and clamp, the refit the outlet horn
Start putting the dash back together, carefully alighning all the trim clips into place

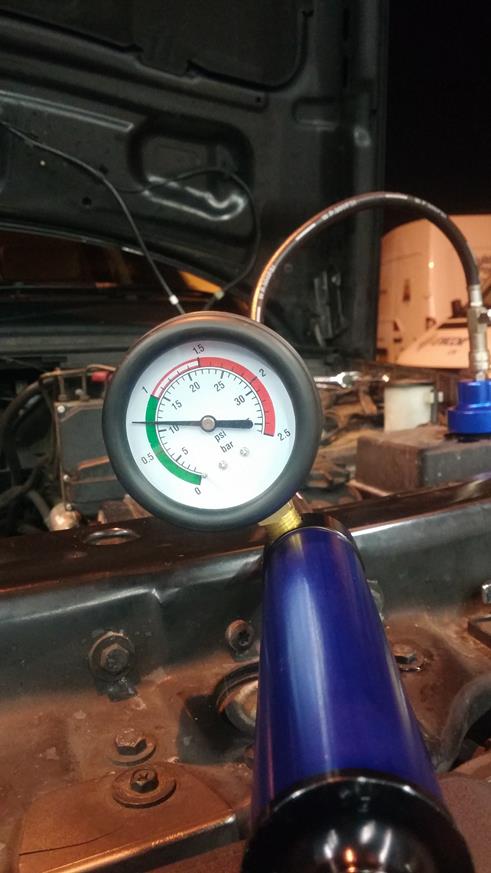
Refill and bleed the system through and carryout a pressure test to ensure the pipes are sealing correctly (I had to reassemble the dash and then get the car outside to refill and bleed the system.....hence why I did the pressure test after it was all reassembled....it would be wise to do this before you put it all back together again!
start pressure
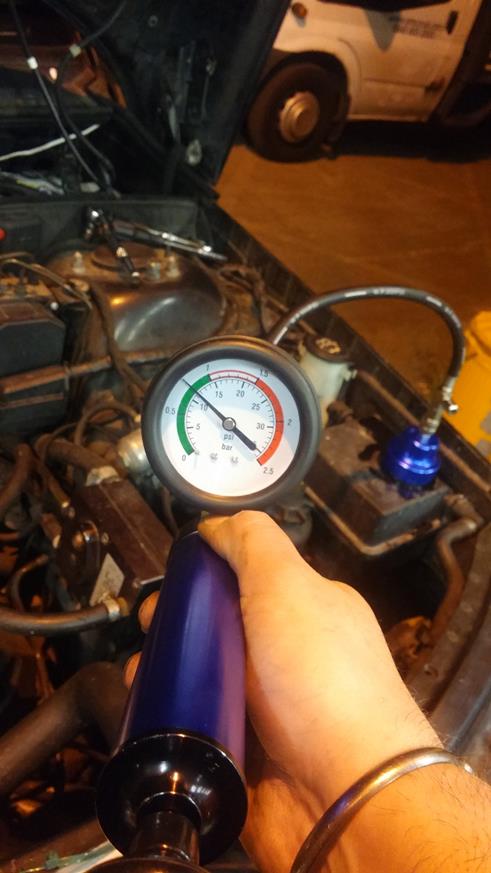
After 10 minutes
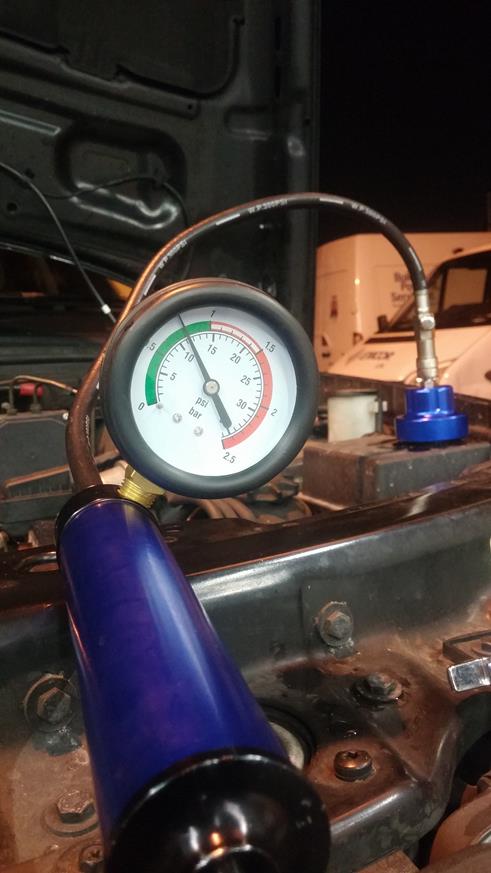
After I tidied al lthe tools away (about 35 minutes later)
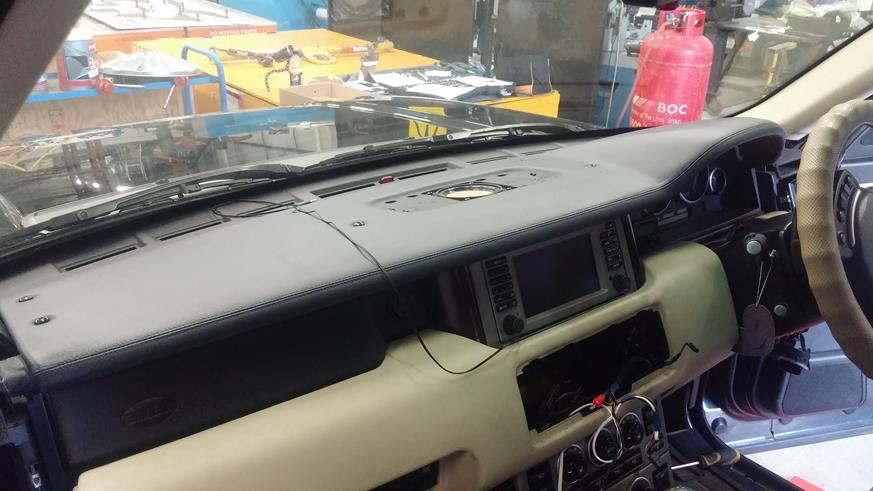
So all looks good in the hood........I started at about 7.30pm and finished about 4am......so just over 8 hours....and I was taking photos and figuring out how to shortcut the method and not have to take the whole interior out.
I do hope others find this helpful as I have not found anything else on the internet on how to do this....if others have seen something I would love to see it and see how others have done it!!
Decided the BH weekend as it would potentially give me 4 days to do the job if my shortcut method didn't workout and I would have to strip the interior!
LR book this job at 16.7 hours to get the HEVAC unit out and that is with trained guys with all the tools and toys to do the job!.....I gave myself the weekend to do it.
The full procedure is to remove the interior, including the seats, steering wheel, centre console, gear selector, handbrake, wheel arch (to get the loom out) etc....read RAVE, it is quite an intense bit of work....then remove the HEVAC unit complete and then strip that to get at the heater matrix from underneath the unit.
I had a plan....a shortcut if you like, that I detailed in a previous thread of mine....
My plan was to see if it was possible to remove the heater matrix through the side of the unit in a similar manner to how you can do the P38 matrix. I did loads of googling and research, looking at photos, reading what very little there is out there about removing the HEVAC unit.....in the whole of the internet, I have found very sparse to no information on how this is done....maybe I am looking in the wrong places, but I found close to naff all.....
Roll on to Friday.....
Armed with trim removal tools and clean gloves (when working with interior parts (esp. white parchment) it is advisable to change gloves regularly to prevent marks on the trim panels) the plan started....
First up was to remove the tranmission tunnel side pieces
By removing the single torx screw....
And then carefully pulling the wooden end to the side and then rearwards to release the panel
Next is to remove the under dash trim panel...two torx bits on the front edge and a weird plastic thingy on the bulkhead behind the brake pedal....
Drop the panel down and remove the connections to the speaker unit and the footwell lamp
The side of the heater unit is shown here. The part that needs to be removed is the outlet horn that goes into the floor for the rear footwell heaters and also it goes to the front footwell heaters.....
My plan was to see if this part could be removed without removing the dash lower fascia panel (the white/cream part)......alas the part is buried quite a way up under the dash...so my first idea of a shortcut method was not going to work.
So I made a coffee and tended to my metaphorical wounds.
After a few minutes, I decided that I still didn't need to strip the whole interior out, all I had to do was remove the lower dash fascia panel......lets read RAVE on how it is done.....looks reasonably simple enough, although RAVE says to remove the steering, wheel, rotary coupler and steering column shroud....sod that, I don't think it was necessary so I decided to crack on and if I need to, I will...
First is to remove the upper and lower dash side trim pieces....
Lever off the side panel
On the passanger (UK) side, remove the drinks holder
And the torx screws holding the side panels on
Remove the side air vents. There are tabs that arre visible when you look inside the air vents, these need to be levered inwards and then withdraw the side vent.
The final torx screw on the upper trim piece is hidden under the air vent!!
With a tug, the upper side trim piece comes off, remove the connection to the lamp.
The lower side trim piece has a torx screw hidden under a plastic gromet, remove this screw, the sill panel, the A pillar cover....this uncovers a crew that holds the lower side trim panel in place.....then withdraw the panel.
Next, undo the fixings holding the under dash panel on the passanger side and remove, don't forget to undo the lamp connection!
Now open the glove box and undo the 5 torx screws on the upper edge, and undo the two screws under the glove box, then withdraw the glove box as a whole unit including the CD player!
Release the glove box lock release cable
Now do the same on the drvers side dash end trim pieces....remove the connections to the headlamp switch and the diagnostic socket....
To get the diagnostic socket out, first open the socket cover, then slide the clip sideways and wiggle the socket out of the holder.
Plug the headlamp switch back in as if you still have the battery connected, the headlamps come on when it is removed (this is a failsafe....if the switch was to fail, the headlamps will come on regardless, this allows you to atleast drive at night if the switch pack fails at night!)
Remove the centre vents in a similar manner to the side vents, remove the connection the hazard lamp switch, the cable to the air temp control and the two connections to the lamps.
Now undo the torx screws around the glove box opening (there are 5 of them - 3 on the front edge and two underneath the top lip)
Now undo the 3 torx screws on the drivers side. Two underneath and one on the side near the top of the fascia panel.
NOW........RAVE doesn't make mention of a final torx screw in the centre......I pulled at the fascia for a few minutes wondering why it wouldn't unclip from the centre section......(there are trim clips that hold the fascia panel onto the dash framework as well as the screws).......
To get this final torx screw out, you have to remove the Sat Nav (Vogue etc) or the MID (HSE etc) to get at it!
Sooooo......undo the torx screws on each end of the upper fascia panel
Then the 7 torx screws that hold the top panel on (I took the speaker grill out, but there is no need to do so)
Now slide the fascia panel rearwards and then up
There are 4 torx screws that hold the Sat Nav (etc) unit in place
Lift the unit out
You can now get to the final torx screw
You can now pull the lower dash fascia panel off
And remove from the car
The glove box CD player wiring is surprisingly long and can be put outside the car as you will need access in the foot well.
OK....from the passanger side, this is the part that needs to be removed to gain access to the heater matrix pipes.
On the drivers side, the part that needs to be removed to access the heater matrix is obscured slightly by the piece of dash support framework...but this is only plastic and can be moved slightly to gain access!
Now we need to remove the footwell air duct that connects to the parts we need o take off....
Simple on the drivers side, two (or was it 3 ) torx screws and the duct comes off
Now we need to remove the control rod to the vent flaps, carefully remove the rod from the actuator and rotate the actuator up so the flap is closed.
Next is to remove the clip....
The 4 torx screws that hold the piece on....the forth is hidden up unde rthe dash by a white control quadrant
Slide the piece out sideways
And then wiggle past the dash support frame (that can be moved slightly to get the panel out)
And there is the heater matrix in all its glory....
Now to the passanger side. Remove the foot well ducting, there is only one torx screw and then remove.
This is the air outlet horn that needs to be removed, only 2 torx screws and slide it out sideways
The heater pipes are now visible
Undo the two torx screws holding the pipe clamp plate in place
Now comes the fun........the pipes can be (as mine were) sodding tight to get out....they idealy need to come out directly sideways to prevent them binding....but as the pipes are still fixed into the bulkhead, when pulled they will pivot at the bulkhead end and start binding....you just have to be careful and paitient.
This was for me the most time consuming part.....I used penetrating oil to get into the join and lube up the O rings and the ports.....gave them a wiggle, more spray, more wiggle...and slowly they came out.....they can put up a fight so be prepared for it.
Now on the HEVAC housing there is a small plastic protrusion that prevents the matrix from being slid out sideways.
Taking a section of hacksaw blade, carefully trim this back to allow the matrix to slid out.
BINGO....the little fecker is out......
Using a spare set of pipes from the spare HEVAC unit I bought, I piped up and put in the sink to see if I could spot the holes!
Vid above shows the holes in the matrix!!
OK, time for reassembly.
Always use new O rings and lube them up before refitting. Our workshop does hydraulic fitting work so we have seal and O ring lube abound!!
This is where the replacement matrix will slide into
Slide in the replacement matrix carefully
And start putting the side air outlet horns back into place. To help get the screws back in, use a blob of vaseline, O ring lube, grease or similar to help the screw stick to the end of the bit and refit.
Put the air outlets back
Refit the pipe s and clamp, the refit the outlet horn
Start putting the dash back together, carefully alighning all the trim clips into place
Refill and bleed the system through and carryout a pressure test to ensure the pipes are sealing correctly (I had to reassemble the dash and then get the car outside to refill and bleed the system.....hence why I did the pressure test after it was all reassembled....it would be wise to do this before you put it all back together again!
start pressure
After 10 minutes
After I tidied al lthe tools away (about 35 minutes later)
So all looks good in the hood........I started at about 7.30pm and finished about 4am......so just over 8 hours....and I was taking photos and figuring out how to shortcut the method and not have to take the whole interior out.
I do hope others find this helpful as I have not found anything else on the internet on how to do this....if others have seen something I would love to see it and see how others have done it!!
Last edited:
