1965 Series 2a Station Wagon in Holland

This site contains affiliate links for which LandyZone may be compensated if you make a purchase.
BULKHEAD REPAIRS (partial) DAY TWO continued

End cap on the side of the dashboard - passenger side - left hand side needs to be replaced. I haven't found someone who makes it so I guess I need to give it a bash me self (pun intended)

#####

Additional information #1

The basic method I'm using is using "Hammer forms". Essentially these are solid shapes onto which you form sheet metal. It isn't rocket science: Make the shape you want and "drape" the sheet metal over it (it is as simple as that).

I'm using wood for the basic shape - but as you will see in a bit it isn't up to the job for the more complicated corners.

#####

Here's cutting out the simple shape.

This is a softwood plywood - not ideal - but it is available and free

1965 series 2a station wagon bulkhead making end cap1.JPG


The lump at the end of the door catch tube turned out to be a separate bit after all (compared both sides of the bulkhead)

1965 series 2a station wagon bulkhead making end cap2.JPG


1965 series 2a station wagon bulkhead making end cap3.JPG


(Bit of a tip for using an angle grinder on complicated shapes - hold it against your body in this downwards manner - but make sure workpiece doesn't move so you end up spinning the wheel into ya nuts)

1965 series 2a station wagon bulkhead making end cap4.JPG


Cutting out the rough shape =>

1965 series 2a station wagon bulkhead making end cap5.JPG


I know I'll probably sound like a real old fuss pot: But make sure you de-burr! Save your fingers! Metal sliver cuts are not nice.

1965 series 2a station wagon bulkhead making end cap6.JPG


Clamping the metal between two bits of wood is important. If you try to bend the sheet over the edge of the form without some clamping on the back the sheet will just bulge on both sides of the bend.

1965 series 2a station wagon bulkhead making end cap7.JPG


Straight bends work well with this soft plywood form...

1965 series 2a station wagon bulkhead making end cap8.JPG


Take your time and use a really light hammer to try and bend the sheet as close to the edge of the wood as possible. If you bash the furthest edge you will end up with ripples. Try and get the hammer head right into the edge between the two bits of wood.

1965 series 2a station wagon bulkhead making end cap9.JPG


Look it really is a light weight hammer =>

1965 series 2a station wagon bulkhead making end cap10.JPG


(When I grow up I'll be allowed to use the big hammer)

Curved edge - harder to achieve as you are stretching the metal round a shape instead of folding along a straight edge.

1965 series 2a station wagon bulkhead making end cap11.JPG


#####

Additional information #2

The next method I'm using in addition to using "Hammer forms" is a method called "flow forming"

See this =>


Or this =>


You can buy (rather expensive) tools for this if you want =>

https://www.tinmantech.com/products/hand-tools/flow-forming/

flow_form_tool_lg.jpg


Now - me being me - I'm tempted to zoom off on another tangent and reproduce the posh tools above (and I still have plans for this) but I've decided to just use the new air riveting set I got from skinpins =>

1965 series 2a station wagon bulkhead making end cap12.JPG


#######

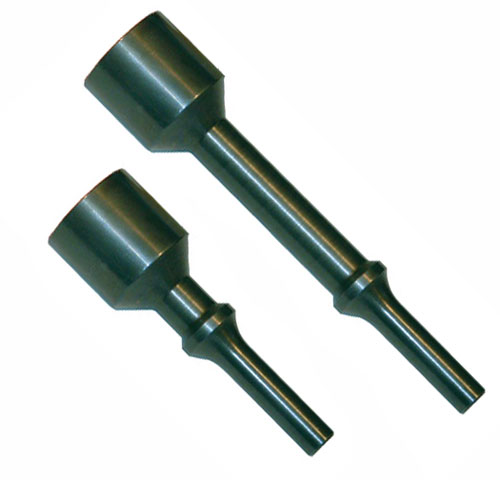
Air riveting kit came with a nicely polished elephant's foot...

1965 series 2a station wagon bulkhead making end cap13.JPG


...which if you want to keep nice it is worth covering with lumps of masking tape...

1965 series 2a station wagon bulkhead making end cap14.JPG


Starting to bend with the lightweight hammer - ideally you should stop before you start leaving marks in the surface (doh)!

1965 series 2a station wagon bulkhead making end cap15.JPG


Finish the shape with the air rivet gun

Wood started to crack and fall apart.

I now need to make a metal form for this bit (to be continued)

1965 series 2a station wagon bulkhead making end cap16.JPG


More edge trimming (this time with tin snips)

1965 series 2a station wagon bulkhead making end cap17.JPG


Whoops - over did that bit!

1965 series 2a station wagon bulkhead making end cap18.JPG


Hammer it flat again (on a vice anvil section)

1965 series 2a station wagon bulkhead making end cap19.JPG


Well - here's how far I got today. I've got the rough shape of the new panel.

1965 series 2a station wagon bulkhead making end cap20.JPG


Sorry I held it the wrong way round in this picture. Metal (anvil) like hammer forms will be made to help finish off the complicated shapes.

To be continued.
 
Last edited:
I don't know about you but I always thought the real talent was with Pliers - he was lumbered with his mate...

(showing me age again)

BULKHEAD REPAIRS (partial) DAY TWO =>

There's a 141cm long bit of capping metal that goes in the "gutter" part of the bulkhead (on the inside where I guess most people put their Werther's Originals and perhaps a 3/8" spanner)

In the real world - when you're not a struggling DIYer - this job would be done on a nice big guillotine and a decent folding machine and be done in ten minutes. Here (where I am) it took a bit longer. Starting with a bit of 1mm thick Zincor =>

View attachment 122757

Cut cut cut cut cut - grind grind

View attachment 122758

Add in supports to stop it from drooping

View attachment 122759

Off into the hand shears - trimming off about 1 to 2mm from the coarse cut edge made by the grinding disc

View attachment 122760

Gorra put a bend along the length too =>

View attachment 122761

(Yes yes that bench needs a tidy)

Those vice mounted bending jaws really are a good buy.

They are not mega easy to use for these long lengths, however, as every time you crunch / bend each bit you need to move them along to the next position on your carefully drawn line.

Because each of the 28 positions (!) used to make the bend along the whole length - the positions of these jaws do not line up exactly - so the chances of a bit of waviness are high.

I'll try and draw an explanation of how the slightly unequal bending effect tends to pucker up the edges of the fold and induce distortion (need to think about that however). You can flatten parts a bit in the vice to get the bend to sit a bit better on a flat surface...

View attachment 122762

...but as you can see in both of these pictures there's a slight amount of distortion.

This waviness can be held down and clamped but tomorrow (may be in a few days) I'll show a trick to make the bend sit a bit flatter.

View attachment 122763

Next I need to cut out the holes for this gutter piece
Back to the gutter!

BULKHEAD REPAIRS (partial) DAY THREE (part one - more in a bit after I've finished cooking dinner - tonight beef stew and gratin dauphinois which means a bit more preparation time is needed than beans on toast)

The gutter piece has several holes in it as well as a few cut out shapes. I've elected to do the cut out shapes now and leave the holes (which have to match the underside parts) for later on once it is spot welded in place.

So today it was cutting out shapes in the strip I made a few days back

1965 series 2a station wagon bulkhead making gutter piece8.JPG


I'm marking out the positions on masking tape - mainly because pencil shows up better but also because if you cock it up you can remove tape and replace with "a clean sheet" and carry on like a pro (what moi? A mistake? Non non non...)

######

Tech tip: CAD

"Cardboard Aided Design"

Not my joke - see "Project Binky" on yew toob =>


If you haven't been following the series I can recommend it.

(Their jokes sometimes fall a bit flat - but hey - I'm sure mine do too!)

Cardboard aided design - tracing stuff and cutting out shapes to copy in metal is a really good trick.

Here I'm using masking tape (fresh out of cardboard) to get a rough idea of the cut outs =>

1965 series 2a station wagon bulkhead making gutter piece9.JPG


########

Pilot drilling holes

1965 series 2a station wagon bulkhead making gutter piece10.JPG


Using a step drill to make bigger holes for the end shape of the cut outs...

1965 series 2a station wagon bulkhead making gutter piece11.JPG


...as expected the step drill in a hand held drill is a bit hit and miss - it tends to wander. Of the eight holes I drilled, five of the buggers wandered off course despite careful pilot drilling. Step drills are best used in pillar drills with the work piece firmly clamped.

Such is life

Anyway my solution was to rough cut what I wanted with the mini angle grinder (have I mentioned my gucci 10.8V Bosch angle grinder before?) leaving lots of meat on the bone =>

1965 series 2a station wagon bulkhead making gutter piece12.JPG


Then I went "all arty" (flounced about - swishing my big long Doctor Who scarf - shouting "I'm an arteeest") and used the Dremel (over priced crap) to sand out the shapes I wanted.

1965 series 2a station wagon bulkhead making gutter piece13.JPG


The results weren't as clean and as sharp as they were for the step drill holes (but that's often the way with art)

1965 series 2a station wagon bulkhead making gutter piece14.JPG


Trial fit - after a bit of paint I reckon it'll come good.

1965 series 2a station wagon bulkhead making gutter piece15.JPG


#####

Back to the unevenness due to using the bending jaws in the vice (28 times wasn't it instead of one clean long bend done on a proper machine)

I was planning to use "shrinking and stretching jaws" but it turned out not to be necessary. I'll have to bore you about those another day. Today, I got away with just fiddling with the bend - straightened it out - got it to stand upright - with the help of these folding pliers =>

1965 series 2a station wagon bulkhead making gutter piece16.JPG


1965 series 2a station wagon bulkhead making gutter piece17.JPG


Really difficult to show this with my point and shoot camera but the gutter piece now sits flat (or flat enough) on a flat(ish) surface.

1965 series 2a station wagon bulkhead making gutter piece18.JPG


So that's all good then
 
BULKHEAD REPAIRS (partial) DAY THREE (part 2)

Back to the end cap that was shown two posts ago.

Made the metal hammer form today - it is just a bit of angle iron I managed to scrounge from somewhere (I can't remember where I found it but it was free (!))

1965 series 2a station wagon bulkhead making end cap22.JPG


I've just shaped the corner parts of the angle iron and cut it so it fits in the end cap

1965 series 2a station wagon blukhead making end cap21.JPG


1965 series 2a station wagon bulkhead making end cap23.JPG


Clamped in place - shot showing how far I needed to hammer the sheet metal (so before shaping onto hammer form was started)

1965 series 2a station wagon bulkhead making end cap24.JPG


Shot showing the other end after a bit of hammering - note backing angle iron is also needed

1965 series 2a station wagon bulkhead making end cap25.JPG


I still need to work a bit more on this - sorry about the strange optical balls up - it looks like the new end cap is longer than the old one in this picture - weird - I know it isn't (!)

1965 series 2a station wagon bulkhead making end cap26.JPG


Anyway - nearly done. I ran out of time to finish it today - still some more tapping to be done. To be continued.
 
BULKHEAD REPAIRS (partial) DAY FOUR

(I keep saying these days are just partial days because the way things are at the moment I only have between 2 to 4 hours a day of Land Rover time)

Today was a day of carnage. Pretty brutal - I doubt very much if it will be the last day of cut cut cut though - there are some pretty sorry parts that need a lot of help.

There's a "dashboard beam" (I don't know what Land Rover calls it - I'm making up names as I go along) that runs across the width of the "gutter" under the windscreen. This had to come out.

Careful cutting at the welds on the webbing / end caps that make the Werthers Originals compartment

1965 series 2a station wagon bulkhead dash beam removal1.JPG


1965 series 2a station wagon bulkhead dash beam removal2.JPG


And then cutting along the inside of the gutter section / through the rust. (This is why I started to make the gutter section a few posts back - first make a new one before you destroy the original)

Angle grinders and Dremel tools wouldn't reach all parts so I ended up using a hacksaw blade for the difficult bits.

1965 series 2a station wagon bulkhead dash beam removal3.JPG


Here we go "Dash beam" is out

1965 series 2a station wagon bulkhead dash beam removal4.JPG


Well worth being careful with the cutting - I wouldn't want to have to try and make this part with hand tools!

1965 series 2a station wagon bulkhead dash beam removal5.JPG


Here's the gap left behind =>

1965 series 2a station wagon bulkhead dash beam removal6.JPG


"Gutter" is made of two pieces - the bit I've made and another that needs a step / joggle along its length this is the bit I cut through to release the dash beam bit.

1965 series 2a station wagon bulkhead dash beam removal7.JPG


########

Now the other bit I've started to make was the end cap on the left hand side of the bulkhead. I wanted to at least have a replacement under way before I did this =>

1965 series 2a station wagon bulkhead end cap removal1.JPG


Carefully cutting away the last bits of the end cap...

1965 series 2a station wagon bulkhead end cap removal2.JPG


(Twist and pull parts that were spot welded)

1965 series 2a station wagon bulkhead end cap removal3.JPG


...so with end cap gone I can do a CAD template and make the (repair) section underneath

1965 series 2a station wagon bulkhead end cap removal4.JPG


##########

Slowly cleaning up the gutter area - taking a lot of time.

1965 series 2a station wagon bulkhead gutter removal1.JPG


1965 series 2a station wagon bulkhead gutter removal2.JPG


###

Garcon! A new set of gonads please!
 
That bulkhead is a real challenge. You are doing some great work. I'm afraid it would be beyond my skill level so I will just look on with admiration. Keep going.
 
... I'm afraid it would be beyond my skill level so I will just look on with admiration. Keep going.
I disagree!

I think it is well within your skill level. You can weld - I've seen it in your build thread. I know you could do something like this too.

Sure you might need to buy a few bits to help you along - sure you might need to put your family life on hold (I know that's easier said than done) but I reckon with a bit of practice you'd be able to follow suit. Like me you might have to request another set of gonads once in a while...

...but that's half of the way - having the balls to cut - and then using "the fear" to get you to the next stage...

...look I'm doing my best to keep the specialist "Gucci" tools to a minimum. I've shown how I cut long straight lengths of steel - well lengths that are straight enough. Sure they're not as perfect as commercially cut stuff but I reckon with a lick of paint "they'll come good". Same goes for cutting holes (though I might stump up the cash for a set of hole punches after yesterday's experience with the step drill). The air rivet gun is expensive but you could do the same with a hammer, it will just take you ten times longer.

Go and have a look at the hand tool threads on www.metalmeet.com or have a look at the many many hand tool metal shaping videos on the toob - be inspired!
 
Yeah Project Binky is great!
As for road kill I want to like it but I find it really fing annoying to watch when they just end up wrecking stuff and acting like annoying tools, which I guess is dictated by the format/target audience (sad really as the are both very accomplished mechanics) prefer Mighty car mods on YouTube.
As for this part:-
8fbe115aa4249272862a0c078ac05474.jpg

That's one of the home engineer's dilemmas when you don't have the original tooling ie do it just like the factory did or do it in away that's possible with hand tools. Personally I'd probably use some tube/pipe and some angle iron welded and ground to look the same. But yes if you can save it it's much easier and cheaper.
Mighty car mods? Now that is a show that I have really struggled to enjoy - oh well different stokes eh?

#####

The other dilemma I'm facing - particularly with this bulkhead - is how much of it is going to be built by me and how much of it will remain Land Rover. Every time I look at it I think "oh **** that's buggered too". I'm still torn between "total dismantle" and "patch as much as I can whilst most of it is intact"...

...the inner side of the vents are looking particularly shabby - I think that'll be the part that helps me decide
 
Yeah Project Binky is great!
As for road kill I want to like it but I find it really fing annoying to watch when they just end up wrecking stuff and acting like annoying tools, which I guess is dictated by the format/target audience (sad really as the are both very accomplished mechanics) prefer Mighty car mods on YouTube.
As for this part:-
8fbe115aa4249272862a0c078ac05474.jpg

That's one of the home engineer's dilemmas when you don't have the original tooling ie do it just like the factory did or do it in away that's possible with hand tools. Personally I'd probably use some tube/pipe and some angle iron welded and ground to look the same. But yes if you can save it it's much easier and cheaper.

A guy over on facebook who goes by the name "The Welding Wood" produces this part

https://www.facebook.com/TheWeldingWood/
 
The other dilemma I'm facing - particularly with this bulkhead - is how much of it is going to be built by me and how much of it will remain Land Rover. Every time I look at it I think "oh **** that's buggered too". I'm still torn between "total dismantle" and "patch as much as I can whilst most of it is intact"...

...the inner side of the vents are looking particularly shabby - I think that'll be the part that helps me decide
How many older Land Rovers are more replacement parts from Richards, YRM, Brip Part etc than original LR. From what I've seen on this thread your doing more to retain originality than most. As far as I'm concerned your going more with the ethos of Land Rover in making and mending yourself than if you were just throwing money at it.
 
Last edited:
Oh wow - thanks for the tip.

What is it with arsebook though? Why is it so popular? Surely forums like this one are the place to advertise parts and services?

I suspect it's due to the amount of people who are on facebook, especially those who follow land rover associated groups.

Most people are on facebook so it's easier to spread the word I suspect.
 
I suspect it's due to the amount of people who are on facebook, especially those who follow land rover associated groups.

Most people are on facebook so it's easier to spread the word I suspect.

Well - just goes to show how out of touch I am with that kind of stuff. Do people ask their friends and family and the rest of their mad network how to fix their Land Rovers much like on this forum too? It must get pretty confusing mixing your broader life stuff with specific technical stuff.

On the flip side: I've got the impression from the series 2 club, of which I am a member, that more than half of the membership doesn't like to use their club's website and forum on the basis that it is strange new technology. The club spends a lot of time and money making a magazine and sending it through the post...

How many older Land Rovers are more replacement parts from Richards, YRM, Brip Part etc than original LR. From what I've seen on this thread your doing more to retain originality than most. As far as I'm concerned your going more with the ethos of Land Rover in making and mending yourself than if you were just throwing money at it.

Well thanks for the vote of confidence - I think the problem is trying to save as much as I can when I need to remove more of the cancer.
 
BULKHEAD REPAIRS (partial) DAY FIVE

(Hardly spent any time there at all today - still something did happen)

In the gutter section under the vents there's a joining piece that matches this bit =>

8fbe115aa4249272862a0c078ac05474.jpg


...to the back part of the bulkhead - it kind of caps off a bit of a closed off free space (I'm going to have to explain the construction a bit better - this will come later once I've done some drawings)

It is a fairly simple length of steel that has a step / joggle along its length.

To make the step piece I decided to do the riveting hammer trick again.


The piece of sheet was clamped between two pieces of angle iron with a piece of steel strip between which has the 4mm step size needed for the joggle / step.

1965 series 2a station wagon bulkhead stepped gutter section1.JPG


I can't stress enough the necessity for clamping!

I just about got away with it - the clamps are of course a pain in the backside as well as being an integral part of the process as they have to moved about to allow rivet gun access.

1965 series 2a station wagon bulkhead stepped gutter section2.JPG


In the picture above you can see that the silvery / bright coloured strip is the forming part for the 4mm step

(You can also see it would have been better to have had a wider bit of angle iron - but I've only got what I've got!)

1965 series 2a station wagon bulkhead stepped gutter section3.JPG


Wazzing along the length of the angle iron and the strip (which must be very firmly clamped) makes the step.

Again not the best picture in the world from the point and shoot camera but it demonstrates quite a nice clean edge and a straight line (!)

1965 series 2a station wagon bulkhead stepped gutter section4.JPG


This process is flawed, however.

Here's a bit of an explanation to why it would be nice for me to go and buy a bead roller machine!

1965 series 2a station wagon bulkhead stepped gutter section5.JPG


The edge of the forming strip makes a nice clean sharp edge but because the other edges are hammered into place (with the rivet gun) you get some "arty" curves.

For this piece I think it might get used because the one edge that is going to be visible has been selected to be the nice sharp edge ('ad to think about it before I started 'ammering)

To be continued of course - I might go and buy a bead roller - I will in either case need to cut some holes
 
Explanation of the bulkhead dilemma.

Two big parts of the inside of the bulkhead are damaged.

1965 series 2a station wagon bulkhead explanation1.JPG


The damage is probably only about 10% may be 20% for each panel. It makes me think that patching might be possible.

The panel labeled "Part A" is the bit around the vents that I've started to think about repairing by patching.

The panel labeled "Part B" is a bugger to reach. Other parts are spot welded onto this panel and, in turn it is spot welded to the door pillars and also some webs that connect to the main panel parts that are on the front side of the bulkhead.

1965 series 2a station wagon bulkhead explanation2.JPG


Under each corner / edge of panel "A", there's an unknown (as yet) complicated structure that also needs repairing for the door pillar. So panel "A" needs to be either completely or partially removed.

1965 series 2a station wagon bulkhead explanation3.JPG


Panel "B" could probably be patched but I think it will also be in the way of the door pillar repairs

I've got the feeling it is probably best to kill panel "B" and carefully remove each of the parts that have been spot welded to it. Panel "B" would then have to be replicated and the original parts put (back) on it.

It isn't a difficult part to make it looks something like this =>

1965 series 2a station wagon bulkhead explanation4.JPG


Once I get the other parts removed I'll know for sure how it was made.

Panel "A" however, is a total pain in the backside to replicate. Bead roller would certainly make me feel like I could tackle the job (talking myself into something)...
 
{Sorry need to have a whinge}

Bloody logistics! It'll be the death of me. With out doubt the worst part of this project - dealing with couriers and suppliers.

It took over a month to get this

1965 series 2a station wagon new differential crown and pinion.JPG


I've given up trying to communicate with either of the 'addocks. If you do manage to get in touch with either of their offices you just get soothing BS from them. Automated emails that are meant to send you tracking numbers don't materialise. This part could have walked itself here quicker. Just as well I'm not in a hurry for stuff!

This part took three weeks to arrive mainly because of DHL (again). They really are utter ****. The DHL chap got out of his van complaining that this was the third time he'd been here. I had been at home for each of the other times he'd "visited". After a bit of a set to it turns out he won't ring the door bell because he's scared of dogs...

1965 series 2a station wagon dynamo commutator again.JPG


...the landlady's dog is a Corgi (for ****'s sake). I tried to set the bloke at ease 'cos the fool will probably be coming back at some time or other - mental chap - bag of nerves - started smiling at the dog. I told him about not "baring teeth" and how he should assert his authority in the food chain with out being aggressive: But I think he's a lost cause.

Surely being a delivery driver you'd get some sort of training for these occupational hazards?
 
Enjoying your thread. Good to see someone taking the time to repair what a lot would have probably given up on. As a thought, if your courier doesn't like knocking because of your dog, how about a wheely style bin outside your door chained up with a padlock? They could then leave the parcel in it and lock it behind them, keeping it reasonably secure?
 
Enjoying your thread. Good to see someone taking the time to repair what a lot would have probably given up on. As a thought, if your courier doesn't like knocking because of your dog, how about a wheely style bin outside your door chained up with a padlock? They could then leave the parcel in it and lock it behind them, keeping it reasonably secure?
Thanks chap. I'm surprised to hear others would give up though - I don't think it is that bad - in fact surprised at how good it is!

As for the couriers - hopeless - the house where I live is part of a larger complex (kind of like a farm) where people are available from 8AM to about 7PM to sign for and accept parcels on the odd occasions I'm not about. It couldn't be easier and yet the excuses keep on coming...

...any way - enough of that - whinge over!
 
Back
Top