110 USW campervan

This site contains affiliate links for which LandyZone may be compensated if you make a purchase.
After looking through some old posts l found the photograph of the test units. They weren’t too far off.
A vital part of the design process.;)
6555A4DD-B35E-41EC-AD81-711A07EB2434.jpeg
 
8ED0987F-DB0D-4BBD-82FA-FF5A31ED6360.jpeg
281B0C80-E529-4642-94F0-DDBDB992FFB0.jpeg
On one of my visits to a Land Rover show a few years ago l noticed a must have item for any campervan/overlander.
A 270 degree awning, the only problem is they are normally mounted on the roof rack and because of the Pop Top this was not possible.
The only option was to have a Halo rail made. (l made up the name, but l think it describes the product).
Basically l went to Patriot with the idea and they came up with the design and finished rail. They even fitted it for me.:)
CDFEB8E9-84CF-44B1-AF55-E10C7102C029.jpeg
View attachment 224074
F68DCD74-22D7-4E74-B4DE-963E7F87965E.jpeg
2E79A3FA-3B13-4A87-BA50-78FEC764273E.jpeg
B2BA1FFF-43BF-478D-895E-C03B8DB75FDF.jpeg
It works very well, and also gives me the option of mounting some other items on the rail shower, shower water tank.
A gutter mounted ladder was added to the rear of the car, perfect for maintenance and flipping over the awning cover.
 

Attachments

  • 3E948F38-FBAE-4BCA-BC76-D5868BC4237D.jpeg
    3E948F38-FBAE-4BCA-BC76-D5868BC4237D.jpeg
    262.5 KB · Views: 118
Last edited:
After a long gap of not doing much on the car (l was told l had to work on the house). It now time for some updates.

I had a small table top made out of stainless sheet metal, quite simple but with two small dome headed bolts positioned along one edge of the top, two springs were placed over the bolt threads to give it some tension.
The idea is that they slip into the keyhole slotted brackets already mounted on the Landy.
I know that you can buy a table off the shelf, but it is too big and l didn’t like the leg arrangement. And this one mounts in the side box.
Photo showing the key slot brackets, you have probably seen them already on an earlier post.
D04441FB-96F3-4749-99EB-062EAFA97A8D.jpeg

The table slots in quite easily.
58518397-90E4-4947-83A3-7BE4B8B30E79.jpeg

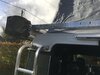
To support the side table l had two webbing straps made. A loop at one end to secure around the roof rail and at the other end a hook to latch onto a webbing bridge, these were pop riveted onto the ends of the table.
EA328524-85EE-4144-8EE1-157BA4285710.jpeg

A photo of the top being used and stowed away in the side box.
472EB134-E900-46C2-9165-F885133206C9.jpeg
8F954410-8115-4579-99A7-BDB42D20BE86.jpeg
CE94E1A5-A0C4-4FB0-93EE-3ABE3B181196.jpeg

We went camping a few weeks ago, and this addition was fantastic, we used it a lot. Well worth the effort and would highly recommend doing this.
 

Attachments

  • F1B8B21F-DF2E-4B9B-96B6-3467C70E2B65.jpeg
    F1B8B21F-DF2E-4B9B-96B6-3467C70E2B65.jpeg
    417.3 KB · Views: 80
Finally l took some photos of one of the key areas of the campervan build, the installation of the LPG underslung gas tank. I didn’t fit the item myself preferring to have it fitted professionally, but it least it was guaranteed and certified.

When l installed the Propex gas heater l also installed the inlet and exhaust pipes. The inlet was bent forward and the exhaust was bent slightly back towards the side of the car, this was then clipped to the bottom of the sill.
B2E319DB-1F6D-4102-A1E2-96B352E48418.jpeg

The gas pipes were then attached, each with there own isolator taps.
One supply goes to the hob the other to gas heater.
29CC0A94-5579-4CB3-93D3-52364C494406.jpeg

A separate tap for BBQ inlet was mounted next to the gas inlet.
E4373C9A-F3FE-4F16-A4FB-A900DD3BBC2F.jpeg

Protective sleeves off!
F3665163-3746-4972-B151-C2C41104D44E.jpeg

The 16 L tank fits well between the side step brackets and shallow so shouldn’t interfere with any off-roading l might do in the future. Originally the tank was red, but sprayed back it blends nicely against the chassis rail.
A146004B-07EF-4492-8954-D90143000F8F.jpeg

113E7492-FF89-4CFA-9FA8-B67D8984CF8A.jpeg

The BBQ hose just simply pushes on the inlet, nice and easy.
07230137-3DB4-4429-B76D-CCE11C9F1C6A.jpeg
 
Back
Top