00KK53 - My Soft Top 12v GS TUL 90. So a soft top 90 then......

This site contains affiliate links for which LandyZone may be compensated if you make a purchase.
had a day off today and as i helped her dad sort his 'boule' pitch at the weekend, SWMBO gave me a land rover pass once i had a) done the shopping, b) got my hair cut. Neither of which were necessary. I should have got up early to make the most of it but i was shagged from work so had a lie in, and an old injury to my leg is rearing its ugly head again. Finally got going around 1400hrs. I made a start on painting the chassis now i have had that hole fixed. The rest is fine, bit of surface rust wire brushed off then a liberal coat of finnigans no1 rust beater. Plan is a layer of that, a layer of regular hammerite then a layer of that waxoyl chassis stuff.

Its going to take a while to do the whole thing, the tops of the rails are a mission to paint.

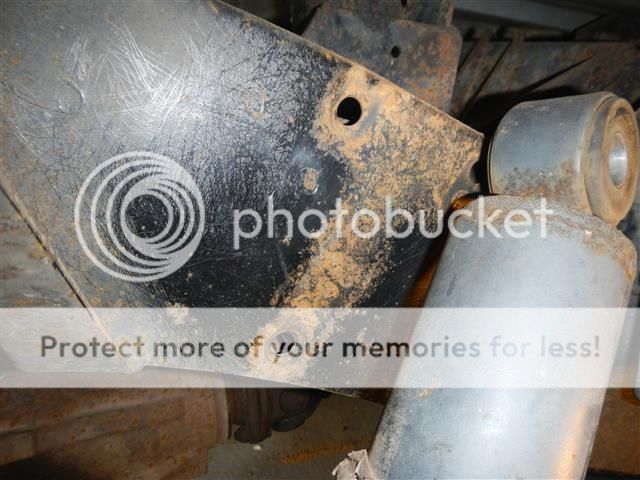
Was a bit nervous about taking the shock absorber mounts off incase it was a rusty hole behind but it was good metal


Rear leg 1st coat is mostly done, just some fiddly bits around the rear cross-member to do. I also painted the hubs and whilst i was there checked out various oily bits. All is good.


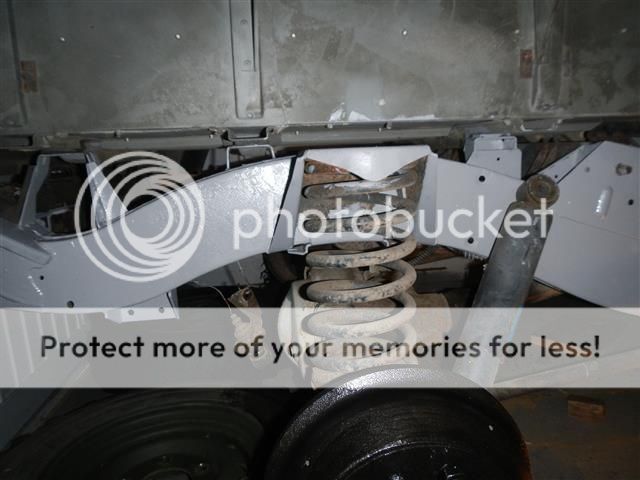
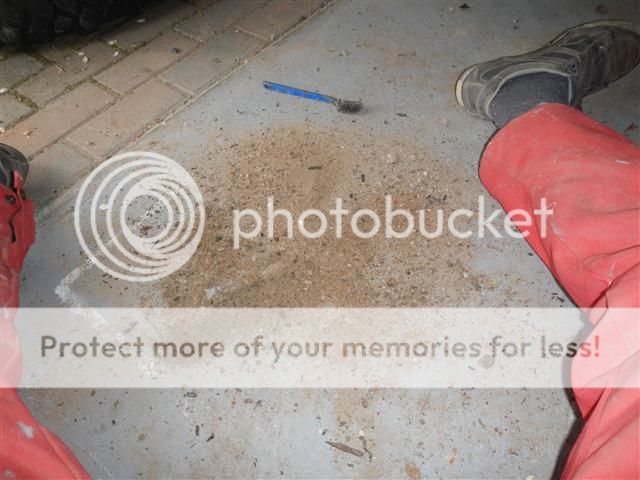
Rear x-member is ok but it was absolutely full of sand, it was bone dry and the rust didnt appear to be active but i did get a lot of the sand out one side! Will fill the sod with as much waxoyl as it will take.


I know i havent painted behind the springs, but i am thinking about ordering some standard springs so i may swap them out and paint that bit later, if i dont get them then i will just drop out the springs i have.

Small progress, going to take me years to sort it all out at this rate!

Ed
 
Last edited:
yeah i know, something to do with the airflow being diverted over the screen. Its a PITA there though, i nearly brained myself when the bonnet dropped so thought screw this, has made the steering lighter to boot.
 
Depending on how original you want to keep it looking, you could always mount the spare on a side-hinged carrier as that way you get the weight off the bonnet but leave the rear load-space free?
 
Yeah I am debating what to do with it long term, I am thinkin of making a mount for the roll bar, I do t carry much in it to be honest so it's ok where it is for the time being
 
got a bit of the black on today.
Apologies for the ****e camera phone photo


Looks much better than it did before, its a right chore wire brushing it all though. Luckily havent found any heavy corrosion that has needed power tools yet.


Quite enjoyed it in a weird way. 1/4 of the chassis down now, i have done the drivers side up to the front trailing arm and inwards to the a frame mounts.

Ed
 
Have now painted the rear chassis upto the mounting points for the rear trailing arms. Had a good poke around the front, and i thought the rear was a pain to brush paint. The front is going to be a ball ache. Still its all getting covered in dinitrol after so will be able to get the bits i cant reach with the brush, with the spray.

Quite hard work but i am hoping i will then just be able to spray underbody sealant on it every few years or so, and make the chassis last well. No further rust found. Which pleases me!

My poking around revealed that I have a recon gearbox and xfer box on the vehicle, fitted 2003.

Anyone else painted their chassis? Got any tips?

Ed
 
Put it all back together today, de-greased and jetwashed the front half of the chassis, will leave it to dry for a week then get cracking on painting that.

After that i worked out what to do in the gap between my front seats. Well i took a trip to dropzone mil surplus place today and got a couple of metal boxes and other tins and did this. I quite like it, i didnt want the usual plastic tray thing, nor did i want anything as big as a cubby box.


No idea what it was for but i has this written on the side,


and had this wood inset bit


Its felt lined so will make a nice place to chuck loose coin, phone, wallet etc when driving

Quite pleased. Only thing i need to do is change the rubber mat for a plain one or something, rather than a sideways footwell mat!

Ed
 
Needed a break from painting so fitted an oil feed plate to stop my unworn splines eating themselves. Had a new gearbox in 2003 and the splines are pretty good.


also dropped off both props and checked the UJ's, had a good poke about underneath checking bushes etc and made a start on fixing the leaking front diff pinion seal. The nut is FT.

Also think my clunking noise is from the front diff it has a lot more play than the rear and the rest is all fine, a frame is new and bushes are all good. hmmm...

Ed

p.s oh yeah took it on 2 x 60mile journeys and it was flawless apart from the clunk :)
 
sorted out my clunk

Ok

Replacing a diff pinion oil seal on Rover axles.


First take out the fill plug for your axle (just to check it will come out!) then take out the drain axle and let the oil drain into a suitable container.

Then remove the propshaft by undoing the 4 bolts holding it to the diff output flange. I found a propshaft tool wasn’t that easier than 2 spanners to be honest. Tie it up securely out of the way.
You should then see this, straighten and pull the split pin out.


Undo that big nut, it’s a 1 inch jobbie and should be farking tight. I used a big breaker bar and a wrench on the flange to hold it still. DO NOT tug on it if you have half the vehicle on axle stands as tugging this nut causes the vehicle to move and it could come down on you head and kill you. I had all 4 wheels on the floor for this, wheels chocked.
When the nut is off it will look like this


Pull of the drive flange, it should come off by hand, if not encourage it with a rubber mallet. Make a note of the order of any washers/spacers that come off with it. Now you can see the drive splines and the seal itself. I have lots of splines, some people might only have 4 chunky ones. That’s fine. My seal looks ok but the inner lip was quite worn. Have a look at your drive flange you just removed, make sure the surface the seal runs on is smooth and clean, if its pitted or ridged it will need replacing.


Now prise the seal out being very careful not to scratch the surface it mounts against. Some people have issues with this but I found a large screwdriver popped it out easy enough. Wipe down the faces and splines, I greased my splines with ep80/90 grease as i love nothing more than slipping a flange onto a greasy shaft (snigger snigger)


Its also worth checking the outer bearing at this point, so gently wiggle it out taking care to note how many spacers/shims there are and the order they go in. This is vital for reassembly to get the preload on the bearing right. Some more modern axles have a crush washer to set the preload. I don’t know about this but have been told that the easiest way to sort that is to mark the pinion nut before you remove it and then count the number of turns it takes to get it off, then put it back on the same number of turns till the marks line up. I don’t know, research this before you pull your landy apart! If you have the shim system then just replce the shims in the right order and torque it up correctly.


My bearing was fine so I greased it again and popped it back in with all its shims


Then I carefully drifted the new seal in till it sat just slightly below the surface of the flange it is going into
NB. If your new seal has the raised centre lip like the one that was removed, this raised centre lip MUST be level with or below the axle casting or it will be destroyed by the drive flange.


Replaced the drive flange


Put the nut back on, torqueing it up to 96lbs/ft and replacing the split pin and then re-connected the propshaft using new nylock nuts and bolts.


Its worth at this point checking your axle breather, undo this banjo bolt and check the breather is clear by blowing some air down it. If it is, great. If it isn’t then replace it of unblock it. A blocked breather will just make your new seal leak again as the pressure in the axle rises it forces oil out around the seal.


Then when you have done all that, refill your axle with ep80/90 (upto gl4) 1.7litres until it dribbles out the filler hole, then take the rover for a test drive and observe for leaks.

Hope that helps some people, this just took me around 1.5 hrs in my garage with normal tools.
Ed
 
Did some more chassis painting over the last few days, just got the front x-member and the passenger side engine rail to paint then i shall order some underseal stuff, probably dinitrol.

Some parts of the front chassis i did little more than wipe over, the original paint was intact, so i just did one coat, on the outriggers etc i did 3 coats like i did on the rear x-member to give them more protection.


the chassis is quite good when just degreased and wiped over


I also have started examining the bulkhead, some small part to be rubbed down and painted. I shall fill the inside with waxoyl as much as i can. Whilst taking part of the dash out found i have a new wiper motor.


Not exciting, but thought i would update in case anyone cares. Also makes a nice record for me!

Ed
 
Really good read. Im embarking on a similar challenge myself with an ex-mil 110 so im hoping for not too many nasty surprises when I get it home.
 
cheers guys, its basically a big man toy to give me something to do at the weekends :) quite enjoying it so far, however all my money budgetted to spend on it keeps on having to go on things for the house and garden!
 
Right. I have exactly £20 I am allowed to spend so splashed it on a tin of paint. NATO Green.

Having finished the garden after shovelling bulk bags of soil and gravel and handling beams and other stuff. Its about time I had a play with the land rover, its been mainly used for tip runs the past few weeks and its feeling unloved. Its sprung an oil leak to show its sadness.

I thought the leak was the rear oil seal behind the clutch and what not but it turned out to be the rocker cover gasket. Easy fix.

Then i thought I would paint up my rear x-member so it was all nato green same as the rest as it was a bit patchwork quilt where it was welded and covered with whatever antirust paint i had to hand.

before


After


It appears to be a slightly different colour - its either the paint needs to dry or the original paint on the vehicle is uber faded. Will see what its like in the morning and another coat. If it is different then my week off in sept will be spent rollering the whole land rover. Oh well i needed an excuse :). I painted one side at the back anyway..........

Ed
 
Genuine IR NATO paint does fade if left to weather and needs to be reapplied from time to time. Usually vehicles were given an annual respray with any touching up done at a local level as & when required.
When I re-built my 101 I painted it NATO green enamel so while it wasn't completely authentic, it didn't fade to the same extend the original paint did. Baring in mind it lived outdoors 100% of the time, I think it was 5-years before I had to do anything to the paintwork.
 
ok, prob my paint is faded then. I will repaint the whole thing i think, just been standing looking at it and think a 'refresh' is in order. Its got mismatched doors etc all painted the same colour but at different times.

got a week off next month so fingers crossed for nice weather!

Ed

EDIT: should i thin the nato green? Its pretty thin straight from the tin. I am rollering not spraying.
 
Last edited:
Ok flatted back the first coat, will give it a going over with a second coat tomorrow.

First coat came out slightly orange peel in places. Any tips to get the top coat smoother?

Ed
 
Back
Top