Trewey
Cockernee, Pasty munchin bastid.
- Posts
- 20,093
- Location
- Kernow - Near England
This is quite an involved job, but not too technical and is within the capabilities of a reasonably experienced DIY mechanic.
I did my front diff bearing. The rear one is a bit easier, because there is no need to remove the hub and stub axle in order to remove the half-shafts.
The first job is to drain the oil from the diff.
Then disconnect the diff end of the prop shaft.
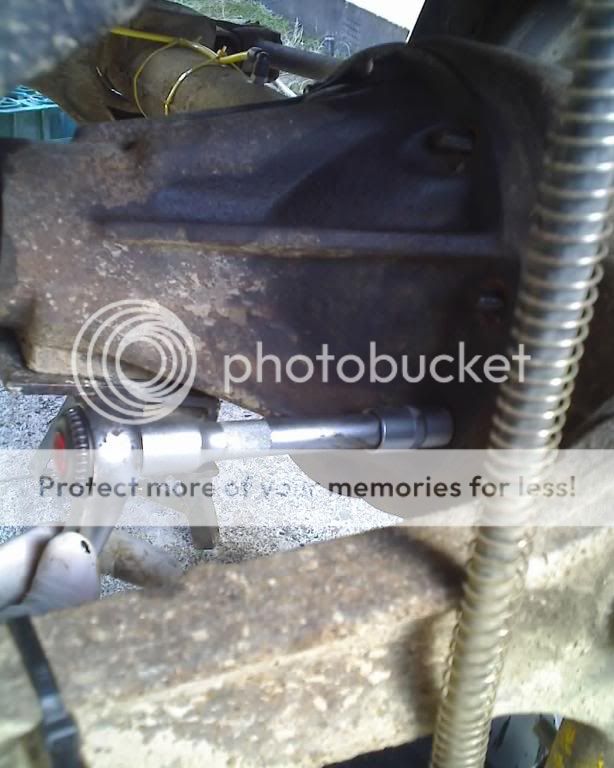
Next, disconnect the half shafts from the diff. To do this, follow steps 1, 2, 5, 6, 7 and 8 of Busters Swivel Ball renewal thread http://www.landyzone.co.uk/lz/f41/swivel-ball-renewal-63808.html
(Buster removed his half-shafts completely theres no need to do this, just pull them out far enough so that theyre disconnected from the diff).
Some of the swivel oil / grease will leak out, so have something in place to catch it and remember to top the swivels up again when youve finished.
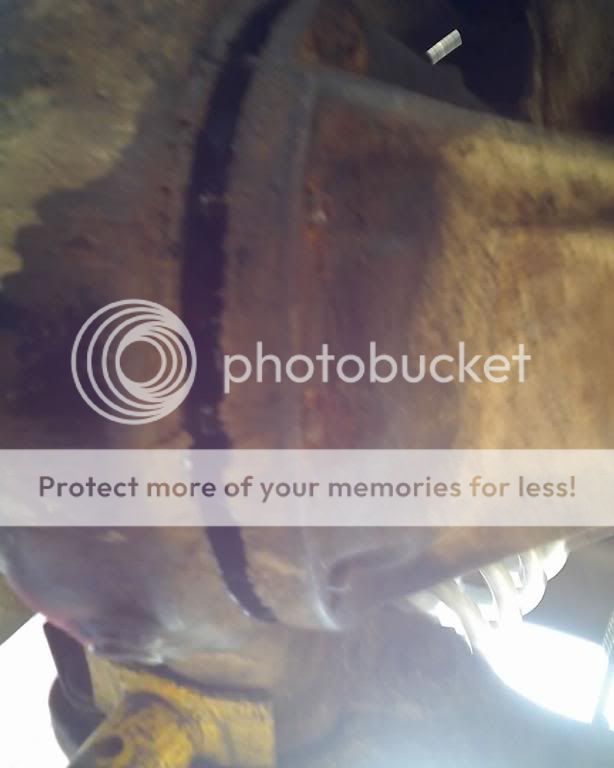
Next, remove the diff from the axle.
It will need a good wiggle and a few taps with a hammer to break the seal.
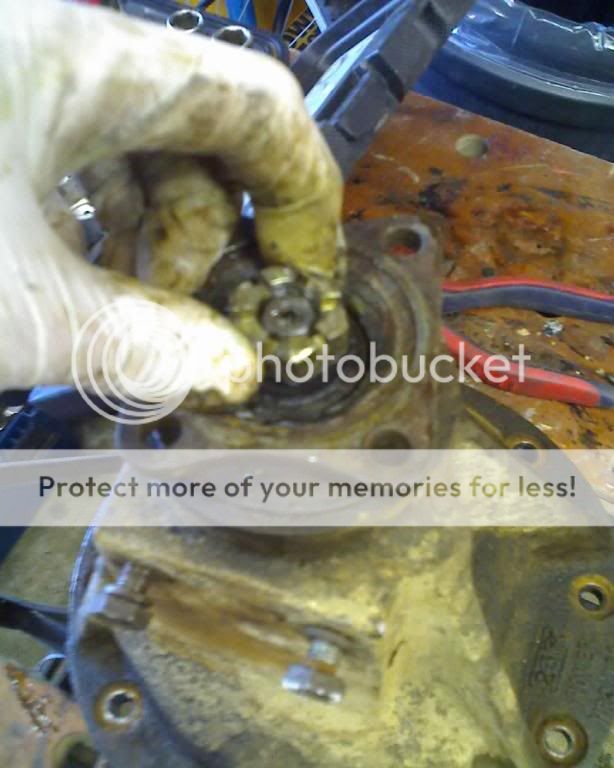
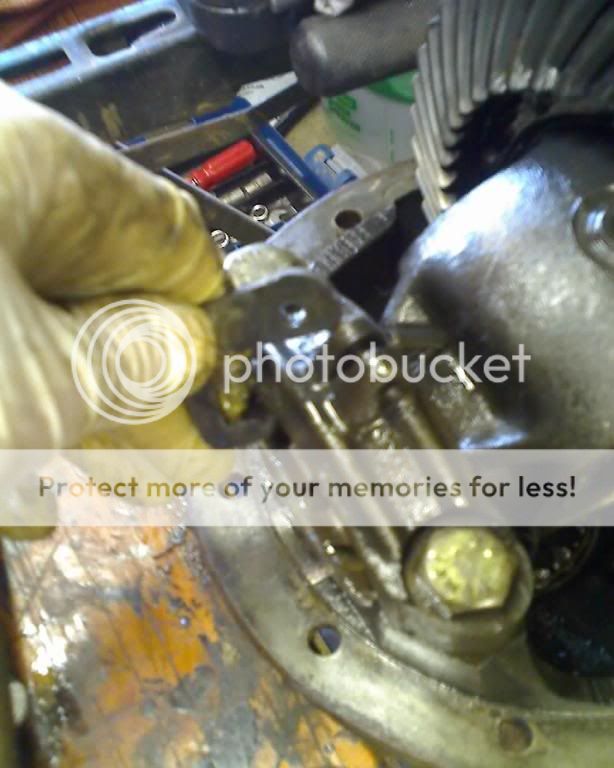
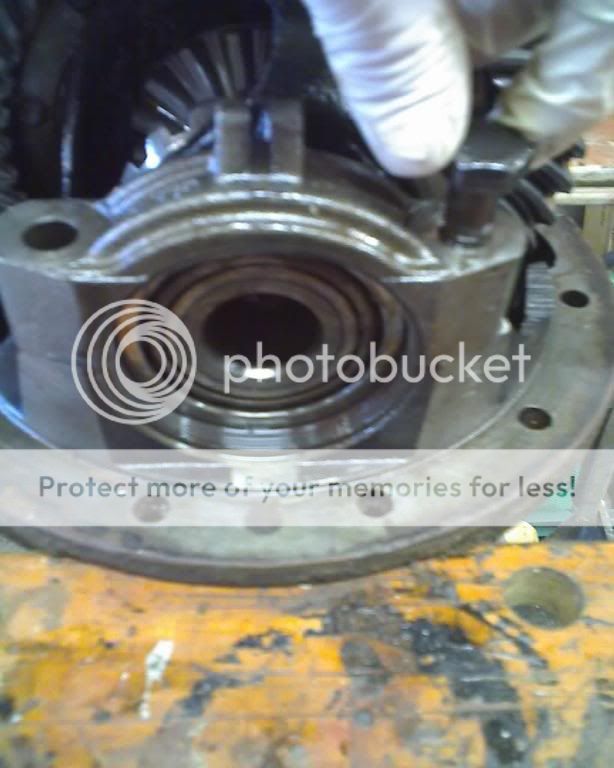
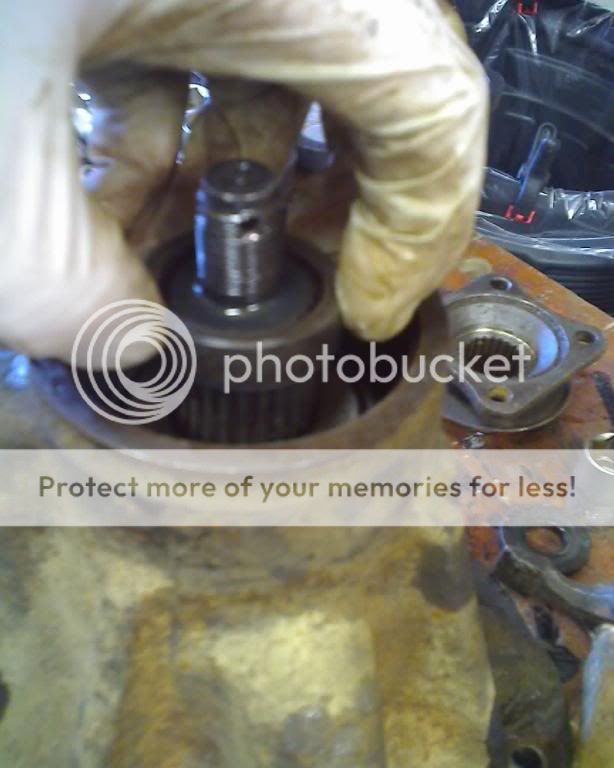
With the diff on the workbench, remove the split pin from the big nut on the input flange
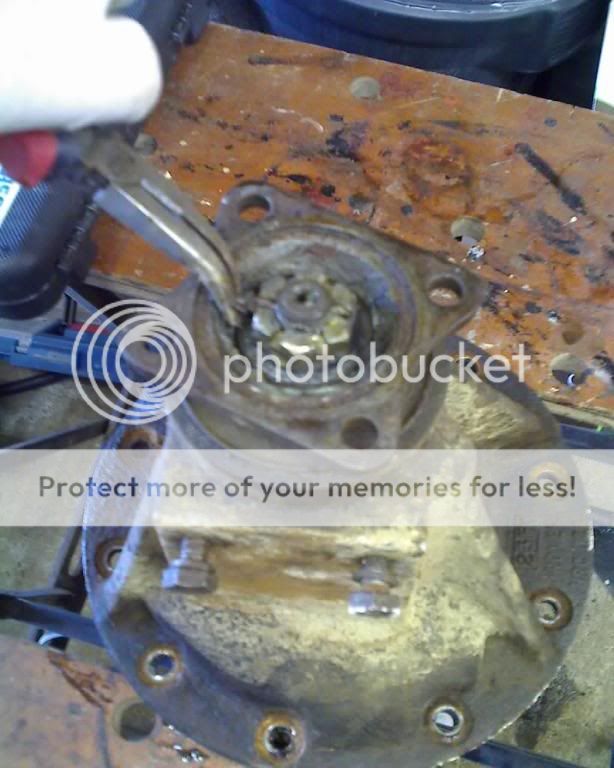
Undo the nut
and remove it
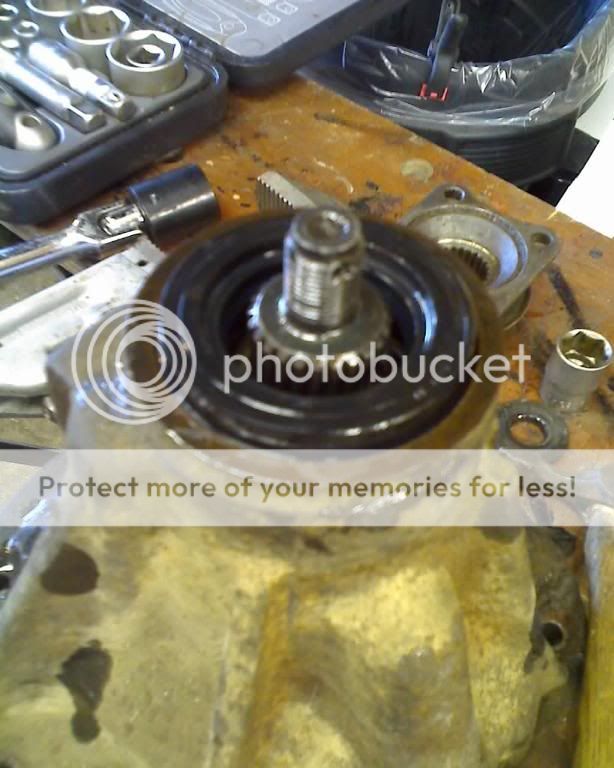
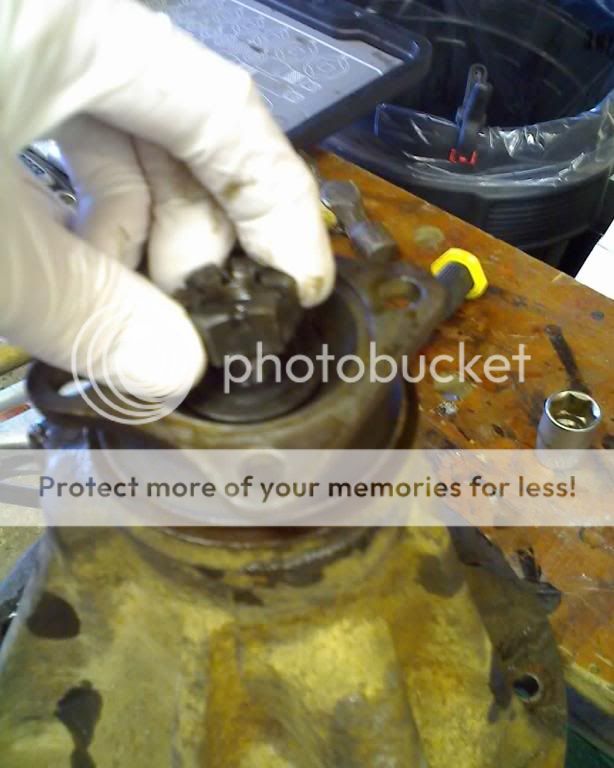
remove the drive flange
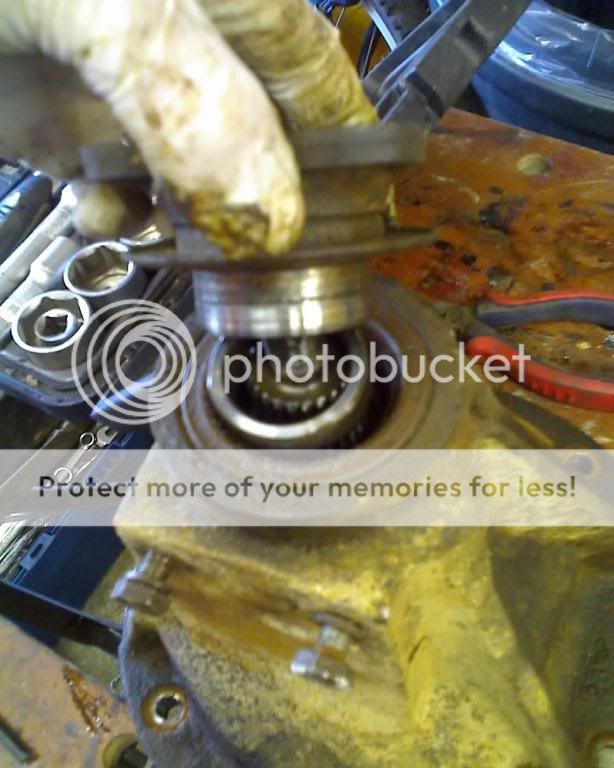
and the spacer
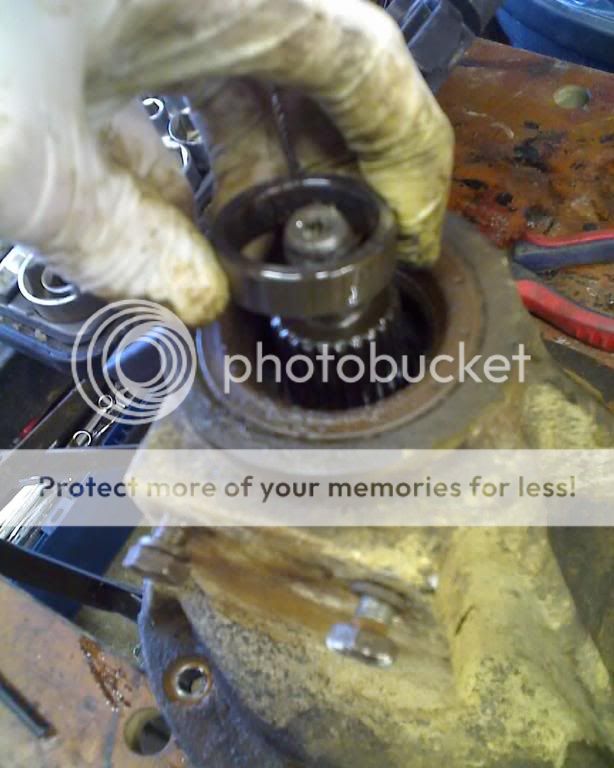
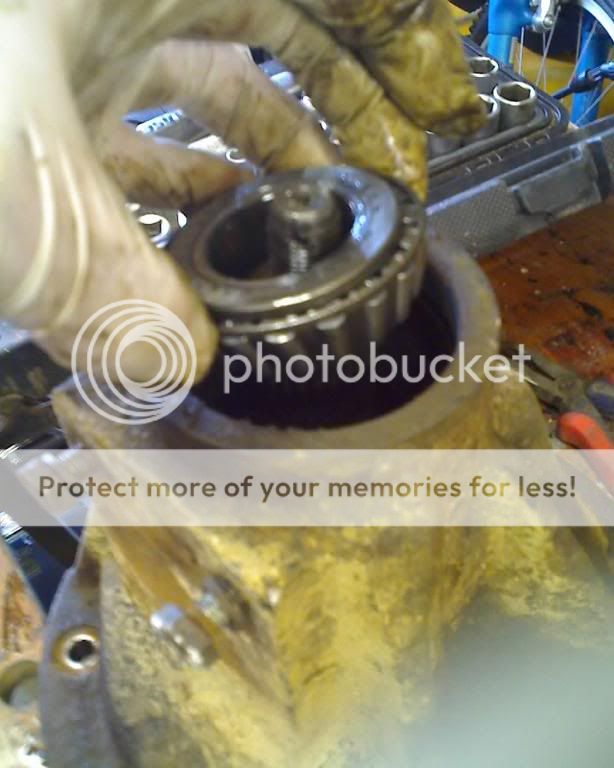
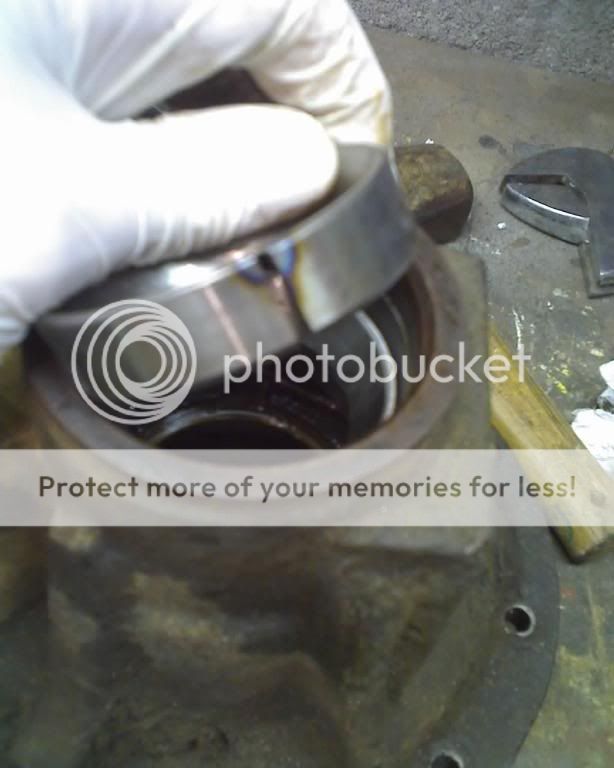
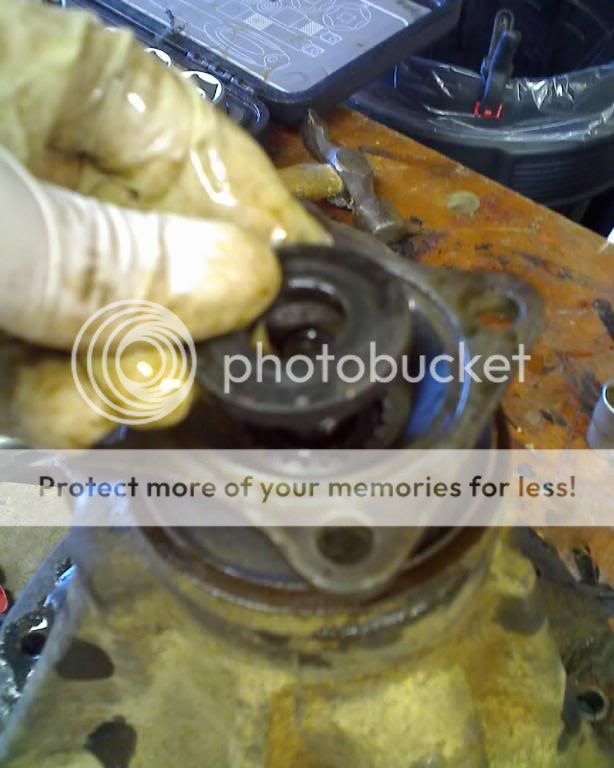
Next, prise out the oil seal
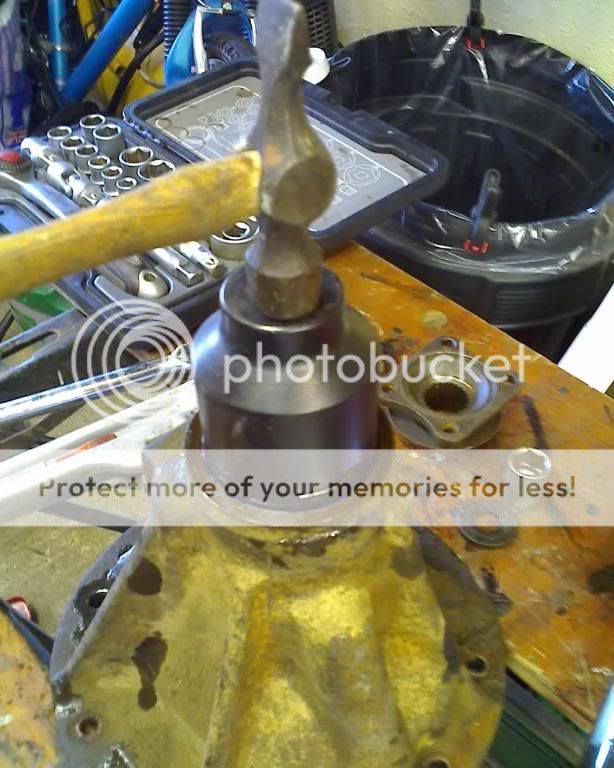
and remove the inner race of the input bearing. NOTE there will be one or more shims on top of the bearing inner, dont lose them and remember the order that things go in.
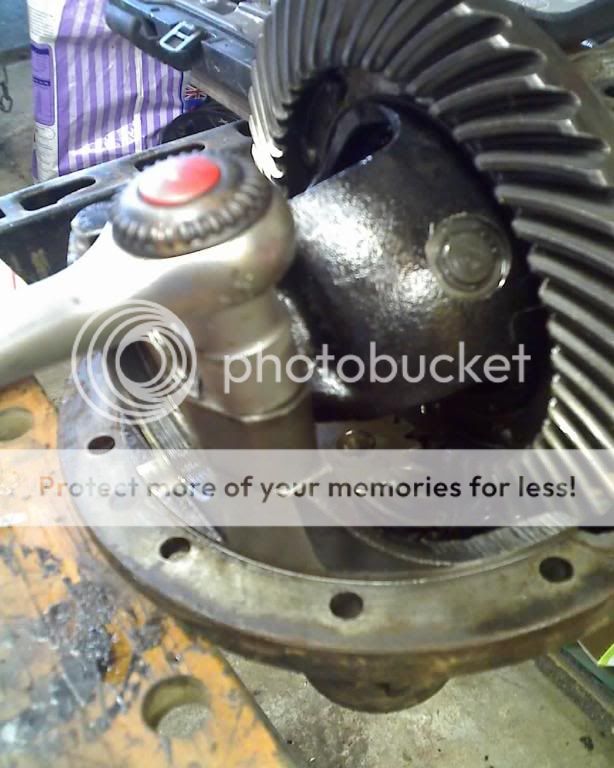
Turn the diff over and loosen the 4 bearing retaining bolts just crack them at his stage about 1/8th of a turn.
Mark the bearing cage when you re-fit it, it must end up in exactly the same place.
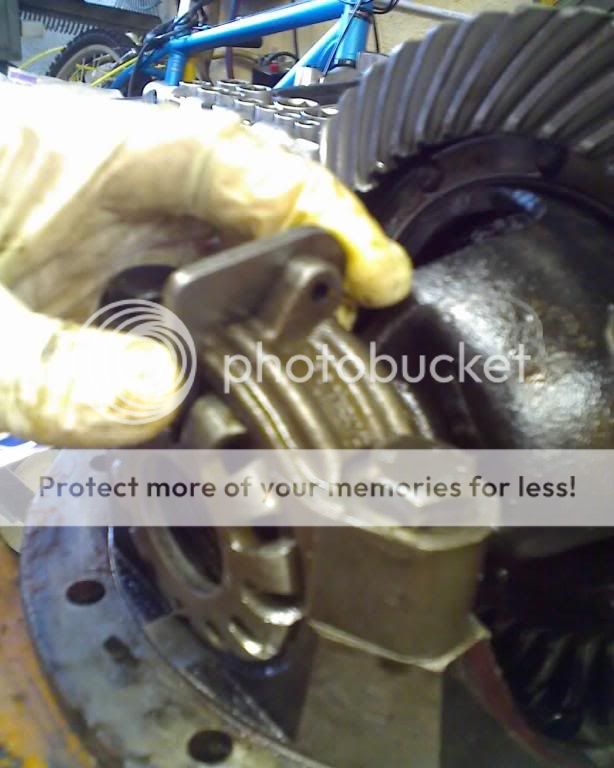
Remove the roll pin
and the bearing locking peg
unscrew the bearing cage by tapping it anti-clockwise COUNT THE NUMBER OF TURNS IT TAKES TO REMOVE IT AND MAKE A NOTE
Do the same for the bearing cage on the other side the number of turns might be different, so make a note of that too.
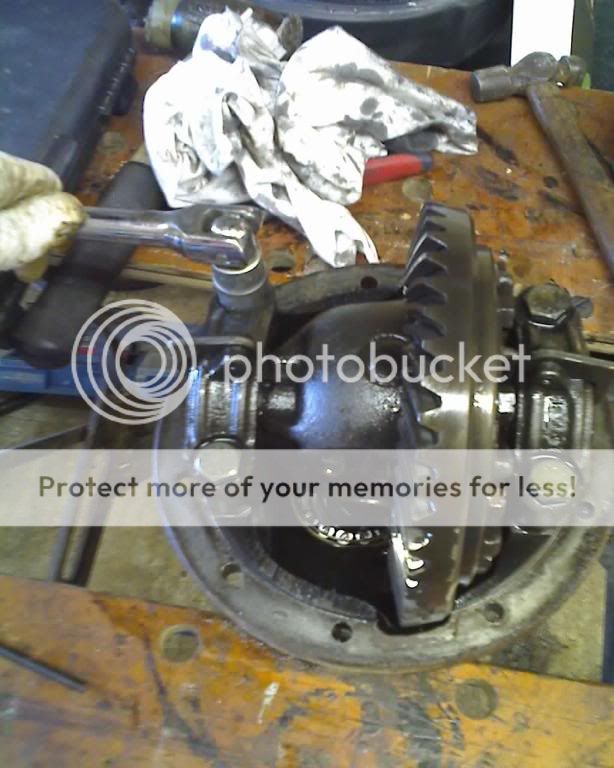
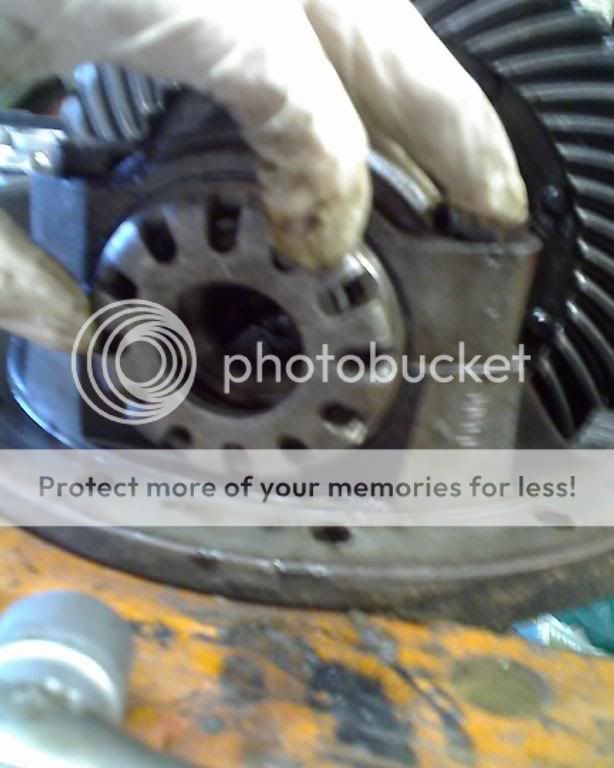
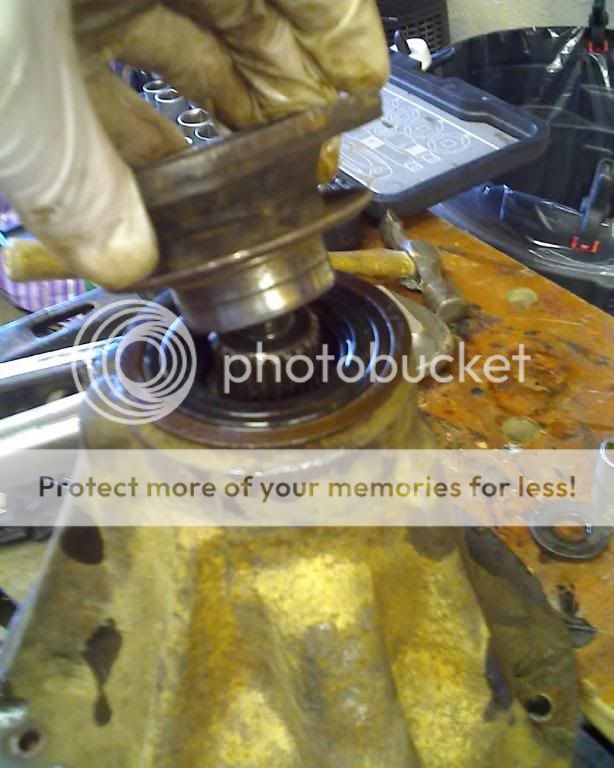
Now the bolts can be removed and the bearing clamps
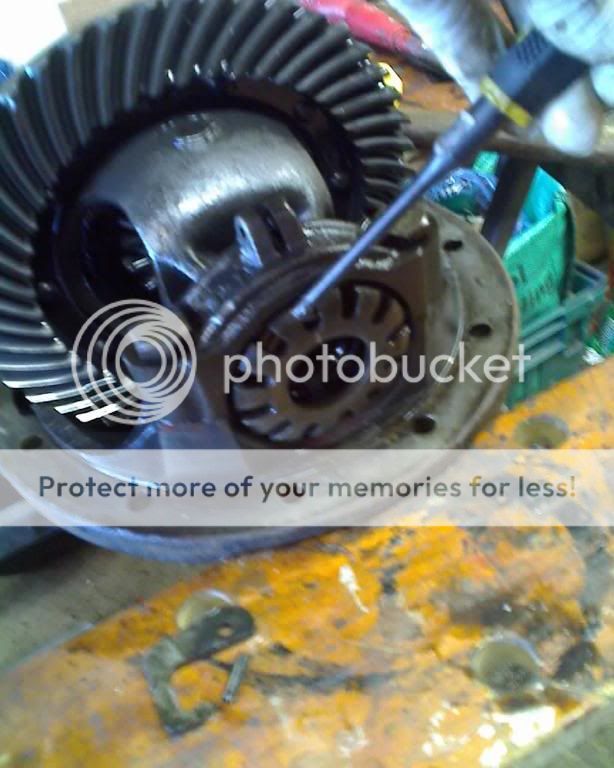
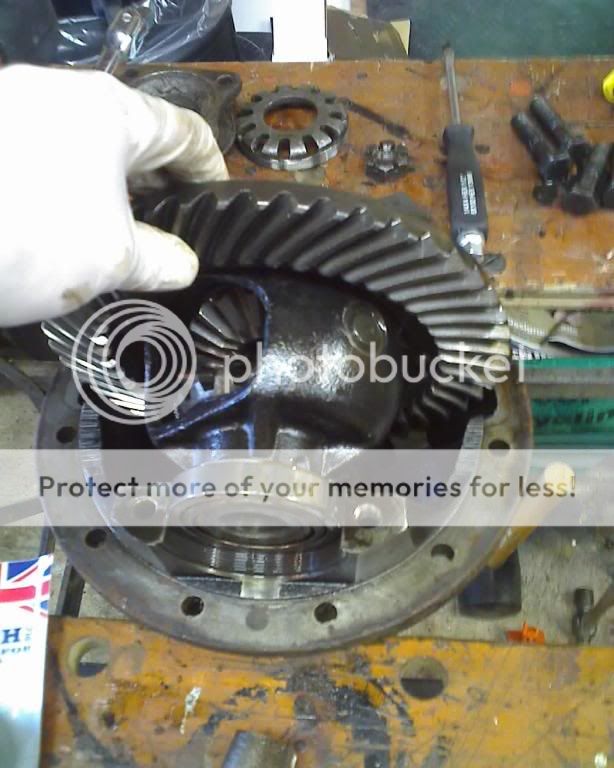
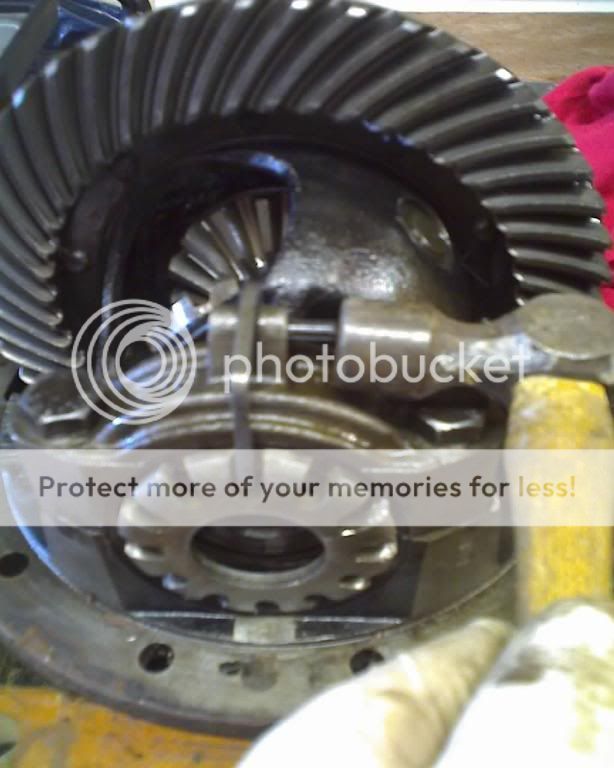
carefully remove the outer bearings (keep them on the same side of the diff when replacing them) and the crown wheel.

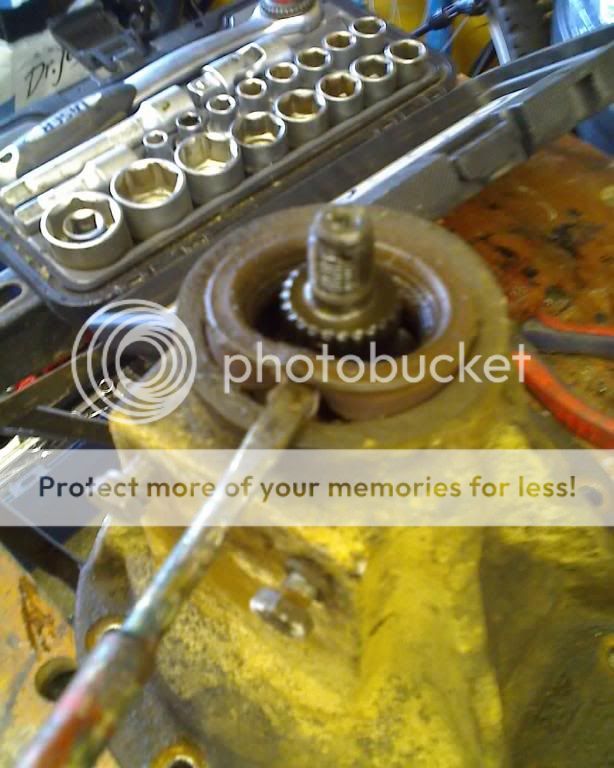
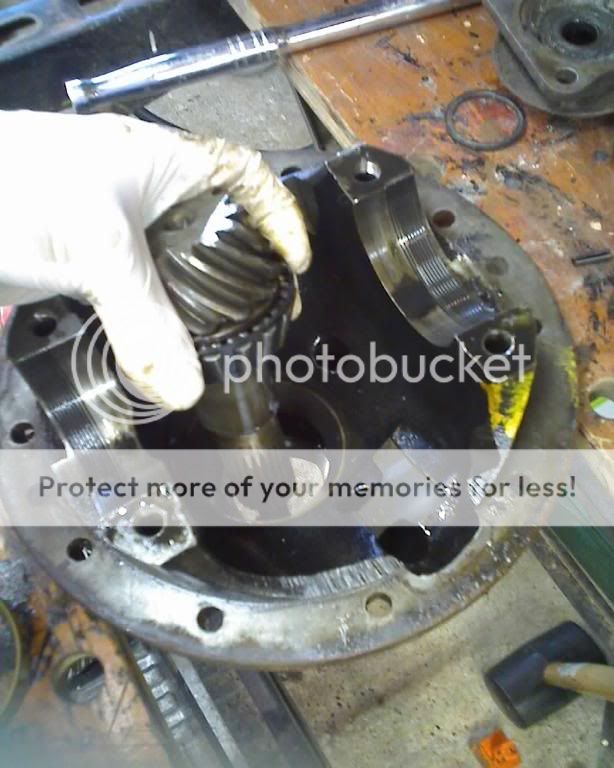
now the pinion can be removed
Working from the rear of the diff, the outer race of the input bearing can now be carefully tapped out with a punch or chisel (I forgot to take a picture of this). Tap gently and evenly, working your way around the perimeter of the bearing.
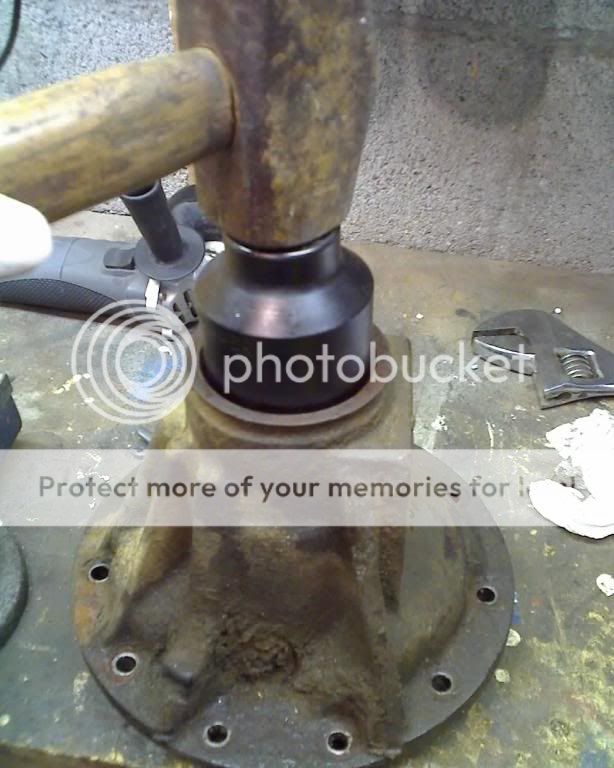
I then cut a slot in the old bearing outer, using a cutting disc on an angle grinder. This then makes a perfect drift for tapping or pressing the new one into place.
I used a 52mm socket to tap the bearing outer into place, making sure it went all the way down to the shoulder.
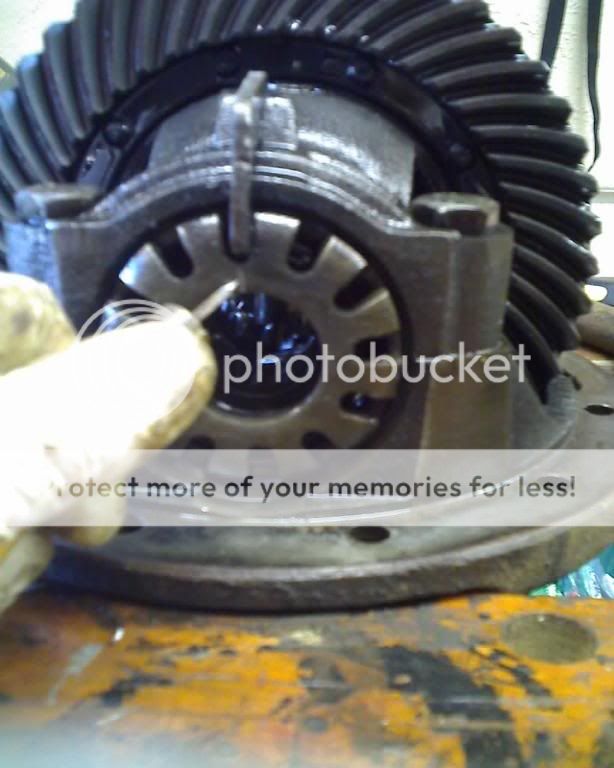
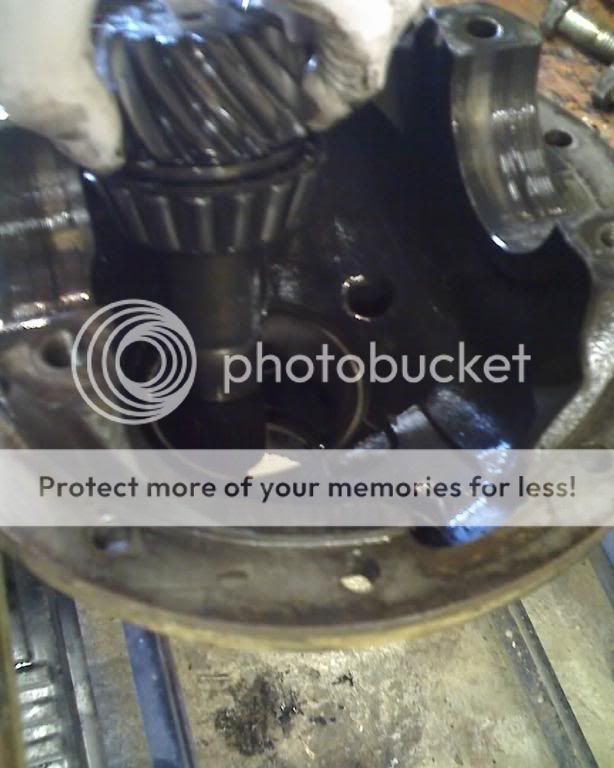
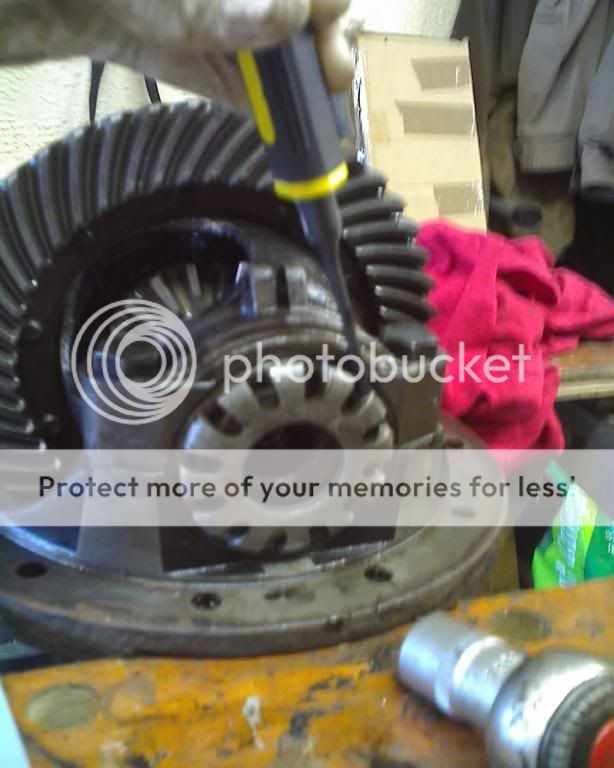
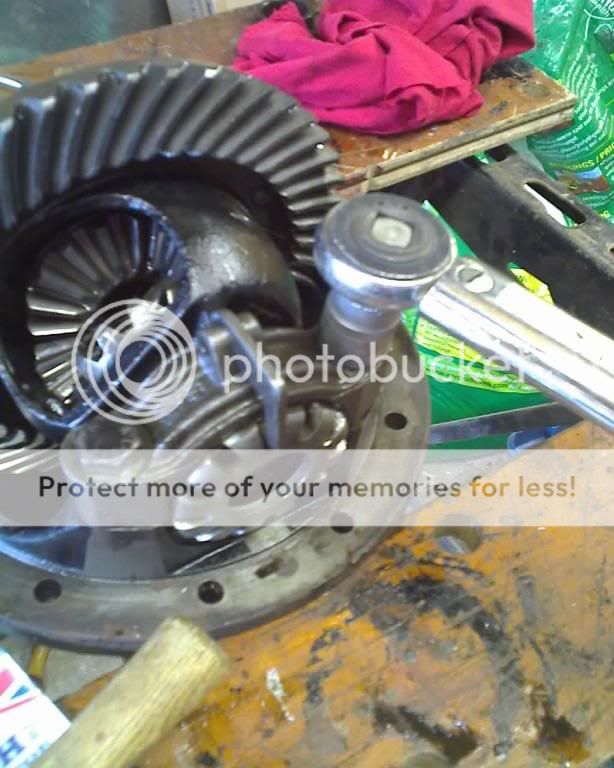
Now the pinion can be replaced
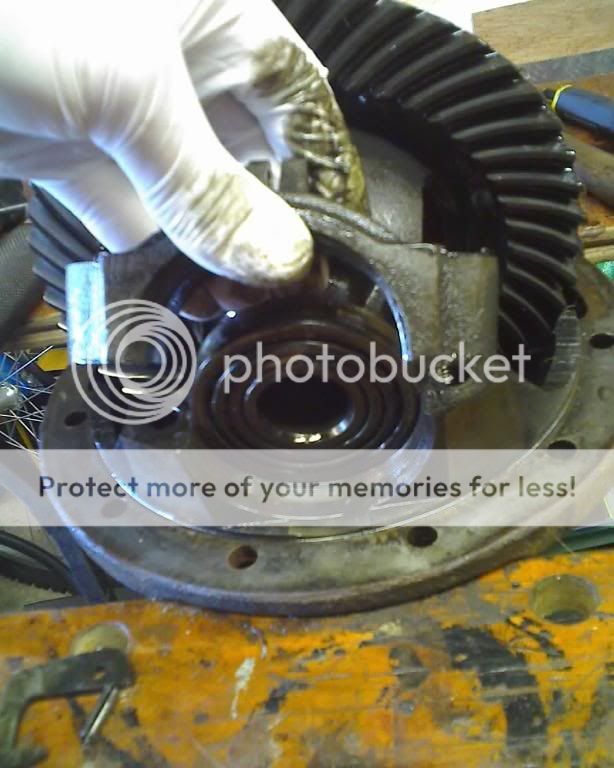
and the crown wheel (re-fit the bearing outers too)
Replace the bearing clamps
and nip up the bolts (dont tighten them yet a little more than finger tight will do)
replace the bearing cages counting the number of turns and using the marks to get them in exactly the same place that they were originally
the last bit will require a few taps
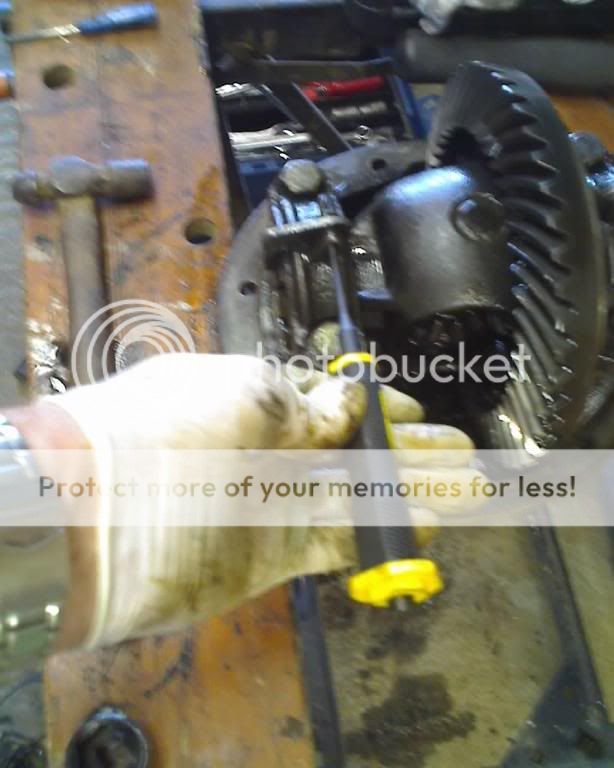
Re-fit the locking pegs
and the roll pins
then torque up the 4 bearing retaining bolts
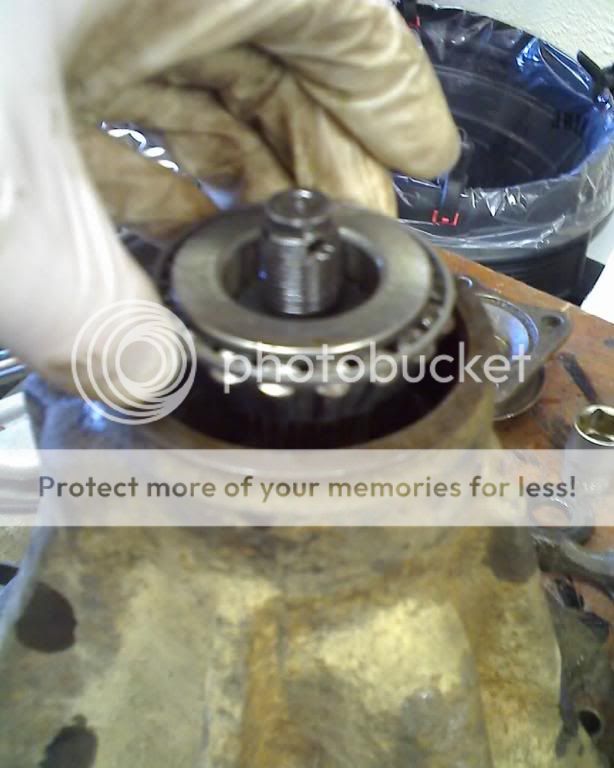
Turn the diff over again and fit the new inner race of the input bearing AND THE SHIM(S) that were there originally.
then re-fit the spacer
Lubricate the new oil seal with some EP90 and push it in evenly as far as you can by hand
then tap it down flush with a suitable drift
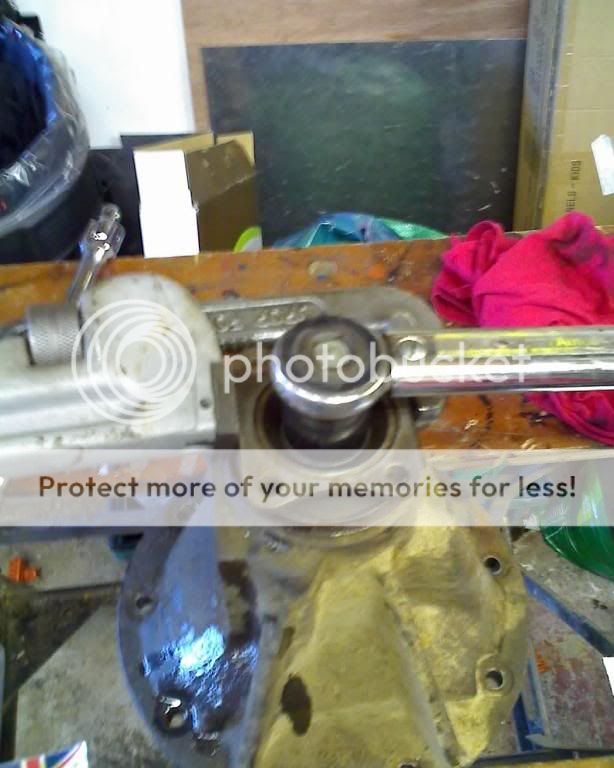
re-fit the input flange
washer
and nut
torque up the nut and fit a new split pin
All that remains is to replace the diff in the axle, re-fit the half-shafts (and whatever has been removed to facilitate that) and re-attach the prop-shaft.
DONT FORGET TO RE-FILL THE DIFF WITH OIL AND TOP UP THE SWIVELS.
I did my front diff bearing. The rear one is a bit easier, because there is no need to remove the hub and stub axle in order to remove the half-shafts.
The first job is to drain the oil from the diff.
Then disconnect the diff end of the prop shaft.
Next, disconnect the half shafts from the diff. To do this, follow steps 1, 2, 5, 6, 7 and 8 of Busters Swivel Ball renewal thread http://www.landyzone.co.uk/lz/f41/swivel-ball-renewal-63808.html
(Buster removed his half-shafts completely theres no need to do this, just pull them out far enough so that theyre disconnected from the diff).
Some of the swivel oil / grease will leak out, so have something in place to catch it and remember to top the swivels up again when youve finished.
Next, remove the diff from the axle.
It will need a good wiggle and a few taps with a hammer to break the seal.
With the diff on the workbench, remove the split pin from the big nut on the input flange
Undo the nut
and remove it
remove the drive flange
and the spacer
Next, prise out the oil seal
and remove the inner race of the input bearing. NOTE there will be one or more shims on top of the bearing inner, dont lose them and remember the order that things go in.
Turn the diff over and loosen the 4 bearing retaining bolts just crack them at his stage about 1/8th of a turn.
Mark the bearing cage when you re-fit it, it must end up in exactly the same place.
Remove the roll pin
and the bearing locking peg
unscrew the bearing cage by tapping it anti-clockwise COUNT THE NUMBER OF TURNS IT TAKES TO REMOVE IT AND MAKE A NOTE
Do the same for the bearing cage on the other side the number of turns might be different, so make a note of that too.
Now the bolts can be removed and the bearing clamps
carefully remove the outer bearings (keep them on the same side of the diff when replacing them) and the crown wheel.
now the pinion can be removed
Working from the rear of the diff, the outer race of the input bearing can now be carefully tapped out with a punch or chisel (I forgot to take a picture of this). Tap gently and evenly, working your way around the perimeter of the bearing.
I then cut a slot in the old bearing outer, using a cutting disc on an angle grinder. This then makes a perfect drift for tapping or pressing the new one into place.
I used a 52mm socket to tap the bearing outer into place, making sure it went all the way down to the shoulder.
Now the pinion can be replaced
and the crown wheel (re-fit the bearing outers too)
Replace the bearing clamps
and nip up the bolts (dont tighten them yet a little more than finger tight will do)
replace the bearing cages counting the number of turns and using the marks to get them in exactly the same place that they were originally
the last bit will require a few taps
Re-fit the locking pegs
and the roll pins
then torque up the 4 bearing retaining bolts
Turn the diff over again and fit the new inner race of the input bearing AND THE SHIM(S) that were there originally.
then re-fit the spacer
Lubricate the new oil seal with some EP90 and push it in evenly as far as you can by hand
then tap it down flush with a suitable drift
re-fit the input flange
washer
and nut
torque up the nut and fit a new split pin
All that remains is to replace the diff in the axle, re-fit the half-shafts (and whatever has been removed to facilitate that) and re-attach the prop-shaft.
DONT FORGET TO RE-FILL THE DIFF WITH OIL AND TOP UP THE SWIVELS.
")