Freelander 1 Diesel mist spraying all over the Fuel Rail & Injectors

This site contains affiliate links for which LandyZone may be compensated if you make a purchase.

brillo21

Member
Posts
56
Location
Kent
Hi all
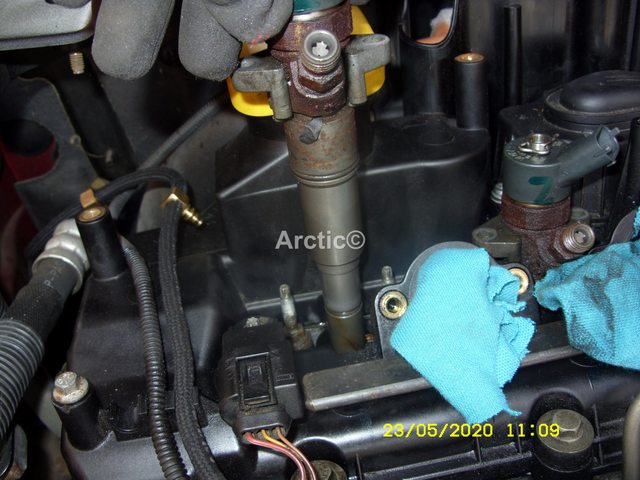
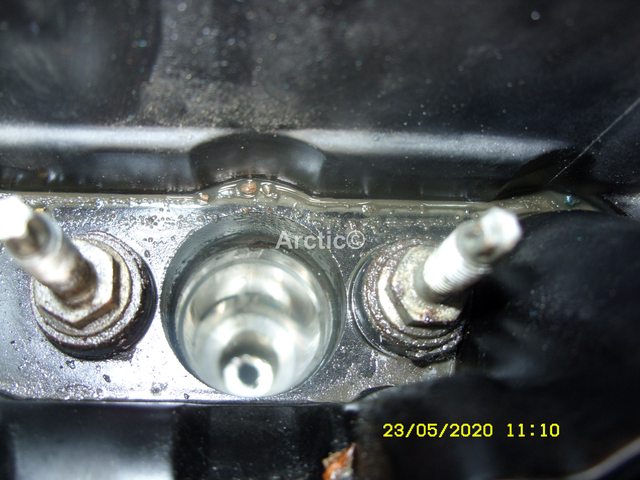
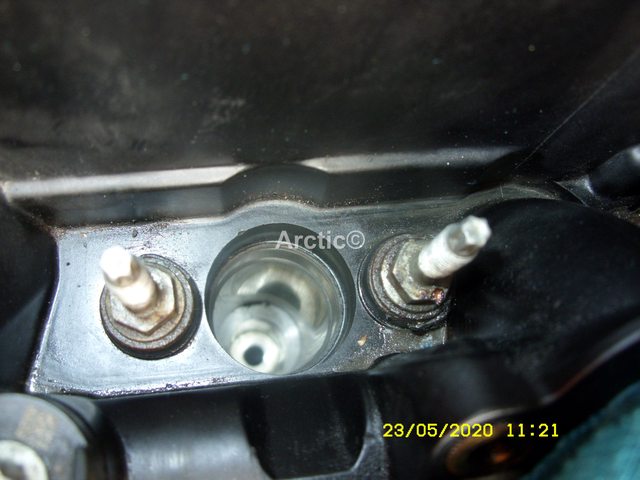
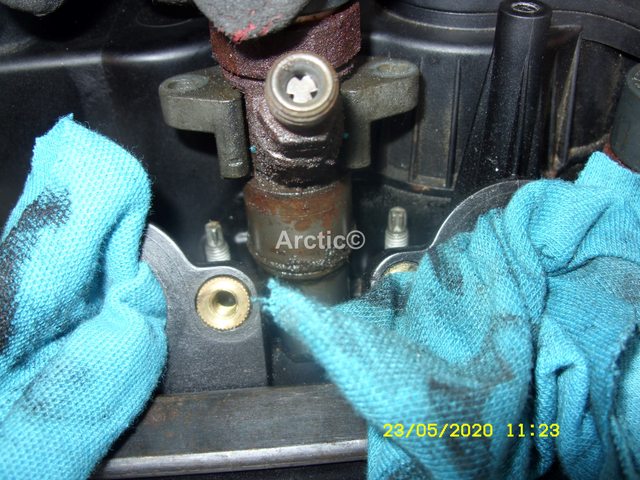
Car was running fine but I could smell a whiff of diesel when accelerating so on lifting the bonnet noticed that diesel was running down the LH side of the engine (standing in front of the car).

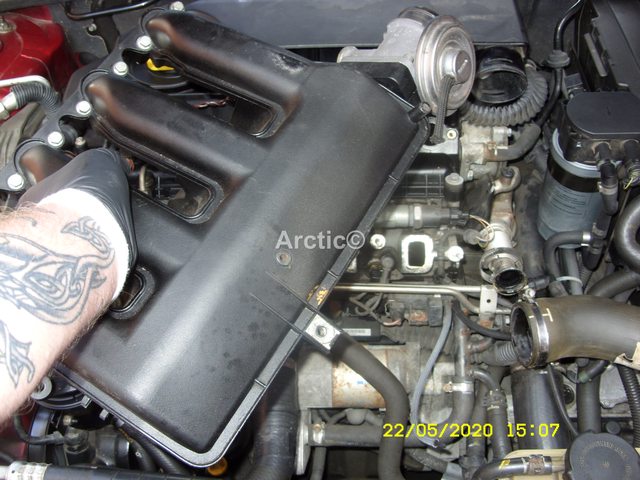
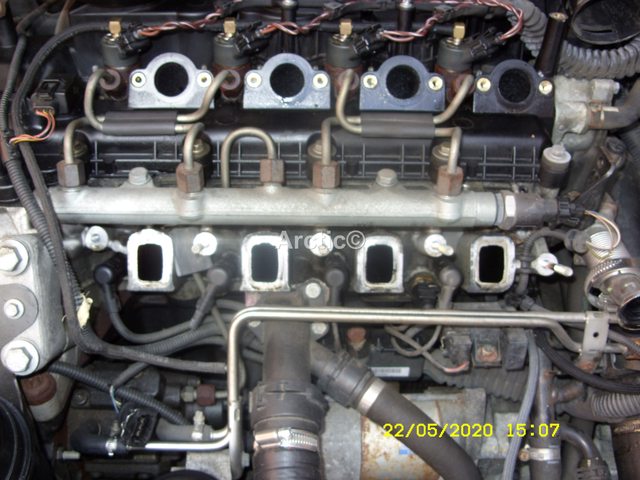
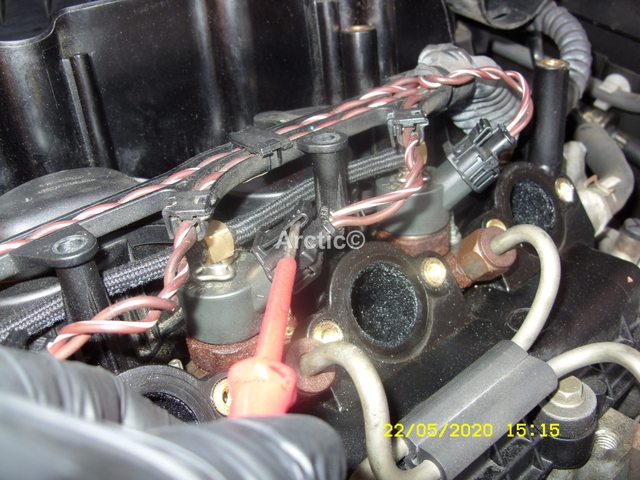
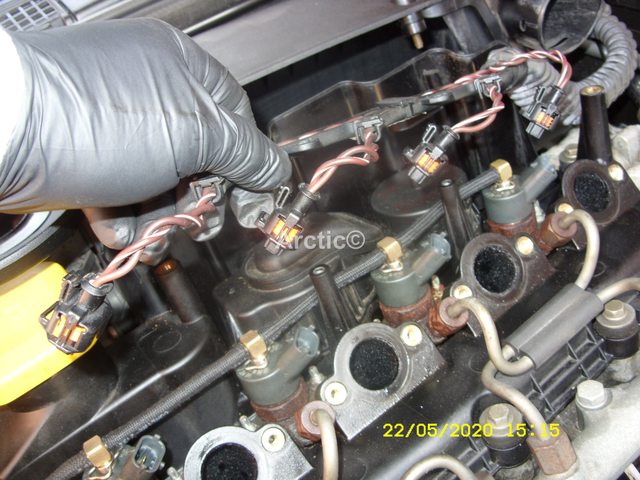
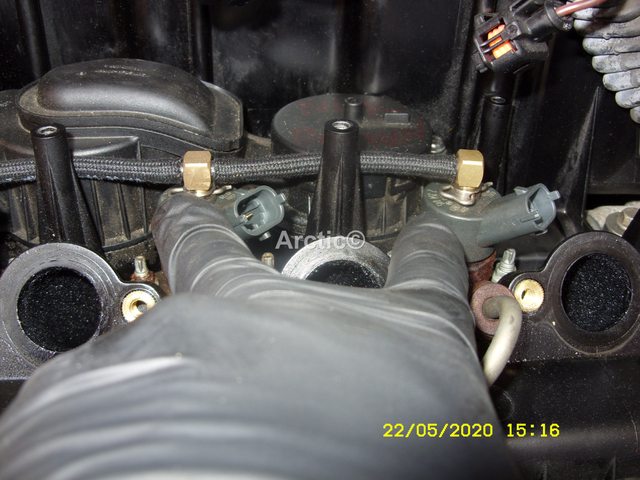
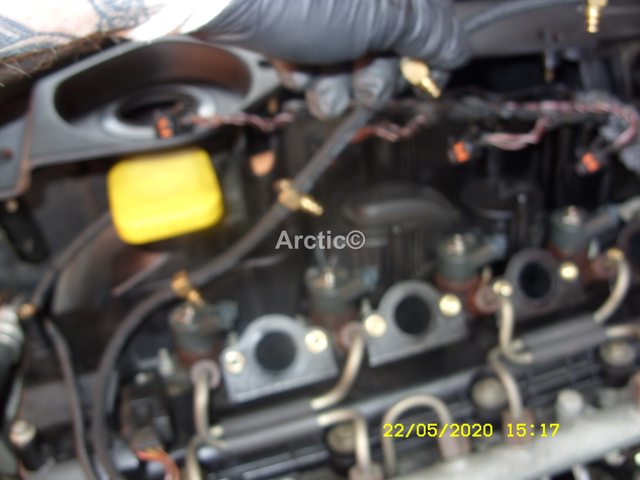
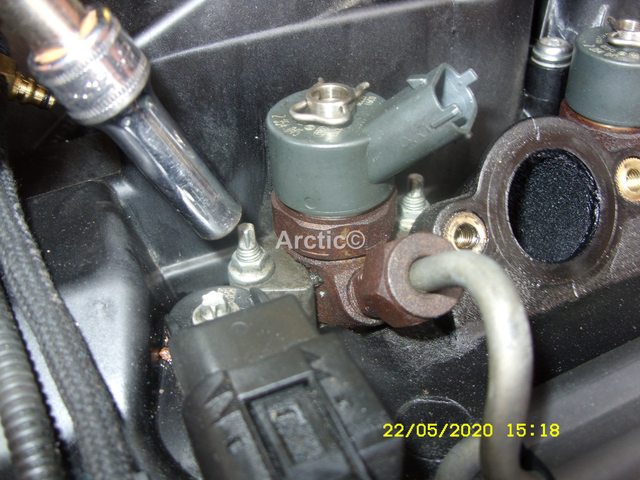
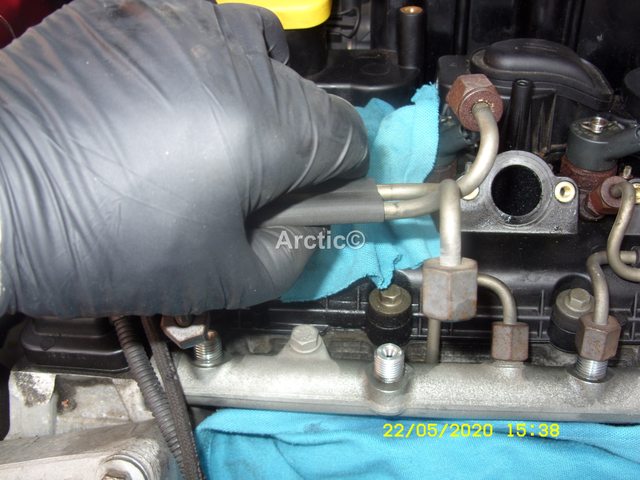
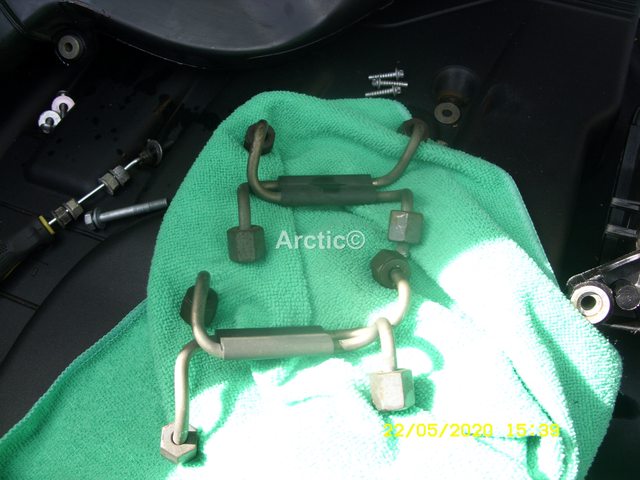
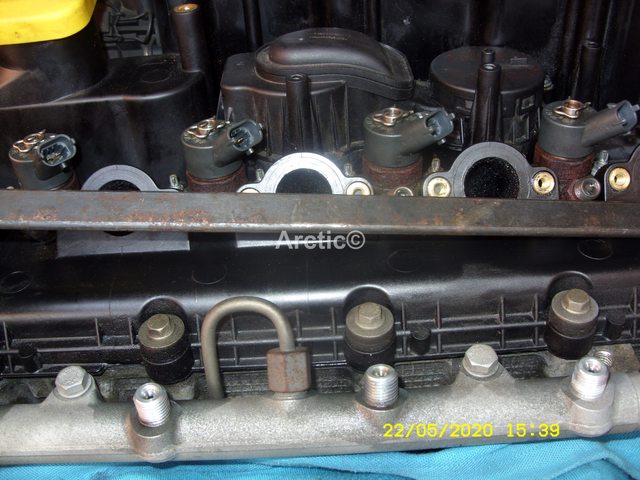
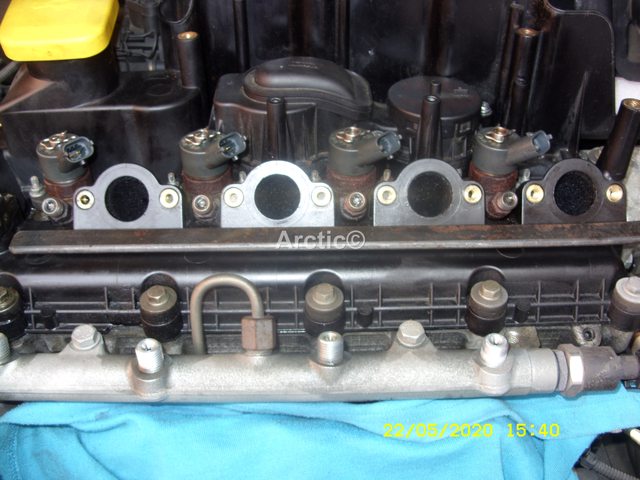
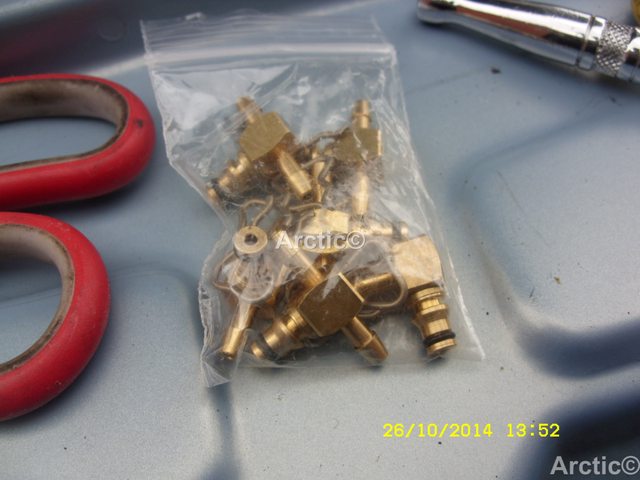
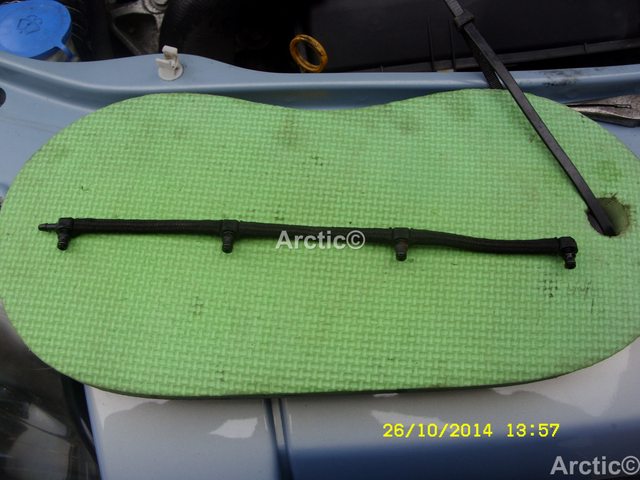
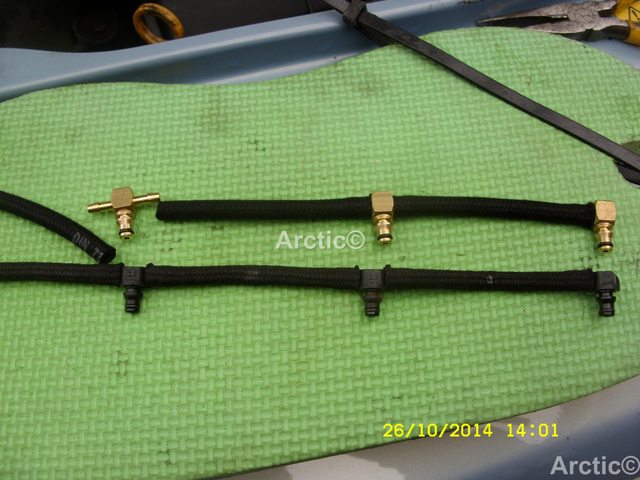
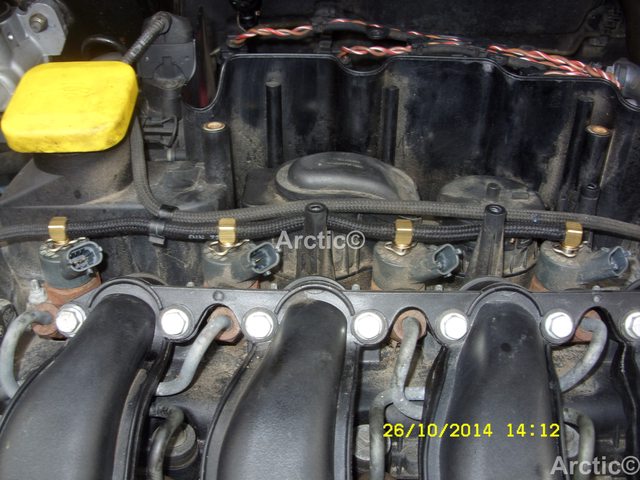
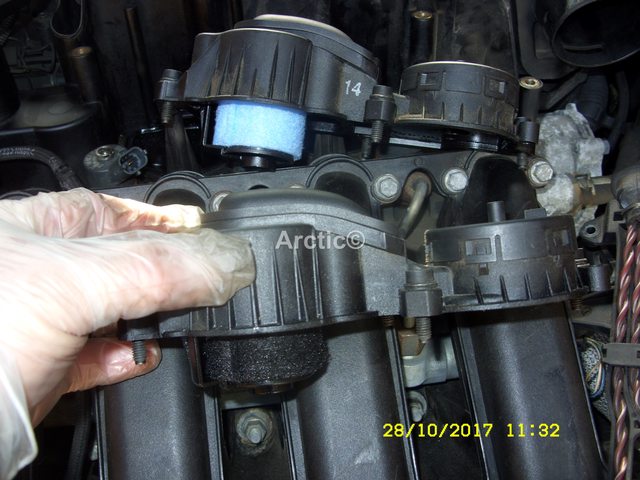
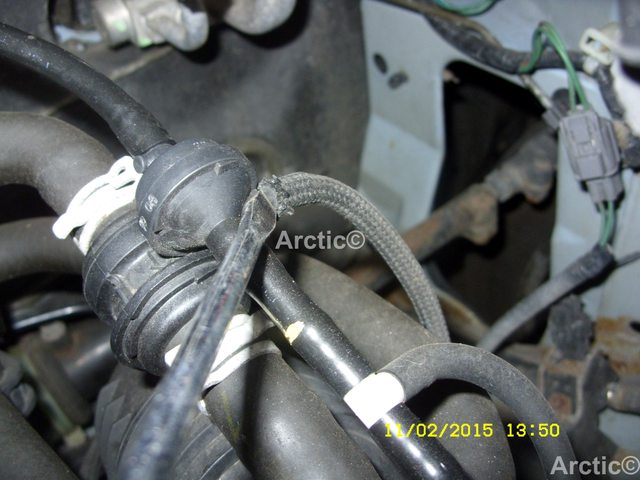
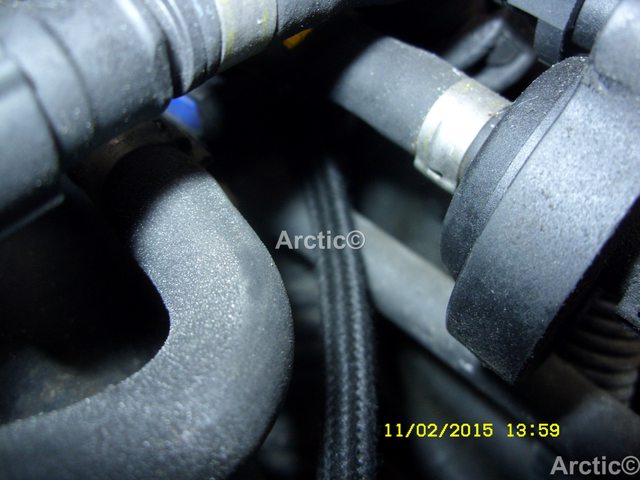
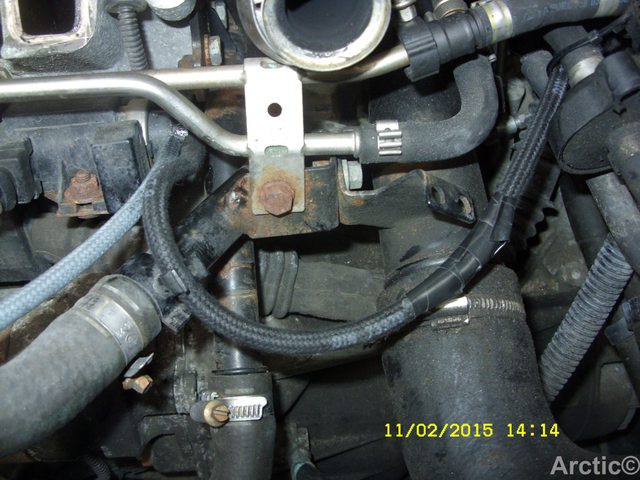
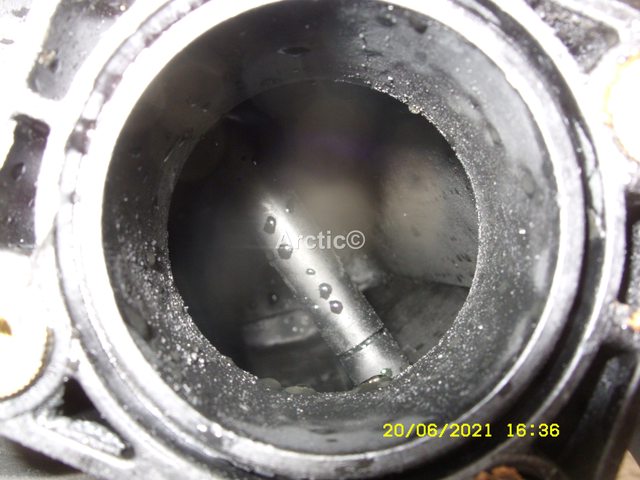
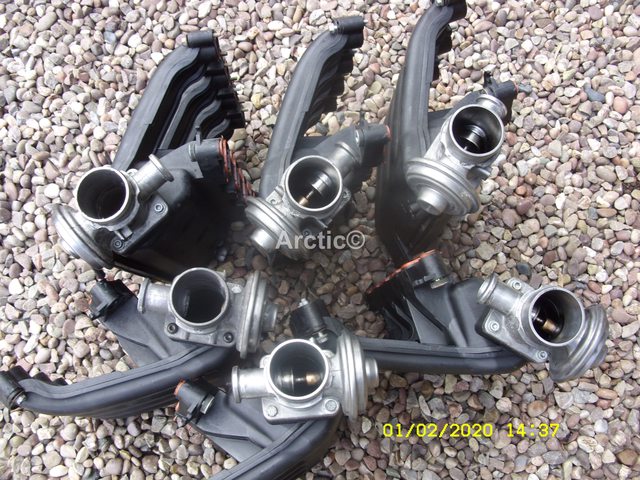
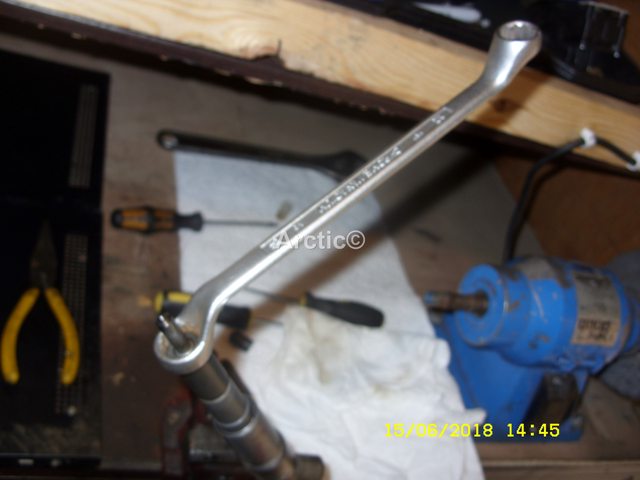
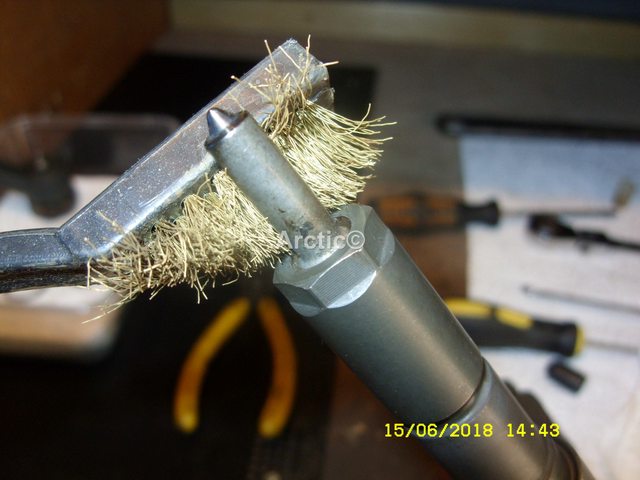
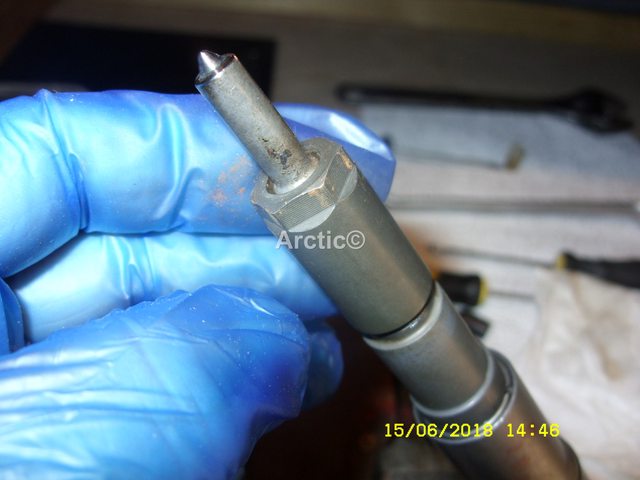
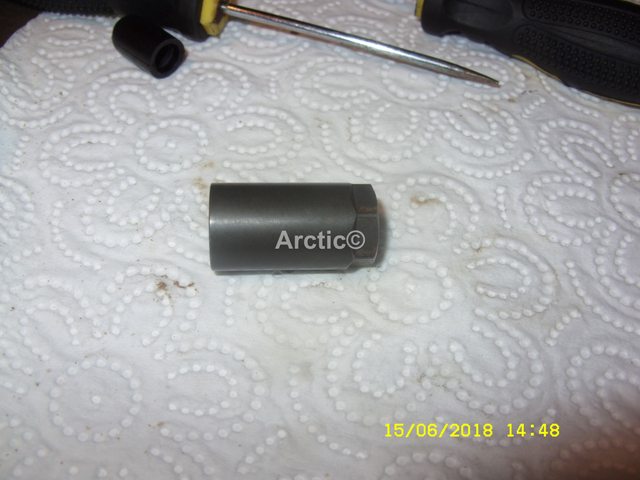
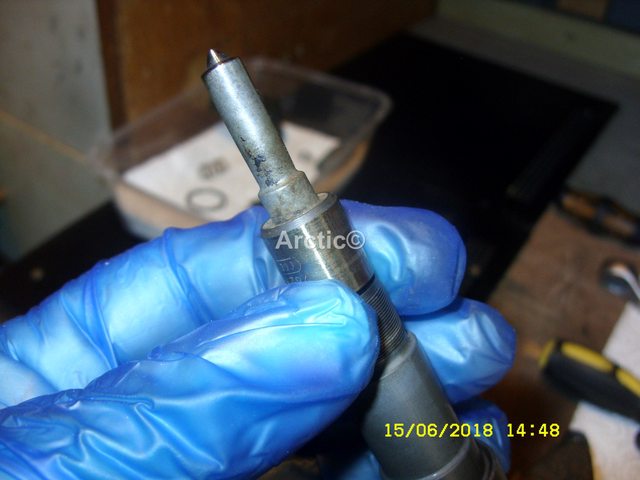
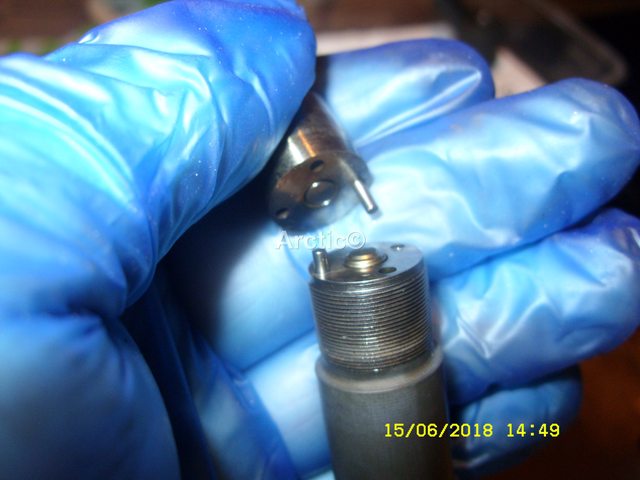
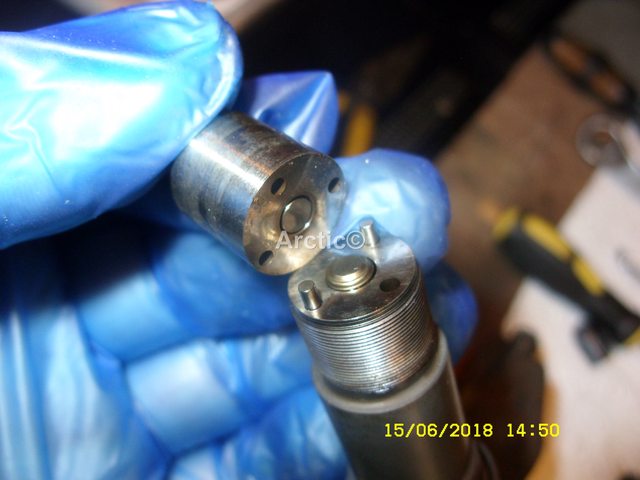
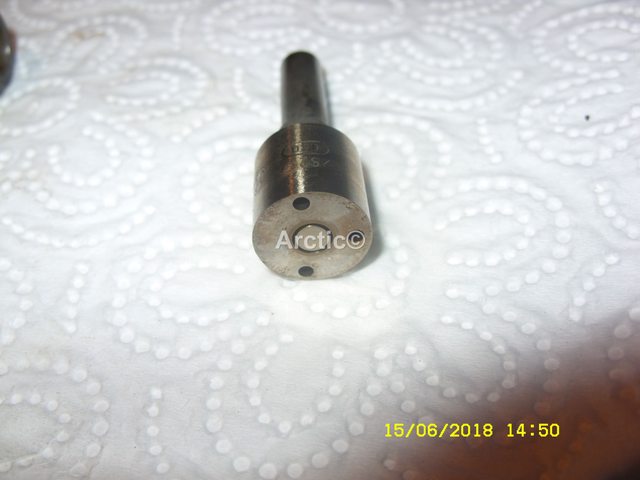
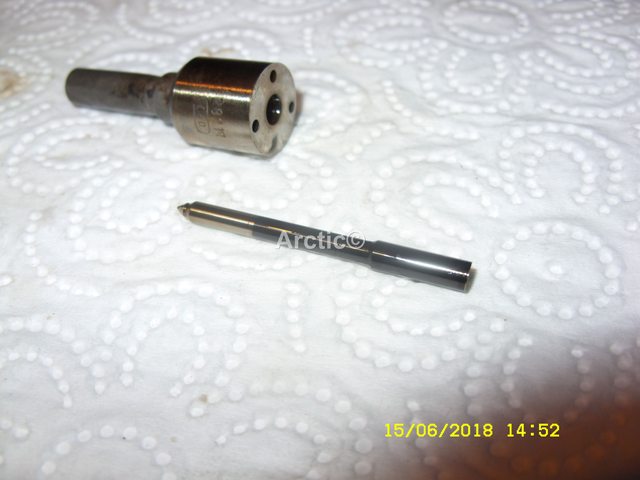
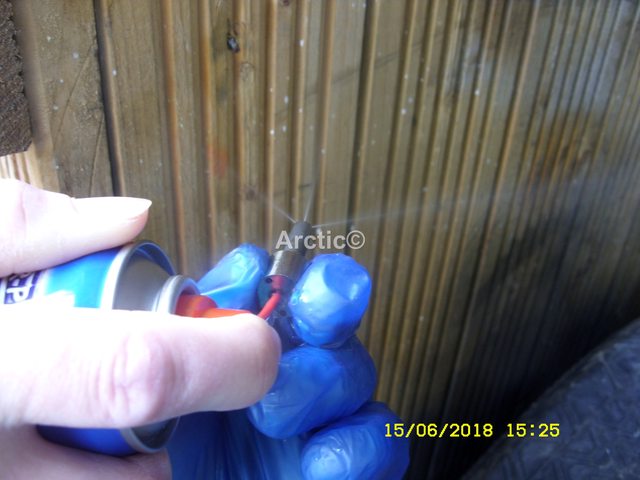
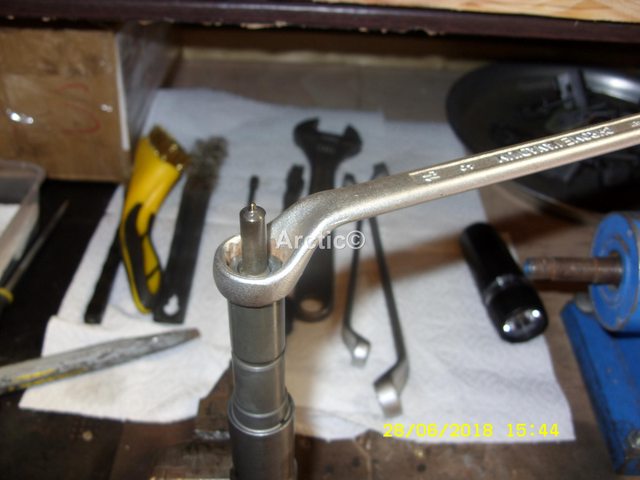
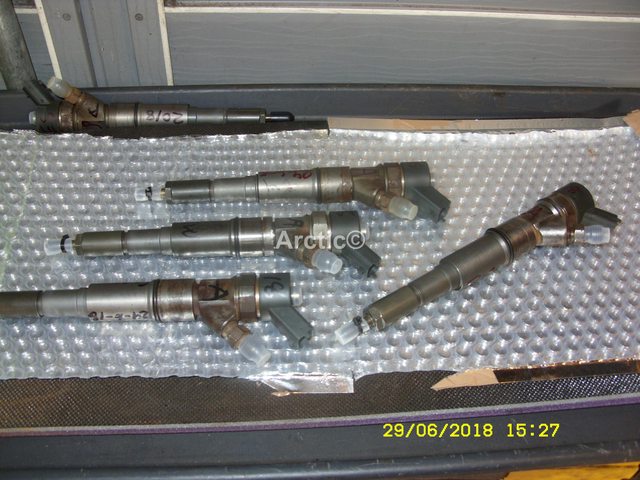
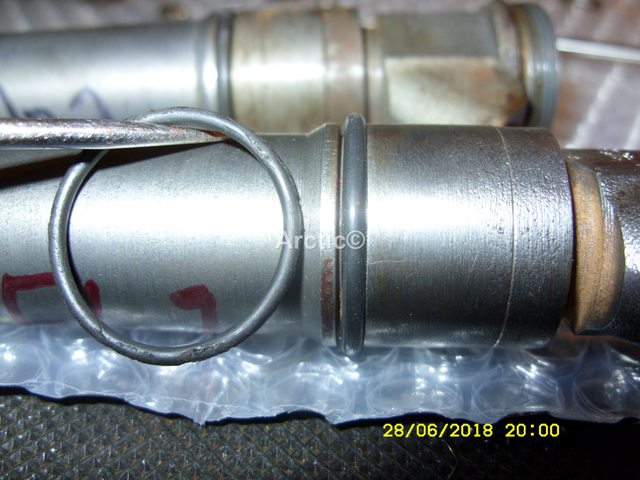
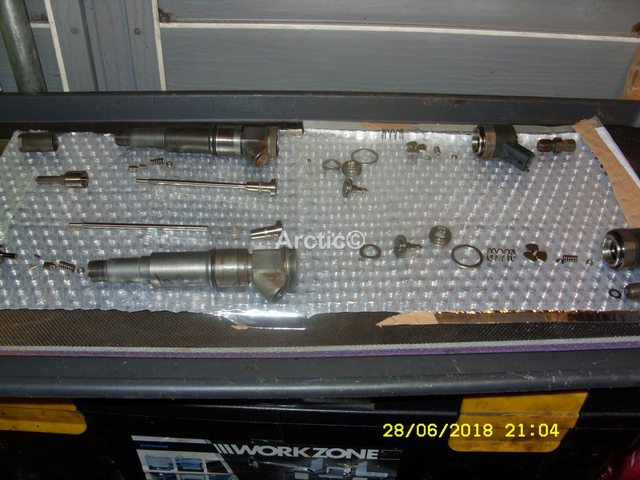
On inspection it seemed to be coming from under the injector rail cover, so I removed the three bolts holding it in place and underneath there is diesel filling all the injector recesses and it had been overflowing down the LH side of the engine when the recesses were full, it looks as if it was hitting the underside on the plastic cover, so I cleaned up all the diesel and then started the engine, with the cover removed and the car running all is well until you increase the revs and then a fine spray mist comes from somewhere down by the base of the injectors / inlet manifold but its impossible to see the source of the very fine mist / spray.

Has anyone come across this issue ? any help as to where to start to remedy this situation would be gratefully received
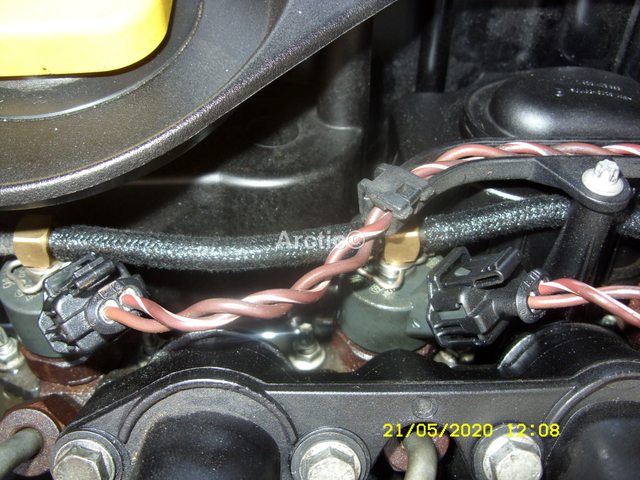
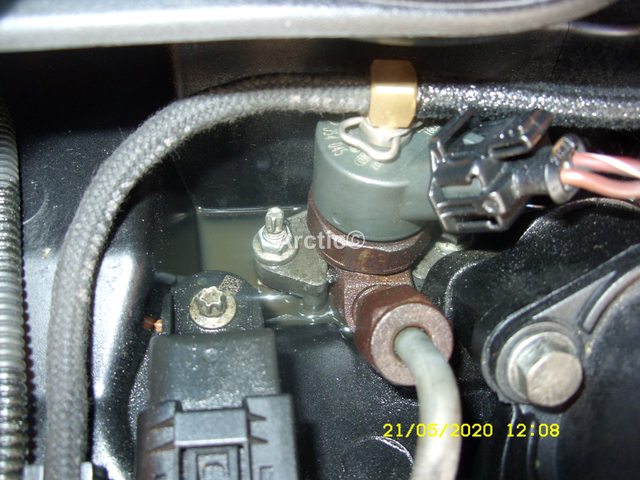
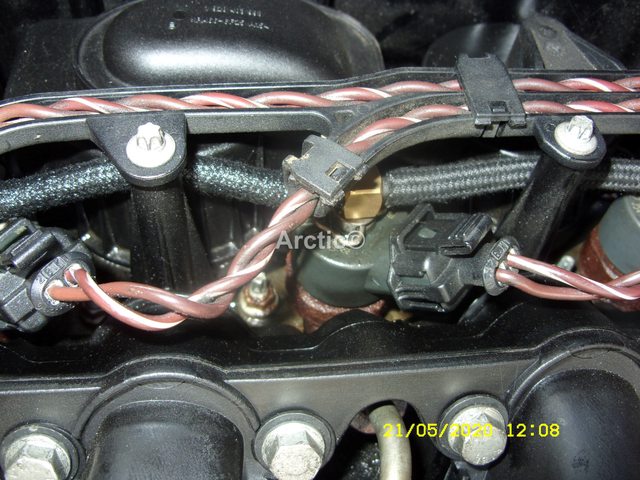
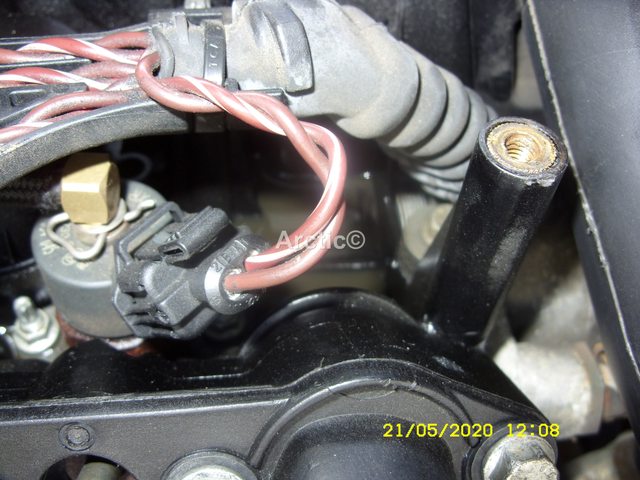
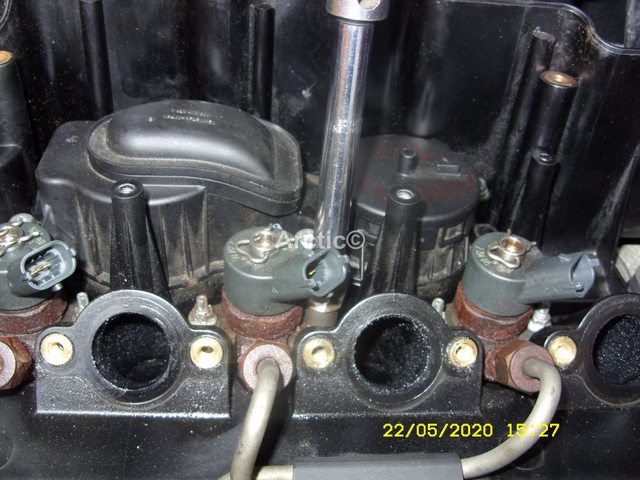
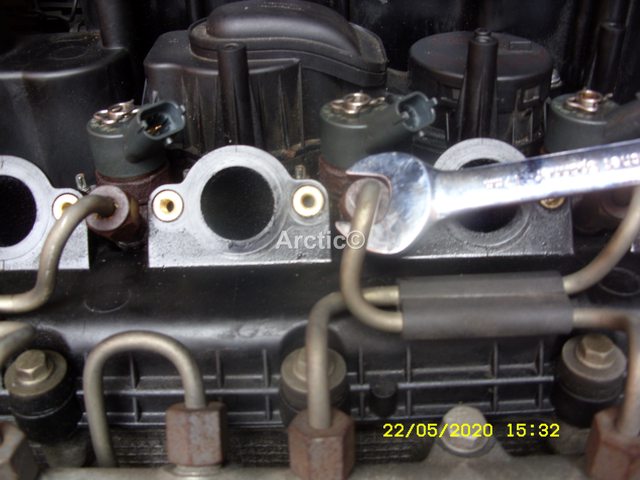
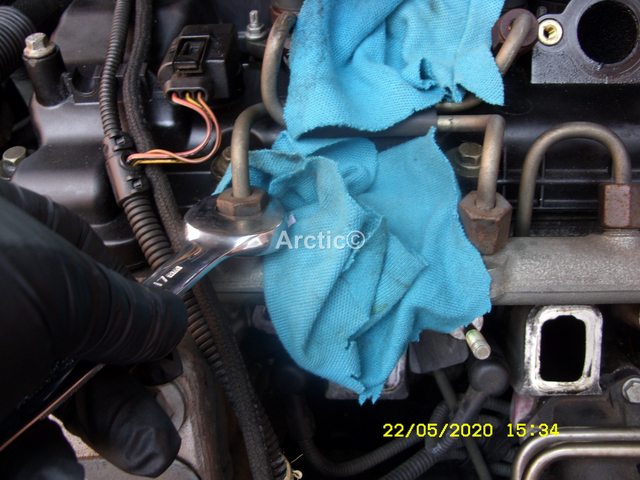
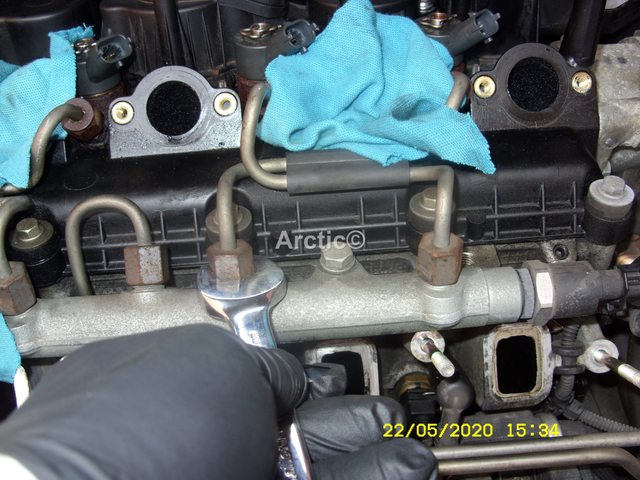
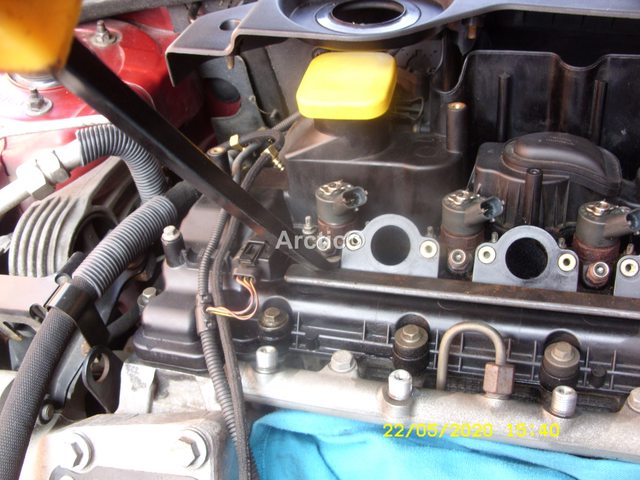
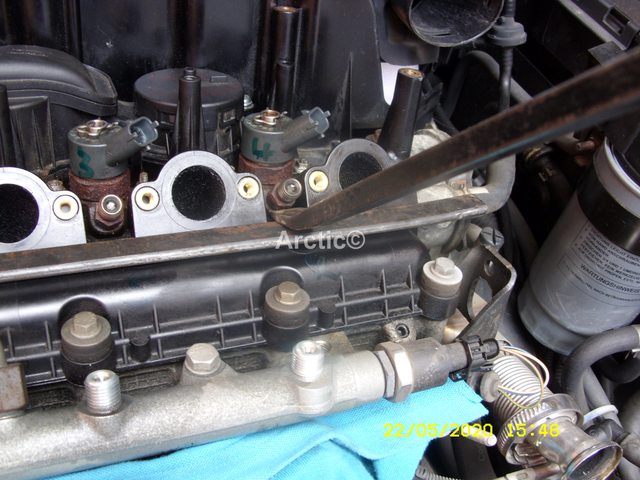
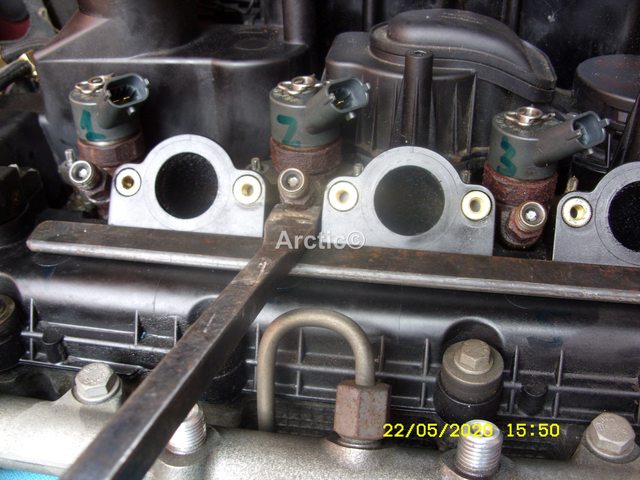
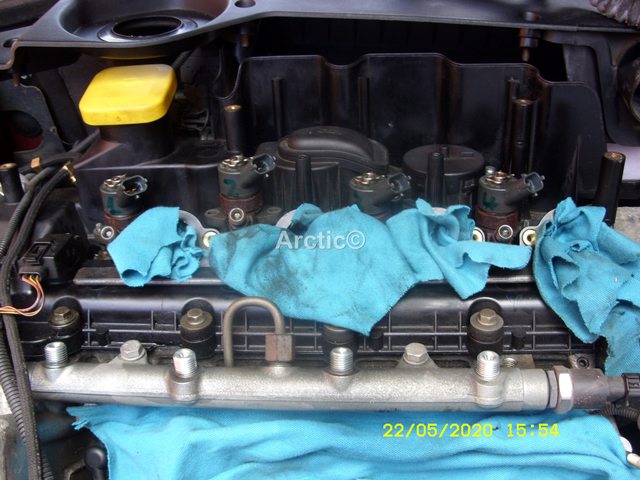
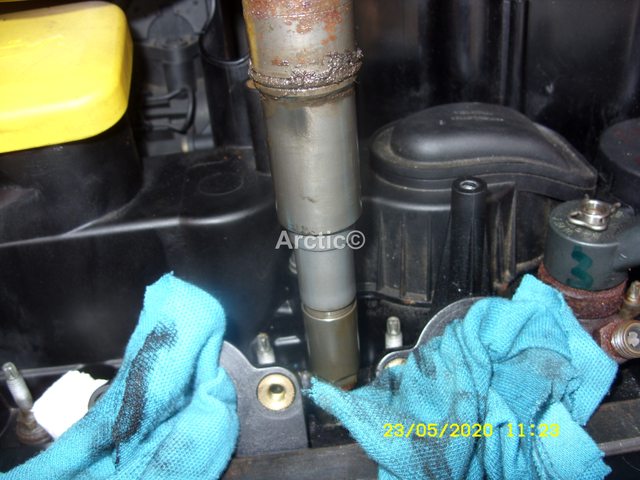
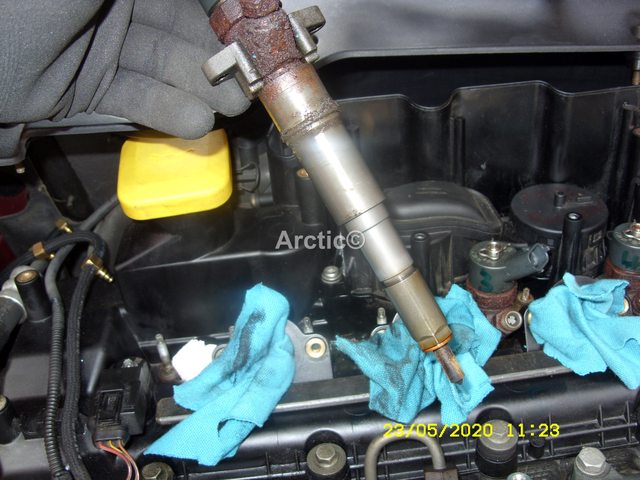
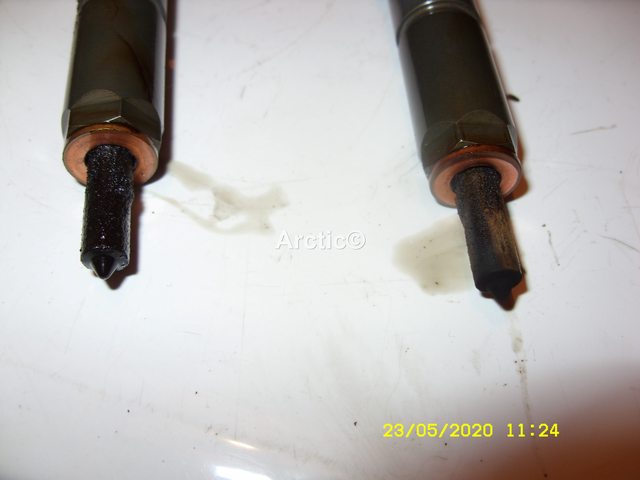
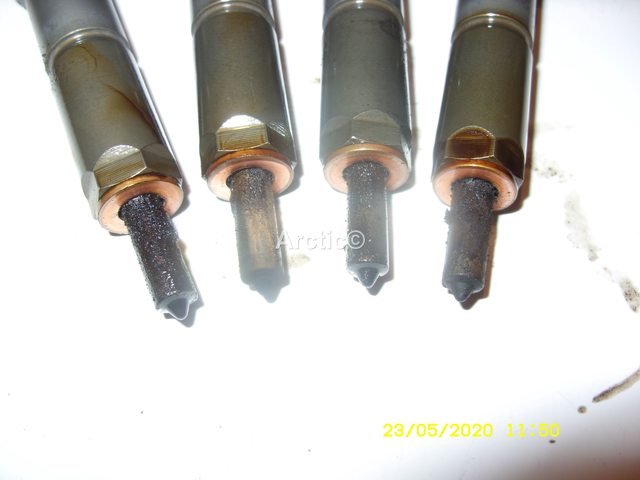
 
Try cracking off the injector fuel connection nuts, then tighten them again.
A making sure the engine is off, and B don't over tighten the nuts.
The other point for leaks is the black leak off pipes, but those normally drip if leaking, no spray.
 
Try cracking off the injector fuel connection nuts, then tighten them again.
A making sure the engine is off, and B don't over tighten the nuts.
The other point for leaks is the black leak off pipes, but those normally drip if leaking, no spray.

Thank you for the replies, when you say leak off pipes do you mean the diesel return pipes that go across the top between each injector ? as they do not seem to be leaking, the mist/spray seems to be coming from lower down and sprays up in your face, but there is so much of it you just cant see where its coming from, I will have a look at the nuts on the steel high pressure lines from the rail and pipework, I presume I should do this with the engine off ? also do do I need to de pressurise the system somehow before I start.

Thanks again for the replies
 
Spraying upwards would suggest you may have a copper washer failure and its combustion pressure forcing the just injected diesel up at you?
 
As above. If it's spraying upwards, it would suggest the copper sealing washers which seal the injectors to the head are leaking.

You never work on a diesel injection system with the engine running. The fuel pressure is so high (up to 25,000PSI) it's high enough to spray diesel straight through your skin, with fatal consequences.
 
It is definitely the copper washers that have failed, i had the same happen on my R40 tourerer (Rover 75 diesel M47 engine) changed all the washers and cleaned the tips on the injectors while i had them out.

ODG9Yvtl.jpg
1

QjQNOkHl.jpg
2

you can se the fuel pooling around the injectors.
4ZNXfkhl.jpg
3

PVtu0FHl.jpg
4

You will need to mop up all the over flow, then get the car engine hot by running it, mop up again then you need to pop out all the injectors to replace the copper washers, its easier to remove the injectors if the engine is hot.

Remove the top air intercooler ducting, then remove the manifold.
0SQQpSUl.jpg
1

Tl6UkLgl.jpg
2
Remove the air filter cover.
ge2KNyFl.jpg
3

Remove the injector loom.
K0HvZ5Nl.jpg
4

qrKeXh0l.jpg
5

NUV5quql.jpg
6

Next remove the leak back connector springs on each injector.
epq4ZiBl.jpg
7

Lift of the leak back hoses, sorry for blurred photo.
9D8JYcyl.jpg
8

Now undo all the 8mm nuts holding the collar of the injectors, undo them so they are flush to the top of the thread,
Rncun5rl.jpg
9

KoxYUkwl.jpg
10

Now you can crack each 17mm nuts going to the injectors.
RDvs2CMl.jpg
11

Then do the fuel rail ones also 17mm
ycl3IXCl.jpg
12

vgXOJzhl.jpg
13

You can now lift of the fuel pipes.
w1PK7DAl.jpg
14

Put them safe in a clean place.
MYkZql2l.jpg
15

Now you need to find your self a piece of flat bar which you put on the cam cover.
JvuWNrSl.jpg
16

dcRvewfl.jpg
17

This is used to pry off so you can lift out the injectors, if you do not use a piece of bar then you can and will crack the cam cover, which will put you in a world of pain.
vlekqSMl.jpg
18

Go along and lift each injector up to the nuts.
G6la2OTl.jpg
19

Then you can remove the 8mm nuts completely, and continue prying up the injectors
SE2t2z3l.jpg
20

They should all now be ready to lift out of the engine.
UQ2zLWVl.jpg
21

zVAgbdNl.jpg
22

Make sure its clean in the port any dirt or gunk needs to be cleaned out.
QMGL6ill.jpg
23

QMGL6ill.jpg
24

Hoover and clean round the port holes if clean when you remove the injector put a rag into post to stop anything dropping in.
csRX6xzl.jpg
25

Remove each injector in turn remembering which port they came from.
MB7wSbVl.jpg
26

uUkSxfhl.jpg
27

W0p3qbxl.jpg
28

These injector now need to be cleaned and wiped off.
X4TC7Wtl.jpg
29

Lwgf79Ul.jpg
30

Y95OQjRl.jpg
31

I will post later or tomorrow how to clean the tips of the injectors you may now all the above already though ?
 
Thanks to "Arctic2" for the write up and photo's, I will await your info on cleaning the injector tips and then start the process, I assume its best to replace the leak off T pieces with brass while I am taking it all apart, also should I replace the red rubber gaskets on the inlet manifold, I presume that it is also obligatory to replace all the copper washers on the injectors before re-fitting them.

Are there any other items I should replace when undertaking this job as I would like to have everything ready before dismantling as if I am missing anything the car will be immobile.

Thanks to everyone for their help

Hi Yes replace the T pieces with the brass ones link below.
LAND ROVER TD4 - BOSCH C/R HEAVY DUTY LEAK OFF KIT (3 x 180° /1 x 90 / 1m Hose) | eBay
KFjt5Ktl.jpg
1

fyqIoRCl.jpg
2

WfSuzfYl.jpg
3

re8n2oAl.jpg
4

titIg11l.jpg
5

Change and replace the PCV filter if you have not done so in the last 12-18months .
7oLRTOhl.jpg
6

WN2Mu3el.jpg
7

check all the vacuum hoses from the EGR solenoid as they can chaff.
fv0Xrgsl.jpg
8

Replace as you will have plenty left over from the brass T joints.
ktkDfeJl.jpg
9

eiVY9DHl.jpg
10

xVxjODjl.jpg
11

qewvnE2l.jpg
12

The rubber gaskets on the manifold are ok to use again, just give them a wipe over with a damp rag, while you have the manifold off, it is a good time to clean it out, so remove the MAP sensor from the side,
0m0RZXwl.jpg
13

FkPOia0l.jpg
14

pfvWAull.jpg
15
Wipe it over with a rag sprayed with carb cleaner, do not poke anything into the hole.
Y6ilWtbl.jpg
16

Remove the EGR from the manifold also and clean that out with an old tooth brush after scrapping any excess gunk from inside with the back of an old hacksaw blade.
you can use swarfega on the brush, then wipe out with an old rag, i have seen some really bad EGR.
TvybzMjl.jpg
17

lNsKoPQl.jpg
18

You need to get it as clean as you can.
Cjiakqjl.jpg
19

ZoLbjEEl.jpg
20

To clean out the manifold now you have the EGR and MAP sensor & rubber seals removed, again scrap out any excess gunk.
3fYhXull.jpg
21

ZrfYzQ9l.jpg
22

Spray the inside with oven cleaner and let is soak for at least 2-3 hours.
0Cdv2Utl.jpg
23

Then you can jet wash it out, repeat if you have to as you want it as clean as you can get it.
QOFlLOxl.jpg
24

qJANxiIl.jpg
25

jJVEjucl.jpg
26

Make sure its dry before you add the EGR, MAP sensor and seals back onto it.

To clean the injector tips you will need to put the injector into a vice,
RLJ6U0Vl.jpg
1

Undo the nut slowly.
Brush any debris away the tighten up again, repeat this until no debris is around the nut.
GJNuhDUl.jpg
2

Then undo with your fingers.
vM261hCl.jpg
3

Take great care not to drop anything, and have a clean paper towel to put the tips on, or a container.
WGwPu9Yl.jpg
4

Lift of the outer case nut.
qTJbntel.jpg
5

Now lift the tip very slow.
8WHd2wel.jpg
6

You will see two pins do not lose them.
8FgFLRVl.jpg
7

leave them in situ if you can or put then back right away as you are only cleaning the tips, not all of the injectors.
FyRl6Dyl.jpg
8

Now you have the tip on the towel or container.
Q4XA5mXl.jpg
9

Try and tap out jet by tapping the edge of the tip onto the table or if you have a magnet us that to pull it out.
7rR5vnTl.jpg
10

Spray some carb cleaner into the tip so you see five clear jets which are equal pattern.
7dYto5rl.jpg
11

clean the the jet pin the same spray with carb cleaner and wipe clan with paper towel, when you refit it into the tip it must be free and smooth.
rebuild the tip onto the injector.
NqXPzFSl.jpg
12

Do this with all four of them.
VgpueQil.jpg
13

You can renew the rubber seals on the injectors if they look perished to flat.
99eYfGql.jpg
14

This is just a quick way of cleaning the tips, not a complete overall of the injector.
fUScUftl.jpg
15

Good luck and get back to us if you need any more advise, link to copper washers below.
BMW 730 d 3.0 Common Rail Diesel Injector Washers/Seals x 6 | eBay
 
Last edited:
Great info there. To verify source of leak I'd put pieces of kitchen roll around injectors to catch the spray or prove where it's not coming from.
 
@Arctic2 I know you have all this info on various threads on the forum, but putting all of these items together with the clear step by step photos and instructions is first class! I've bookmarked this page for the inevitable time at some point in the future that it will prove very helpful! Stirling work.
 
Thanks to Arctic2 for the excellent write up, I have ordered the leak off Kit and the copper washers for the base of the injectors, I have not yet managed to find the rubber seals that are located further up the injector but I will keep looking as I want to get all the parts assembled before attempting the strip down.

Thanks again for all the help

here you go links below.
For Land Rover Freelander I 2.0 TD4 Diesel Injector Outer Body Shaft O-ring x 4 | eBay

Land Rover Freelander 1 TD4 Diesel Injector Washers and Seals Set Genuine Bosch 3165143274743 | eBay
 
Great post, excellent step by step, wish I had seen it a few months ago when I did mine. The brass run off connectors are a must as the plastic ones are prone to damage when working with the injectors or the air filter or...well you get the idea.
 
Today I checked again as best I could where the diesel mist was coming from and it appeared to be coming from under the securing collar on injector No2 going from left to right standing in front of the car looking at the bulkhead, I stripped off the air cleaner cover and the intake manifold removed the wiring to the injectors and removed the leak off kit..
Undid the two nuts retaining injector No2 as instructed and levered it up as shown in the excellent how to (Thank you Arctic2) then removed the nuts and removed the injector.
Inspected the rubber "O" ring which seemed to be totally undamaged but below the "O" ring the injector was filthy with what looked like baked on oil all down the shaft and the tip. I attacked this with carb cleaner and eventually got the whole thing clean, I removed the copper sealing washer from the tip and cleaned all round the thread where the hex "Nut" appears to undo, however I was unable to unscrew the tip and to be honest was scared of breaking something it was so tight. so I decided a external clean would have to suffice.

I then hoovered out the debris from round the Injector hole and also from where the copper washer seats, fitted a new copper washer and re-fitted the injector with a small amount of petroleum jelly wiped round the rubber "O" ring, I could not get the injector to sit at the correct height by just pushing it in place so I had to resort to putting the retaining nuts back on and gently tightening them half a turn alternately.

I then re-fitted the intake manifold, but left the air cleaner cover and the injector cover off so I could see the bottom of the injectors once the car was started.

The end result of all this was that the mist was still coming from under the injector retainer on Injector No2 as it did before, nothing shows on tick over but as soon as the revs are increased the mist comes up.

I am convinced that I have done something incorrectly but at present I can not think what, any suggestions would be helpful as its a little frustrating.

Thanks to all
 
Today I checked again as best I could where the diesel mist was coming from and it appeared to be coming from under the securing collar on injector No2 going from left to right standing in front of the car looking at the bulkhead, I stripped off the air cleaner cover and the intake manifold removed the wiring to the injectors and removed the leak off kit..
Undid the two nuts retaining injector No2 as instructed and levered it up as shown in the excellent how to (Thank you Arctic2) then removed the nuts and removed the injector.
Inspected the rubber "O" ring which seemed to be totally undamaged but below the "O" ring the injector was filthy with what looked like baked on oil all down the shaft and the tip. I attacked this with carb cleaner and eventually got the whole thing clean, I removed the copper sealing washer from the tip and cleaned all round the thread where the hex "Nut" appears to undo, however I was unable to unscrew the tip and to be honest was scared of breaking something it was so tight. so I decided a external clean would have to suffice.

I then hoovered out the debris from round the Injector hole and also from where the copper washer seats, fitted a new copper washer and re-fitted the injector with a small amount of petroleum jelly wiped round the rubber "O" ring, I could not get the injector to sit at the correct height by just pushing it in place so I had to resort to putting the retaining nuts back on and gently tightening them half a turn alternately.

I then re-fitted the intake manifold, but left the air cleaner cover and the injector cover off so I could see the bottom of the injectors once the car was started.

The end result of all this was that the mist was still coming from under the injector retainer on Injector No2 as it did before, nothing shows on tick over but as soon as the revs are increased the mist comes up.

I am convinced that I have done something incorrectly but at present I can not think what, any suggestions would be helpful as its a little frustrating.


Thanks to all

Great to hear you managed to extract the injector ok, also cleaning in and around the injector port, hopefully you put the collar back on the right way up, it sounds like the injector maybe leaking further up, rather than from down by the tip, which i must say are really tight, and you need to use some strength to undo it, you will not break anything.

I suggest you undo the injector again, and swap it over with the one next to it, which you should clean as you did the first one, do not add petroleum jelly wiped to the rubber "O" ring, a rubber does not like petroleum it can make it swell and affect the rubber, use red rubber grease, this time remove the tips and give them a clean as in the photos.

Did you fit new T connectors if not i would so, how bad is the misting when revs are on, can you video it ?
 
I found when I did my injectors that if they don't go down properly then they aren't in correctly. It took me a couple of goes to get it slide down right. I think the copper washer didn't slip down correctly the first time and may have been sitting crooked and jamming the top of the injector from seating properly. Just a thought and from my own endeavors with injectors. Taking them apart was a real trial as I cleaned all the bits and was terrified that A I would loose a bit or B not remember how they went back together again. Persevere and it'll be worth it. Keep everything together and lay them out as the come off the injector, makes for easy stages for reassembly.
Hope this helps.
 
I can certainly take a video on my phone, but have no idea how to upload it to the forum (I have only just managed WhatsApp), I will attempt the Injector swap and remove the petroleum jelly from the "O" ring on the injector I have already removed, How can I tell which way up the copper washer that goes over the tip should be, I could not see any difference on the one I removed, but it did have marks from debris on the side that faces the cylinder head and it required a lot of carb cleaner and brushing to enable its removal from the tip due to the amount of baked on debris and it required the careful use of a pair of pliers griping only the copper washer to dislodge it.
The replacement copper washer was a very tight fit on the tip and required a smear of WD40 to the tip to allow me to push it into place where the old one had been by hand.

The T connectors on the leak off kit have not yet been fitted as the plastic one came out without any damage so I decided to reuse it hoping that my cleaning up would cure the misting and once that was cured I could change the whole leak off kit in one go.
"lynall" suggested "Anneal the new washers" I assume he means the Copper washers, how would I go about this as my ignorance knows no bounds.

I have been thinking about the misting and have to ask Under normal circumstances with everything running leak free, would any diesel get past the copper washer and be able to get between the copper washer and the Rubber "O" ring while in its correct position with the cast retaining collar held in place with the two nuts.
as presumably if diesel can get past the copper washer and there is damage the rubber "O" ring then diesel under pressure could get past the "O" ring and mist under the cast Injector retaining collar.

Please bear in mind I really don't know what I am talking about just trying to think it through.
 
Back
Top