110 USW campervan

This site contains affiliate links for which LandyZone may be compensated if you make a purchase.

Barney’s Landy

Active Member
Posts
80
Location
East Anglia
I collect my my new defender called Lil in just under two weeks from a garage, a dented Keswick green 110 USW base model.
My plan is to give it a smart modern retro feel on the outside and a modern clean look on the inside.
I will try and keep the 5 seats, but it will have a pop up roof and removable units.

A new Zunsport grille, surround, bumper and LED lights have been ordered, and the wheel arches have been sprayed green, the roof will remain white to help with the retro look.
I have not decided on the pop up roof but my budget will prevent me from spending too much. All the work when l get it back l will try and do myself including all of the electrics.

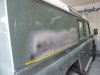
The last time l saw the car was roughly four weeks ago and at the time the body had quite a few major dents, these have now been filled and resprayed.

New photographs in a couple of week
53DA7CDF-75D2-4B67-809B-12ABA2289813.jpeg
37BF63B3-8446-47C8-8A57-B1410F1E1FA3.jpeg


D1BA6CF7-1D65-4E72-B244-D83DD93EE6CE.jpeg
 

Attachments

  • 353F48C5-06DF-4016-A33E-ECA6A6BC1593.jpeg
    353F48C5-06DF-4016-A33E-ECA6A6BC1593.jpeg
    160.1 KB · Views: 252
  • 76E18332-2D09-4A57-9197-71FE5625FD03.jpeg
    76E18332-2D09-4A57-9197-71FE5625FD03.jpeg
    186.2 KB · Views: 256
First photo update...
My philosophy and direction on this Campervan project will be guided firstly by design, then quality, product material, then price, the reason being is l am a fussy old ******.
My other Defender vehicles l have owned have mostly been led by cost, they have looked okay, but this is the first campervan.
Lil (Landy) will look retro, l will keep the white roof, front end change, single pivot spare wheel carrier, mainly because l don’t want to drill through the body. (Fussy);)
The boost wheels were thrown in with the purchase, so l will keep those for now. New style LED lights
and LED headlights, l managed to get some headlights that didn’t look too modern.
The vinyl seats will be re-trimmed to tan leather, maybe also grab handles, carpets will be added, also a stereo.
Steering wheel looks tatty, but l have sourced out a mint condition XS off plumtree.
Lil will be a five seater, and turned into a camper by tumbling the 2nd row seats forward, adding aluminium
stack containers and a fridge all locked down to cargo rails.
I will also add a Gull wing window, split charger, diesel heater, sink, under chassis water tank, and solar panel.
The units will be handmade, not off the shelf units, hopefully made out of metal.
The roof, l am not sure about yet. l might go for a classic side fixed roof, or a more modern wedge shape.
There are of course pros and cons with each design, so l will need to look into this further.
From this point the work will mostly be done by me. It is all new to me, so l hope not too many mistakes are made.

Before
6CB09517-7FBB-4A37-ACFB-5B6C1275AABE.jpeg

A bit different.
3BCA90F5-2079-4B44-924F-56F0309C2D9E.jpeg

Before
ADD9B170-0384-4F91-9D71-8E5BB8044AB0.jpeg

After
BE53896E-2253-4224-B978-FBC59B4B81A6.jpeg
 
First photo update...
My philosophy and direction on this Campervan project will be guided firstly by design, then quality, product material, then price, the reason being is l am a fussy old ******.
My other Defender vehicles l have owned have mostly been led by cost, they have looked okay, but this is the first campervan.
Lil (Landy) will look retro, l will keep the white roof, front end change, single pivot spare wheel carrier, mainly because l don’t want to drill through the body. (Fussy);)
The boost wheels were thrown in with the purchase, so l will keep those for now. New style LED lights
and LED headlights, l managed to get some headlights that didn’t look too modern.
The vinyl seats will be re-trimmed to tan leather, maybe also grab handles, carpets will be added, also a stereo.
Steering wheel looks tatty, but l have sourced out a mint condition XS off plumtree.
Lil will be a five seater, and turned into a camper by tumbling the 2nd row seats forward, adding aluminium
stack containers and a fridge all locked down to cargo rails.
I will also add a Gull wing window, split charger, diesel heater, sink, under chassis water tank, and solar panel.
The units will be handmade, not off the shelf units, hopefully made out of metal.
The roof, l am not sure about yet. l might go for a classic side fixed roof, or a more modern wedge shape.
There are of course pros and cons with each design, so l will need to look into this further.
From this point the work will mostly be done by me. It is all new to me, so l hope not too many mistakes are made.

Before
View attachment 195195
A bit different.
View attachment 195196
Before
View attachment 195197
After
View attachment 195198

There is a place here on the island that does custom fibreglass roofs for campers, he mostly does the VW and Tranny van conversions, chops the steel roof out and fits a frame with a bellows and the new reinforced roof.

I was looking at it for the Disco at a later date.

I like your idea for the gull wing windows, going to be super neat.

:) Thanks, one side mounted roof l have seen, you can decide on the bellow colour. They do a sandy colour which would then match the retro styling and look good against the white roof.

Two options for the Gullwing: l hope maybe to bring the level of the inside units above window, so it allows me to access the back of the units from outside, more storage, or l can drop the level of the units down so that l can access the sink from outside.
Not sure yet l might have to wing it :) when the time comes. I think it will be down to how much storage I will end up with.
A good thing with this type window Is that l could mount some supports/tracking, then use these as extra storage on the outside of the vehicle.
They do two types, glass and the more expensive aluminium, both with rounded corners, but l have come across a company that do a with squared off corners. Time will tell ;)
 
There is a place here on the island that does custom fibreglass roofs for campers, he mostly does the VW and Tranny van conversions, chops the steel roof out and fits a frame with a bellows and the new reinforced roof.

I was looking at it for the Disco at a later date.

I like your idea for the gull wing windows, going to be super neat.
Opposite pullingers next to what was the billy? Didn't realise they did modifications. Thought just traded. There's a nice old series in their garage.
 
I'm thick, what's a gull wing window?
If you're building it yourself, keep a check on the weight that you're adding in :)
Sounds like a fun project!!
 
I managed to collect the Lil a few weeks ago, an enjoyable 180 mile round trip.
It drives well and l was impressed as to how how quickly the inside warms up compared to my old TD5 90, and it wasn’t too noisy.
I drove it back in the rain, and it has felt like it has rained everyday since, or it has been to dark to do anything, so l have been a bit delayed getting things moving.
Finally!
 
First thing on my to do list was to change the standard wing grilles to stainless steel ones, they now match my front grille, so shouldn’t rust. I also added a rear swing away with a 2nd hand wheel and tyre, and a new Defender badge and the very important Union Jack.
C2998615-BFF1-417C-8B22-B10061BC45D6.jpeg
13238595-1061-42EC-BE9A-1C8F68E961E7.jpeg
CEA8EB21-CF1C-4DDA-9631-1D489B98074B.jpeg
One issue l found with the car was that the front hinges were bent and were close to hitting the bulkhead. These were both straightened and welded, and the stay bracket on the car positioned correctly.
E6BB1C59-DFFF-491E-824B-E77C615AC522.jpeg

Next l concentrated on the electrics or should l say l gave it to someone else to concentrate on them.
On the before and after photographs you will notice the differences, double din facia with new Alpine head unit, heated seat wiring and buttons, electric windows and a small auxiliary button facia, this also has a battery voltage meter to keep an eye on the starter battery.
571C4E29-DB1B-4A5B-981A-AF9C0FB7C41B.jpeg

3523A84A-8F69-456C-A1A2-E5EAC97071AC.jpeg
 
Just fitted the Gullwing window, it wasn’t too bad to fit, but l had to make sure that the position was inline with the
window trim.
I Purchased the glass version in the end because l want to drop the level of the units, more light and l think it looks better. Removed the internal window trim and the vertical bar, just had to remove rivets and prize off.

ED3E1878-E438-4019-9B8D-9A92A6D539B2.jpeg
The area was marked off using a pen over some masking tape, this was cut out.
AD5AE68B-2429-42AC-A9A4-A379D02E3761.jpeg
The tape was removed and the window placed back in position. I then drilled though the holes in the frame and into the shell of the car.
8212FE17-2B2C-4E5E-8A7E-6EF979ED1BAB.jpeg
 
Last edited:
On my to do list was the the sound insulation, so that was my next job. The problem is the temperature was so cold that l had to get the heat gun to warm up the insulation.
513CF4D5-AC51-40BC-9432-510ECF960DEC.jpeg

E486CE69-71ED-4427-81A5-74892B82E050.jpeg

I left two areas clear on the floor, this is where l will place the two new seat striker plates.
62EC29C1-28FA-4DCE-B60B-BE671099F1AC.jpeg

Next l removed the cab headliner, faced it with sound proofing and thermal insulation. I also added insulation to the
roof sections. The flat area of the roof will be removed to add the elevated roof, so this area was left alone.
9480157C-06E1-4F37-8C5A-D255825F7DBB.jpeg

11CB0314-3F13-4232-A95D-90805DF5EBA0.jpeg

While the head liner was of, l thought l would recover it.
9256E834-D690-4ADB-8975-BE966F02BB86.jpeg

Do you ever think to yourself, I wish l hadn't started this!
Well It started off easy enough, but as l started pulling the old surface off it also started to rip up the surface. l found it best to rip away from the centre, but it still messed up the surface. The edges were then wire brushed to remove some of the old foam surface. For the really poor areas l painted on several coats of PVA glue and sandpapered this down. It did help, although in hindsight l could have used filler.
The end result was okay, but was it worth the hassle? It took a long time, longer than l thought it would.
And make sure you don’t get caught using the dinning room table, wife was not happy!:rolleyes:
868D3391-A177-451F-BB34-1696AE17B57B.jpegB4F73528-32A2-4296-A9C2-5FF03377CF83.jpegD5C5F699-B94C-4D85-BEC5-5DC97A8DD8CD.jpeg8E90F96D-FB3A-4054-BBDD-7EF05619FFC0.jpegAE59018E-AE55-49A8-BF34-527D64F0A6C2.jpegE83BDD84-D44E-4861-A89D-6306D24FFBF1.jpeg46C0E5B5-A671-406C-9A6A-649D3A53E508.jpeg
Sorted!
6270AEA2-B5CA-43B7-B61E-DFCD86BC1024.jpeg
ABFB2151-BE42-4CF8-957C-322A868C0F00.jpeg
 
Back
Top