How does steering wheel come off

This site contains affiliate links for which LandyZone may be compensated if you make a purchase.

landowner

Pensioner Pete
Full Member
Posts
12,618
Location
WA2
Dont know whether to bother having a go at this today or shall I leave it till I have a full day spare without using the Disco.

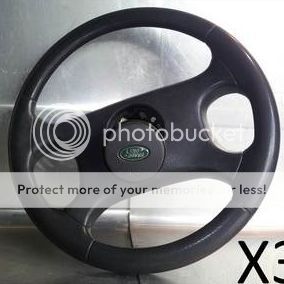
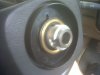
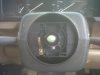
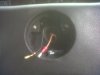
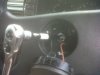
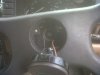
How does the steering wheel come off on Disco 2 please my indickerators dont cancel properly and I was going to seee if perhaps something had come loose in there.
I have to turn the wheel one and a half turns when turning right before the mechanism cancels the trafficators and one full turn left to cancel the left turn trafficator.:)
 
The cancel ring is broke .. easy job to do.

You need one of these ..

Indicator cancel Ring

The standard plastic tabs break and replacements are about £35 to £65 depends who you use!!

Prise out the centre horn push (if non-abs) dunno what to do if it is abs .. and disconnect leads.
Make sure wheels and steering wheel are in straight ahead position for when replacing.
Undo Hex nut, can't remember size but maybe 15 or 17mm, Nyloc but OK to re-use. Steering wheel should pull off splines easily.
The bottom of the wheel has the plastic cancel ring around it, very flimsy plastic, which has to be prised off.
The alloy ring replaces this with a set-screw to hold it.
Can't remember off-hand which way round the wires go, but the stock ones are replaced by those on the new alloy ring.
re-assembly is the reverse of assembly, as they say!! ;)

I did it a while ago ...should have took pics but didn't, sorry ..
 
Pooh.

Just re-read and noticed yours is a D2 .. the above may not apply then, sorry!

:eek: :confused:
 
Pooh.

Just re-read and noticed yours is a D2 .. the above may not apply then, sorry!

:eek: :confused:

Thanks anyway

My horn push wont prise out for some reason that's why I thought I would ask before breaking anything:rolleyes:
 
Here are the steps in order....big attention to the battery disconnection and rotary coupler things:


Airbag module - drivers

WARNING: It is imperative that before any work
is undertaken on the SRS system the appropriate
information is read thoroughly.
WARNING: Always disconnect both battery leads
before beginning work on the SRS system.
Disconnect the negative battery lead first. Never
reverse connect the battery.
Remove
1.
Remove the key from the starter switch.
Disconnect both battery leads, negative lead
first. Wait ten minutes before starting work.
2. Remove 2 Torx bolts securing airbag module to
steering wheel.
3. Release airbag module from steering wheel.
CAUTION: Do not allow the airbag module
to hang by the airbag harness.
4.
Disconnect multiplug from airbag module.
5. Remove airbag module.
WARNING: Store the airbag module with the
deployment side uppermost. If it is stored
deployment side down, accidental
deployment will propel the airbag module
with enough force to cause serious injury.
WARNING: Store the airbag module or seat
belt pre-tensioner in a designated storage
area. If there is no designated storage area
available, store in the locked luggage
compartment/loadspace of the vehicle and
inform the workshop supervisor.

Steering wheel

Remove
1.
Remove drivers airbag.
2. Disconnect horn multiplug.
3. Centralise steering wheel with road wheels in
straight ahead position.
4. Restrain steering wheel and loosen self locking
nut securing steering wheel to column.
5. Release steering wheel from column.
6. Remove and discard self locking nut.
7. Remove steering wheel.
8. Attach tape across edge of rotary coupler to
retain correct setting.
9. Release 2 clips securing each horn button to
steering wheel.
10. Remove screw securing horn earth lead to
steering wheel.
11. Disconnect radio and cruise control multiplugs.
12. Remove 2 screws securing radio switches to
steering wheel.
13. Remove radio switches from steering wheel.
14. Remove 2 screws securing cruise control
switches to steering wheel.
15. Remove cruise control switches from steering
wheel.
16. Remove horns from steering wheel.

Refit
1.
Fit horn switches to steering wheel and secure
with clips.
2. Fit and tighten screw securing horn earth lead
to steering wheel.
3. Fit cruise control switches to steering wheel
and secure with screws.
4. Fit radio switches to steering wheel and secure
with screws.
5. Connect radio and cruise control multiplugs.
6. Remove tape from rotary coupler.
7. Ensure road wheels are in straight ahead
position and indicator cancelling cam are
aligned horizontally.
8. Fit steering wheel to column.
9. Connect horn multiplug.
10. Fit and tighten new self locking nut securing
steering wheel to column to 43 Nm (32 lbf.ft).
11. Fit drivers airbag.
+RESTRAINT SYSTEMS, REPAIRS,
Airbag module - drivers.
 
Here are the steps in order....big attention to the battery disconnection and rotary coupler things:


Airbag module - drivers

WARNING: It is imperative that before any work
is undertaken on the SRS system the appropriate
information is read thoroughly.
WARNING: Always disconnect both battery leads
before beginning work on the SRS system.
Disconnect the negative battery lead first. Never
reverse connect the battery.
Remove
1. Remove the key from the starter switch.
Disconnect both battery leads, negative lead
first. Wait ten minutes before starting work.
2. Remove 2 Torx bolts securing airbag module to
steering wheel.
3. Release airbag module from steering wheel.
CAUTION: Do not allow the airbag module
to hang by the airbag harness.
4.
Disconnect multiplug from airbag module.
5. Remove airbag module.
WARNING: Store the airbag module with the
deployment side uppermost. If it is stored
deployment side down, accidental
deployment will propel the airbag module
with enough force to cause serious injury.
WARNING: Store the airbag module or seat
belt pre-tensioner in a designated storage
area. If there is no designated storage area
available, store in the locked luggage
compartment/loadspace of the vehicle and
inform the workshop supervisor.

Steering wheel

Remove
1.
Remove drivers airbag.
2. Disconnect horn multiplug.
3. Centralise steering wheel with road wheels in
straight ahead position.
4. Restrain steering wheel and loosen self locking
nut securing steering wheel to column.
5. Release steering wheel from column.
6. Remove and discard self locking nut.
7. Remove steering wheel.
8. Attach tape across edge of rotary coupler to
retain correct setting.
9. Release 2 clips securing each horn button to
steering wheel.
10. Remove screw securing horn earth lead to
steering wheel.
11. Disconnect radio and cruise control multiplugs.
12. Remove 2 screws securing radio switches to
steering wheel.
13. Remove radio switches from steering wheel.
14. Remove 2 screws securing cruise control
switches to steering wheel.
15. Remove cruise control switches from steering
wheel.
16. Remove horns from steering wheel.

Refit
1.
Fit horn switches to steering wheel and secure
with clips.
2. Fit and tighten screw securing horn earth lead
to steering wheel.
3. Fit cruise control switches to steering wheel
and secure with screws.
4. Fit radio switches to steering wheel and secure
with screws.
5. Connect radio and cruise control multiplugs.
6. Remove tape from rotary coupler.
7. Ensure road wheels are in straight ahead
position and indicator cancelling cam are
aligned horizontally.
8. Fit steering wheel to column.
9. Connect horn multiplug.
10. Fit and tighten new self locking nut securing
steering wheel to column to 43 Nm (32 lbf.ft).
11. Fit drivers airbag.
+RESTRAINT SYSTEMS, REPAIRS,
Airbag module - drivers.

No air bag in steering wheel, 1998 Disco with round horn push in centre of wheel
 
No air bag in steering wheel, 1998 Disco with round horn push in centre of wheel

My post might help then .. does it look like this?

Clipboard02.jpg


If it does then that's mine ... or identical to mine anyway!! ;)
 
Give us a few minutes and I'll take a couple of pics to show the bits .. ;)
 
I'm about to go outside to change diff oils and fettle other bits so a quick wheel off isn't a problem ...
 
I just poke a slim screwdriver into the horn, it's soft on top, but housed in a case, so make sure you get the outside of the case and lever it up, following it round like taking a bicycle tyre off.

19mm socket for Nyloc wheel nut in the bottom, undo the two horn wires ..

Once undone, pull the wheel off .. it can be reallt stiff the first time, but it will come with steady even pressure. Or a hammer ...

Mine looks different underneath as it's got an alloy fitment where yours will still have a plastic cone shaped thing, very flimsy, you'll see the tab bit broken off, which also pulls off the bottom, as does it's case. Be careful with the wires on the plastic bit, when it's all apart it's obvious where they go and where the one from the new fitment goes.

Try to line up the wheel straight again when re-fitting, it's just fiddly to go through it a few times to get it right again!

When you're putting the horn back be aware that the top of the horn button casing has a tab that locates into the soft material of the steering wheel. Put the tab in first and press it under the soft material, and again, follow it round pressing one edge so it all fits back under the wheel material. I've done it a few times now and don't beep the horn, but if you have neighbours who don't like horns, undo the battery or horn before trying it!!
 

Attachments

  • 008.jpg
    008.jpg
    73.7 KB · Views: 510
  • 007.jpg
    007.jpg
    78.2 KB · Views: 520
  • 006.jpg
    006.jpg
    77.4 KB · Views: 499
  • 005.jpg
    005.jpg
    84.7 KB · Views: 514
  • 004.jpg
    004.jpg
    84.7 KB · Views: 983
  • 003.jpg
    003.jpg
    64.1 KB · Views: 512
  • 002.jpg
    002.jpg
    86.8 KB · Views: 681
I just poke a slim screwdriver into the horn, it's soft on top, but housed in a case, so make sure you get the outside of the case and lever it up, following it round like taking a bicycle tyre off.

19mm socket for Nyloc wheel nut in the bottom, undo the two horn wires ..

Once undone, pull the wheel off .. it can be reallt stiff the first time, but it will come with steady even pressure. Or a hammer ...

Mine looks different underneath as it's got an alloy fitment where yours will still have a plastic cone shaped thing, very flimsy, you'll see the tab bit broken off, which also pulls off the bottom, as does it's case. Be careful with the wires on the plastic bit, when it's all apart it's obvious where they go and where the one from the new fitment goes.

Try to line up the wheel straight again when re-fitting, it's just fiddly to go through it a few times to get it right again!

When you're putting the horn back be aware that the top of the horn button casing has a tab that locates into the soft material of the steering wheel. Put the tab in first and press it under the soft material, and again, follow it round pressing one edge so it all fits back under the wheel material. I've done it a few times now and don't beep the horn, but if you have neighbours who don't like horns, undo the battery or horn before trying it!!

Fantastic, thanks very much.
I'm goin out now to have a look at it...you're a star.:):)
 
Gonna have to disconnect the battery so I'll do it tomorrow.

Only got the rubber off and the plastic horn carrier is solid and I'm makin too much noise for a Sunday as the horn keeps sounding.

Might take a fuse out after dinner and have a go.
 

Attachments

  • SDC12183.JPG
    SDC12183.JPG
    248.7 KB · Views: 1,167
  • SDC12184.JPG
    SDC12184.JPG
    231.2 KB · Views: 378
Back
Top