After years of outguessing Td5 fuel pump and/or fuel pressure regulator problems finally came up with a gizmo to measure live fuel pressure.
In the past I had rigged up a mechanical pressure gauge (glicerine type) but for obvious safety reasons it could be only used in static mode (driveway idling). Although the mechanical set up did contribute to fuel pump diagnostics, I wanted something more precise that would allow to closely monitor fuel pressure while driving.
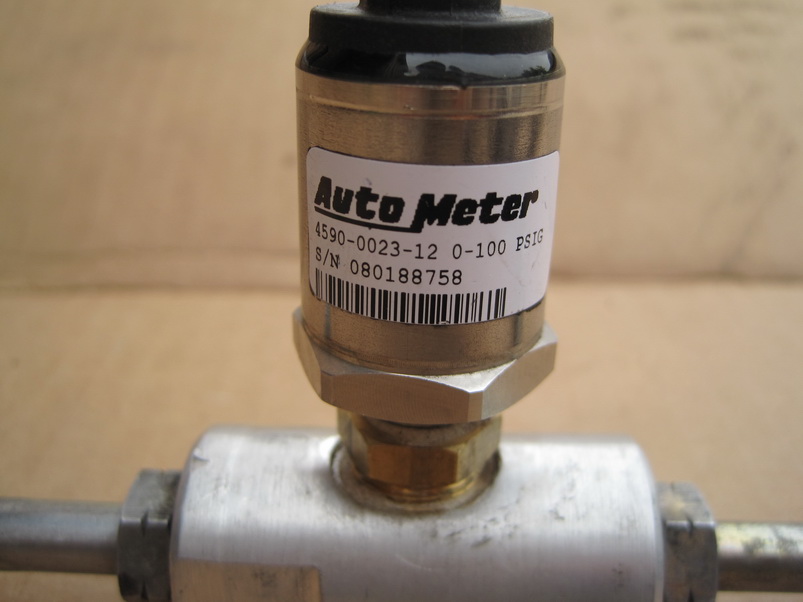
It is based on a full sweep electrical fuel pressure gauge (0-100 psi scale) kit from Autometer.
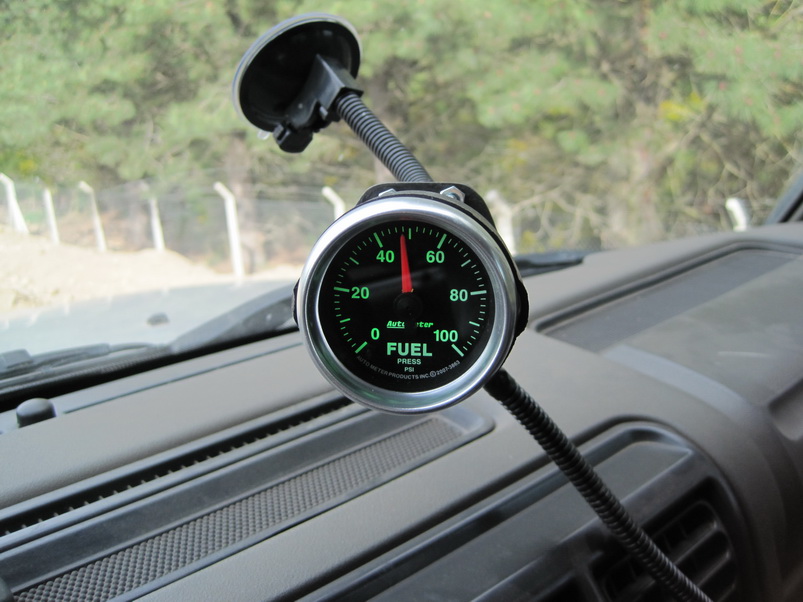
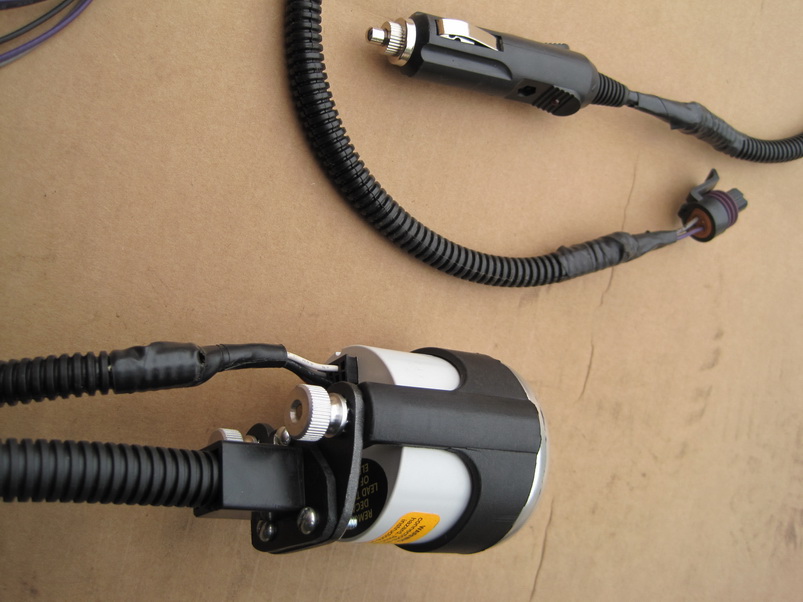
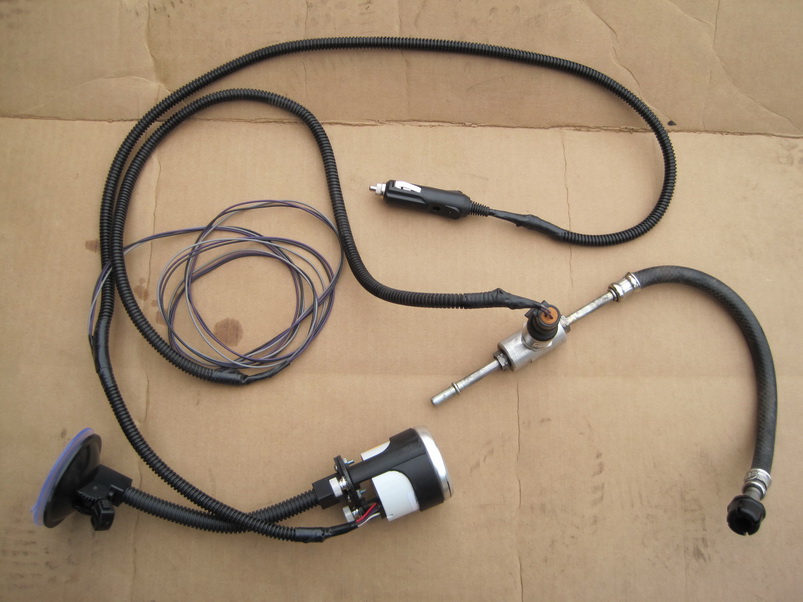
The set up comprises (3) parts, firstly the pressure gauge which was mounted on a modified cheapo suction cup type cell phone holder for quick installation and removal:
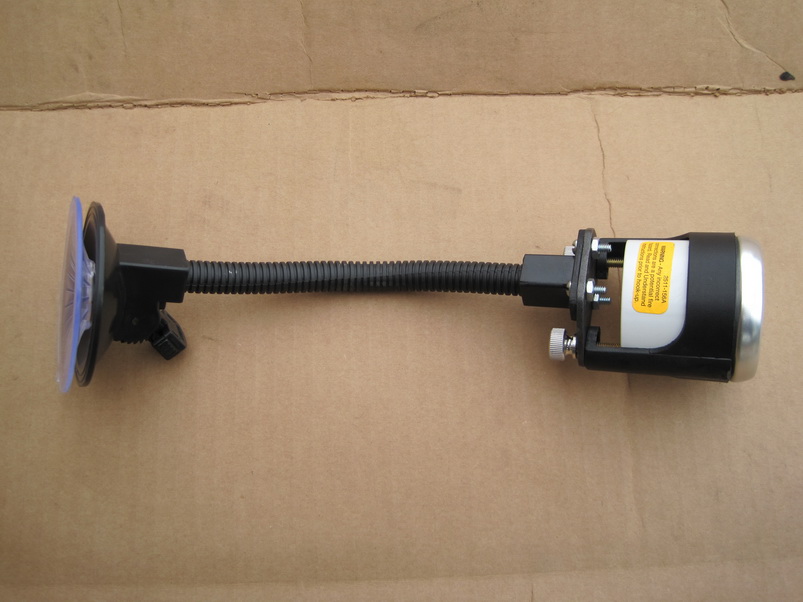
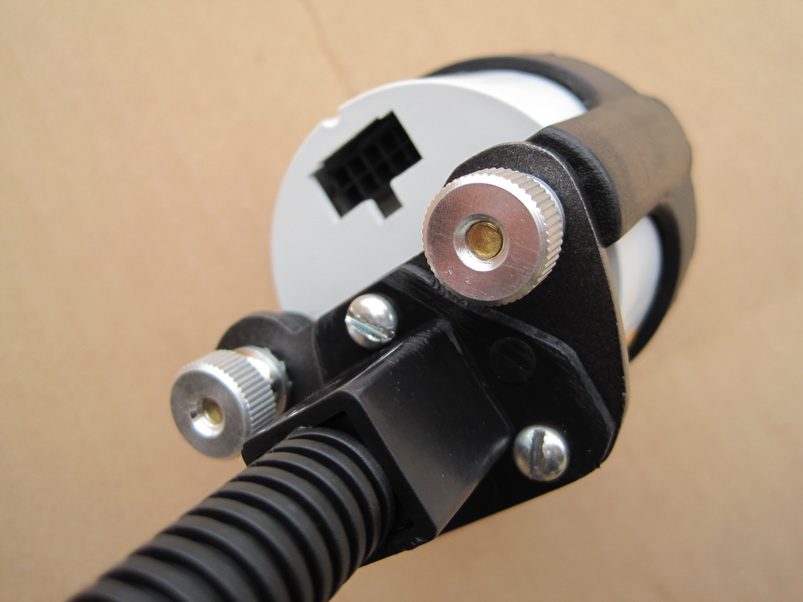
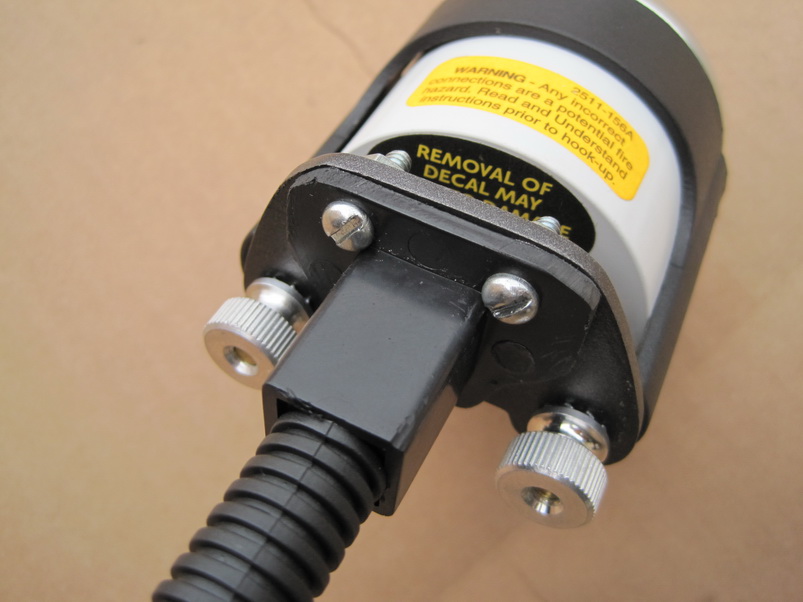
Secondly, the harness, which connects the pressure sender to the pressure gauge, and branches off to a cigarette lighter male type connector where it gets power from:
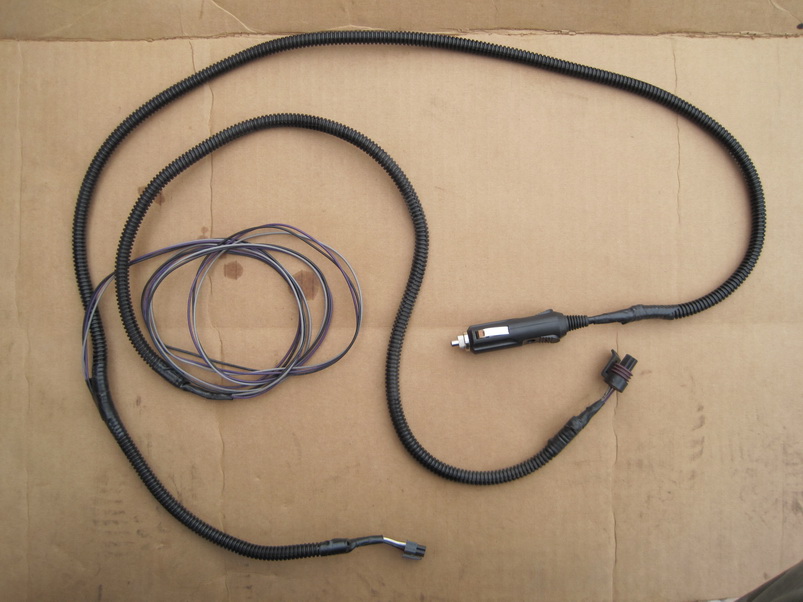
A section of the harness was deliberately left naked so it could be run from the engine to the cabin through the bonnet & door weatherstripping.
And thirdly and most importantly the pressure sender part:
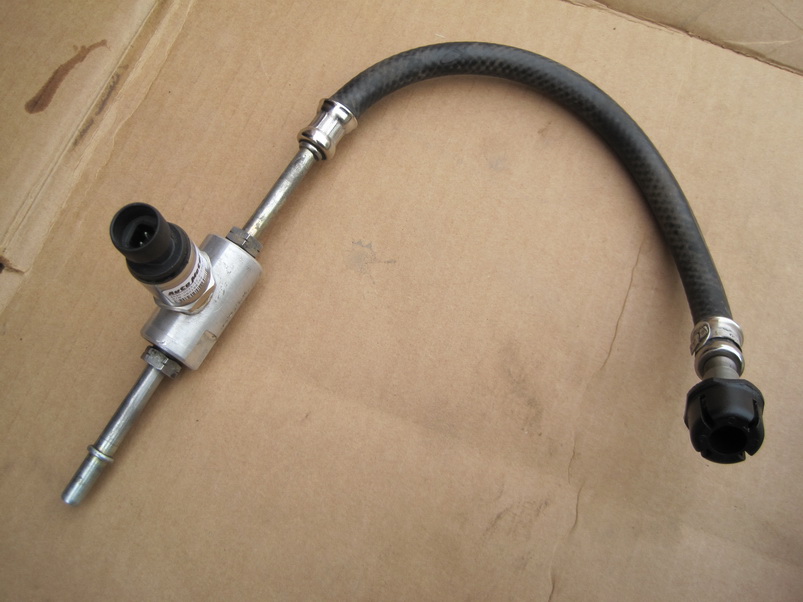
This is in essence a fuel line extension (male x female fuel line connectors) with a side outlet on which the pressure sender is mounted.
Used left over parts from a failed fuel pressure regulator (fuel return union with hose + fuel feed union with pipe) and machined the T as to have non-sealing threads on the side ends but the same bowl type shape in the interior where the o-rings seat (copied from fuel pressure regulator housing). Fitted new o-rings which are LR p/n STC4509.
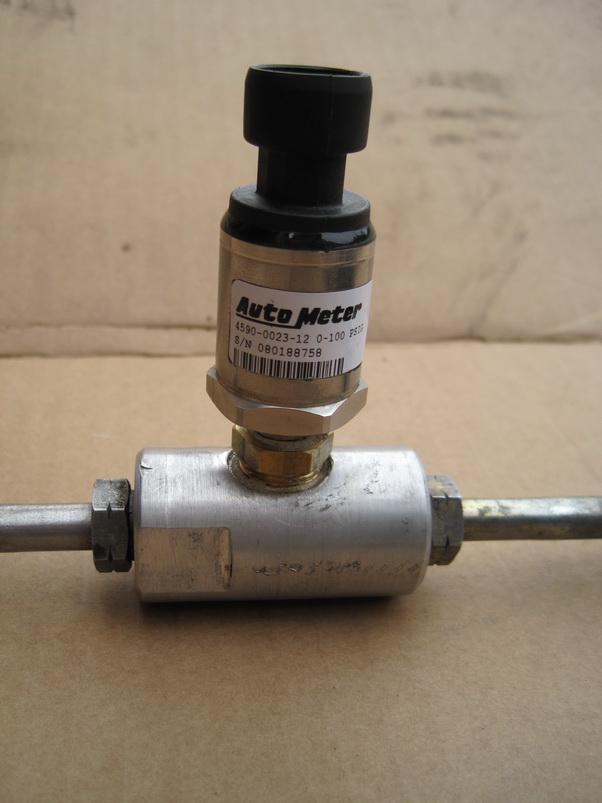
For the side outlet cut a ¼ NPT female thread to match the 1/4 NPT male x 1/8 NPT female adapter included in the pressure gauge kit (pressure sender is 1/8 NPT male). Made up sender with PTFE thread sealant.
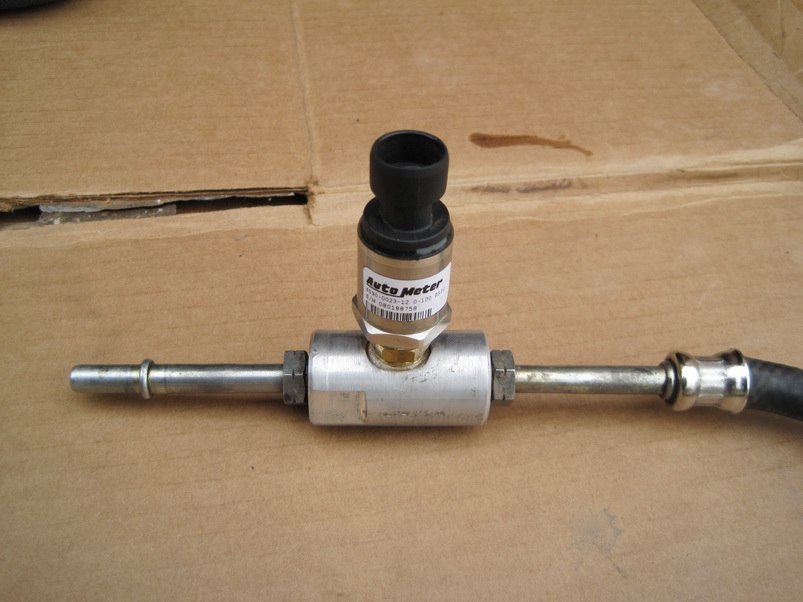
The whole thing put together:
Bill of materials:
- Autometer Sport Comp Fuel Pressure Gauge Kit #3363 which includes:
- 3 Amp fast acting fuse
- ¼ convoluted slit tubing
- (busted) Fuel Pressure Regulator, complete with union pipe and hose
- (2) LR STC4509 o-rings or equivalent
- Machined T: (FPR sample thread) M x F x side ¼ NPTF
- Suction cup type holder
- Solder, tin, black tape
Usage and findings:
It has been a few weeks since it went into service and after having scoped four different Td5s as well as having it permanently installed in my own, have learned the following:
Raw fuel pump pressure (sender installed upstream of FPR):
- Runs between 6 and 7.5 bar (different vehicles)
- Not a steady value, even when idling oscillates in a 0.5 bar range
- Decreases as fuel heats up
- Decreases slightly as consumption rises (full boost)
Regulated fuel pressure (sender installed downstream of FPR and injectors, i.e. downstream of fuel cooler)
- Runs at 4 bar steady (nothing new)
- Decreases sharply when consumption rises (down to 3.5 bar)
- Can be used to diagnose FPR!! i.e. if pressure not sufficiently steady or below 4 bar then FPR is toasted.
Regards
Matt
In the past I had rigged up a mechanical pressure gauge (glicerine type) but for obvious safety reasons it could be only used in static mode (driveway idling). Although the mechanical set up did contribute to fuel pump diagnostics, I wanted something more precise that would allow to closely monitor fuel pressure while driving.
It is based on a full sweep electrical fuel pressure gauge (0-100 psi scale) kit from Autometer.
The set up comprises (3) parts, firstly the pressure gauge which was mounted on a modified cheapo suction cup type cell phone holder for quick installation and removal:
Secondly, the harness, which connects the pressure sender to the pressure gauge, and branches off to a cigarette lighter male type connector where it gets power from:
A section of the harness was deliberately left naked so it could be run from the engine to the cabin through the bonnet & door weatherstripping.
And thirdly and most importantly the pressure sender part:
This is in essence a fuel line extension (male x female fuel line connectors) with a side outlet on which the pressure sender is mounted.
Used left over parts from a failed fuel pressure regulator (fuel return union with hose + fuel feed union with pipe) and machined the T as to have non-sealing threads on the side ends but the same bowl type shape in the interior where the o-rings seat (copied from fuel pressure regulator housing). Fitted new o-rings which are LR p/n STC4509.
For the side outlet cut a ¼ NPT female thread to match the 1/4 NPT male x 1/8 NPT female adapter included in the pressure gauge kit (pressure sender is 1/8 NPT male). Made up sender with PTFE thread sealant.
The whole thing put together:
Bill of materials:
- Autometer Sport Comp Fuel Pressure Gauge Kit #3363 which includes:
- Full sweep electrical fuel pressure gauge 0-100 psi
- 8 foot harness with connectors
- 1/8 NPT pressure sender
- 1/4 NPT male x 1/8 NPT female adapter
- Wiring instructions
- 3 Amp fast acting fuse
- ¼ convoluted slit tubing
- (busted) Fuel Pressure Regulator, complete with union pipe and hose
- (2) LR STC4509 o-rings or equivalent
- Machined T: (FPR sample thread) M x F x side ¼ NPTF
- Suction cup type holder
- Solder, tin, black tape
Usage and findings:
It has been a few weeks since it went into service and after having scoped four different Td5s as well as having it permanently installed in my own, have learned the following:
Raw fuel pump pressure (sender installed upstream of FPR):
- Runs between 6 and 7.5 bar (different vehicles)
- Not a steady value, even when idling oscillates in a 0.5 bar range
- Decreases as fuel heats up
- Decreases slightly as consumption rises (full boost)
Regulated fuel pressure (sender installed downstream of FPR and injectors, i.e. downstream of fuel cooler)
- Runs at 4 bar steady (nothing new)
- Decreases sharply when consumption rises (down to 3.5 bar)
- Can be used to diagnose FPR!! i.e. if pressure not sufficiently steady or below 4 bar then FPR is toasted.
Regards
Matt
")