retneprac
Well-Known Member
- Posts
- 2,035
- Location
- Bedfordshire
Coloured and now waxed.
Coloured and now waxed.
Did that too last week the new LOF master works good, the bleeding took ages thoughI removed and painted the clutch pedal frame as I am now fitting an LOF Mastercylinder.
Cheers
Did that too last week the new LOF master works good, the bleeding took ages though
")
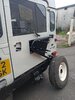
Fitted the new fuel tank to the 110 300 tdi. What a pig of a job. Trying to defy gravity with the tank, guard and a dozen spacers, washers and nuts. Nighmare.
Haha, I made the stupid mistake of waxoiling the whole tank and guard before refitting. What a pita - wrestling a wet fish into place in 30 degree heat last year.
Fitted the 4 bolt steering box in place of the 6 bolt unit.....touch wood, no more leaks.
Cheers
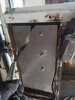
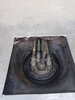
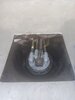
I cleaned my steering box tonight to try and identify the source of a leak.
youll have to strip down i find the loose rollers damage the chrome ball eventually,looks like a drive member boltBit of a wheel wobble on nearside so thought I'd investigate preload.
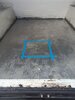
Defo a problem
View attachment 213145
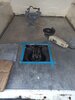
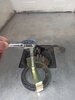
Only 3 of the 13 rollers were recovered
View attachment 213146
Do you think if I take the swivel ball seal off I'll be able to fish them out?
I bought new swivel pin bolts a year or so ago because I knew the bolt head's were passed their best. At least I thought I had
View attachment 213147
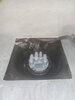
I was hoping against hope reallyyoull have to strip down i find the loose rollers damage the chrome ball eventually,looks like a drive member bolt
standard tdi are 606666 td5 top bearing is differentI was hoping against hope really
I reckon I over shimmed when I set it up.
It'll take my mind if the turbo issue
By any chance do you know the part number of those bearings
Tremendous. Mine is a standard 1996 Tdistandard tdi are 606666 td5 top bearing is different
Welcome To LandyZone, the Land Rover Forums!
Here at LandyZone we have plenty of very knowledgable members so if you have any questions about your Land Rover or just want to connect with other Landy owners, you're in the right place.
Registering is free and easy just click here, we hope to see you on the forums soon!