Freelander 1 V6 belts

This site contains affiliate links for which LandyZone may be compensated if you make a purchase.

andyfreelandy

Well-Known Member
Posts
5,117
Location
Devon
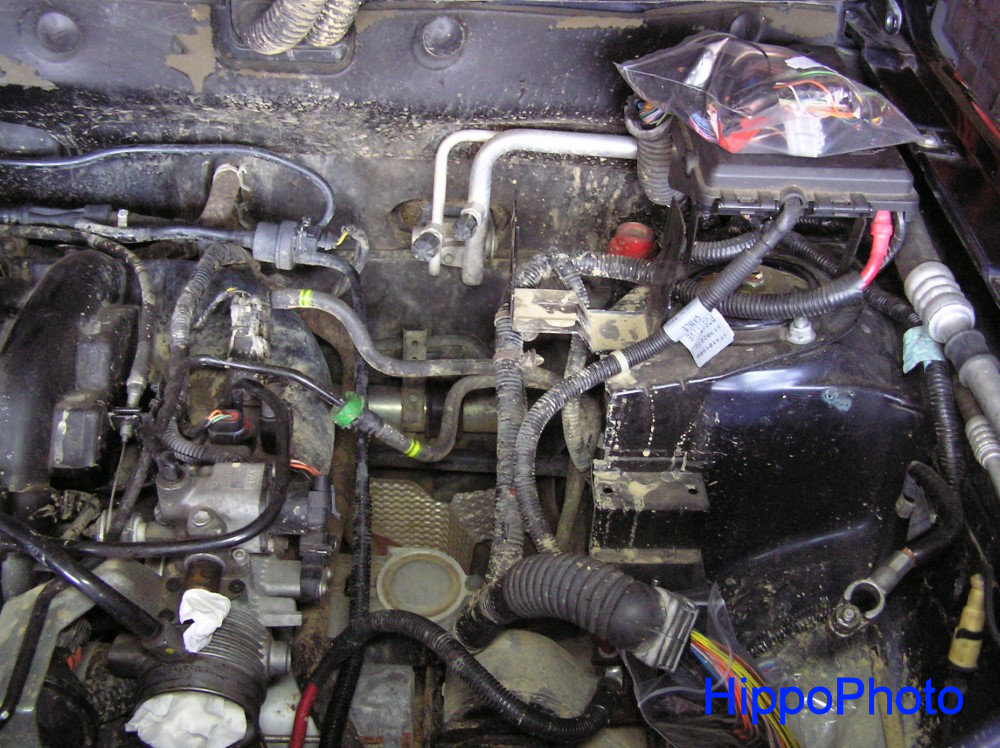
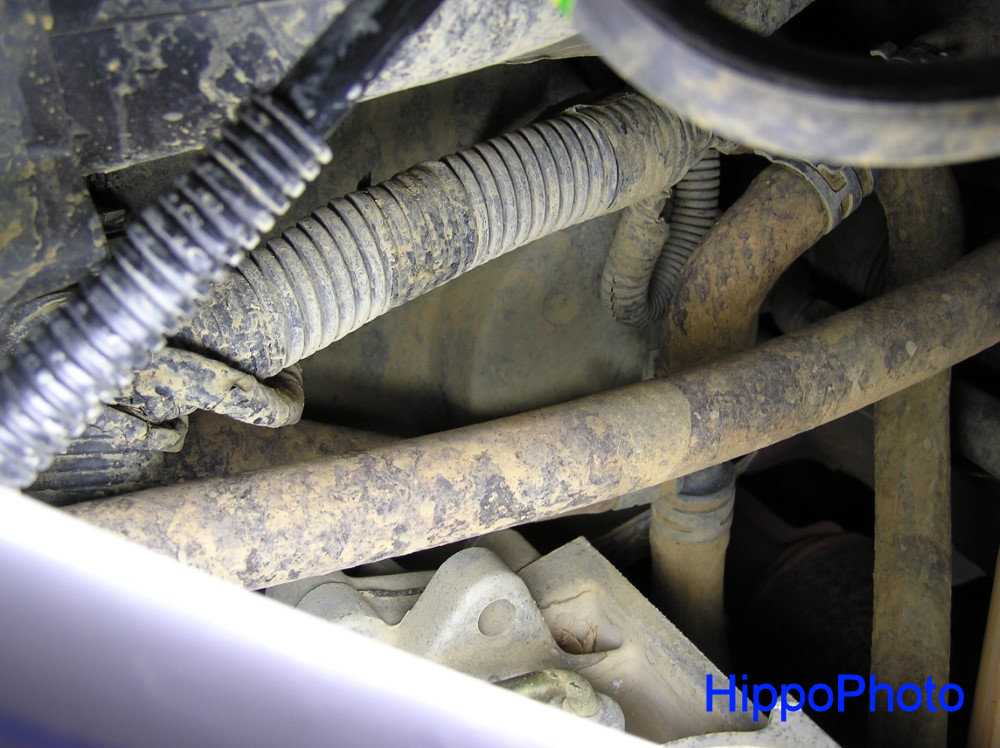
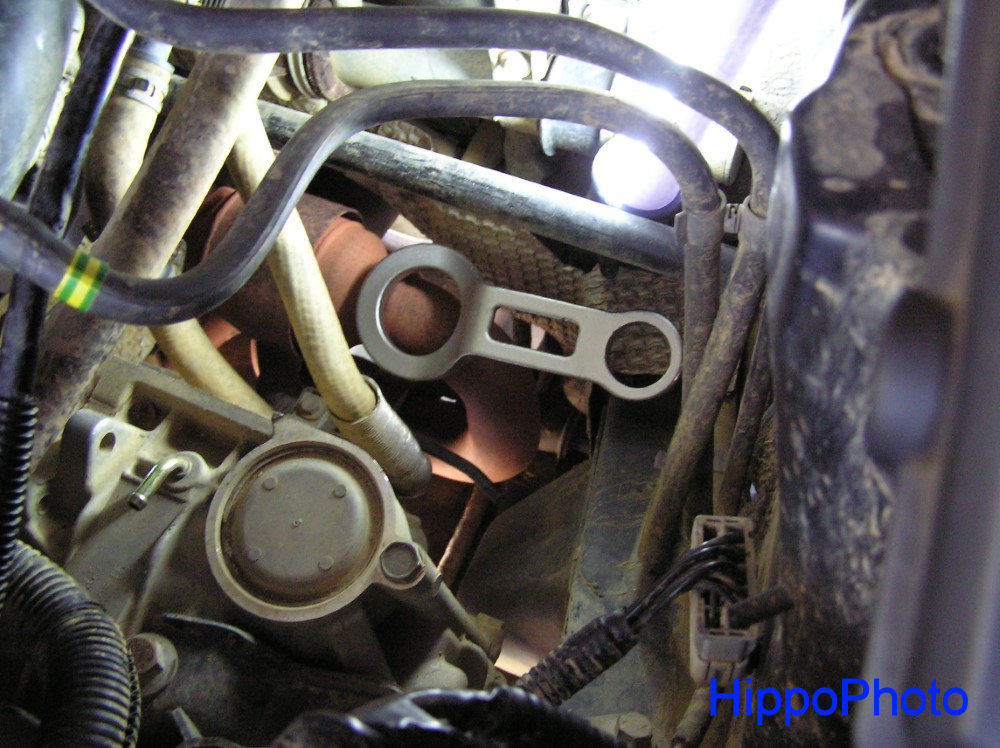
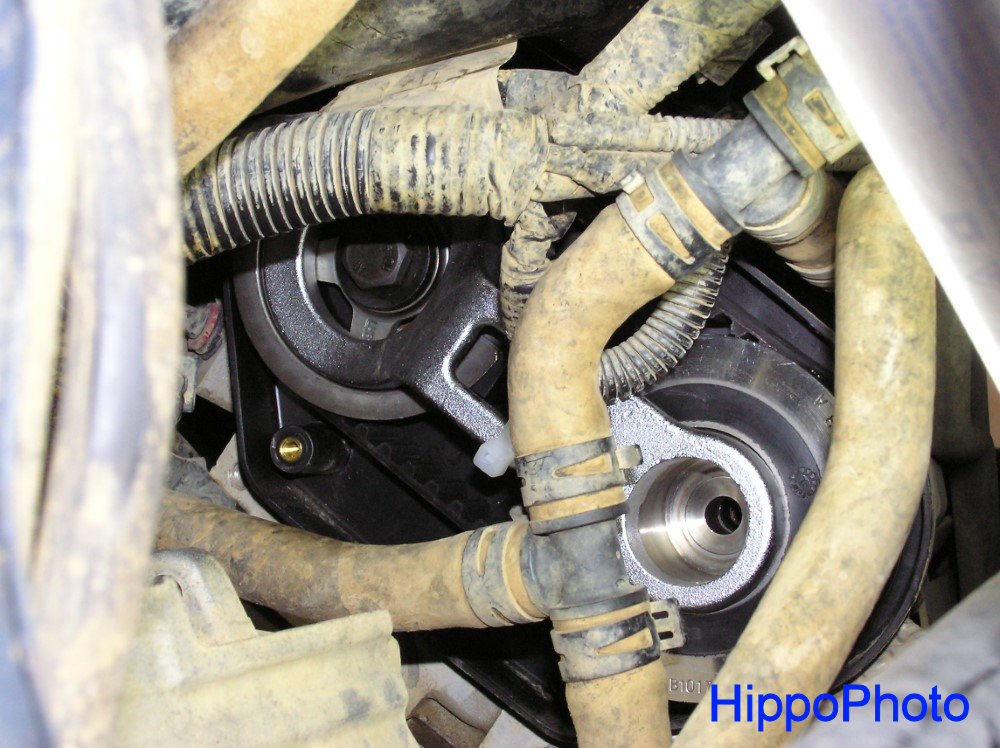
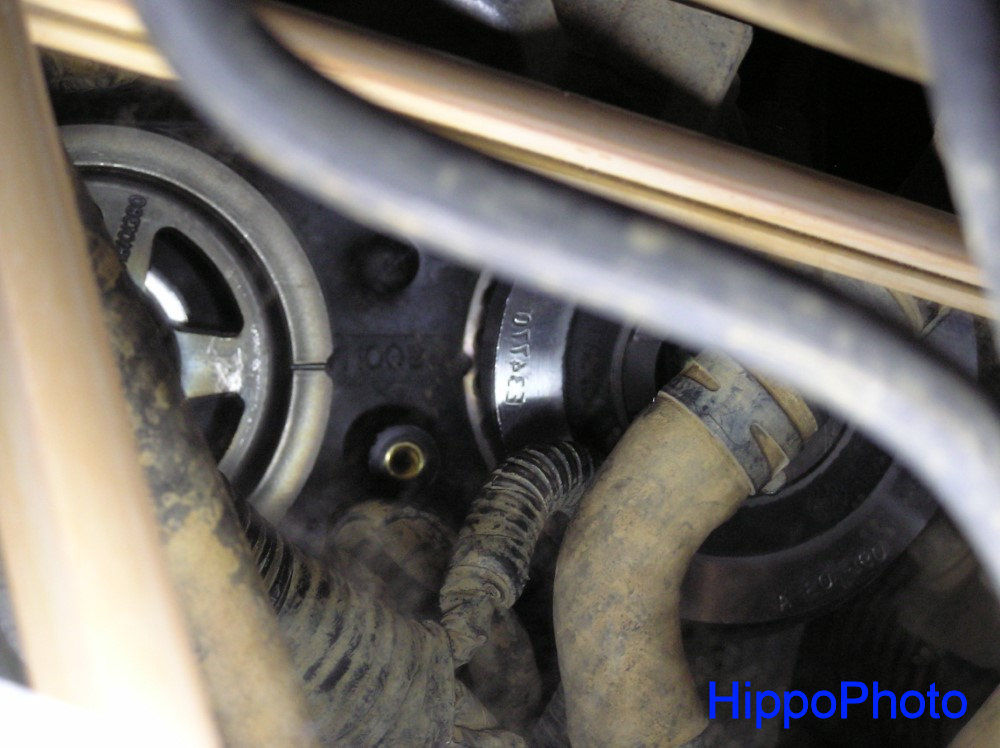
Spent an hour doing a survey before tackling this job. Boy there's loads to come off before you can even start!
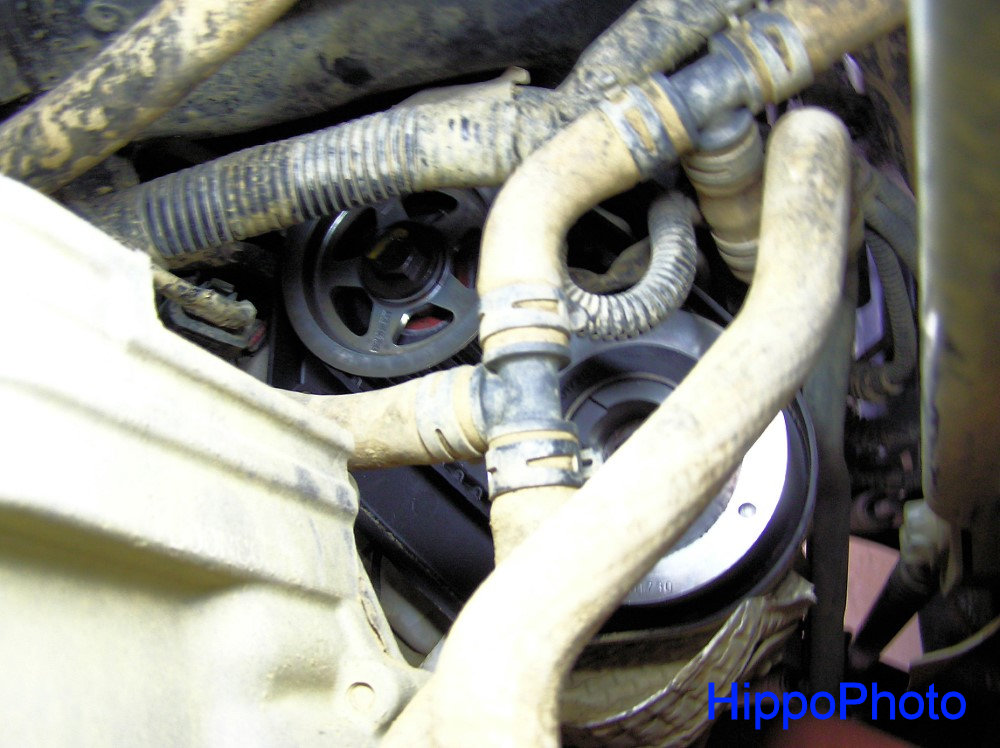
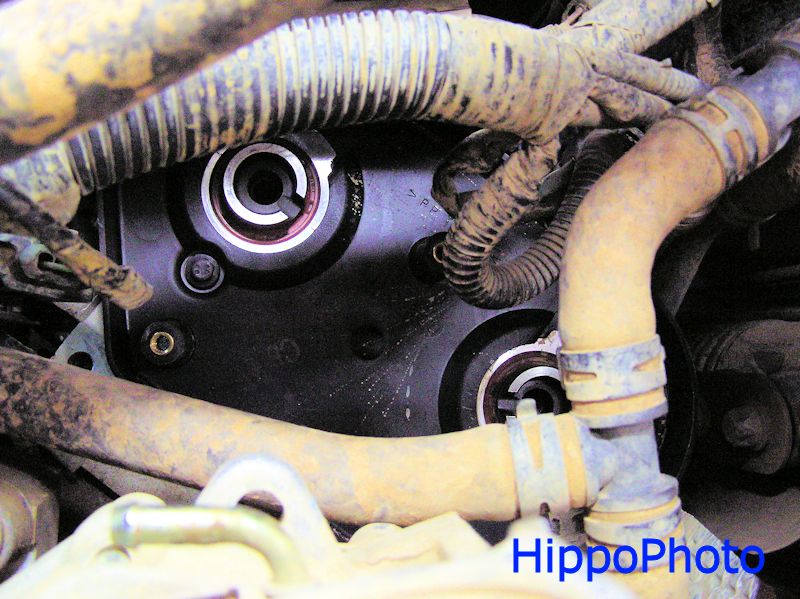
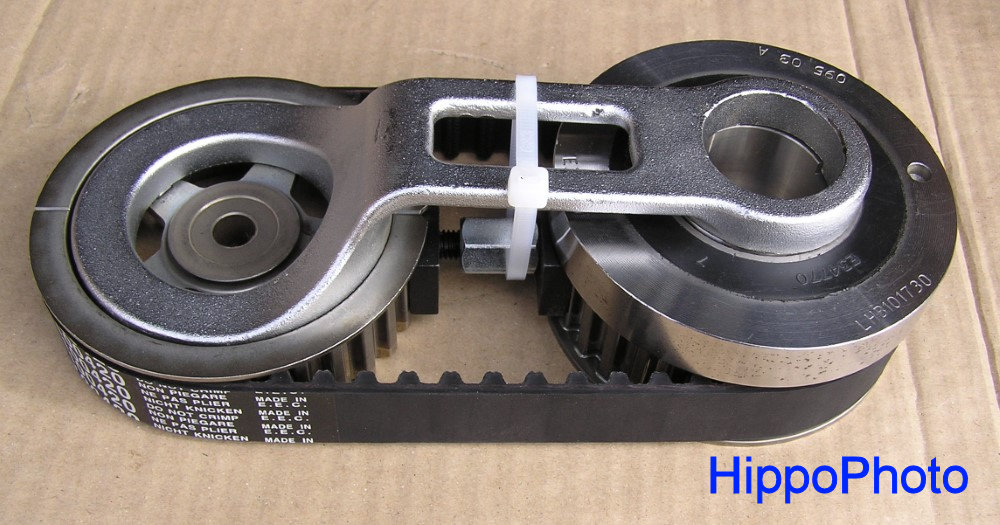
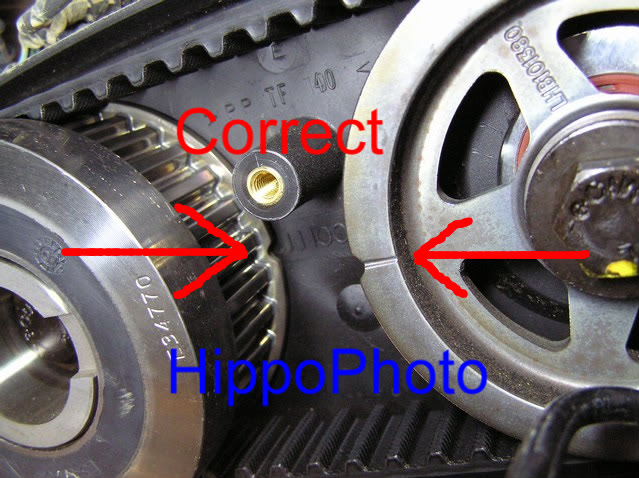
Anyway, had a look at the belts that are on there and by rotating the engine could clearly see 'Rover' printed on the belt. Does this mean that they are likely to be originals??
They look in perfect condition and very tight.
Just having a think and planning work before beginning!! Risks of leaving a 22 year old belt??
 
There is loads to remove.
IMO it's faster to remove the whole power unit, C/W the subframe.
The belts take less than 30 minutes to change, once the engine isn't in the confines of the vehicle.

They are likely the originals, so are well past their time, even if the mileage hasn't been reached.
 
Yes, engine out might be easier!! Depends on state of bolts on suspension, exhaust etc.
I have read that @Hippo managed the rear secondary belt without removing the inlet chamber! Perhaps he can explain how to do this without double jointed 2 metre long arms!! Happy to try it to save dismantling.
Also, there is a tyre valve on a pipe sticking out from under the inlet manifold, anyone got a clue what it is please??
Careful measurement and thinking continues. Not worried about doing belts, just getting to them!!
 
I changed my v6 cam belts with the engine fitted. Book time is 5.2 hours, regardless of taking the engine out or not, for all 3 belts. Main dealers take it out as they have lifting gear and it's easier to do the belts when it's all on the floor. First timing belts I have done. Remember doing it as if it were yesterday. Did mine with it in the garage with the wheels turned to the right.

To do the rear belt, remove the battery and the L shaped plastic computer box. It will give you betterer access.

HcGAjLS.jpg

P8171544 HcGAjLS

To do the rear belt, remove the plastic cover. Several small hex bolts hand tight.

xMc4lQN.jpg

P8171566 xMc4lQN
 
This is the view taken from the rear of the gearbox. Old belt still in place. The heat shield at the bottom has a bolt that's a sod to reach. I could only just get to it, to put it back in while lying across the top of the engine. Feeling the way as you can't see at the same time. If doing it again I would bend the heat shield as far as I could to see if access was ok. If you drop the bolt when putting it back it lands on top of the ird.

I0zmd6J.jpg

P8171571 I0zmd6J

Gear oft. View from top of gearbox. Note the exhaust cam shaft has turned as there's tension on it when the belt is released.

SjXNgzV.jpg

P8171578 SjXNgzV
 
I bought the correct fitting tools then sold them after use. The tie wrap is to hold everything together while you fight it through the coolant pipes.

IKPgB4m.jpg

P8171580 IKPgB4m

Put the tool and gears/belt here as one piece, then slide up behind the coolant pipes.

xJq0vHS.jpg

P8171608 xJq0vHS
 
Access is not easy but doable if yer got long thin arms. Fitting tool still in place near the center of the pic.

oOWCt7S.jpg

P8171588 oOWCt7S

HvIHPHP.jpg

P8171598 HvIHPHP

foS1Tpa.jpg

P8171599 foS1Tpa
 
There's a fly wheel locking pin hole at the front of the engine to stop the crank turning.

A1h0uaw.jpg

P8151269 A1h0uaw

C1x2kXB.jpg

P8151270 C1x2kXB

J4I3WnL.jpg

P8151272 J4I3WnL
 
Yes, engine out might be easier!! Depends on state of bolts on suspension, exhaust etc.
If I had my own 2 post lift, I'd not even consider changing the belts within the confines of the engine bay. ;)
managed the rear secondary belt without removing the inlet chamber

It takes 10 minutes to remove the inlet plenum, so I can't see a reason to struggle to access the belts with it in place. Especially as without the tools, you need to be able to view the belt pulleys from the cam ends.

Also, there is a tyre valve on a pipe sticking out from under the inlet manifold, anyone got a clue what it is please??
That's the fuel rail pressure test point.
Not worried about doing belts, just getting to them!!
Hence me suggesting to remove the power unit. Which also gives you the opportunity to change the coolant, thermostat (which is likely to leak), and power steering fluid. ;)
 
Made a start on this today. Took ple ty of photos for all the pipe work!!
Had a look and engine and box out just looked fraught. Rusty bolts on exhaust, suspension and, to be honest, my energy levels are down since Covid dose so decided to take it slowly and do it from the top with the aid of a small step to provide a comfortable height.
Managed to do the small belts in 2 hrs and tidyed up the butchered pipes and clips as I went. Only tool I bought was a pulley holding tool. Marked pulley, belt and backplate on each pulley. Removed inlet cam pulley only. Put tippex on belt in same place as old. Fitted belt aligned to both pulleys. Fitted new inlet pulley bolt loosely and rotated inlet pulley to turn exhaust to correct mark then inlet pulley dropped onto keyway.
While I am in there I had a good look at the thermostat and elbow. Bit of pink damp so will probs take manifold off and do both. Any tips for these??

Might shout when I have pipes left over.!!!!
Photos soon.
 
Best to remove fuel rail with injectors complete or take fuel rail off and leave injectors?? Which is best for reducing risk of damage or seals?
Quite enjoying myself!!!
 
Thinking and looking at pictures, would the front manifold flip sideways if unbolted with fuel rail and injectors untouched? This may give room for the thermostat and L pipe replacement.
Trying to avoid leaks afterwards !!
 
Any tips for these??

You only need remove the plenum and front manifold.

I pull the locking plates out the rail link pipe, and lift up the front manifold, along with the front fuel rail.
I generally replace the rail O rings too, as they're prone to leak once removed.
 
Thanks, reduces the number of O rings to replace too!!

This is going to be a good vehicle when finished. Got new brakes today and made a lead for a steering wheel volume controlled stereo. The pre 2001 has different connectors to the later audio arrangement.
 
Back
Top