border
Well-Known Member
- Posts
- 3,620
- Location
- North East. UK
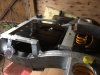
Thanks Again, Pleased I asked as was going to buy another.3 brake flexis, theres only 1 at the rear
Thanks Again, Pleased I asked as was going to buy another.3 brake flexis, theres only 1 at the rear
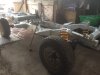
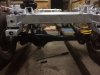
I know Mate, Feels like the hard work is done, then again I wouldn't know as this is a first for me. Is there harder to come ??It’s looking good. Getting to a rolling chassis is a great morale boost.
Well Ive got this far so cant stop now.Sorry, but yes there is. It’s worth it though, I promise!

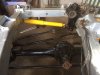
Forgot I had fuel lines, not sure if there all here but will have a go at fitting them if they are. will have to get a bit of info on them to see what bits I need, clips ect.Looking good
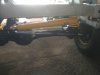
Next?
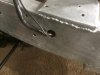
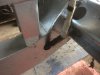
I honestly don’t know but anything that runs the length of the chassis, brake & fuel lines?
While you have nice access.
J
Yes leaving it Shiny, just more work and money to wash and paint it. cant see the point myself,Same, get the brakes and looms in while you can.
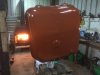
You leaving it shiny? Most folks I've seen recently T-washed and painted their galvanised chassis.
You done a Cracking job there Mate, never thought about bumper, will definitely look in to one, probably one of the last jobs to do so will be a while away yet.I Left mine.
Put a galv bumper on and painted grille and light surrounds Zambezi silver so it all matchedView attachment 171542 .
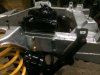
My original bumper was pretty rotten anyway and so I needed a new one. I didn't rebuild the engine as part of the body rebuild. I lifted it out and left it on the end of the drive under a tarp. Just dropped it back in once the rebuild was done. Unfortunately, it later developed a faulty injector which carped the engine. I then had the choice of buying a second hand engine about which I would know nothing, Or, rebuild mine. Having invested a lot of money and two and a half years rebuilding the Landy I thought I might as well rebuild the engine. Plus, it gave me another projectYou done a Cracking job there Mate, never thought about bumper, will definitely look in to one, probably one of the last jobs to do so will be a while away yet.
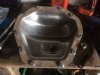
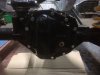
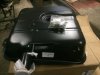
Wish I could afford to build engine like you did to yours. seems a shame to put dirty old engine back in but never mind, gonna clean it up best I can and obviously put new timing kit, water pump ect.
Thanks will have a go and try not to break anything.Yes, it's just a case of removing all of the bolts around the bell housing.
Once I get it all cleaned up. a Mate will fit clutch and timing for me, I wouldn't dare have a go on my own.As above.
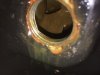
But when fitting new clutch,alignment is important. And do the spigot bearing,thrust bearing and also not sure of the clutch arm and pivot but check while you are there. Not expensive bits and much easier while it’s all out.
Looking good
M&J
Maybe see when the time comes. Gonna have Nightmares about it nowWe have faith man go for it yourself
Not hard and plenty help from guys here.
J
Thanks will have a go and try not to break anything.
Welcome To LandyZone, the Land Rover Forums!
Here at LandyZone we have plenty of very knowledgable members so if you have any questions about your Land Rover or just want to connect with other Landy owners, you're in the right place.
Registering is free and easy just click here, we hope to see you on the forums soon!