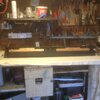
As the thread I just posted was asking about an electrical mystery.....something a little nicer....and yes I am showing off a bit here!
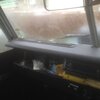
restored my old dash top......and really please with result....what do you think?

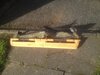
I have also done major work to the dash bottom, rewelding, cutting, banging new metal into shape and covered in the same stuff......I’ll post a photo once fitted
thanks
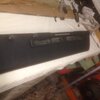
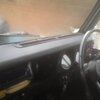
restored my old dash top......and really please with result....what do you think?
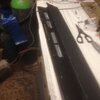
I have also done major work to the dash bottom, rewelding, cutting, banging new metal into shape and covered in the same stuff......I’ll post a photo once fitted
thanks