Freelander 1 Rusty & leaking sunroof frame

This site contains affiliate links for which LandyZone may be compensated if you make a purchase.

pscan.eu

Active Member
Posts
378
Location
uk
SWMBOs Freelander 1 is dripping water on her head.

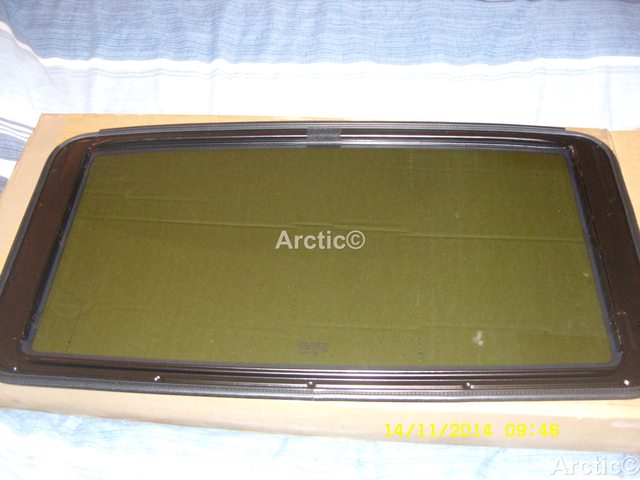
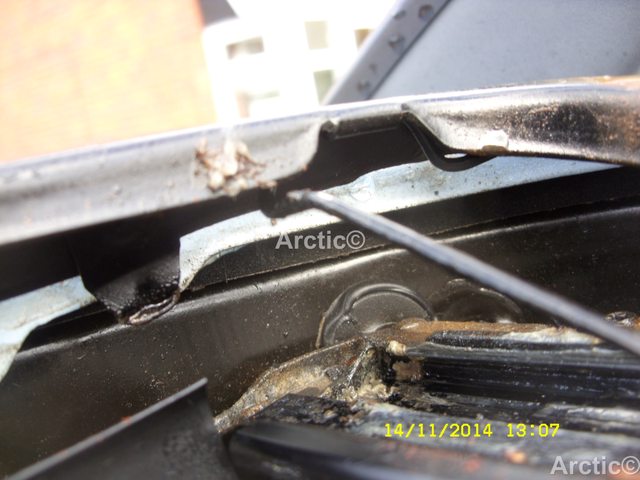
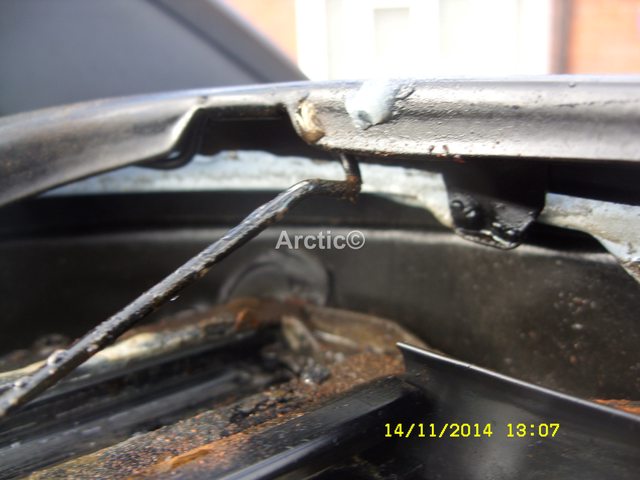
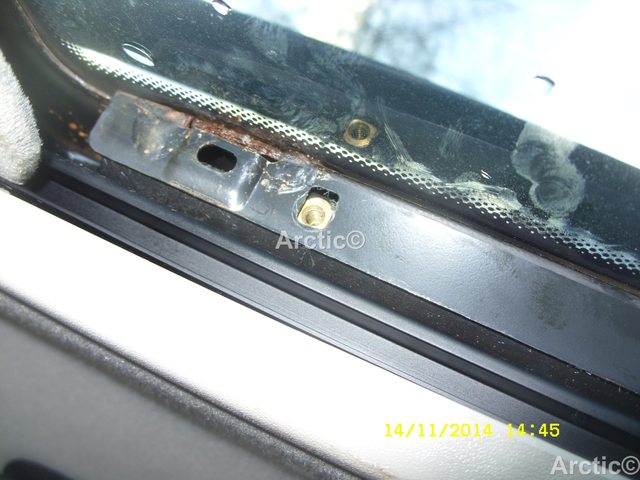
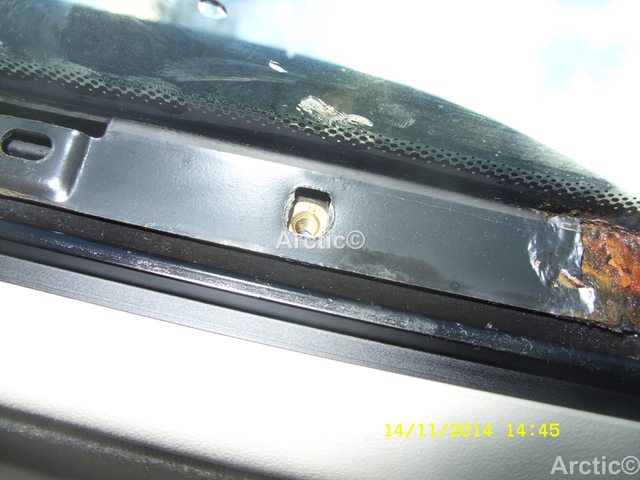
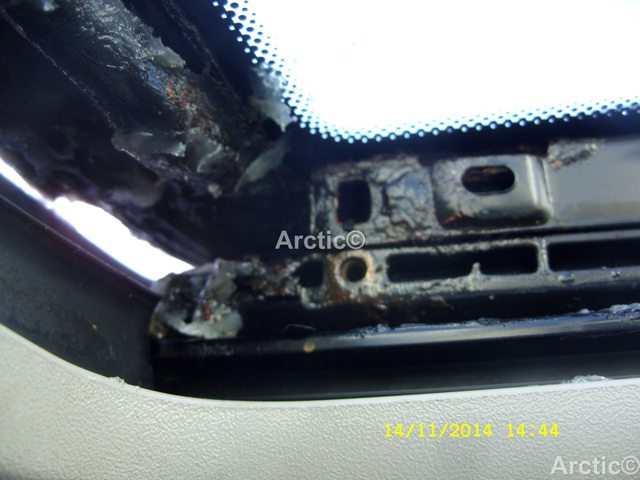
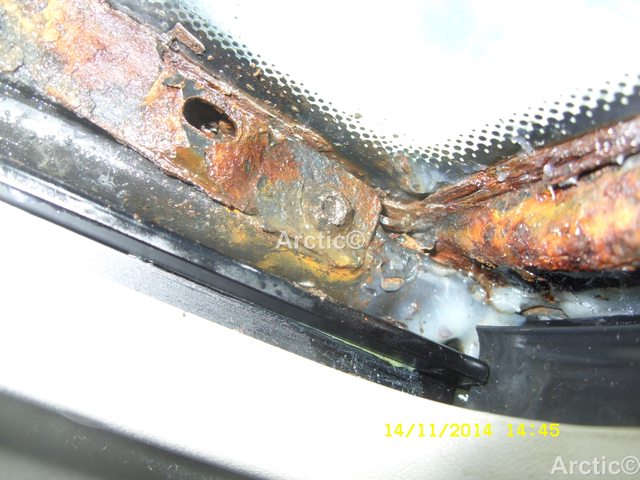
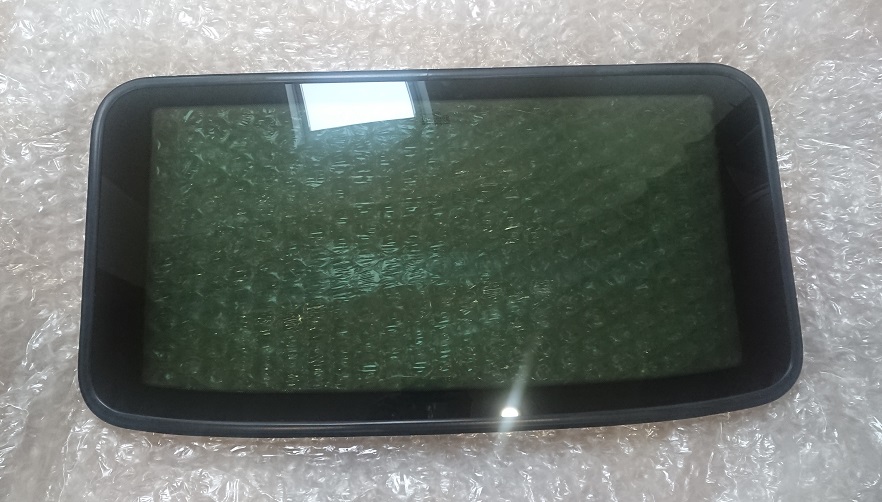
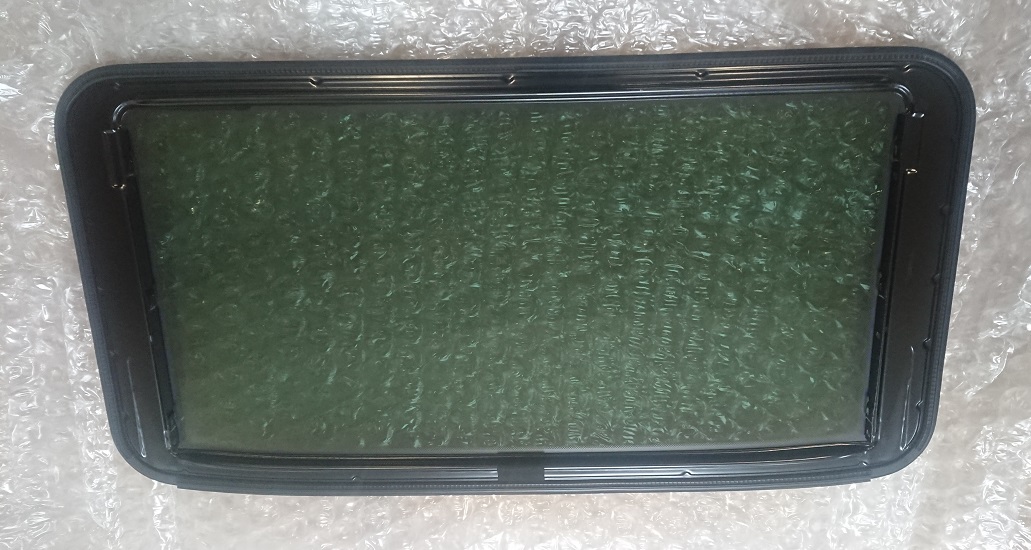
I had a look and it seems so me that there is a metal frame, which I think is part of the moving mechanism of the sunroof (is it?) which is sort of U section and in each front corner it has rusted through.
Therefore small amounts of water that get past the seal instead of draining away drip on her.
The sunroof has never worked since we have had it (probably disconnected by previous owner) so I haven't opened it to see if this U channel is part of the sliding bit, or part of the body shell.

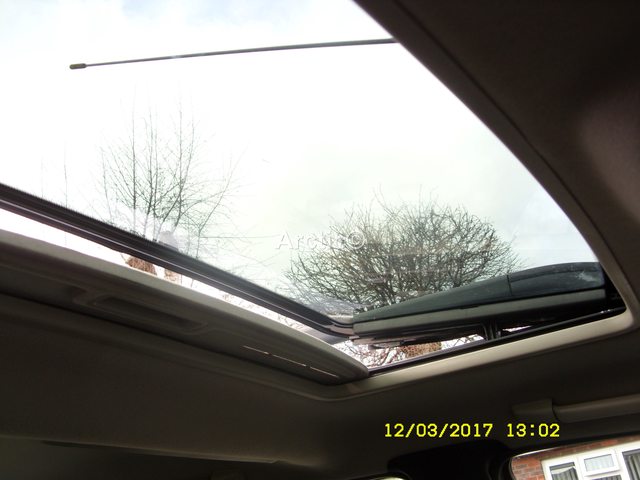
Anyway I am sort of tempted to re-instate the the sunroof. I know it's a lot of work, but I've done far worse. It's in otherwise quite good condition and SWMBO loves the thing. It's difficult to find cars that she likes and so it's value to me is way higher than its ££ value. There's very little corrosion in it and it drives really well. It had all new clutch hydraulics and a Valeo solid flywheel conversion, replaced gearbox and IRS fluids not long ago. It would be nice to have a working sunroof.

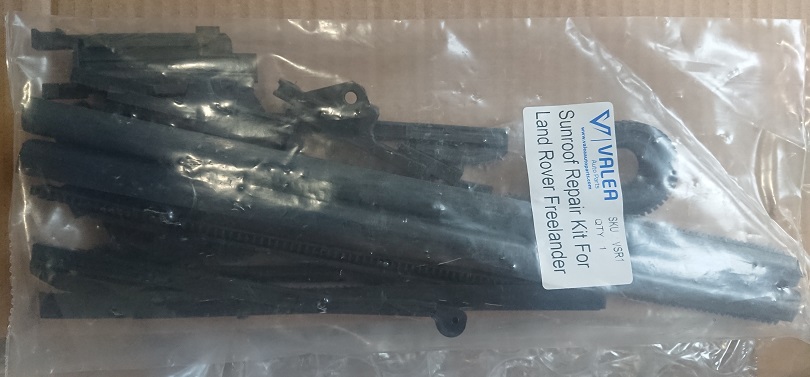
So if I pull the sunroof to sort out it's gears / cables whatever what can I do about the rusty mechanism? Is it glued to the glass? Can I pull the glass off and weld it up without the glass there? Can I buy a new frame?

thanks for any replies.
 
Just done similar on a V6.
So, chances are if it has failed the plastic sliders and lift pieces have broken. Kits on the bay with all the bits in.
Inside car, prise off two long plastic trims, one each side, then 6 torx screws and top glass and frame lifts out.

You can then see the mechanism and what has broken. Don't think the glass separates from frame for welding. I bought frame and glass complete for £150.

Obvs check electrics are all connected, cables to motor can be seen through interior light hole. You can either repair the side tracks or buy them complete with cables ready to fit to motor.

Not difficult, bit fiddle, I replaced some broken plastic bits. Lay it all out and use one side to help reassemble!!

Worth doing. There is also an alignment routine to get the tilt and open to work on the switch correctly. Documented in Rave.
 
I had a look at sunroof glass on ebay (just to see the pics). It seems to me that metal that's rusted is actually part of the "glass" part number EFT500070, which is available from Rimmers.
So if I buy a new glass and repair kit is that all I need?
Presumably there are some drain tubes that I should clean out as well? Is there a recommended method?

The other option I suppose is to dump the whole thing and seal a sheet of clear polycarbonate plastic over the hole.

I have to do something because if I leave it leaking it will eventually destroy the car. If water doesn't have a way out it rots it's way out.
 
Also I notice that the "glass" is held in by six screws (three on each side) but some of these look extremely rusty.
What do those screws screw into?
If I have to destroy or drill out the screws and damage something is that something included in the repair kit?
 
Last edited:
What do those screws screw into?
If I have to destroy or drill out the screws and damage something is that something included in the repair kit

No, if you damage the back piece then you'll need the whole side mech with cable unless you drill and tap larger.
 
This is the one i purchased when i did mine.
https://www.famousfour.co.uk/new_parts/lr_part?part=373228

As you say Rimmer do the same
https://rimmerbros.com/Item--i-EFT500070

gzTS8gYl.jpg
1

792GR7Hl.jpg
2

jfDVcjdl.jpg
3

xMpqIR5l.jpg
4

sUKmpypl.jpg
5

8PNbsrGl.jpg
6

nZDszthl.jpg
7

8yVkTTul.jpg
8

JvmNEJPl.jpg
9

Qx2cS7Ul.jpg
10

Hope the photos help
 
Last edited:
Hola. Recientemente reconstruí mi techo de cristal. El marco estaba oxidado. Compré un kit de reparación para guías, ruedas, etc. y no usé nada:
Primero lijé bien el marco de vidrio con una amoladora angular, luego le di una imprimación en aerosol antioxidante, encima dos capas de pintura anti-calor (sí, sí, esa para motores) Resultado PERFECTO.
Ahora las guías y los toboganes: mi techo no funciona debido a: 1) las virutas cayeron en los toboganes por el óxido del marco, dificultando el funcionamiento y limando el hierro del tobogán.
El propietario anterior ya ha reparado, pero el tubo guía del cable deslizante se dejó sin colocar, por lo que el cable no corrió.
el motor debe retirarse del techo.
Solución: quitar el motor, desmontar cada juego de rieles de techo (seguro que ya has dicho cómo aquí). Desmontar los toboganes de plástico y limpiar muy bien las limaduras de hierro de los raíles (trabajo minucioso que bien merece la pena).
Coloque los tubos de guía de cable (PRECAUCIÓN, tienen una posición exacta para ser sujetados por la parte de la cabeza de la guía)
Ensamble las guías. Tenga en cuenta que la marca superior de la corredera dentada interna de plástico debe colocarse justo donde la rueda dentada para que el techo entre en su lugar.
Después de todo, funciona perfecto, ya no se pega y se abre y se cierra perfectamente. Guardo el kit de reparación por si acaso ...

para ser mi primera publicación quizás un poco pesada.
Espero que te ayude


upload_2020-11-1_13-24-23.png


Abrir en el Traductor de Google
 
Loosely translated......

Hi. I recently rebuilt my glass ceiling. The frame was rusty. I bought a repair kit for guides, wheels, etc. and I didn't use anything:
First I sanded the glass frame well with an angle grinder, then I gave it an antioxidant spray primer, on top of it two coats of anti-heat paint (yes, yes, that one for engines) PERFECT result.

Good stuff, thanks for the post!!


¡¡Buen contenido, Gracias por la publicación!!
 
Sorry. I didn´t see my translator program was activated.
Hi. I recently rebuilt my glass ceiling. The frame was rusty. I bought a repair kit for guides, wheels, etc. and I didn't use anything:
First I sanded the glass frame well with an angle grinder, then I gave it an anti-rust spray primer, on top of it two coats of anti-heat paint (yes, yes, that one for motors) PERFECT result.
Now the guides and slides - My roof is not working due to: 1) Chips fell into the slides from rust on the frame, hindering operation and filing down the iron on the slide.
The previous owner has already repaired, but the slide wire guide tube was left unattached so the wire did not run.
the motor must be removed from the roof.
Solution: remove the motor, disassemble each set of roof rails (surely you already said how here). Disassemble the plastic slides and clean the iron filings from the rails very well (painstaking work that is well worth it).
Position the cable guide tubes (CAUTION, they are exactly positioned to be held by the head part of the guide)
Assemble the guides. Note that the top mark on the plastic inner sprocket must be positioned right where the sprocket is in order for the roof to go into place.
After all, it works perfect, it doesn't stick anymore and it opens and closes perfectly. I keep the repair kit just in case ...

to be my first post maybe a bit heavy.
I hope it helps you
 
muchas gracias. I have just ordered a new sunroof from Rimmerbros. My frame has holes in it so cleaning it will not solve that.
 
A bunch of bits arrived this morning, along with a life time supply of bubble wrap.
DSC_5150.jpg

DSC_5151.jpg

DSC_5152.jpg


I'm not exactly sure how to fit this repair kit as it doesn't come with any instructions.
Does the headliner have to come down in order to fit it?
I would like to have a sunroof that not only doesn't leak, but which can be opened and closed as well.
I'm hoping that I have bought enough stuff to achieve that.
 
Also, the kit seems to have some long plastic bits with "rack" teeth on which have threaded brass inserts which look to me like the ones that the previously mentioned rusty screws go into.
If I'm right then it means that I don't have to worry too much about the six screws that hold in the sunroof panel having to be destructively removed (if it comes to that) because I have a replacement anyway.
 
Hi. The plastic parts of the kits sometimes do not fit perfectly and need to be filed or sanded a bit. Measurements are sometimes not exact.
I preferred to save the original components as they seems to be of higher quality and with the correct measurements. Before throwing away any original part, make sure that you can correctly assemble the one of the kit.
It's going to be great. Luck.
 
Back
Top