Rattler n Son S11a Restoration Project

This site contains affiliate links for which LandyZone may be compensated if you make a purchase.
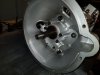
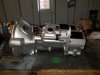
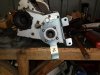
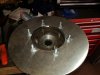
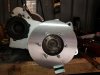
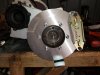
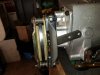
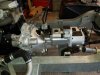
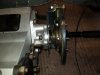
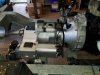
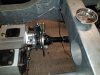
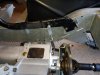
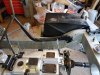
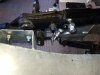
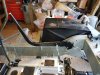
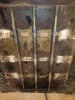
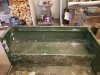
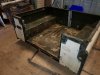
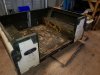
Dropped the gearbox and HRTC kit off at D.Beaumonts today so hopefully this weekend coming or the weekend after we will have it all back and start getting it all fitted :)
 
Got the gearbox back today, they don't normally open weekends but as it was a cash in hand job they opened up for us
 

Attachments

  • 20190216_122152.jpg
    20190216_122152.jpg
    319.3 KB · Views: 325
  • 20190216_122143.jpg
    20190216_122143.jpg
    247.5 KB · Views: 296
  • 20190216_122136.jpg
    20190216_122136.jpg
    280.6 KB · Views: 303
Being as the gearbox specialist has gone to the trouble of painting the inspection covers and keep plates and stuff on the gearbox and transfer box I decided on painting stuff like the high/low lever, 4x4 selector lever,clutch actuator bracket and the gear lever turret to match that need to be fitted before it all goes back in, I haven't painted the main gear lever as I plan to fit a series Slick shift but will do that after the gearbox is back in :)
 
Carried on fitting a few more bits back on the gearbox inc part of the X brake ( disc hand brake ) the refitted the gearbox back in :)
 

Attachments

  • 20190223_120116.jpg
    20190223_120116.jpg
    278 KB · Views: 309
  • 20190223_120124.jpg
    20190223_120124.jpg
    244 KB · Views: 301
  • 20190223_120859.jpg
    20190223_120859.jpg
    259 KB · Views: 299
  • 20190223_125001.jpg
    20190223_125001.jpg
    284 KB · Views: 324
  • 20190223_125008.jpg
    20190223_125008.jpg
    258 KB · Views: 276
And then after the gearbox was fitted
 

Attachments

  • 20190223_163649.jpg
    20190223_163649.jpg
    298.2 KB · Views: 295
  • 20190223_163707.jpg
    20190223_163707.jpg
    230.5 KB · Views: 295
  • 20190223_163724.jpg
    20190223_163724.jpg
    302.1 KB · Views: 279
  • 20190223_173423.jpg
    20190223_173423.jpg
    326 KB · Views: 290
  • 20190223_173437.jpg
    20190223_173437.jpg
    303.3 KB · Views: 271
Painted and fitted the h/b lever as well as the linkage between the h/b lever and X brake lever and adjusted accordingly and set at 2 clicks, plus replaced the new BP steering relay for a new Bearmach one inc new arms and securing ring, just need to dig out the clutch mech which will finish the fitting of the gearbox off ( forgot all about it ) :oops:
 

Attachments

  • 20190225_153111.jpg
    20190225_153111.jpg
    313.8 KB · Views: 284
  • 20190225_153116.jpg
    20190225_153116.jpg
    344.9 KB · Views: 267
  • 20190225_153129.jpg
    20190225_153129.jpg
    231.7 KB · Views: 268
  • 20190225_153209.jpg
    20190225_153209.jpg
    352.8 KB · Views: 267
Well i literally emptied all the garage out today to look for the clutch release shaft but to no avail so I've had to resort to buying a new one which should be here hopefully next week then once I put everything back I fitted the steering rods then a van pulled up with some other bits i'd ordered last week amongst them was a gallon of ep90 gear oil and my new slave cylinder so I topped the gearbox and transfer box and fitted the slave cylinder then I fitted the new injector pipes I bought a few weeks ago :)
 
Dragged the tub in the garage this morning to clean all the crud from the under side of the tub then removed all the aditianal nuts and bolts and X members and found a few small holes there the X members was riveted in place that i need to sort out :)
 
Made a few small repairs to the tub floor today, there was 5 X member fixing points that had corrosion on the rails where the X members fix to so I did all 15 points so the X members would fit proper then I riveted a patch over the small hole in the floor, I do plan to chequer plate the inside of the tub later which will hide the rivets on the inside :)
 

Attachments

  • 20190228_100239.jpg
    20190228_100239.jpg
    499.6 KB · Views: 294
  • 20190228_100248.jpg
    20190228_100248.jpg
    363.9 KB · Views: 310
  • 20190228_100259.jpg
    20190228_100259.jpg
    340.9 KB · Views: 309
  • 20190228_130102.jpg
    20190228_130102.jpg
    467.9 KB · Views: 275
  • 20190228_140842.jpg
    20190228_140842.jpg
    387.4 KB · Views: 286
Spent the afternoon removing the cappings and get new ones ordered
 

Attachments

  • 20190301_170753.jpg
    20190301_170753.jpg
    237.5 KB · Views: 284
  • 20190301_170803.jpg
    20190301_170803.jpg
    349.9 KB · Views: 290
  • 20190301_170814.jpg
    20190301_170814.jpg
    273.7 KB · Views: 269
  • 20190301_170823.jpg
    20190301_170823.jpg
    402.2 KB · Views: 287
  • 20190301_170830.jpg
    20190301_170830.jpg
    346.5 KB · Views: 277
  • 20190301_170845.jpg
    20190301_170845.jpg
    389.9 KB · Views: 266
  • 20190301_170952.jpg
    20190301_170952.jpg
    318.5 KB · Views: 299
  • 20190301_170959.jpg
    20190301_170959.jpg
    309.1 KB · Views: 294
I enjoyed replacing the cappings when I did mine. Weirdly one of the most satisfying jobs - unlike most other stuff where you usually take two steps forward and one back :)
 
Son and i replaced the cappings on our 90 before we sold it and they was a pain to do as the tub sort of distorted its self when we removed them which made fitting the new ones hard the old cappings in the 2a fit perfect so i'm hopeing the new ones will fit just as good :)
 
Last edited:
Scraped off the old paint / underseal from the underside of the floor today and filled all additional holes in the tub with pop rivets, just waiting for all the tub parts I've ordered to come in then I can fit some of them before the tub gets painted :)
 
Not done much today just fitted the X members to the tub and cleaned up a few bits n bobs :)
 

Attachments

  • 20190309_131529.jpg
    20190309_131529.jpg
    336.4 KB · Views: 262
  • 20190309_131541.jpg
    20190309_131541.jpg
    374.7 KB · Views: 238
Back
Top