Freelander 2 (LR2) PTU Oil Change Drain.

This site contains affiliate links for which LandyZone may be compensated if you make a purchase.
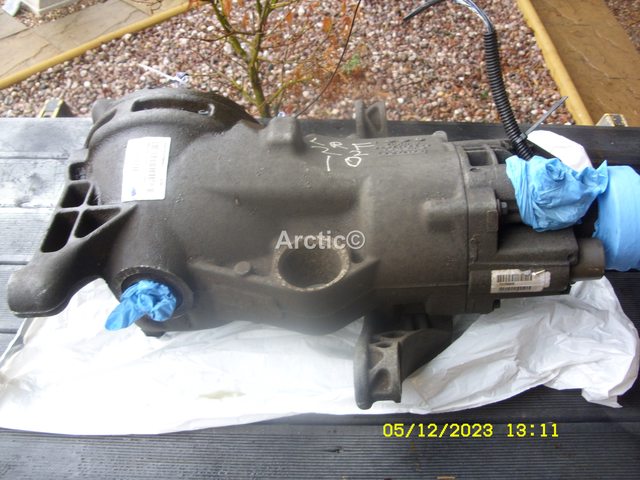
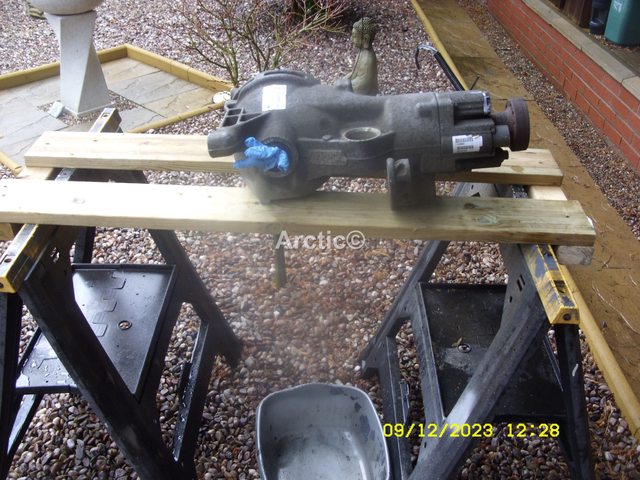
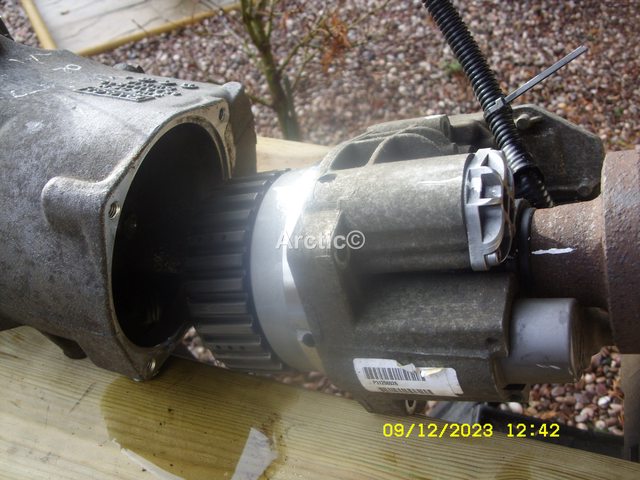
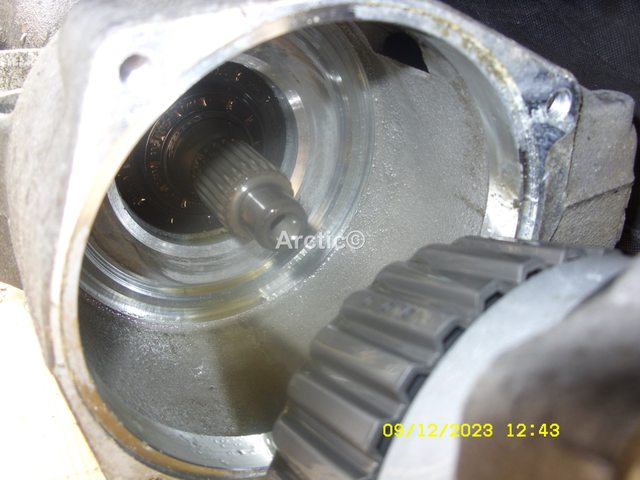
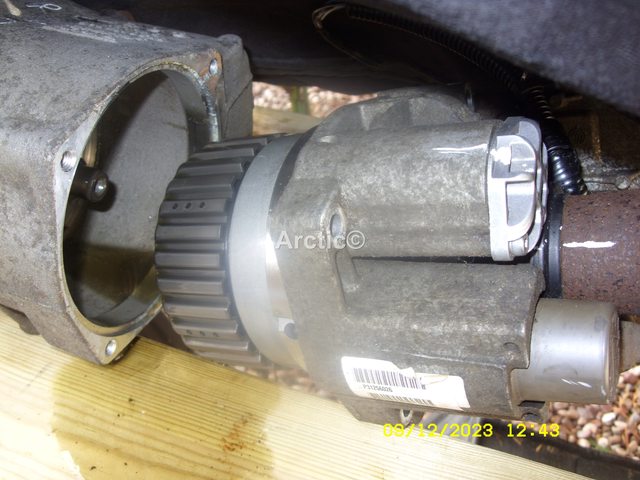
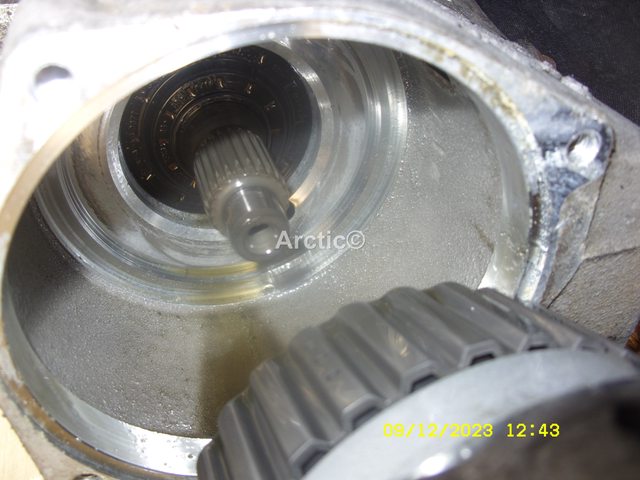
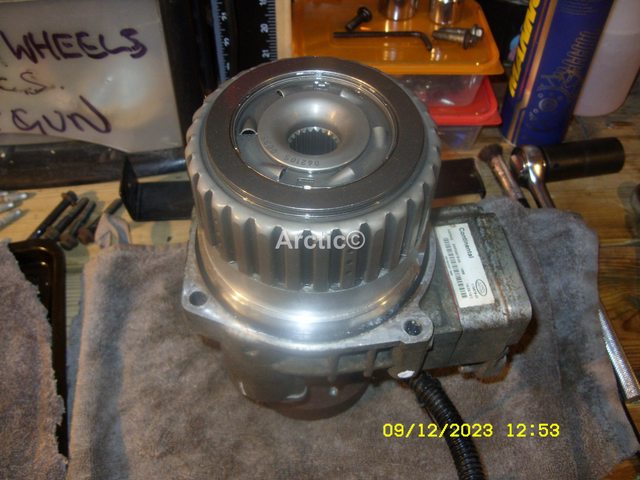
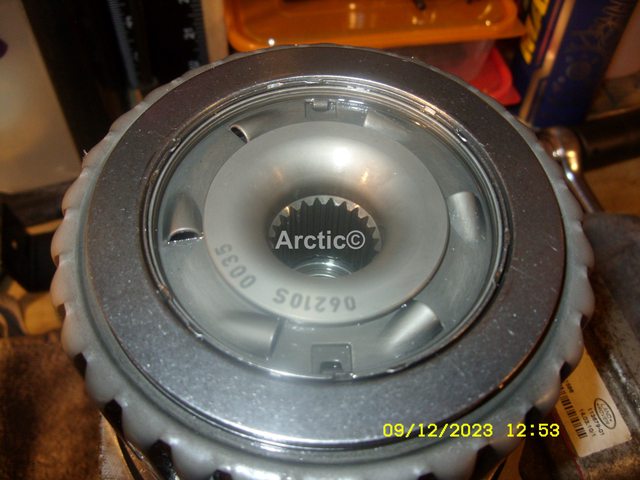
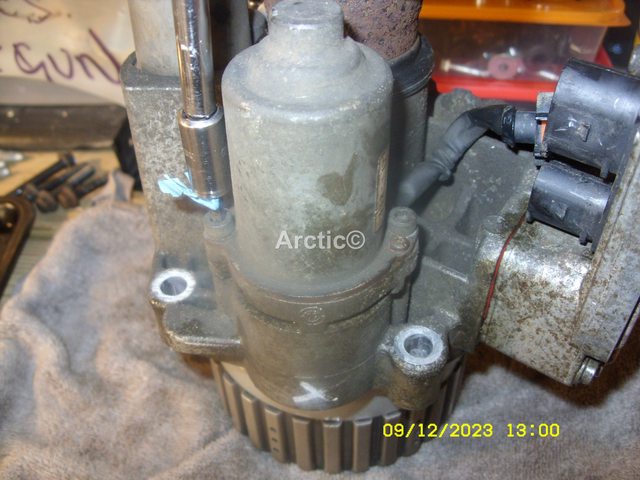
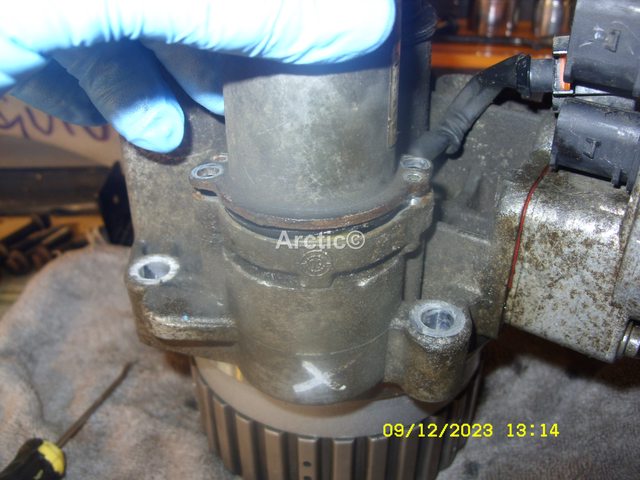
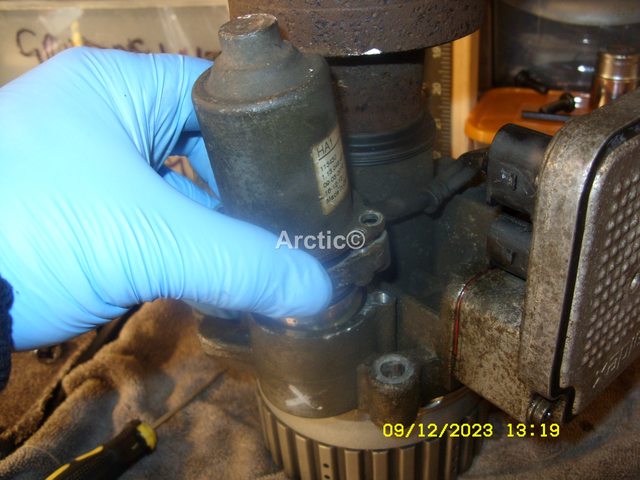
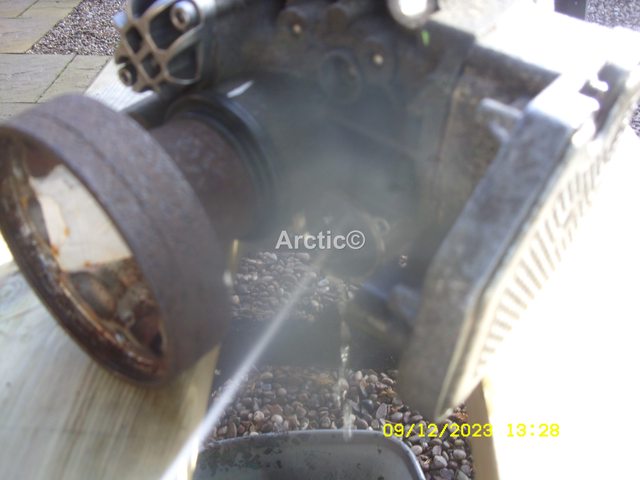
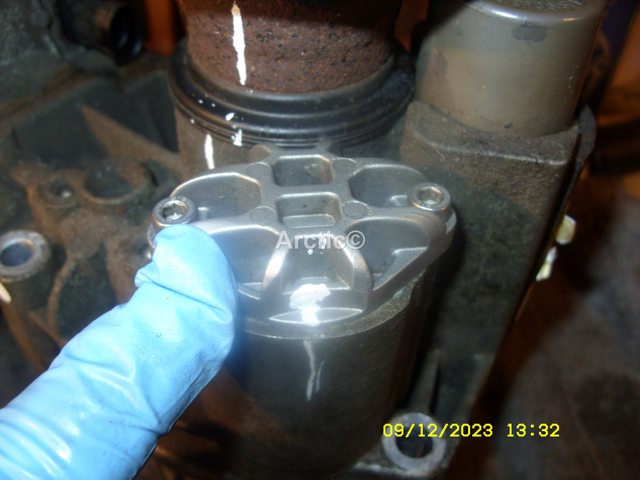
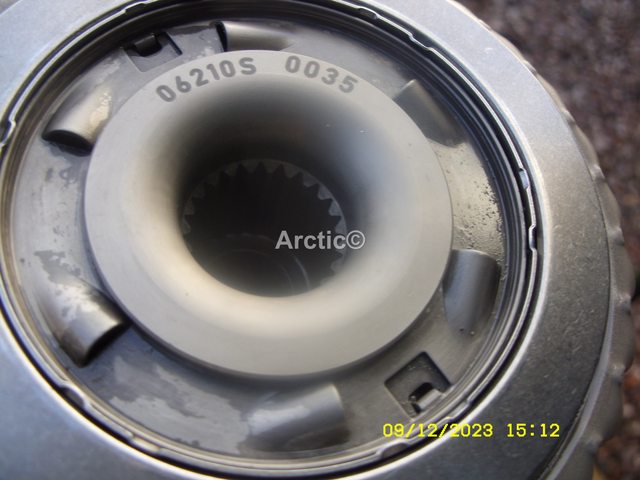
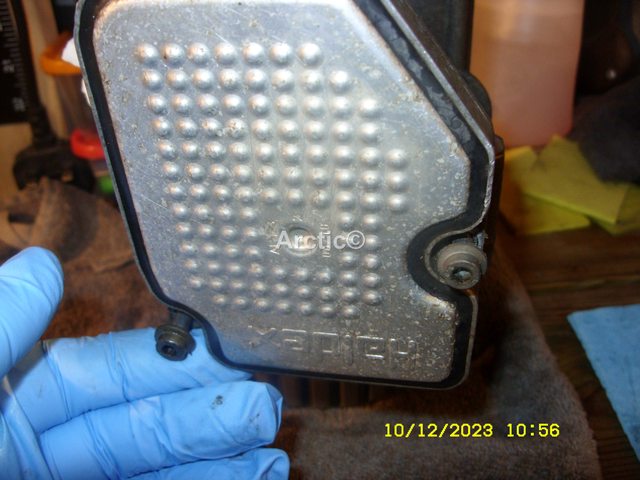
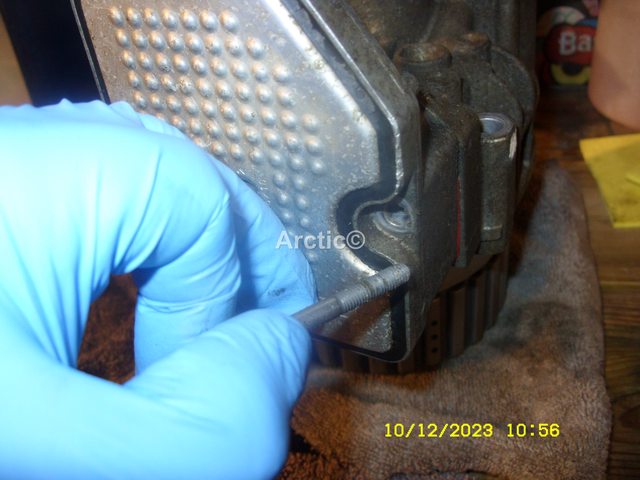
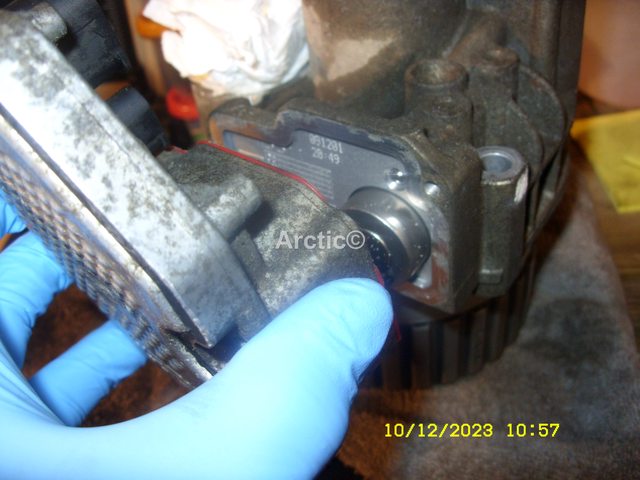
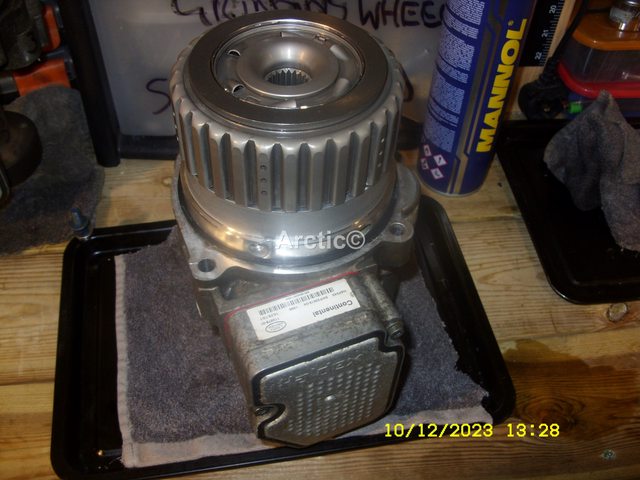
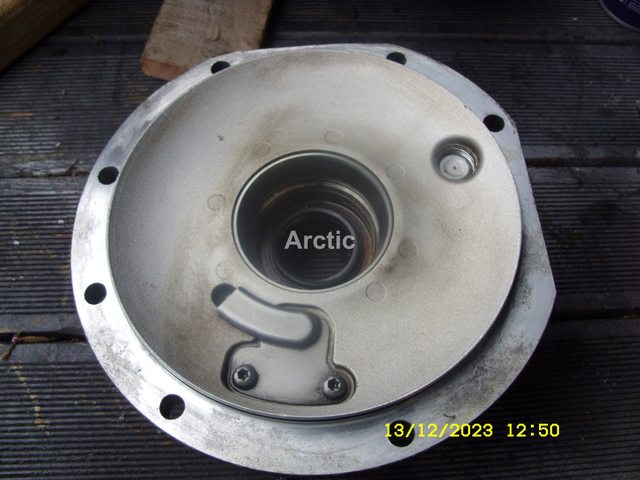
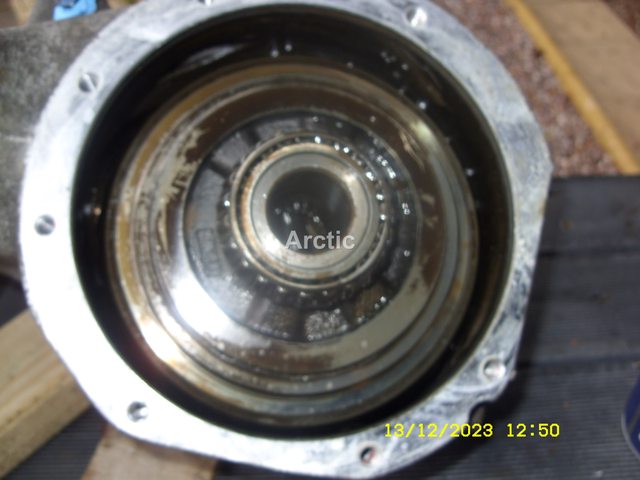
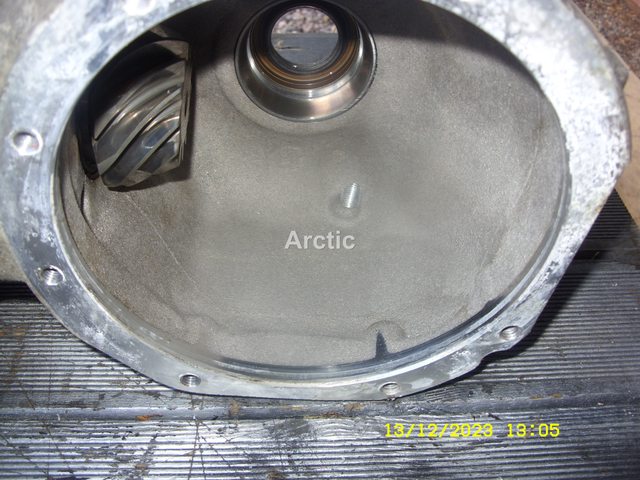
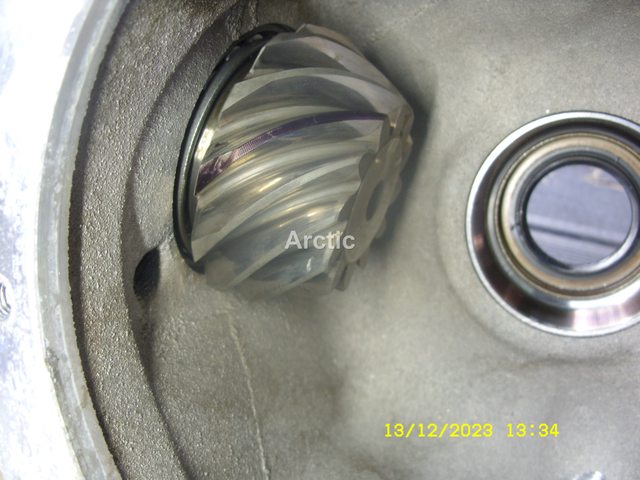
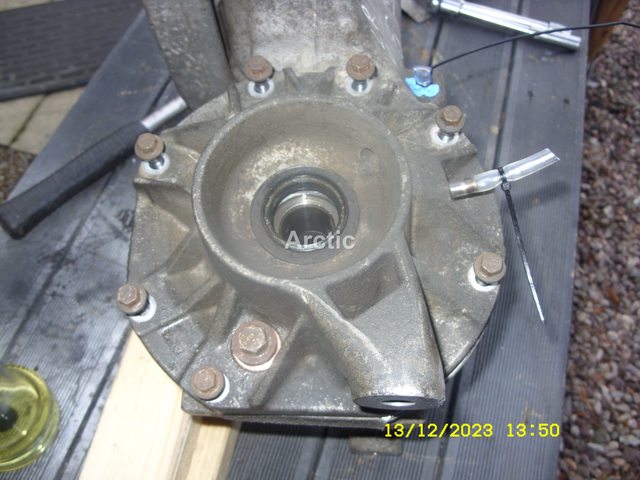
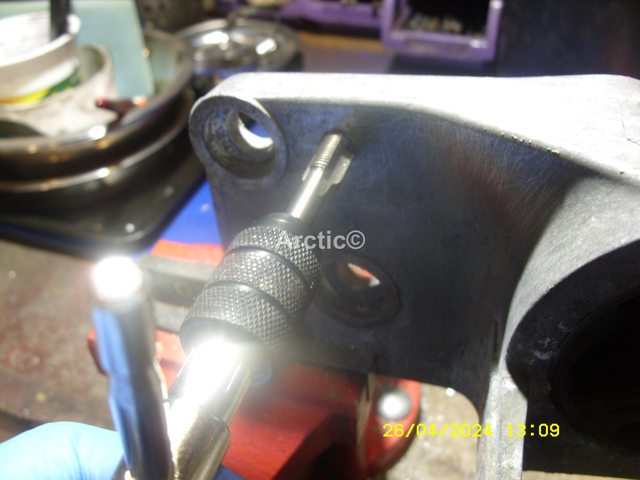
Ok so my plans did not all go to plan, first i could not remove the Haldex pump, and or the Haldex filter, which as i said above had been replaced 8 weeks ago not 6 by the dealer to try and sort out the grabbing, where upon they added the new pump, and filter, and supposedly flushed the oil and added new Ravenol oil.

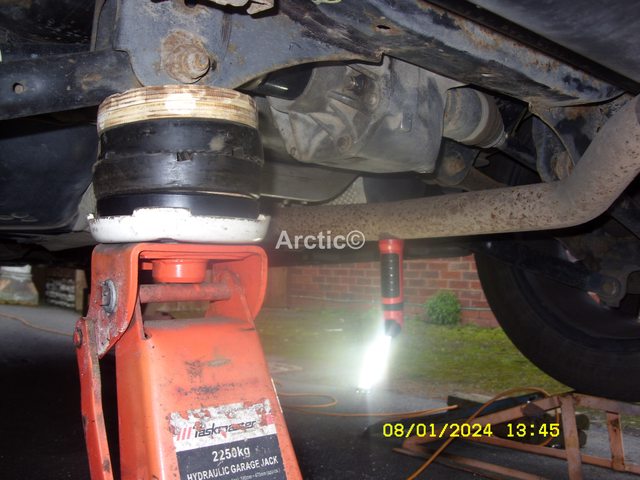
I therefore only removed the oil again by suction method, FL2 is going into Bell Engineering on the 8th January, so pump and filter will be removed then but until then i thought just do and oil change, it should not be that bad only being changed 8wks ago.

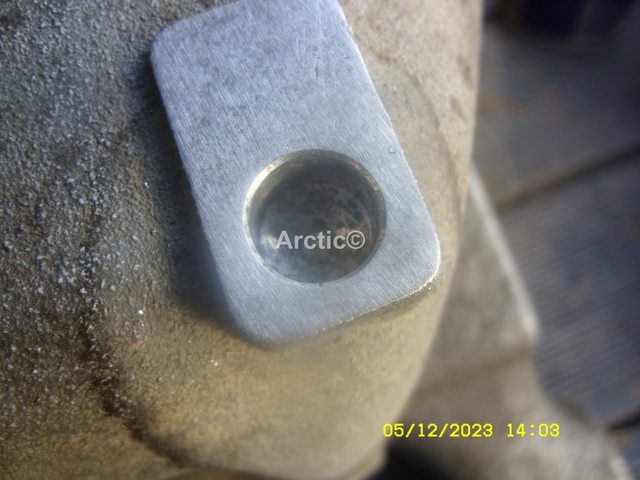
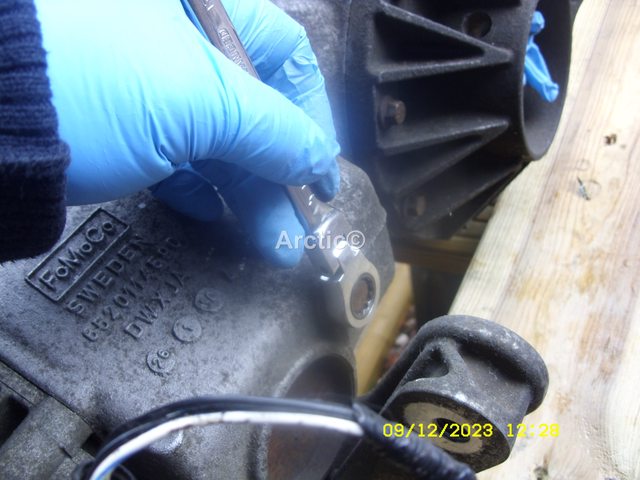
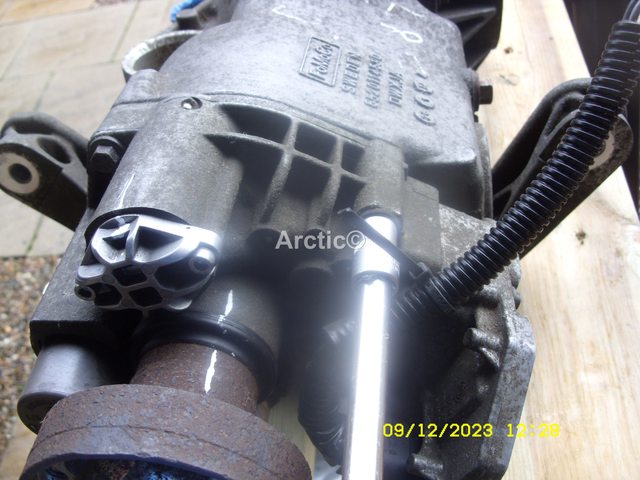
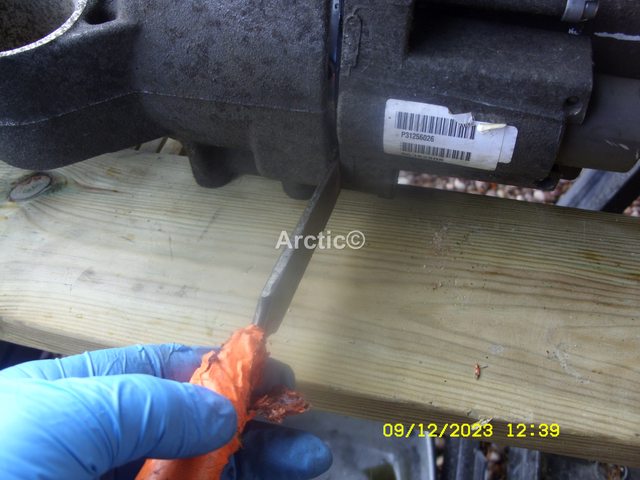
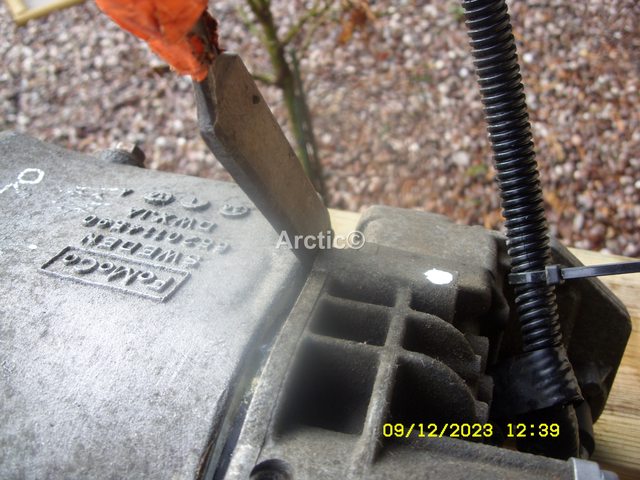
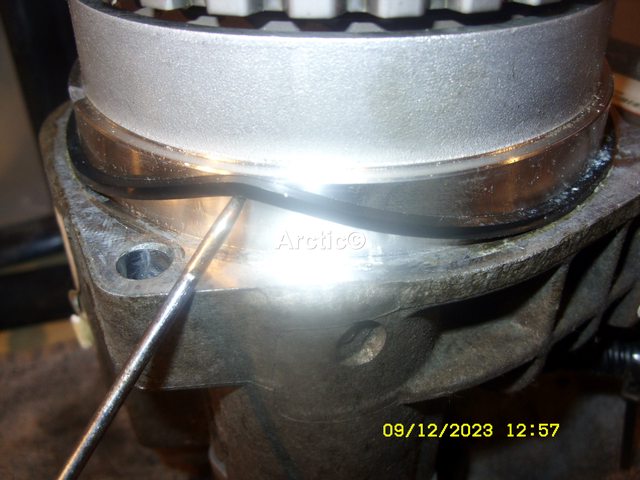
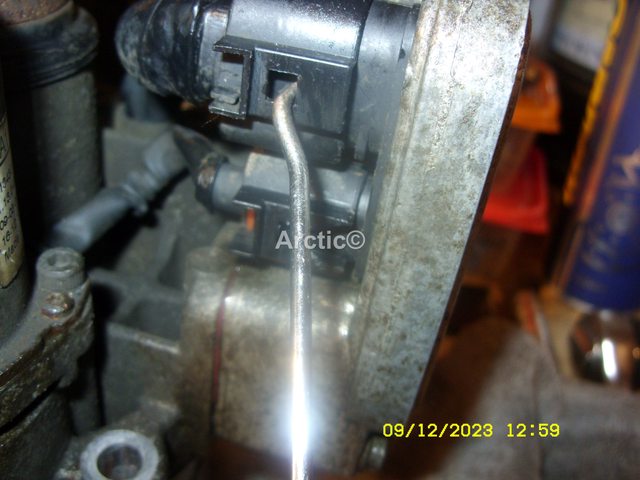
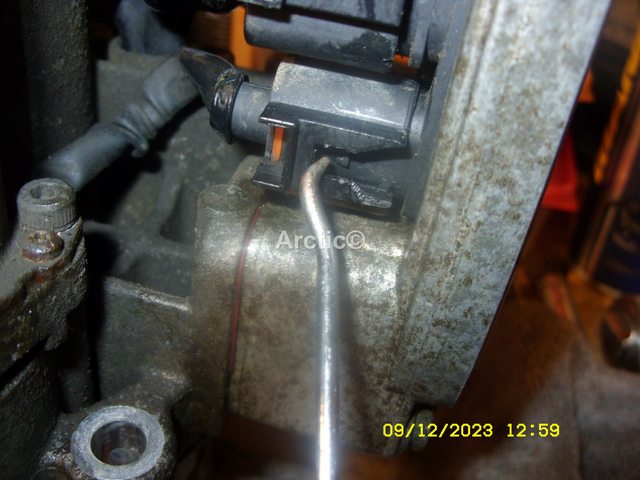
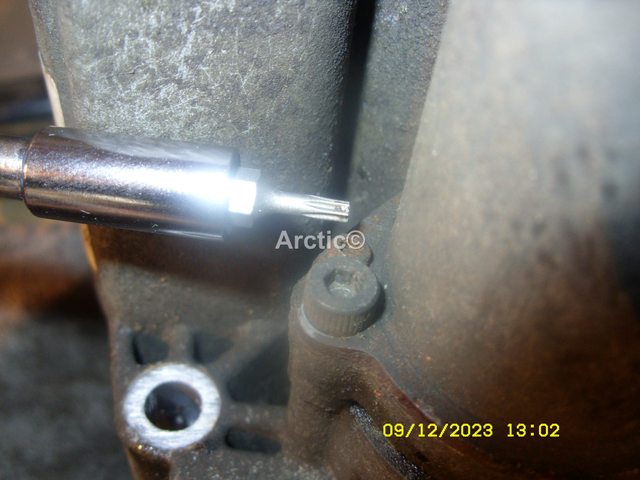
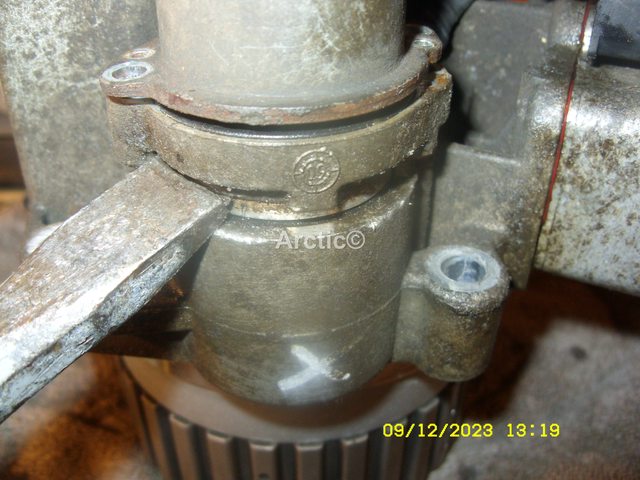
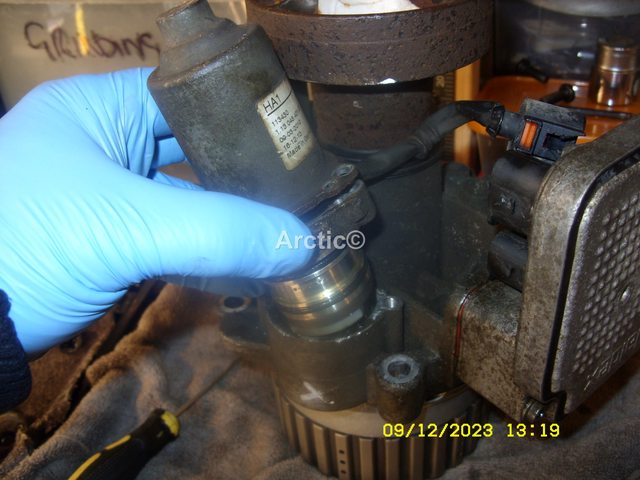
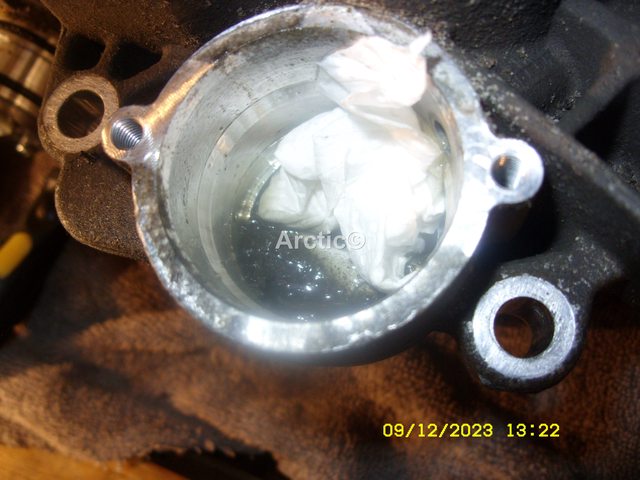
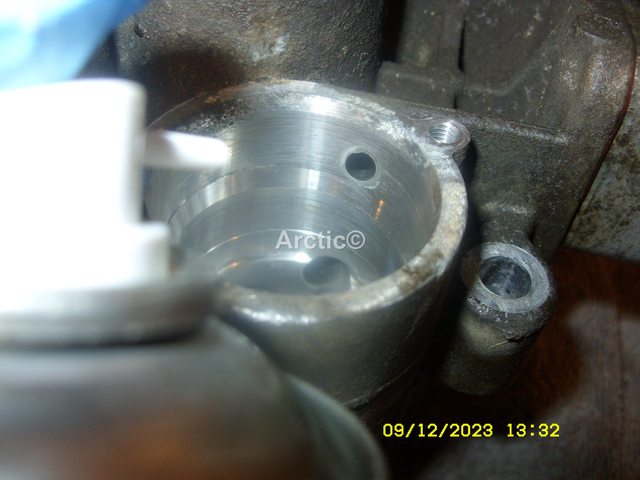
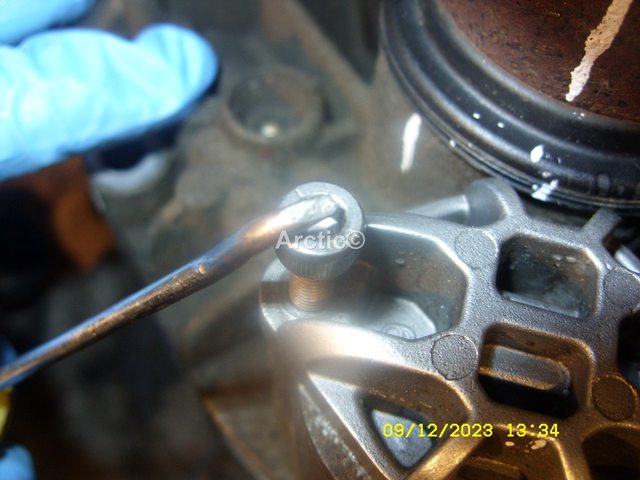
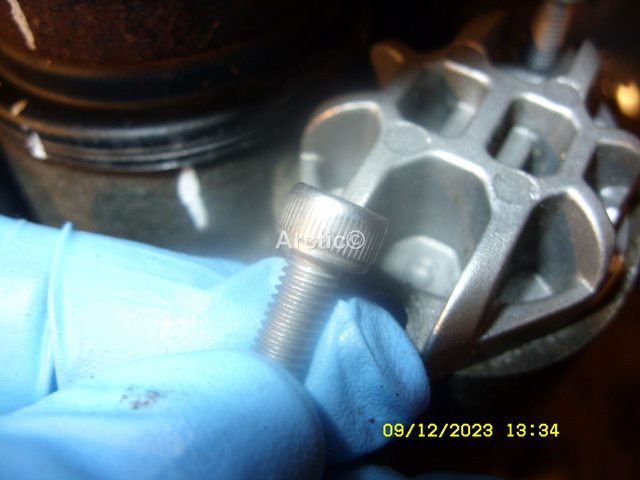
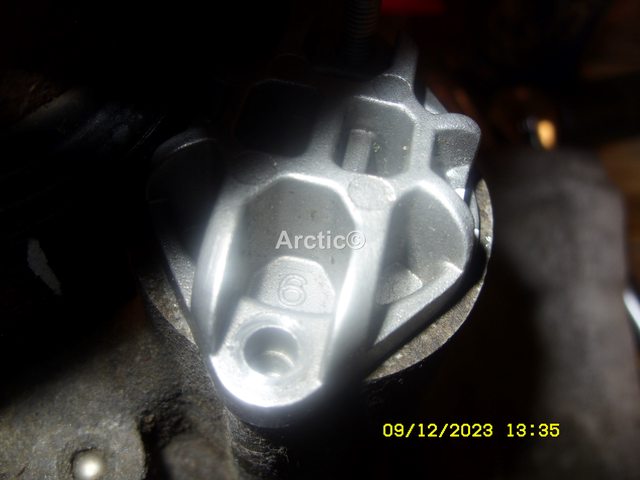
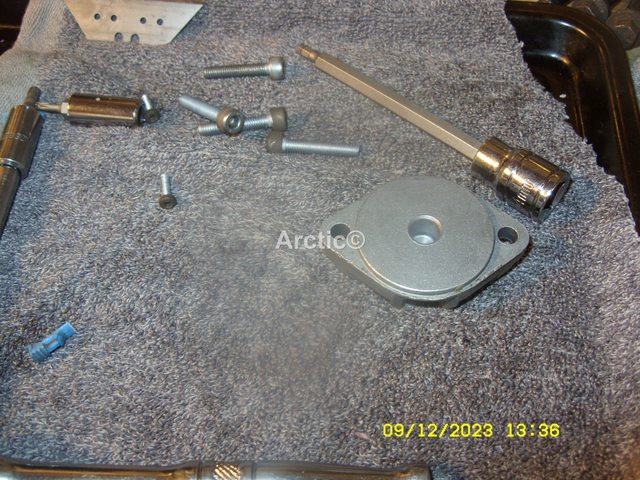
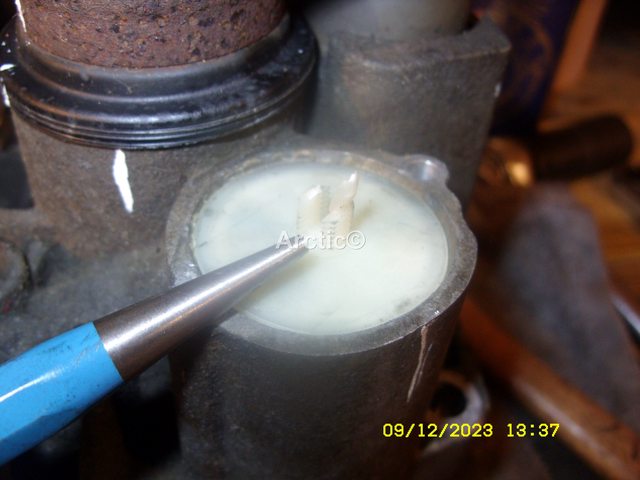
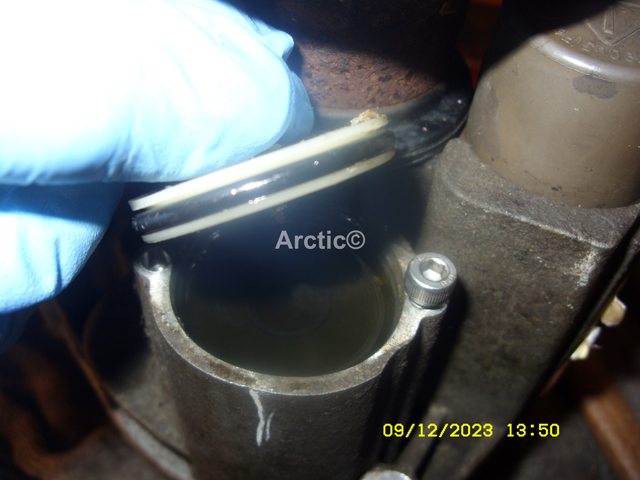
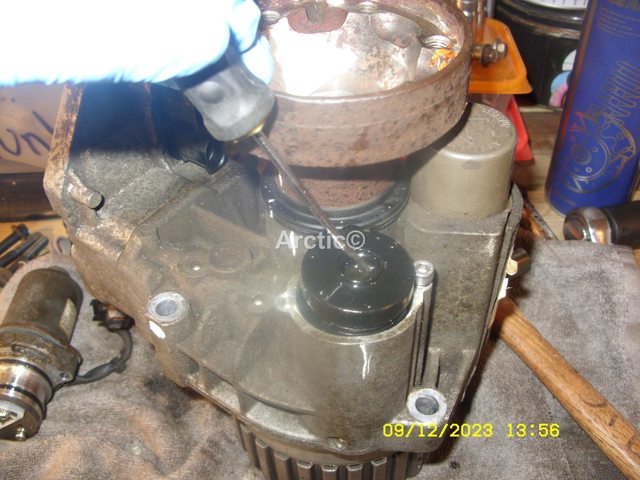
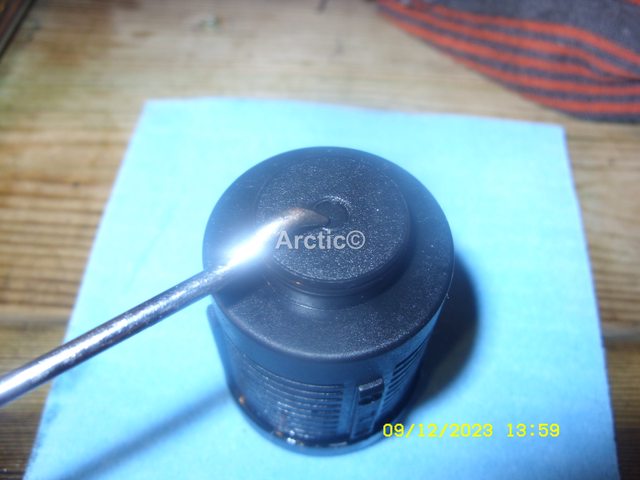
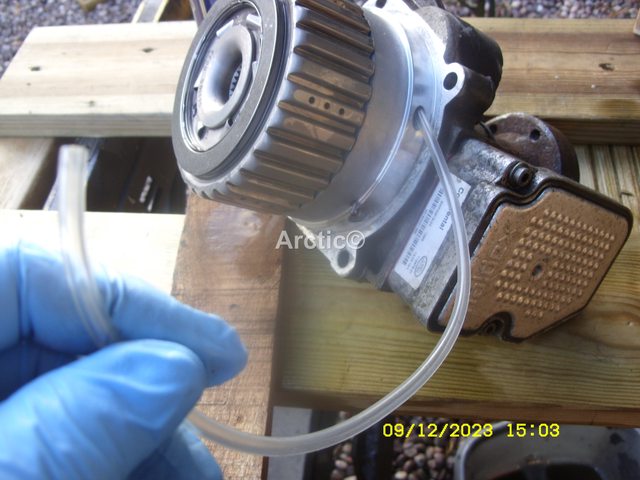
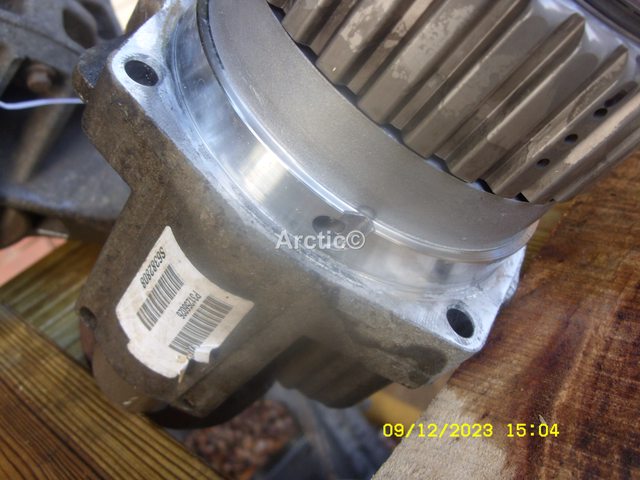
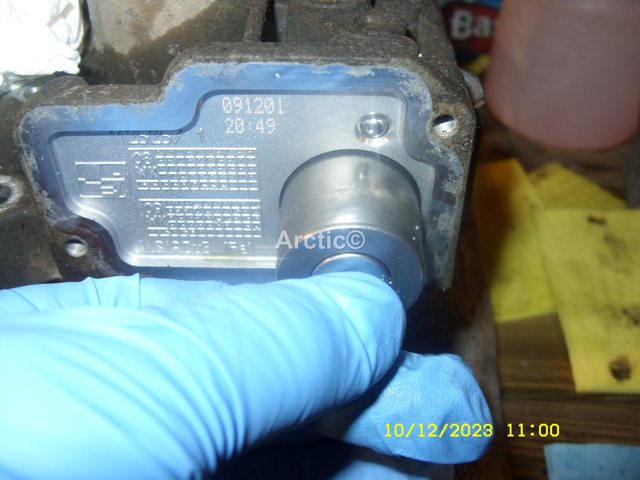
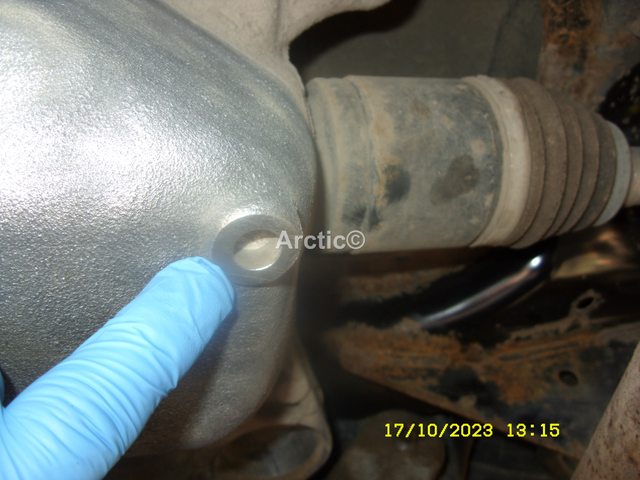
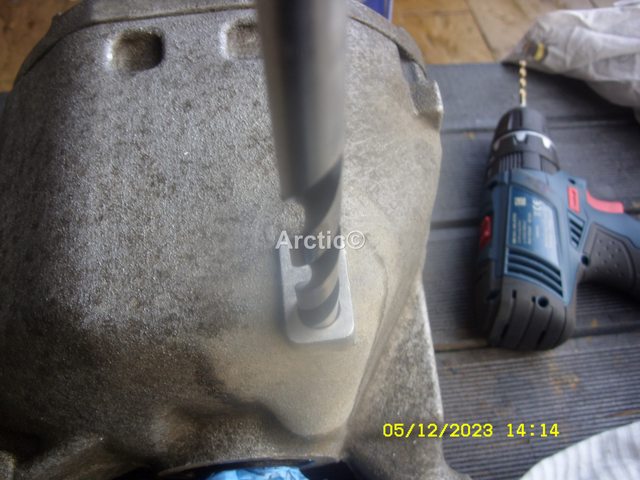
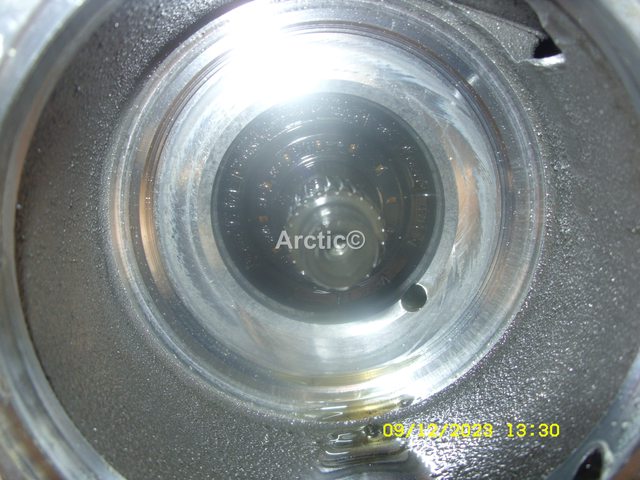
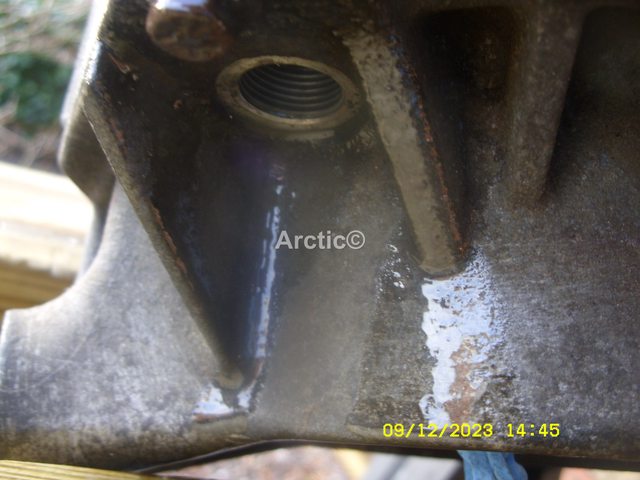
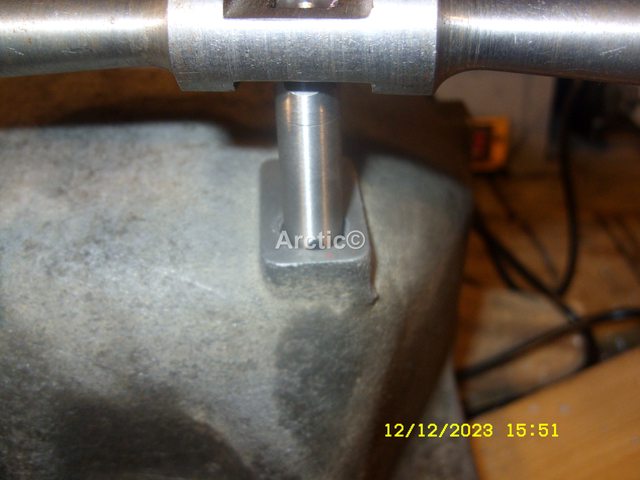
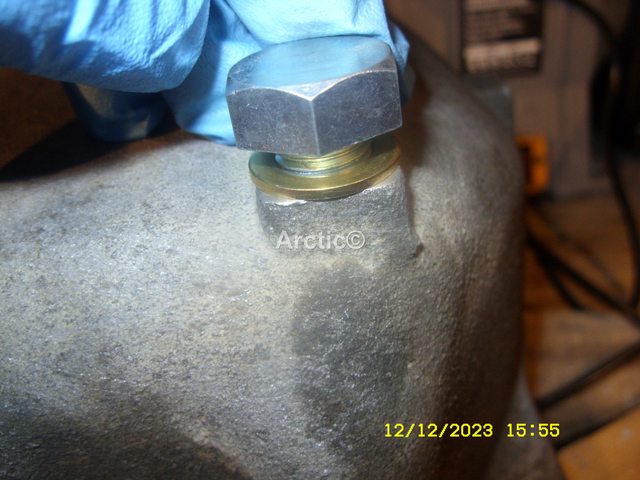
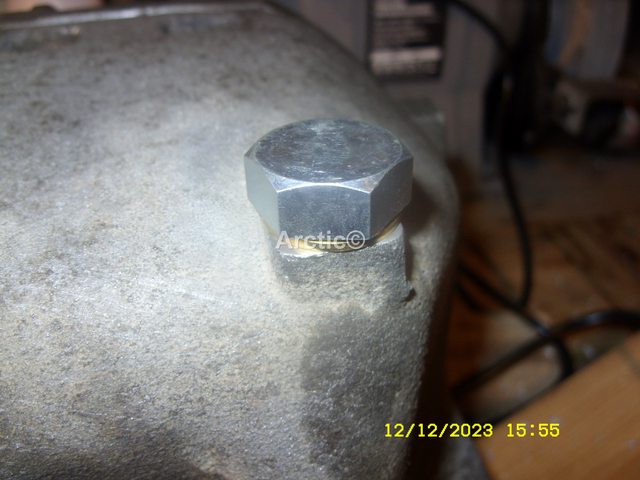
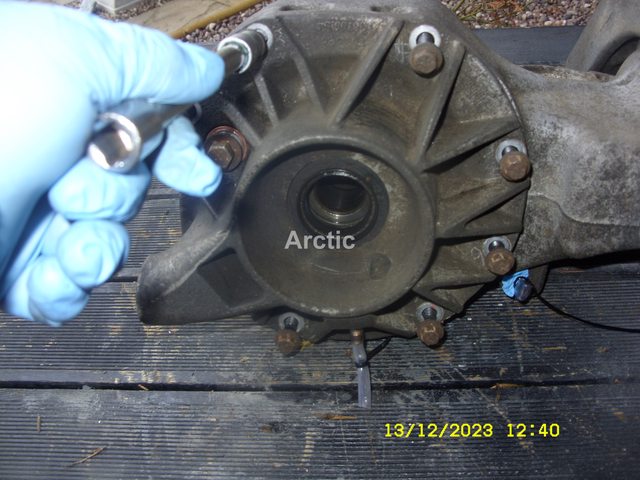
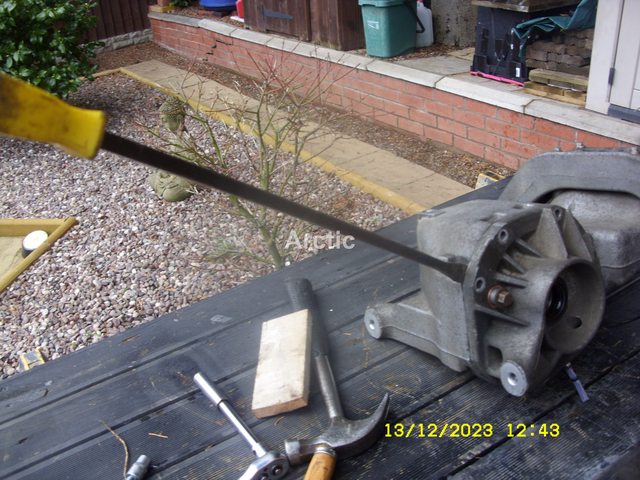
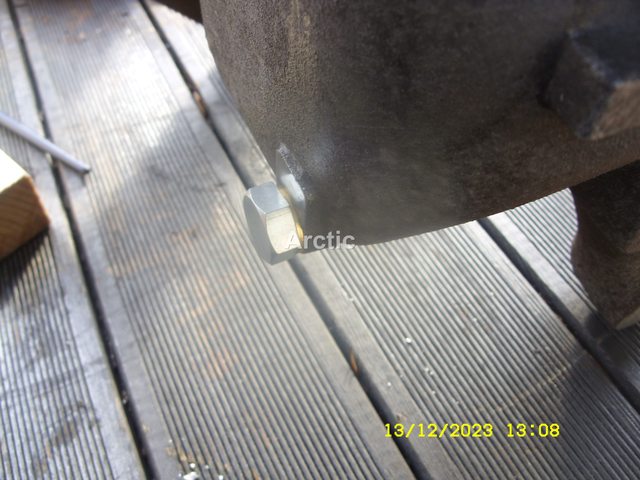
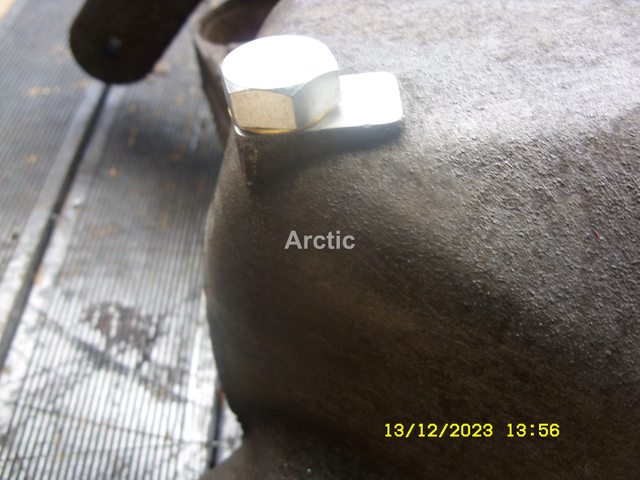
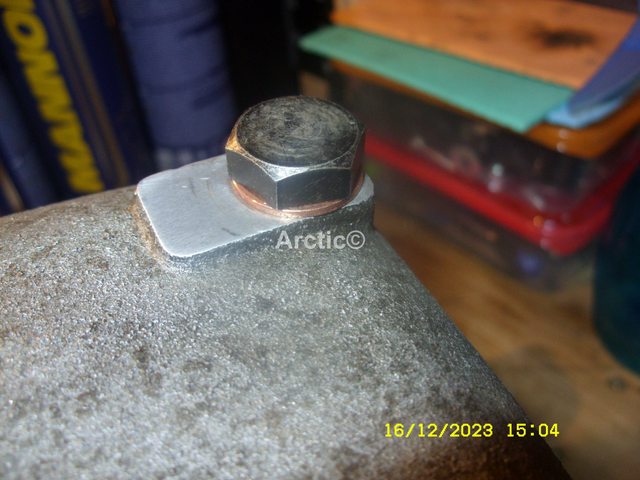
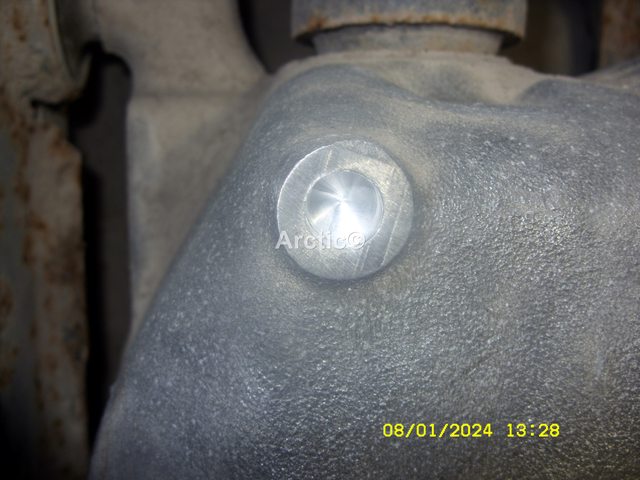
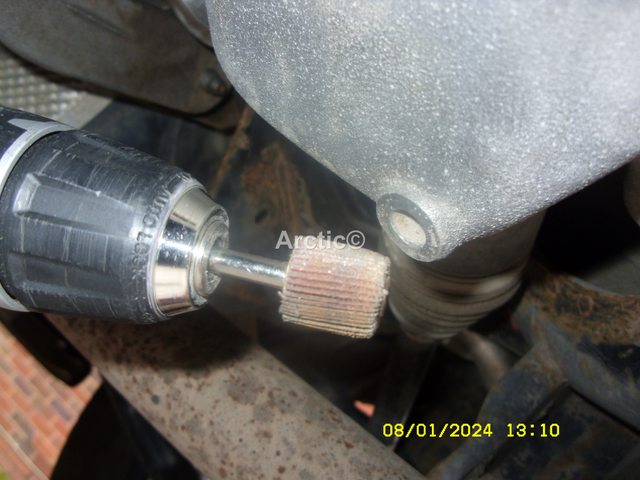
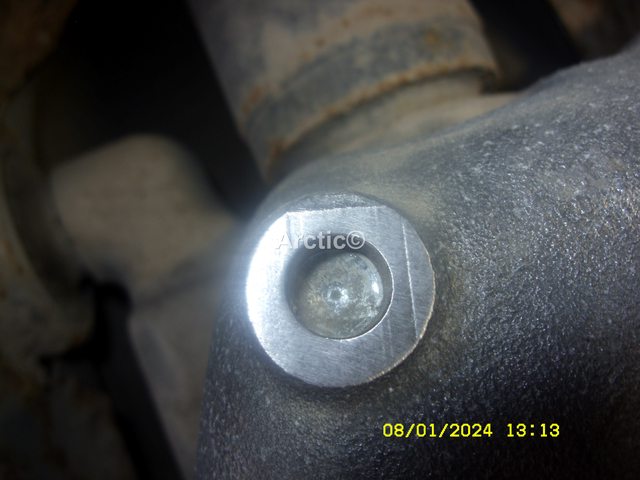
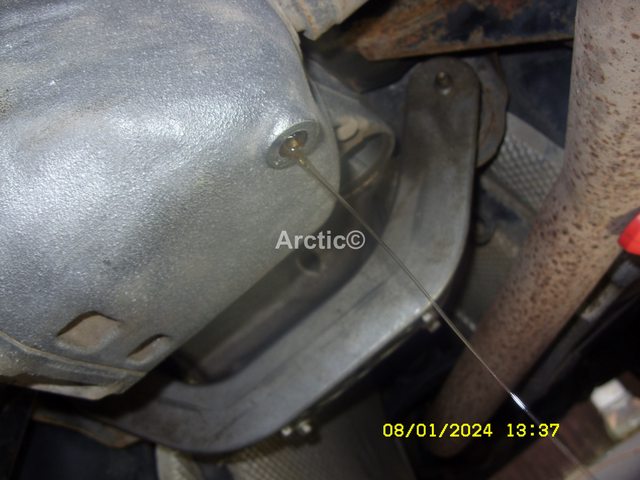
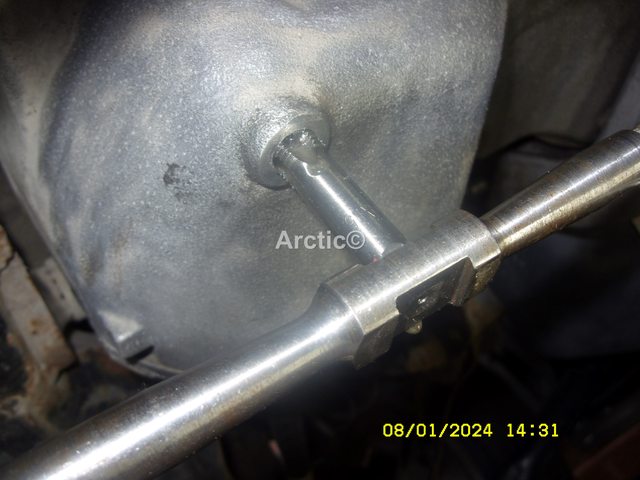
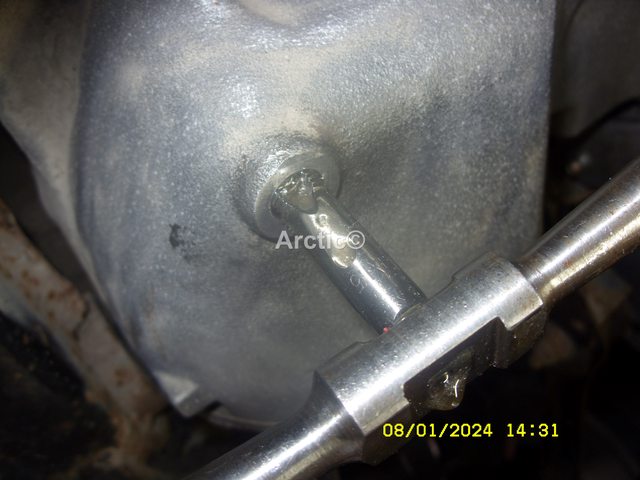
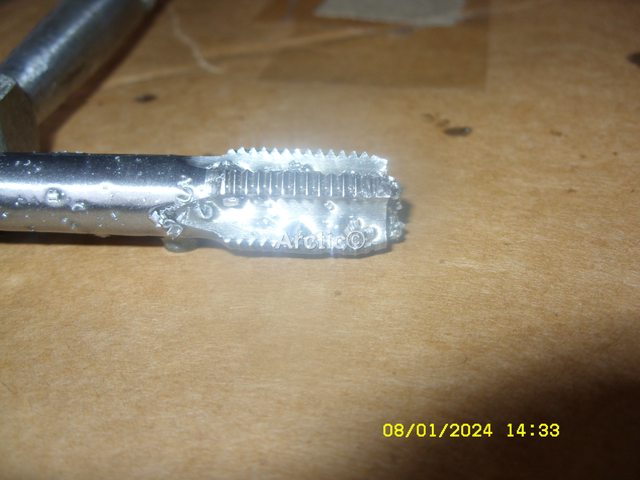
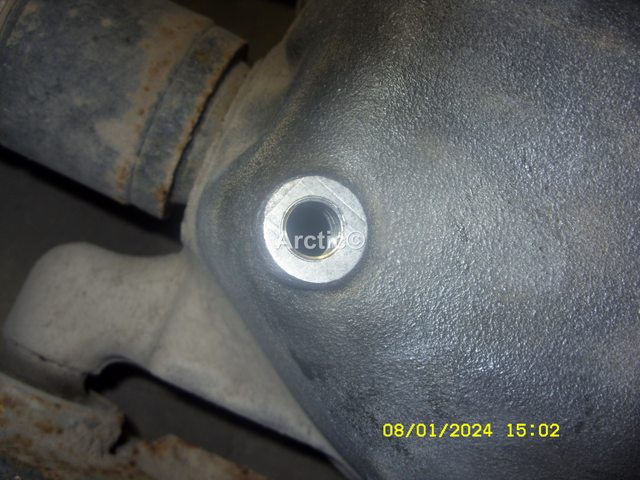
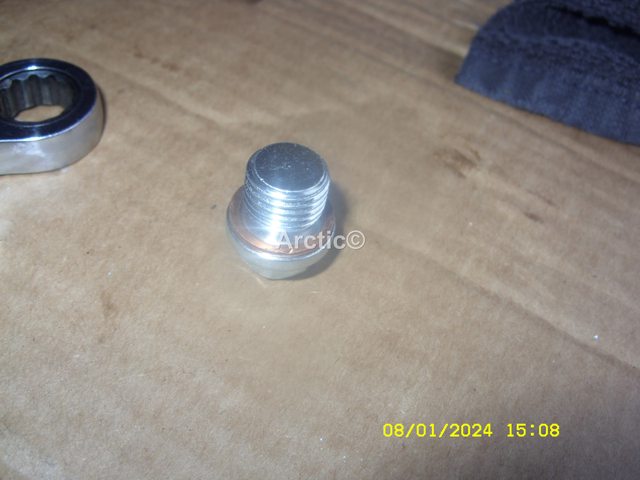
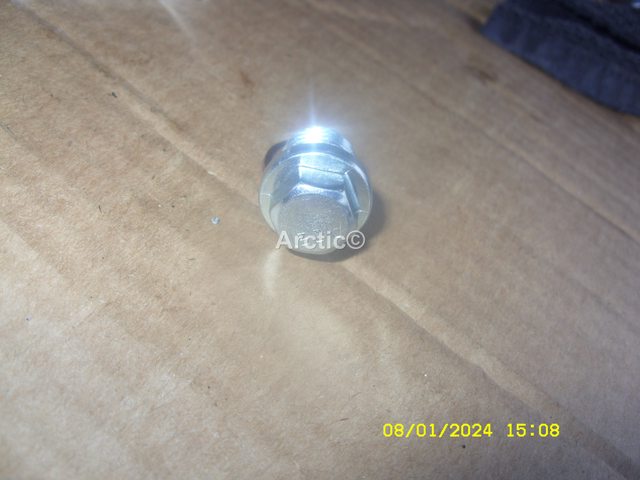
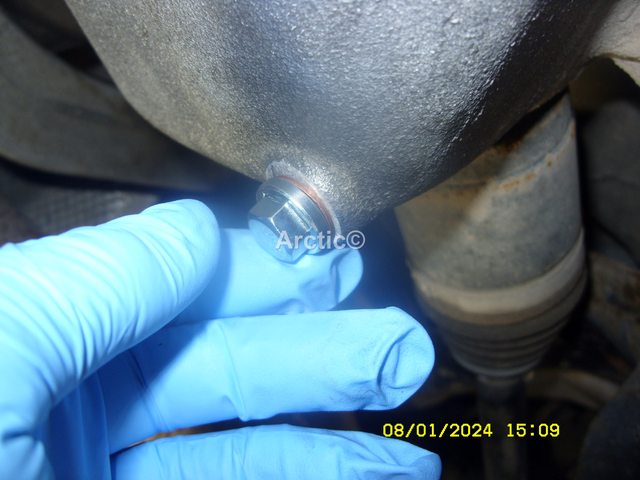
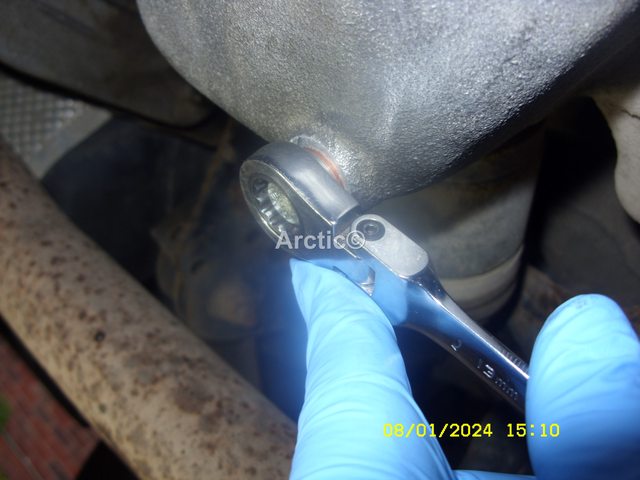
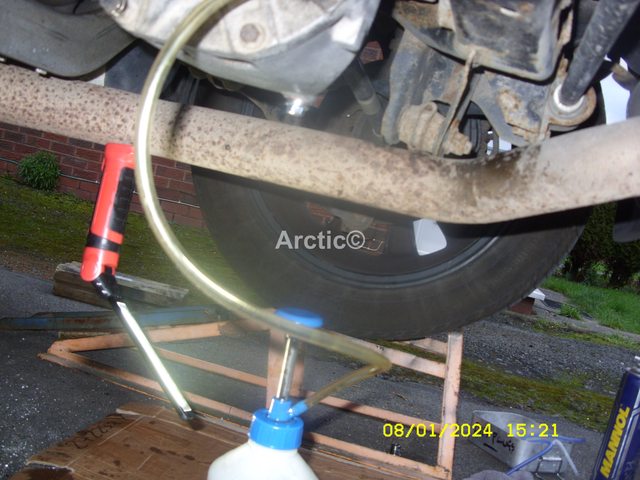
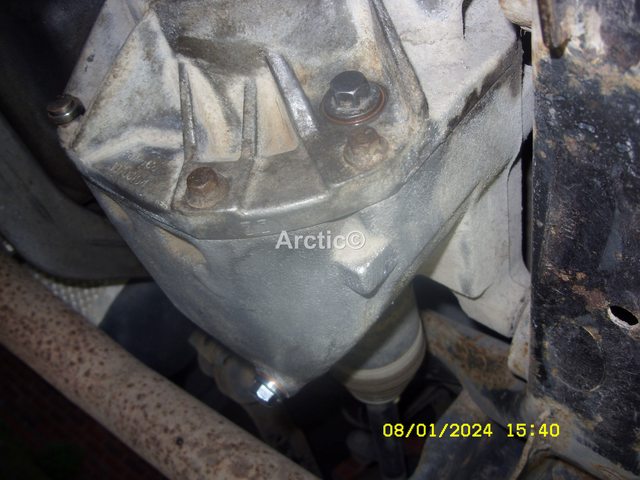
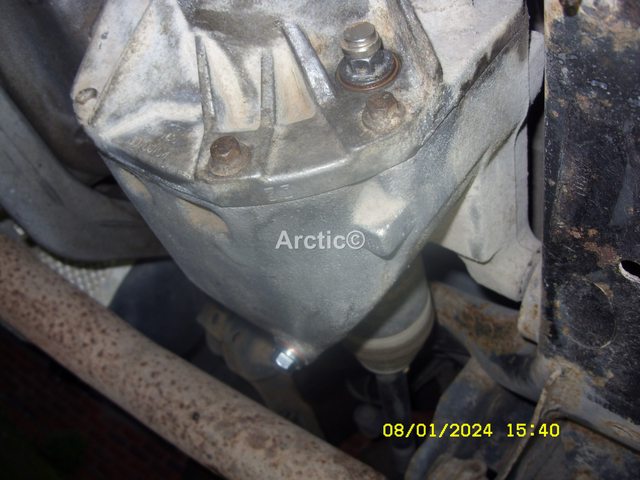
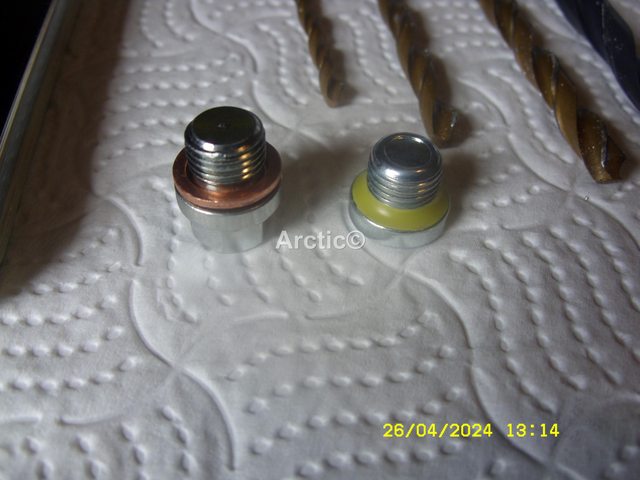
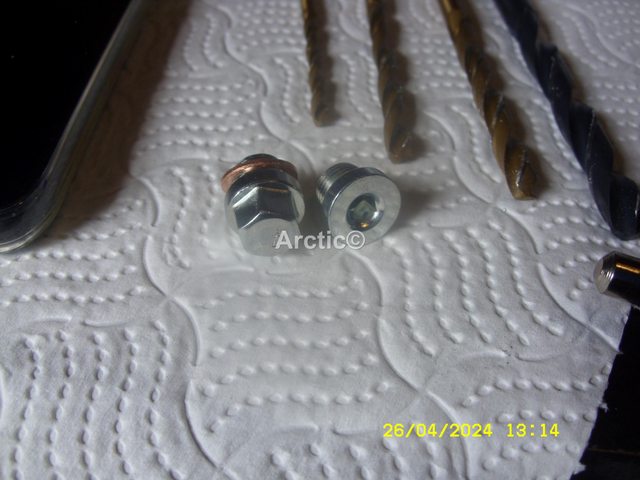
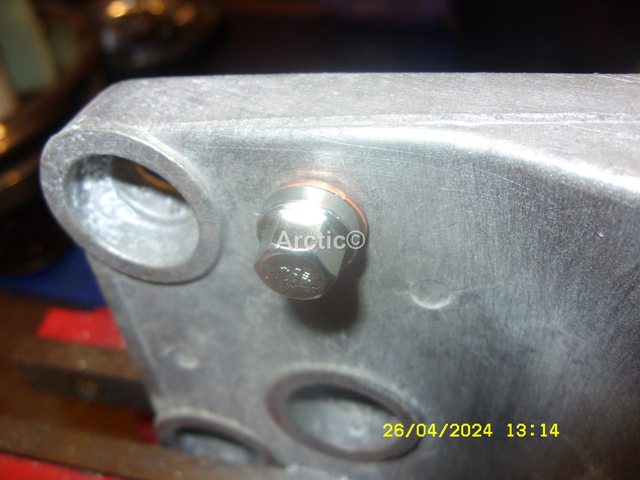
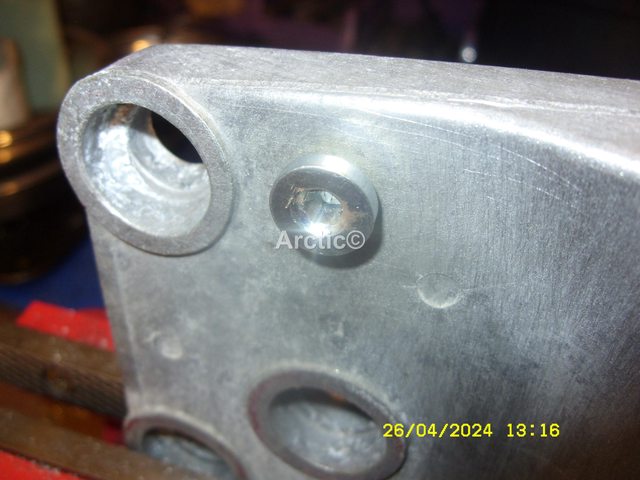
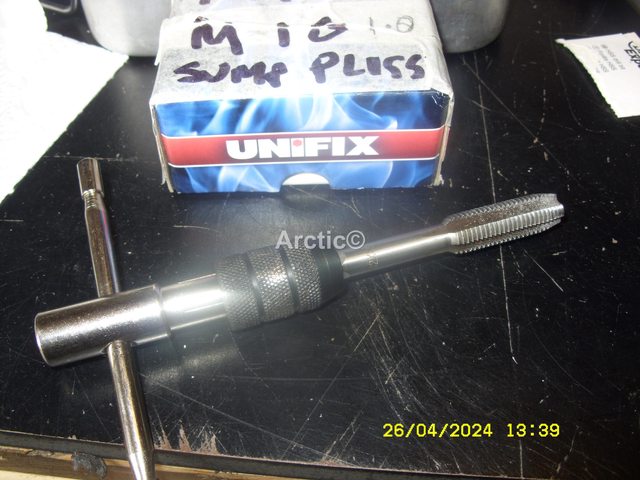
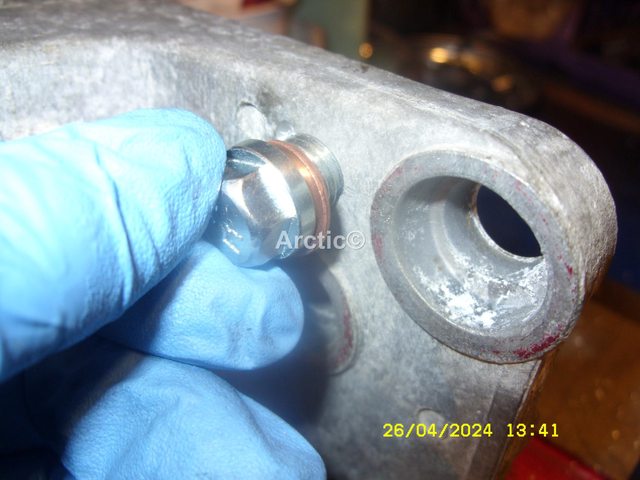
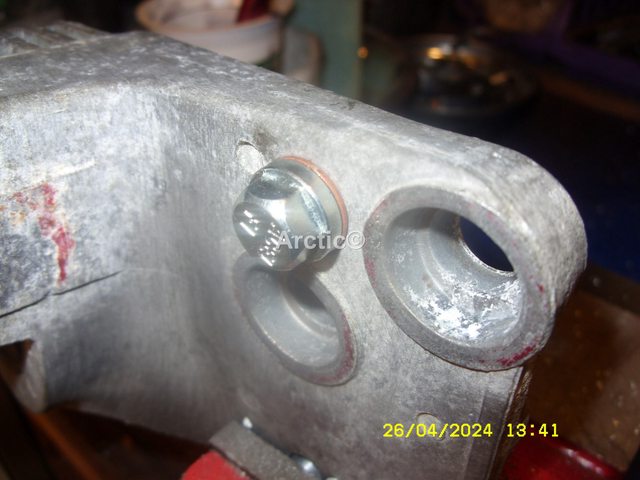
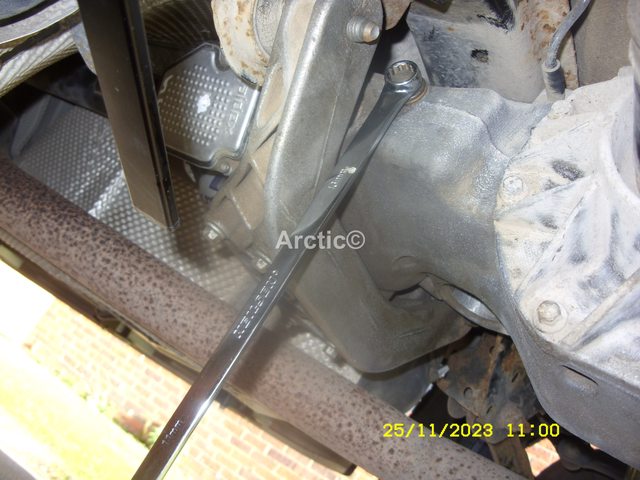
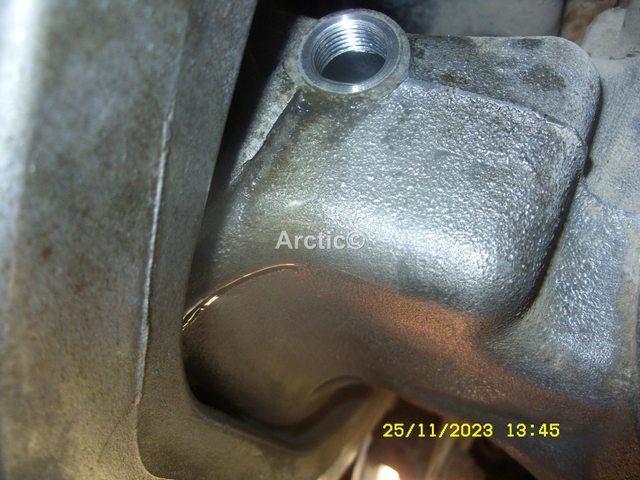
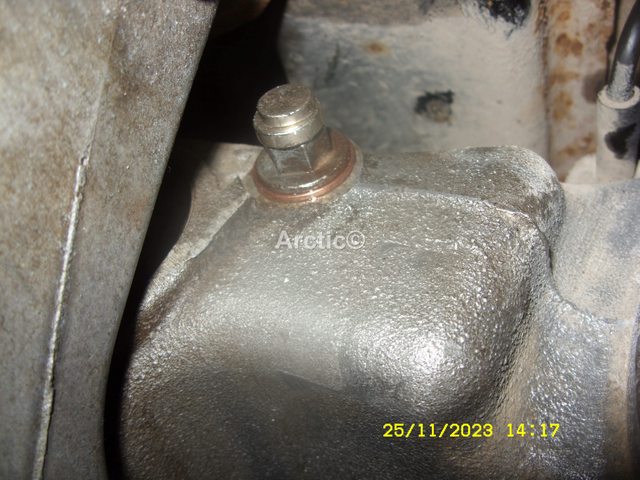
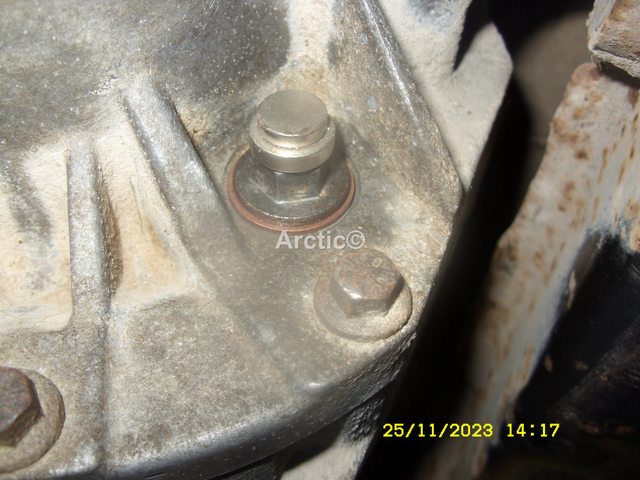
Cracked the the 13mm filler plug.
vQOxt2Cl.jpg
1

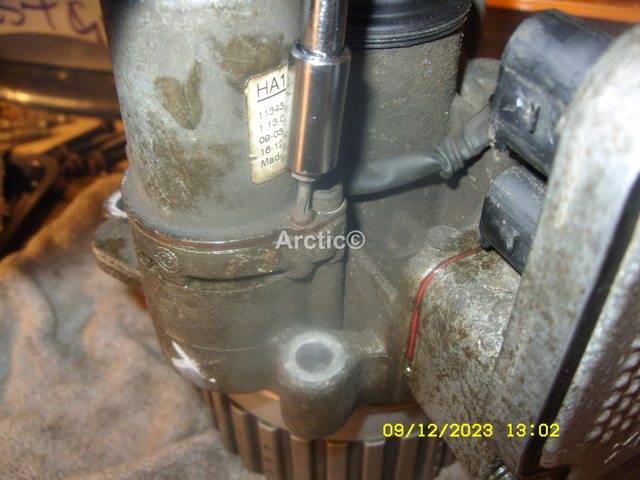
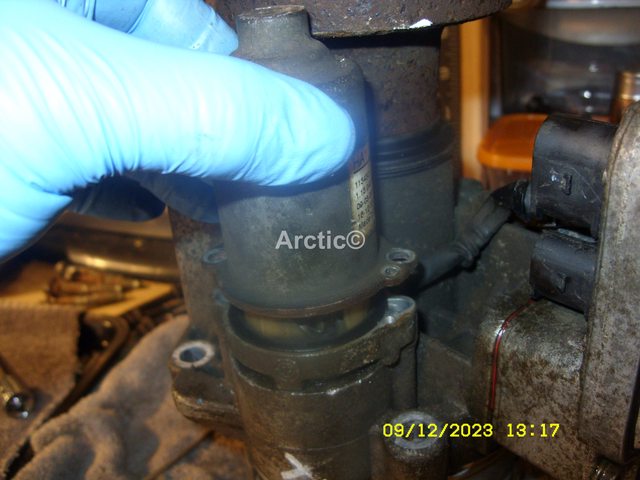
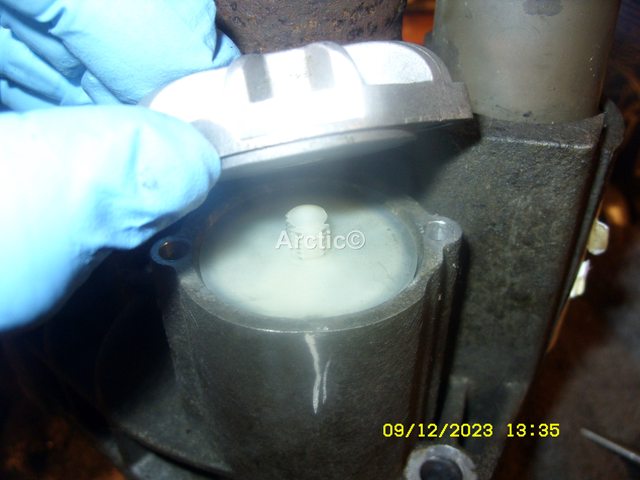
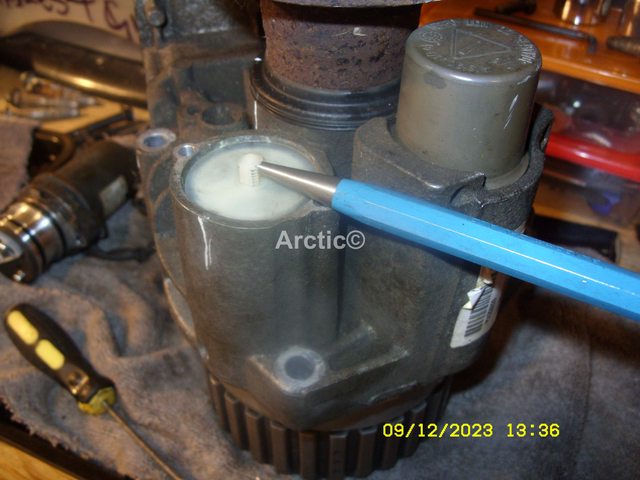
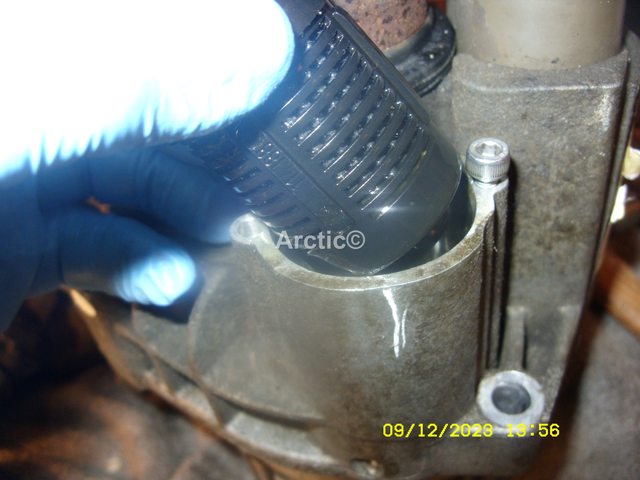
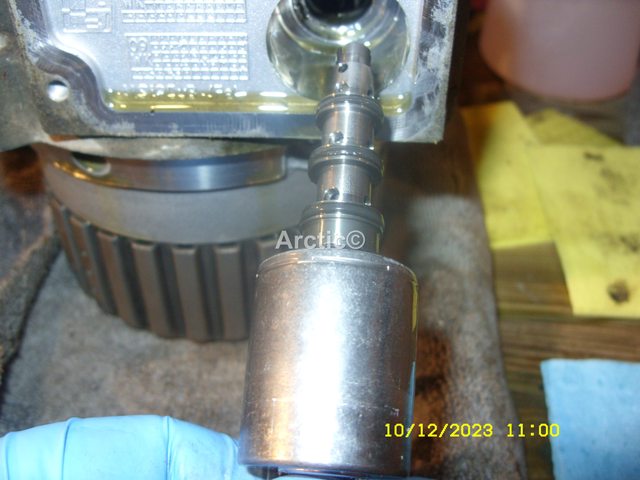
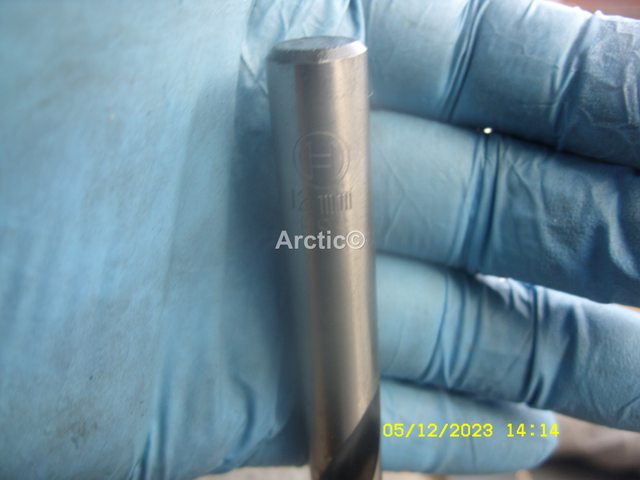
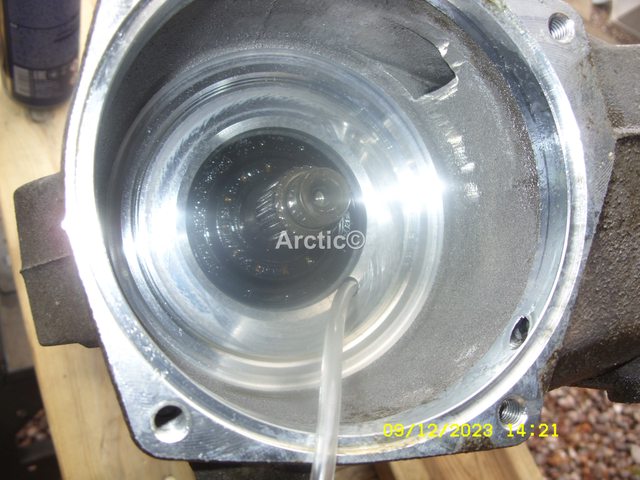
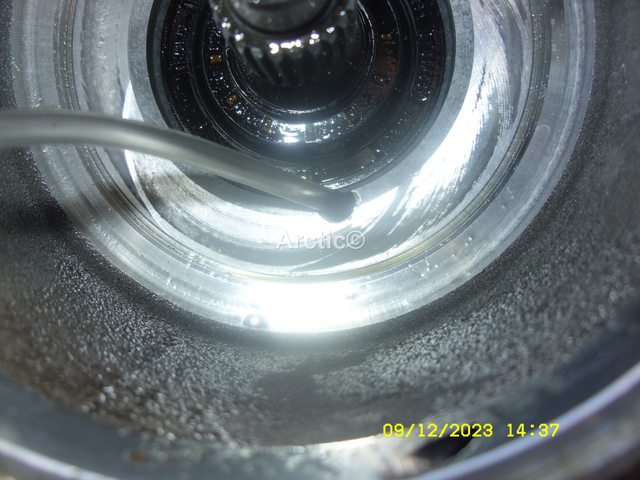
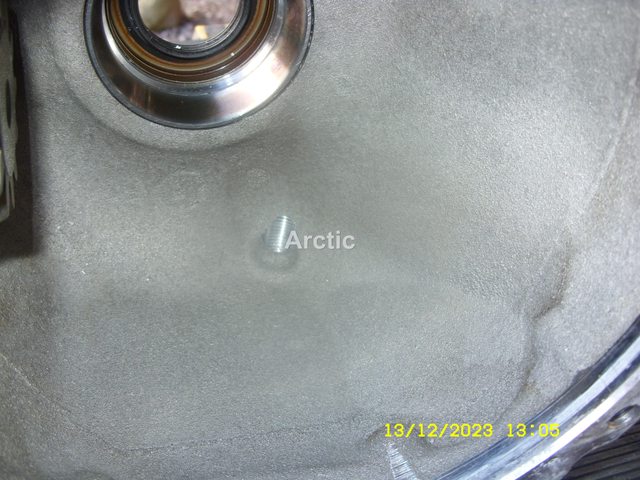
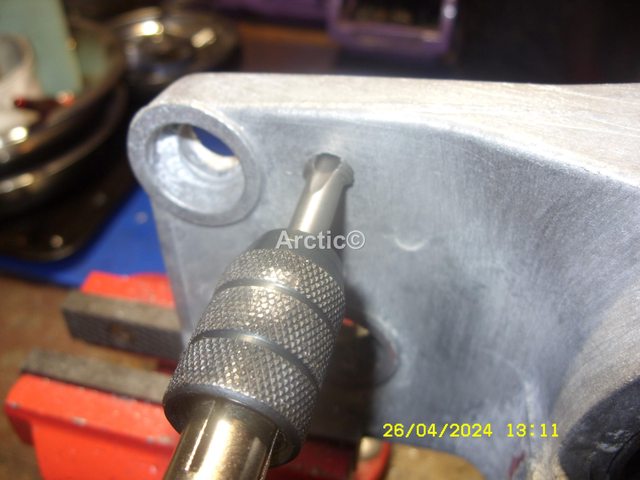
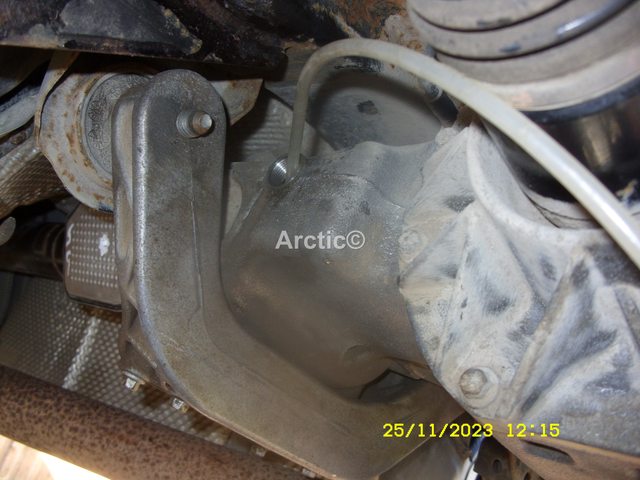
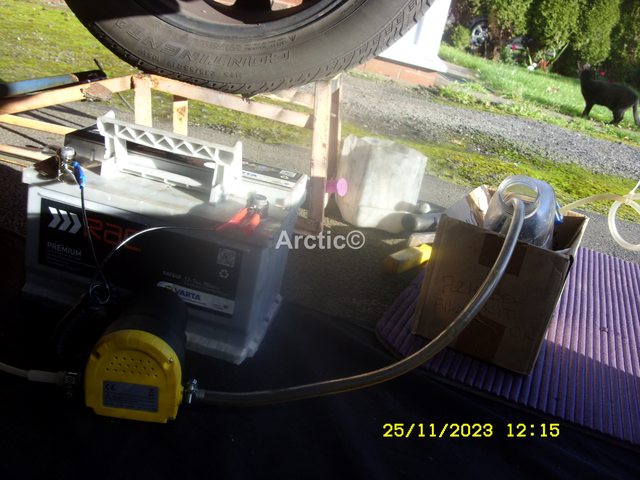
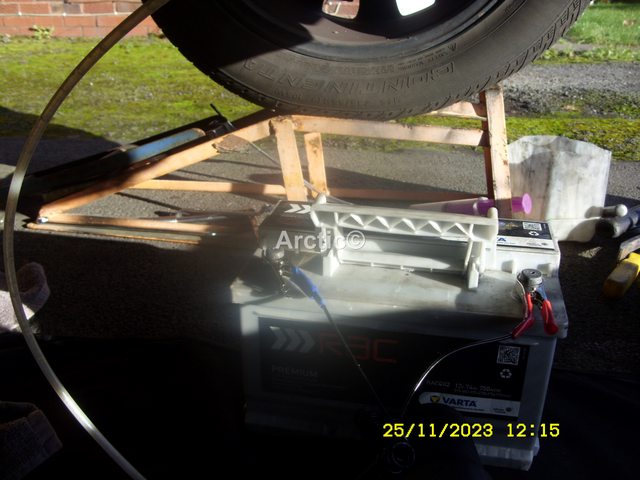
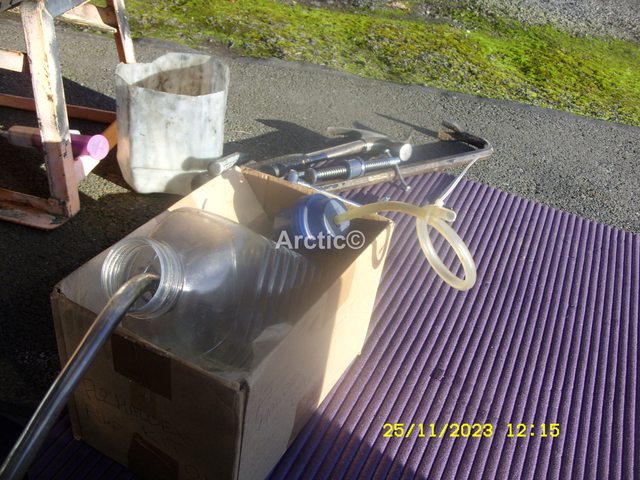
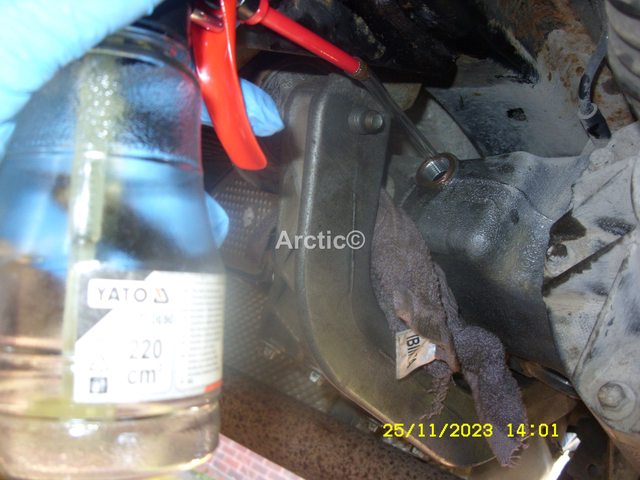
Inserted the 5mm plastic tube which is quite stiff opposed to a clear soft tube, you can direct it more into where you need to.
PLsg78ol.jpg
2

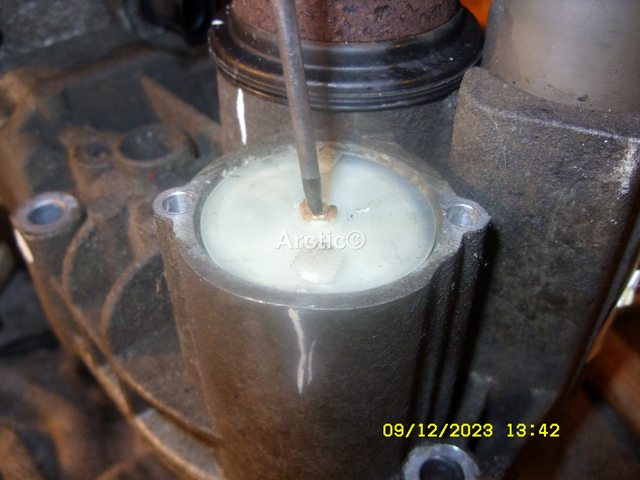
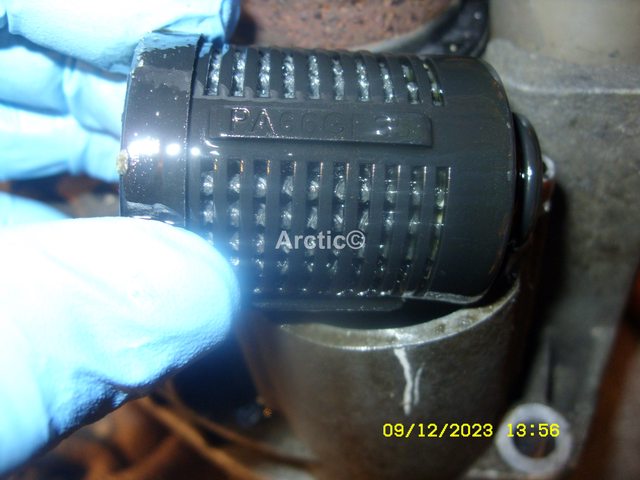
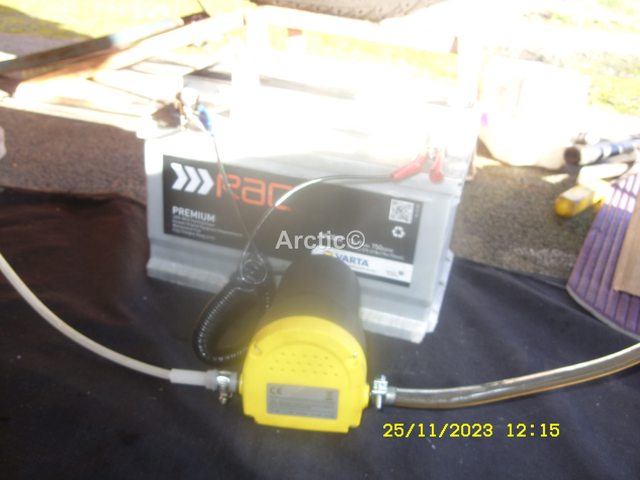
The was joined to the little extraction pump which was connected to the 12v battery fully charged.
kQc34All.jpg
3

The pump was started.
XkvrXhrl.jpg
4

Oil got flowing right away.
Nkgp3Y3l.jpg
5

wQIkJ8fl.jpg
6

oTZMxWIl.jpg
7

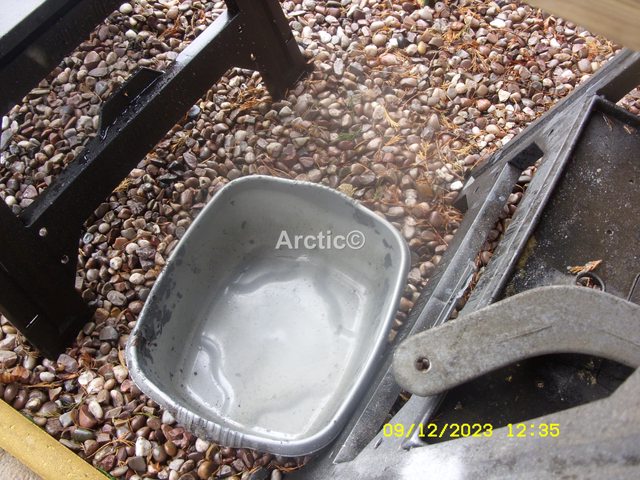
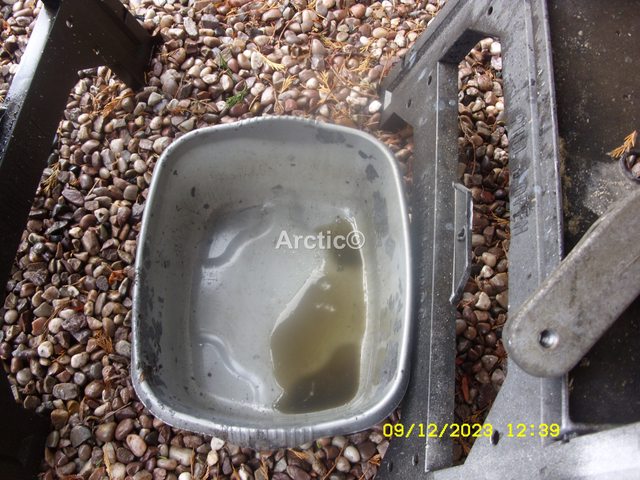
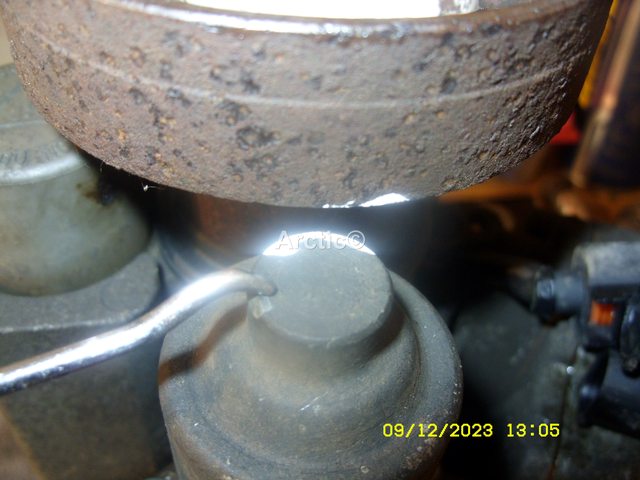
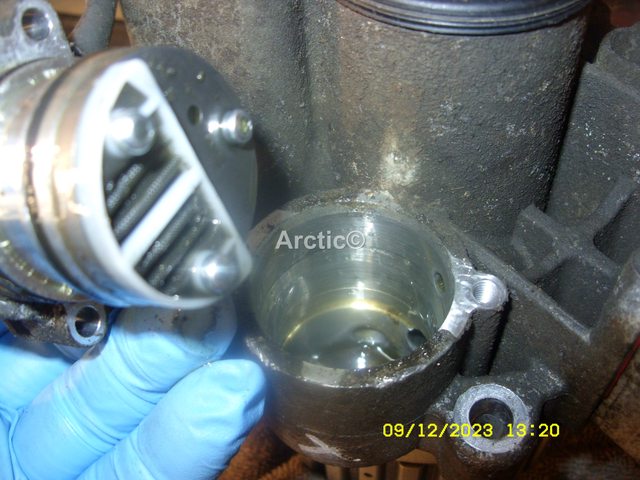
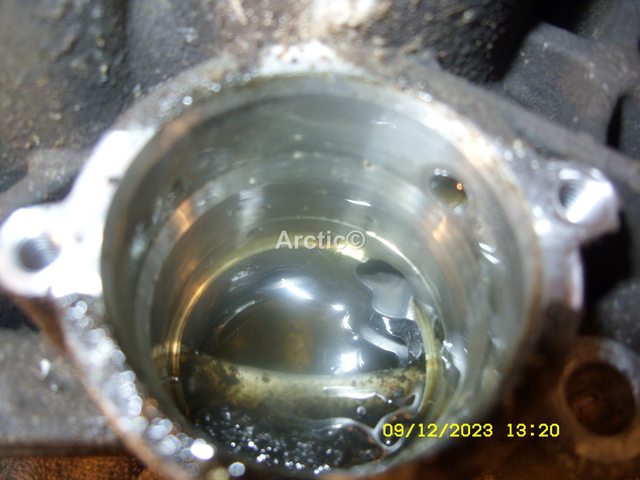
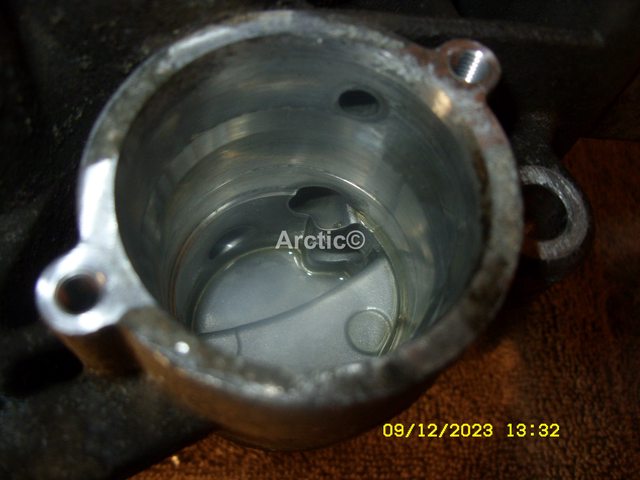
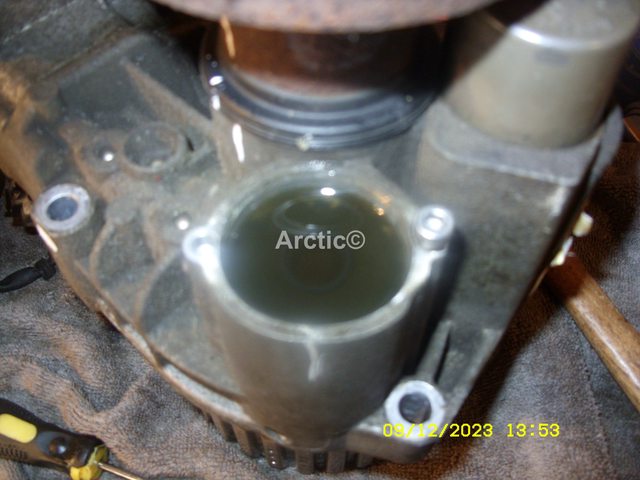
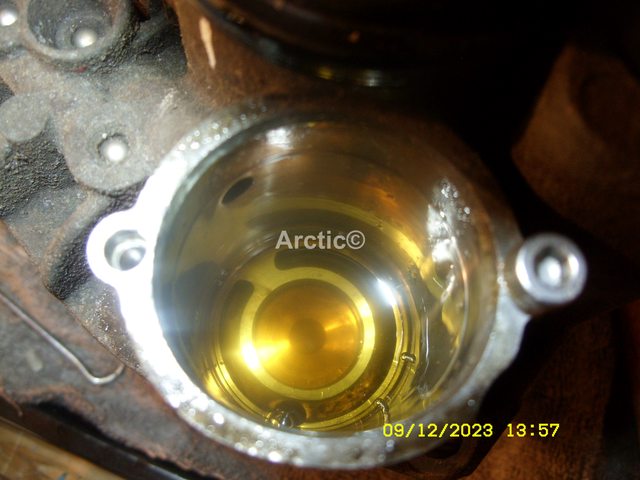
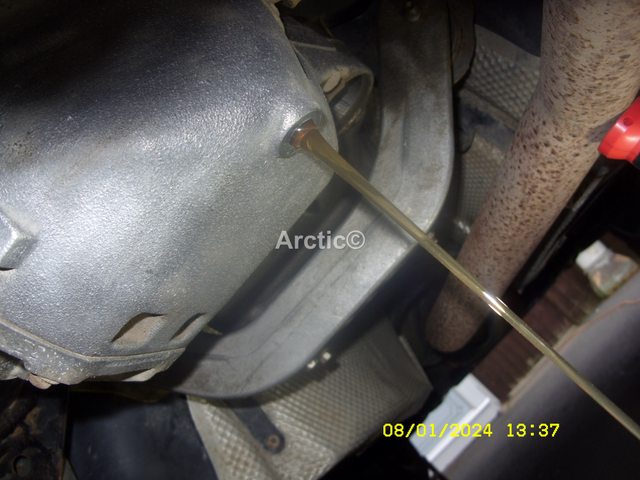
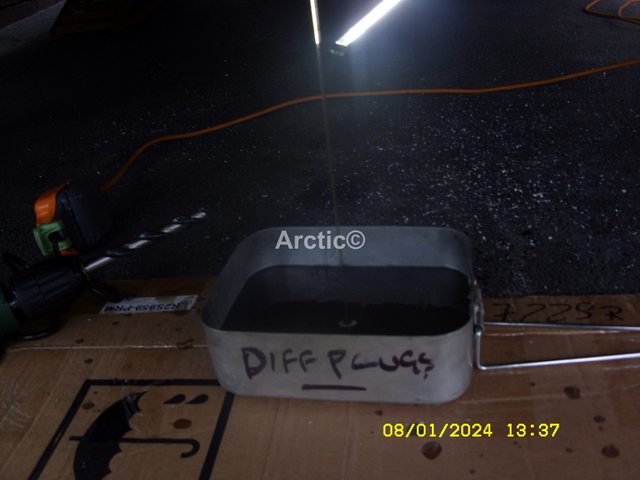
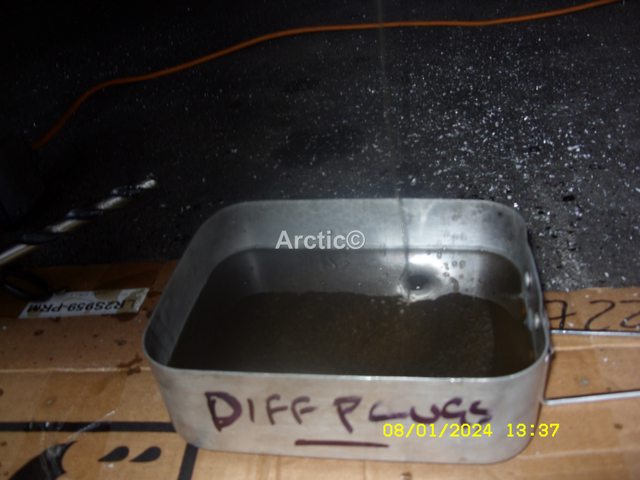
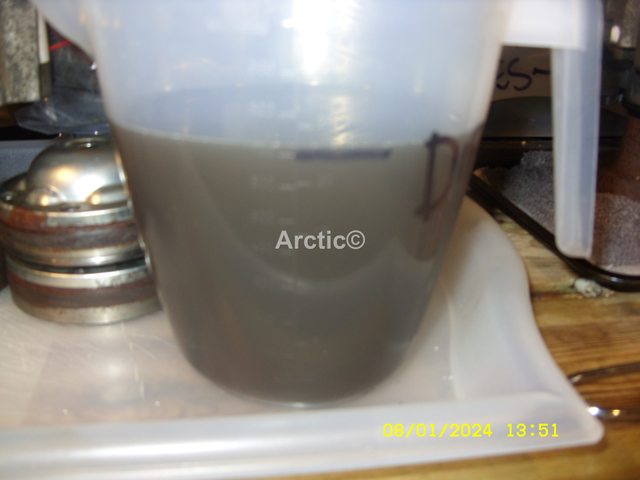
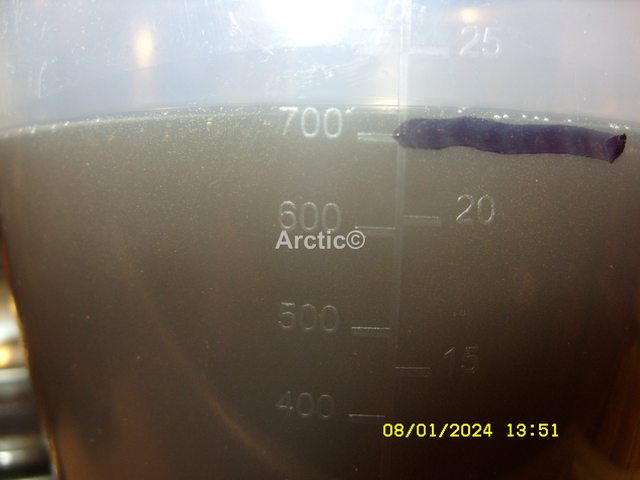
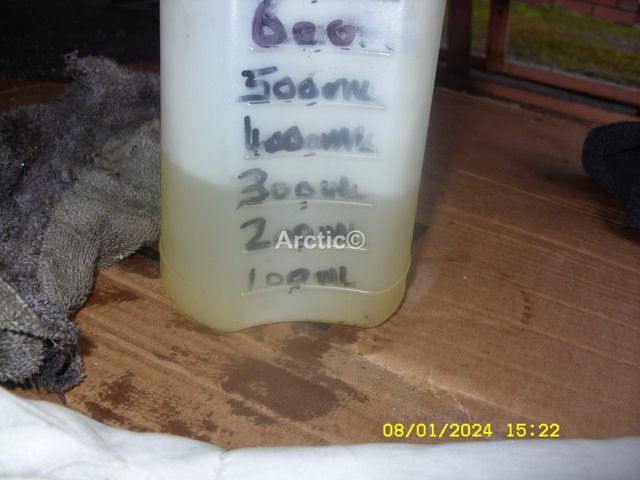
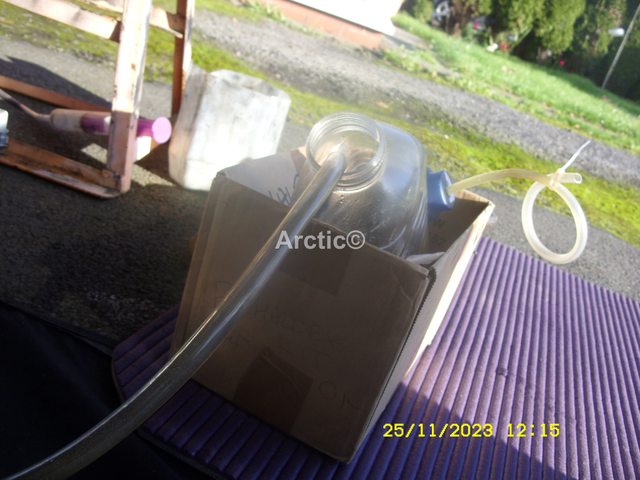
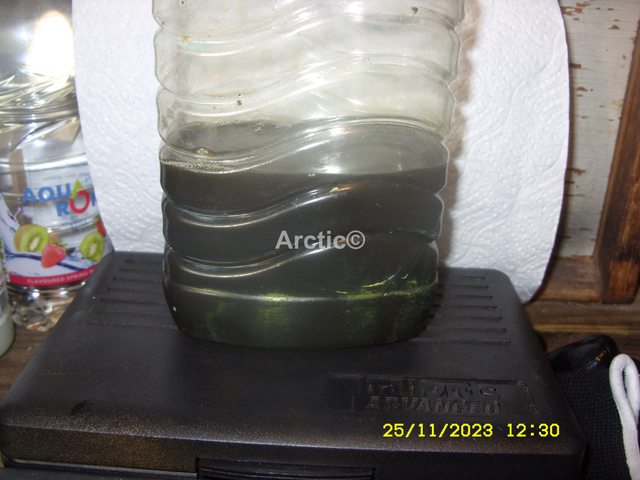
After about 15 minutes 12.30pm i had managed to remove 500ml
WbRpbyEl.jpg
8

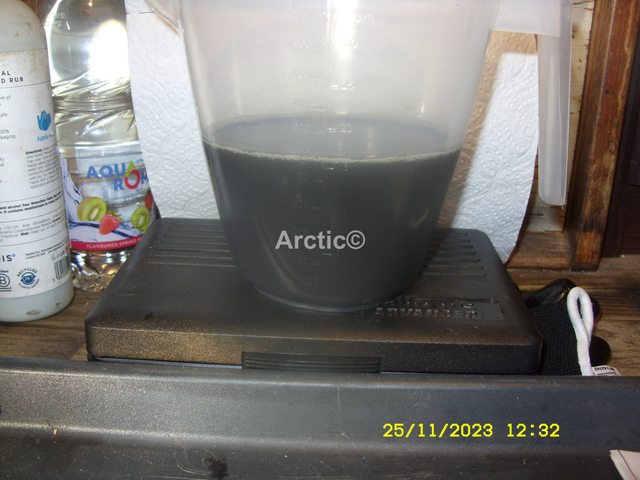
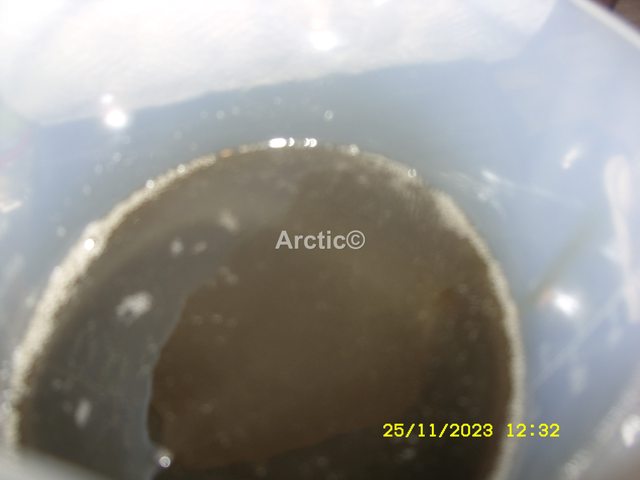
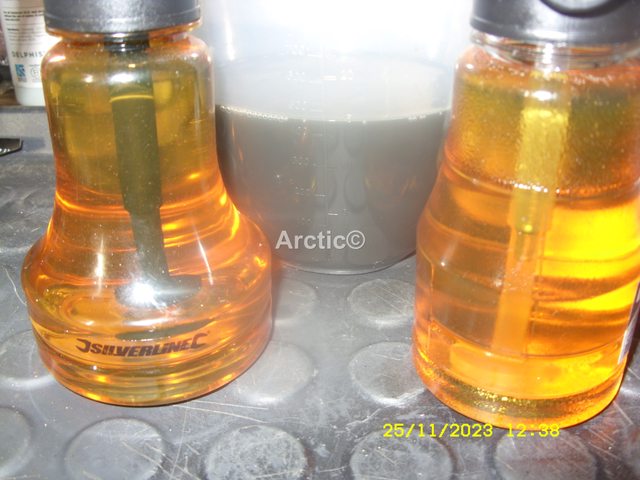
I poured this into a jug for measuring the colour does not look like 8wk old oil to me.
OhHC3NGl.jpg
9

This is why i have not believed the seller since i purchased the car.
3T4MThbl.jpg
10

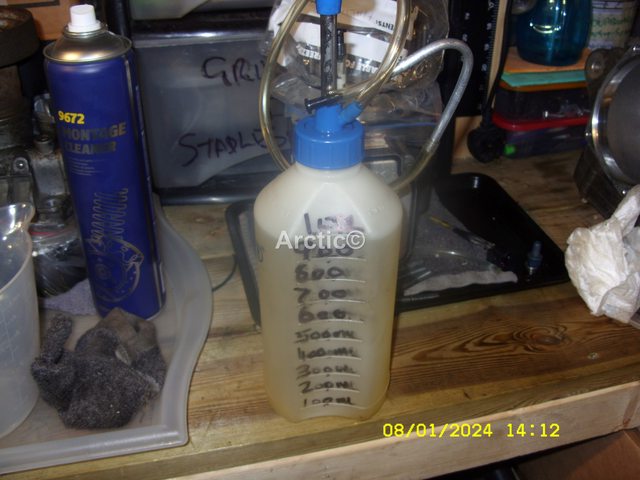
Anyways i filled two little pump containers with 300ml each, compare that to the oil taken out.
obeoIW5l.jpg
11

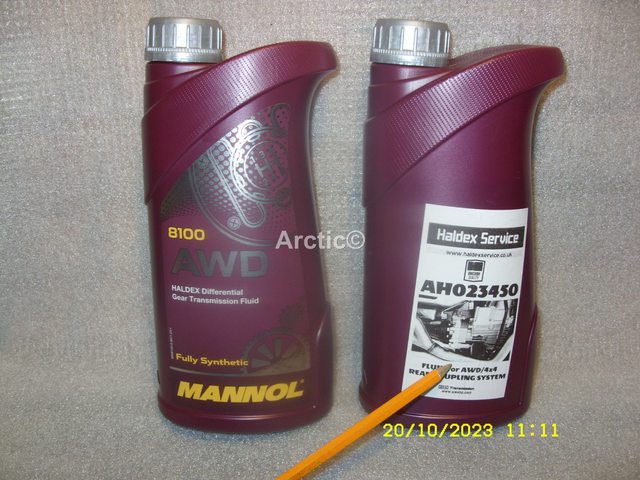
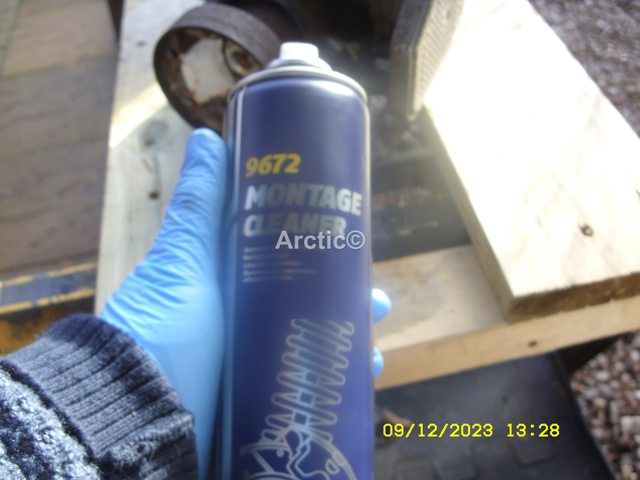
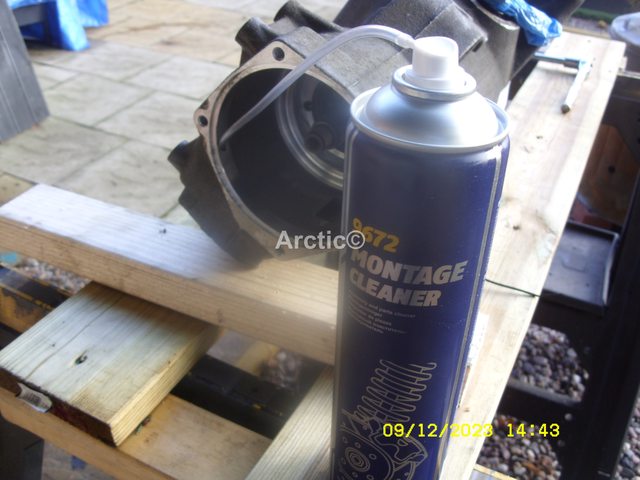
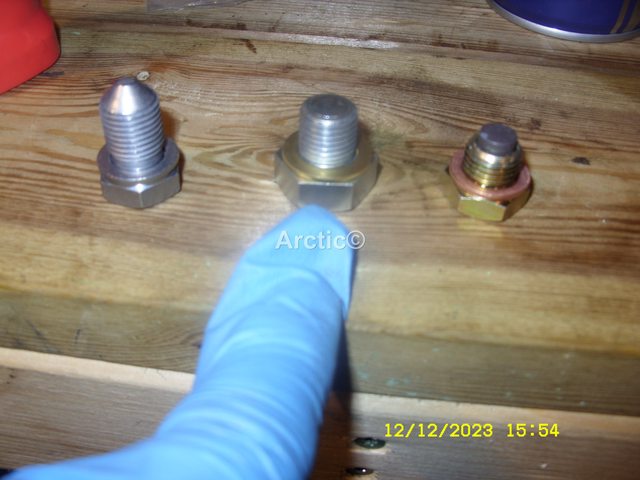
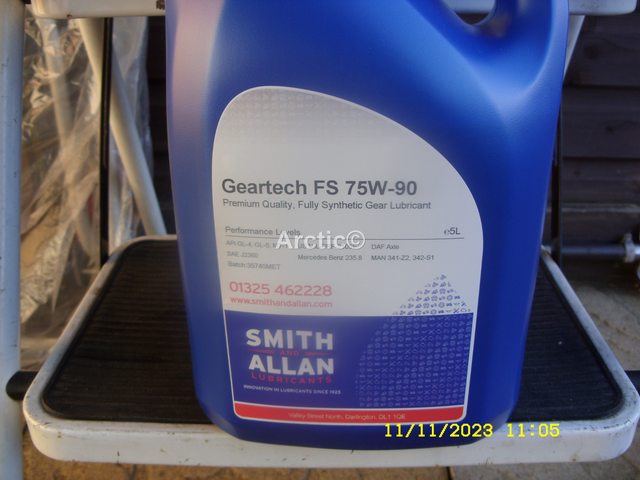
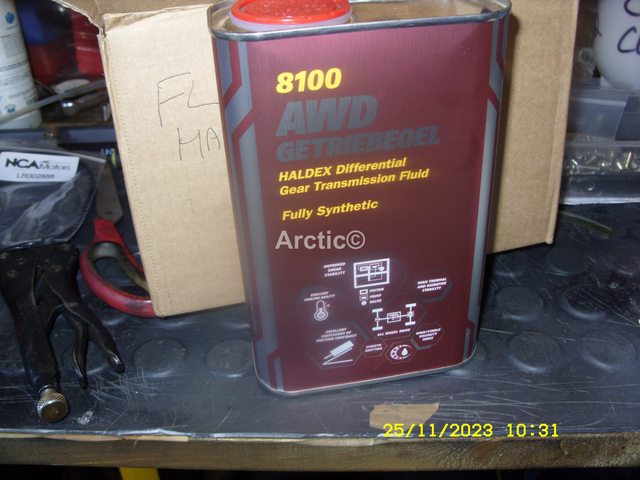
The oil used was 8100 AWD Getriebeoel
PvWs5sel.jpg
12

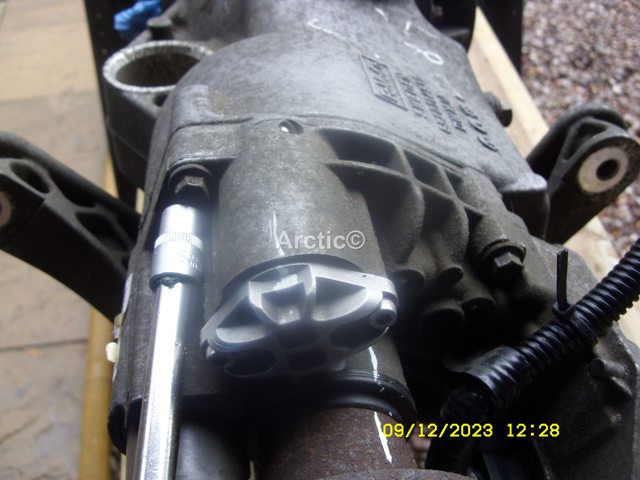
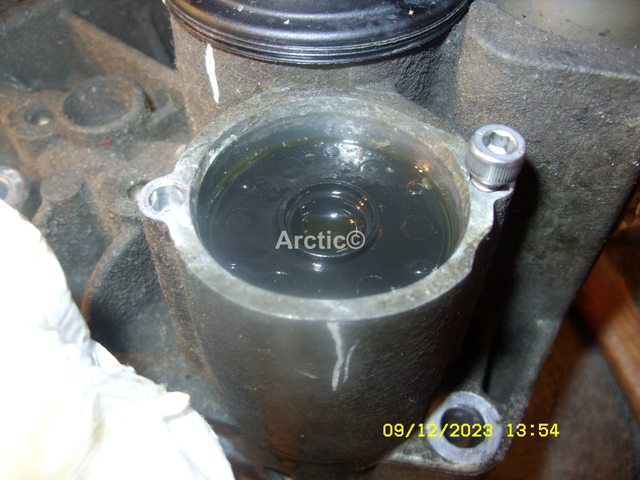
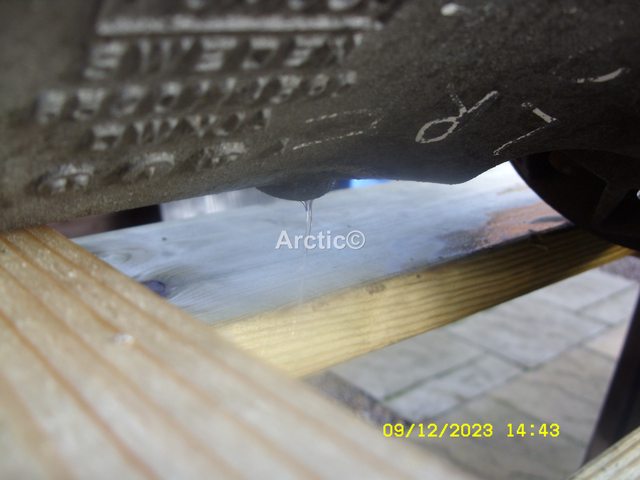
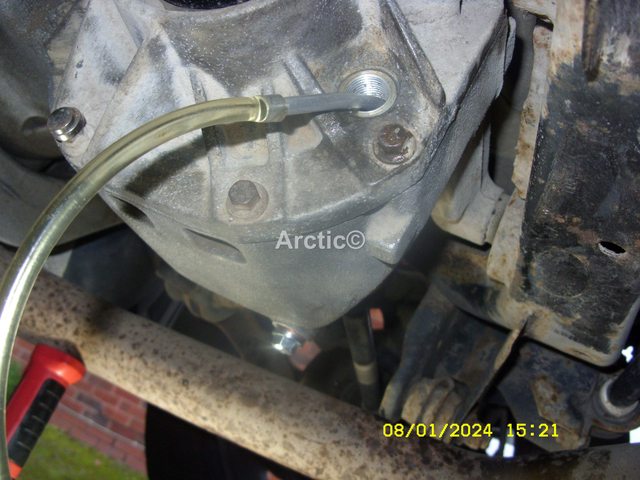
It took 600ml and no oil was over flowing out from the Haldex.
p9NRn0sl.jpg
13

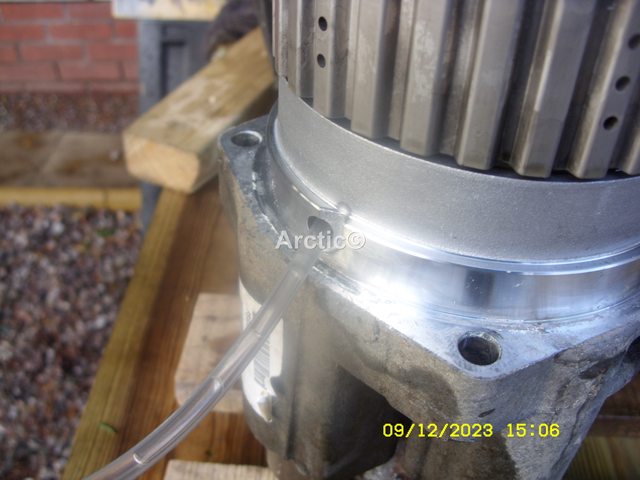
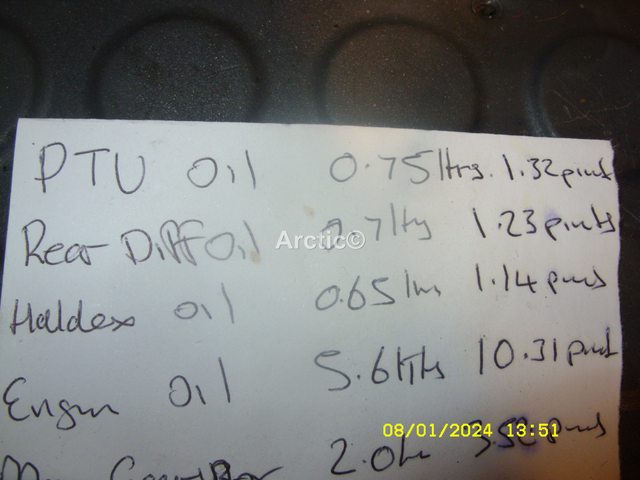
So another 100ml was added and it started to flow out, the amount it states in the hand book is 0.65litres = (1.14pints).
aclggcol.jpg
14

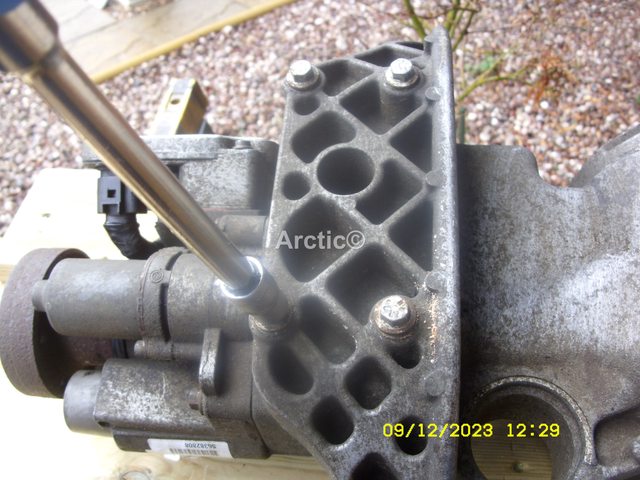
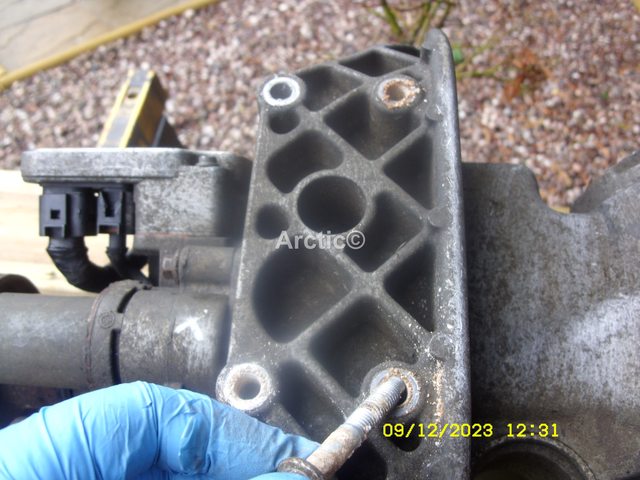
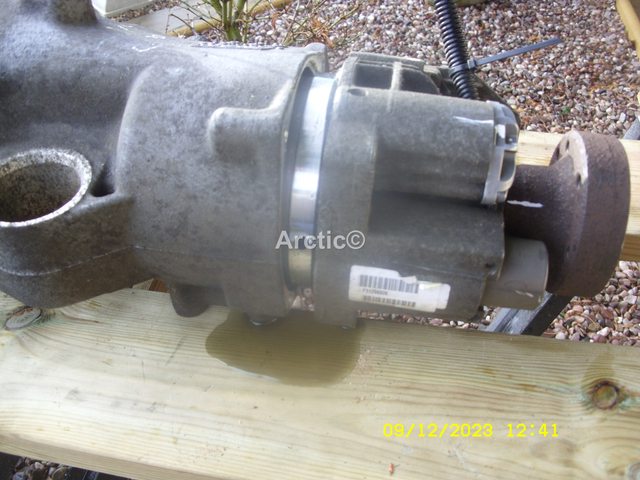
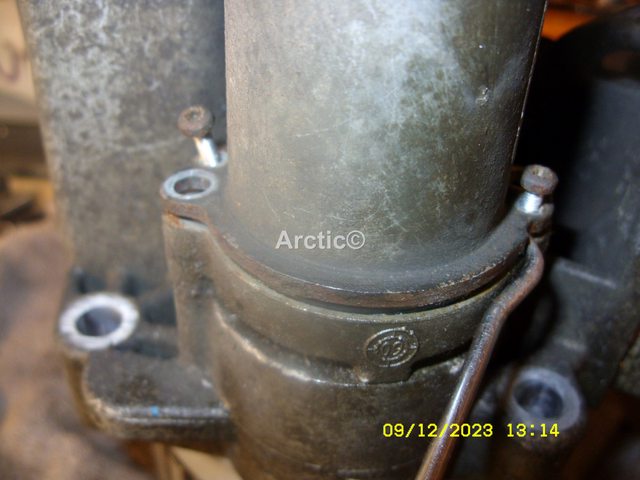
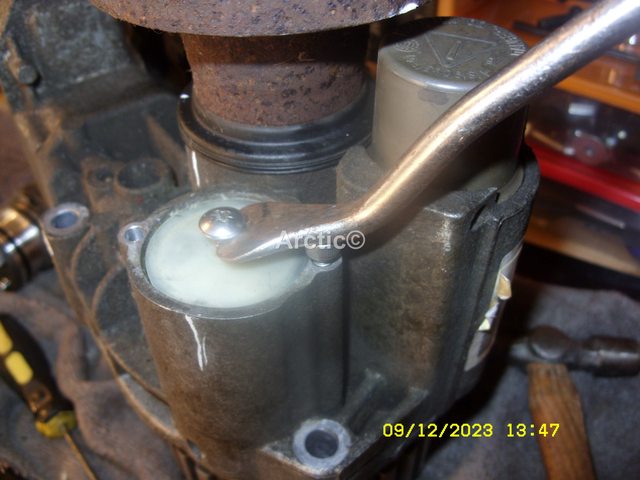
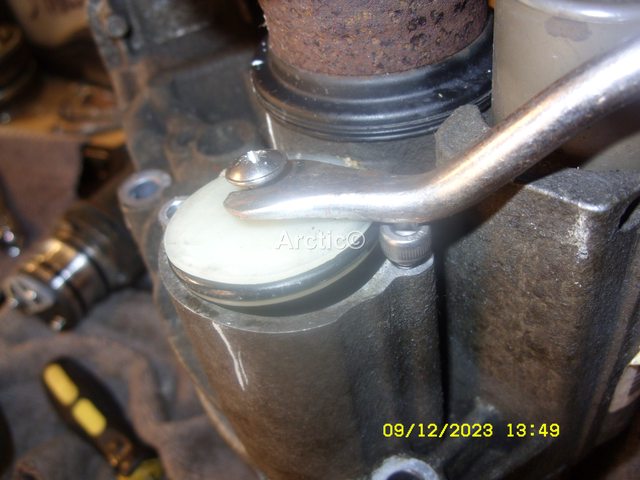
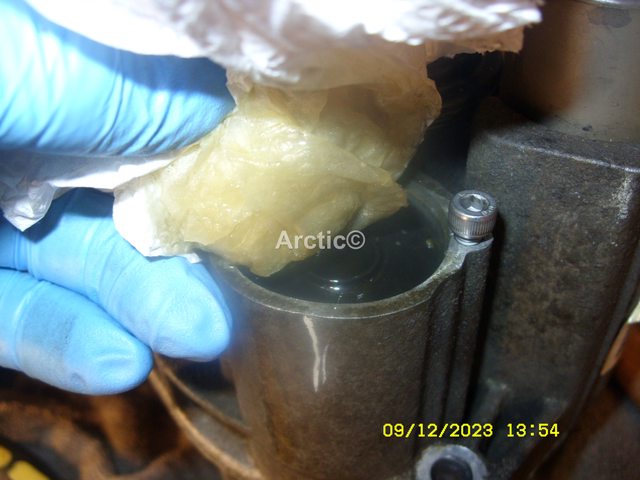
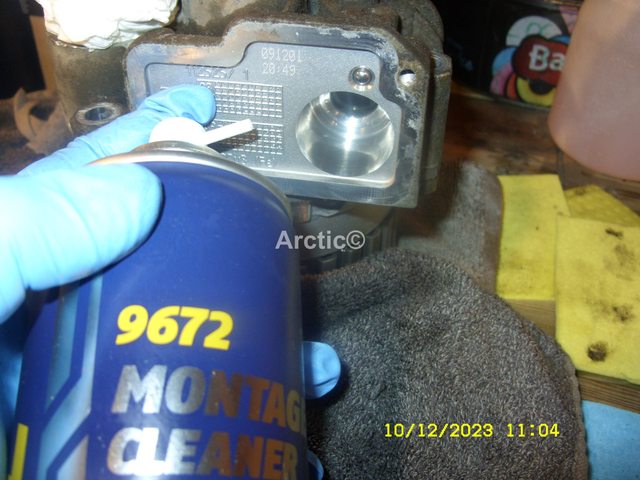
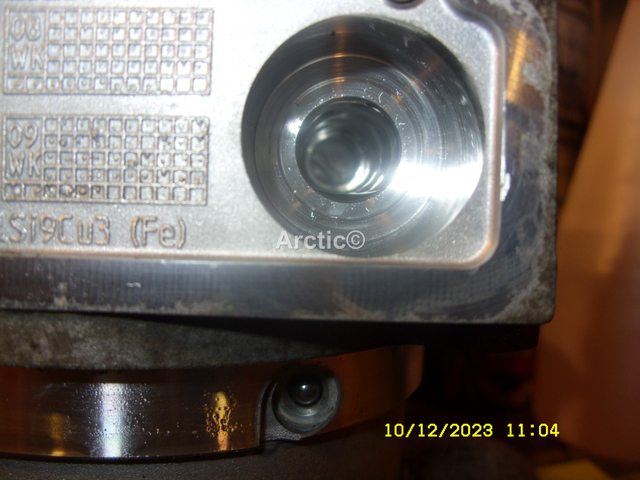
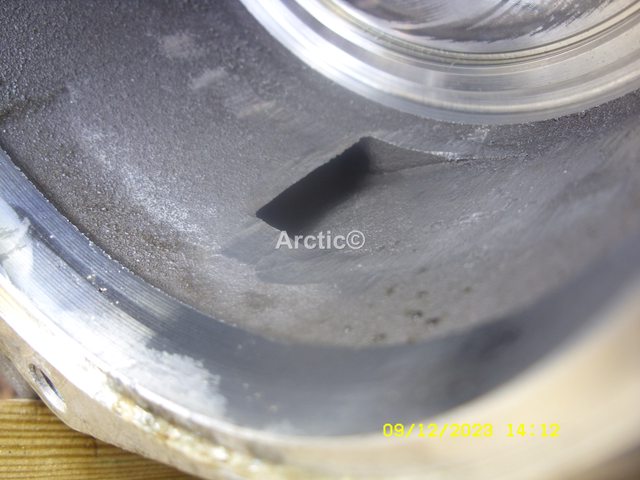
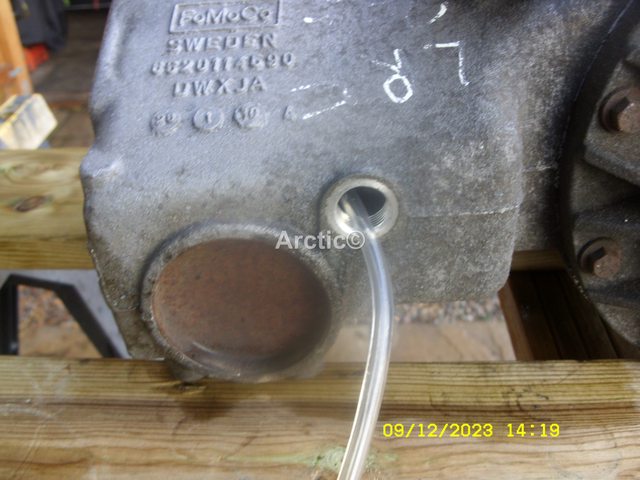
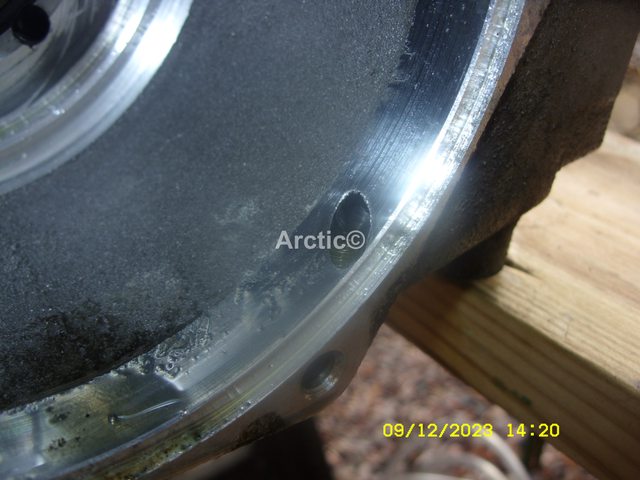
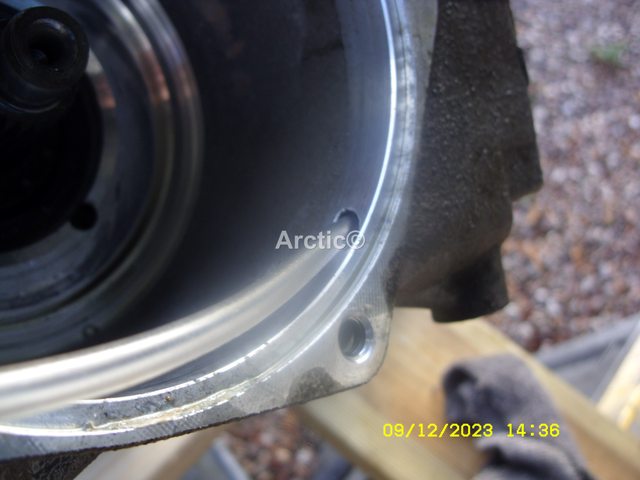
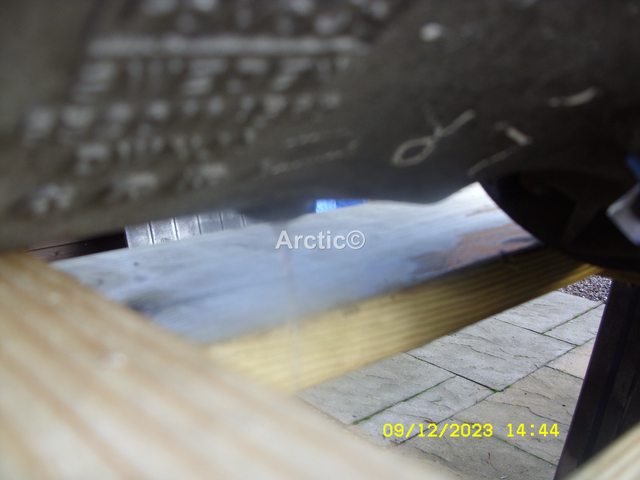
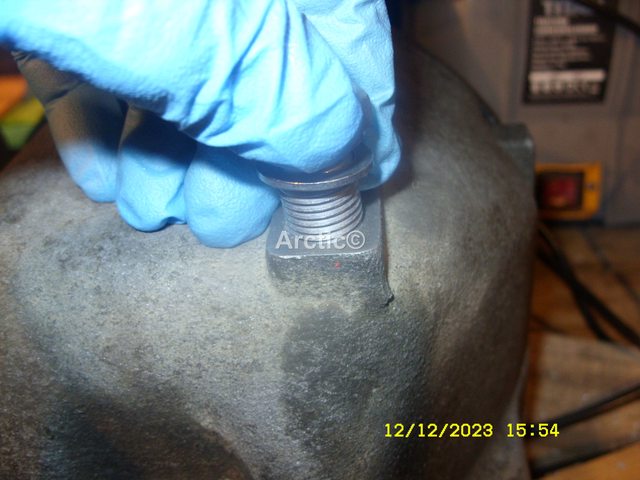
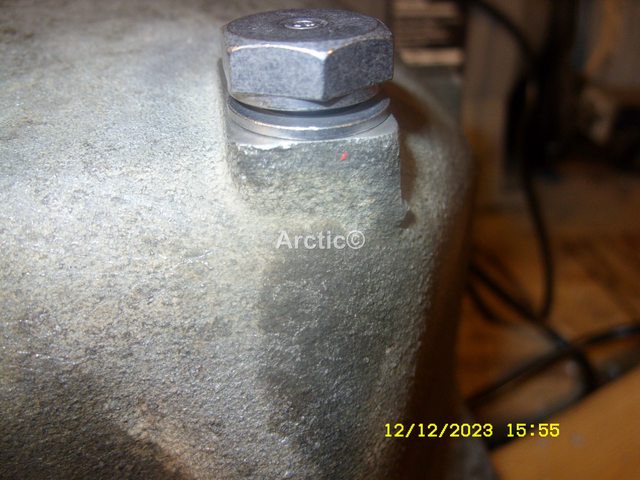
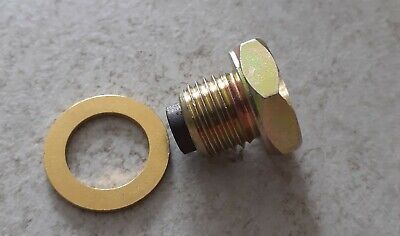
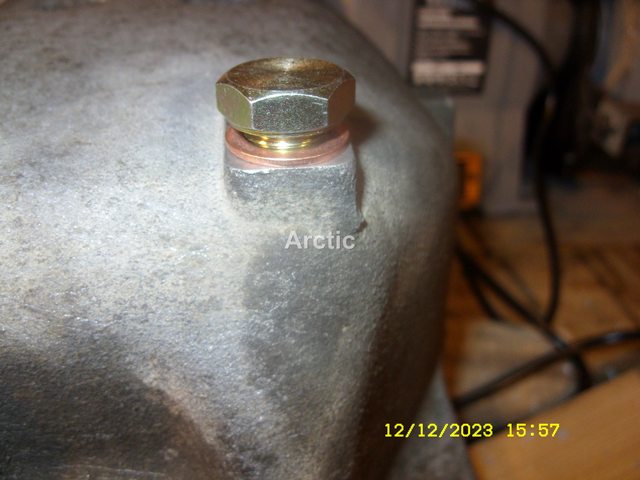
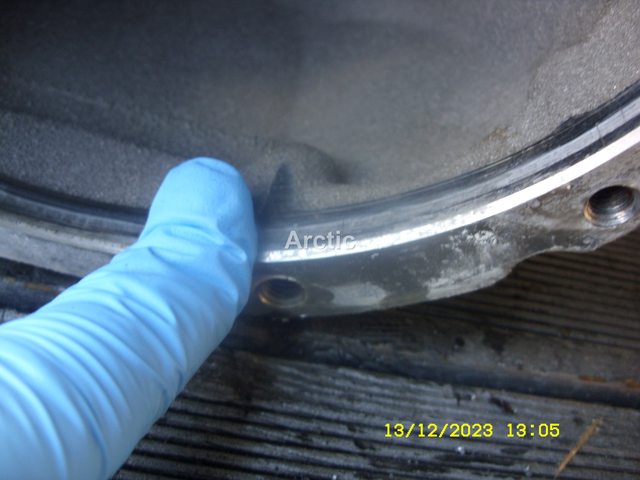
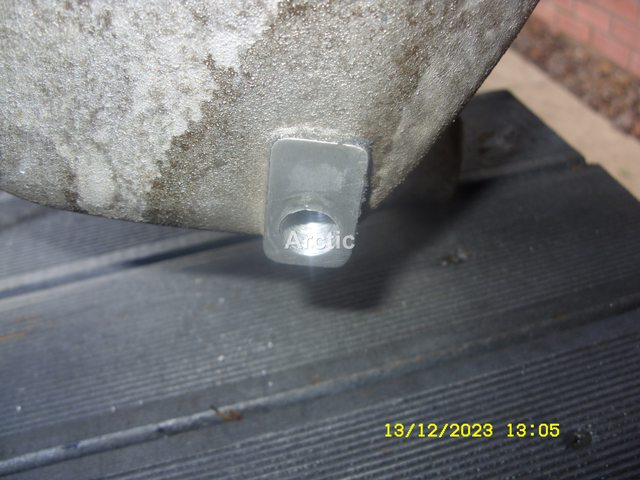
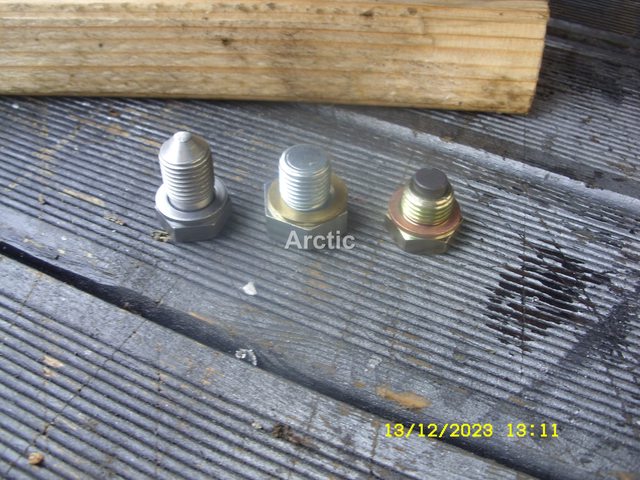
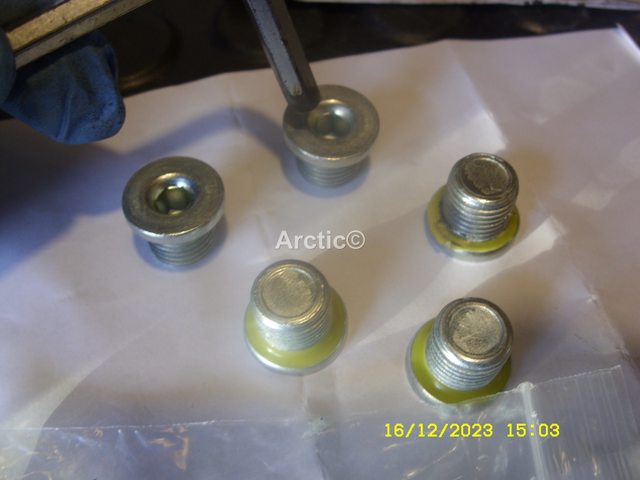
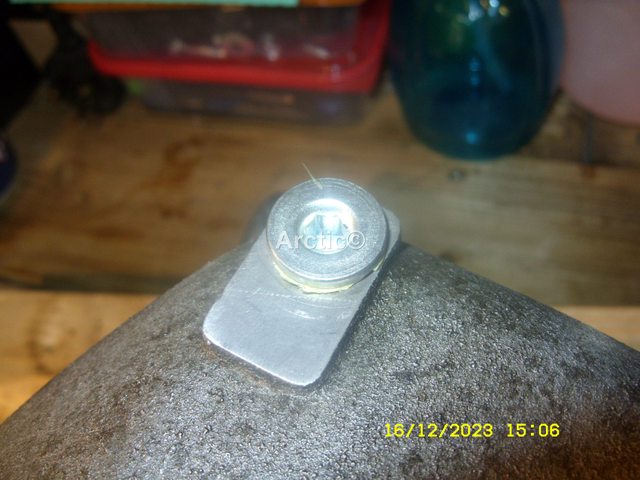
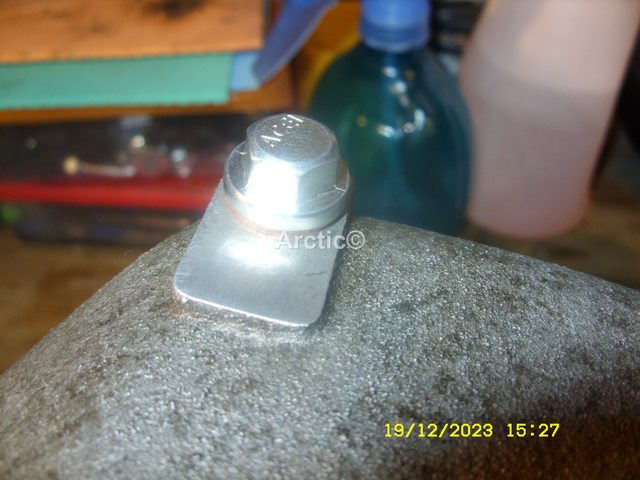
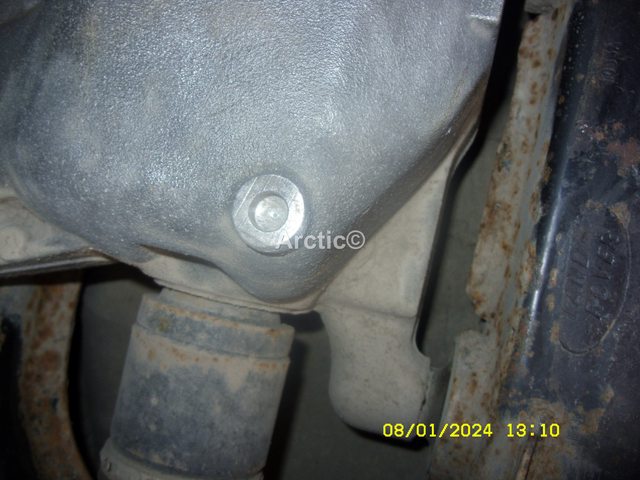
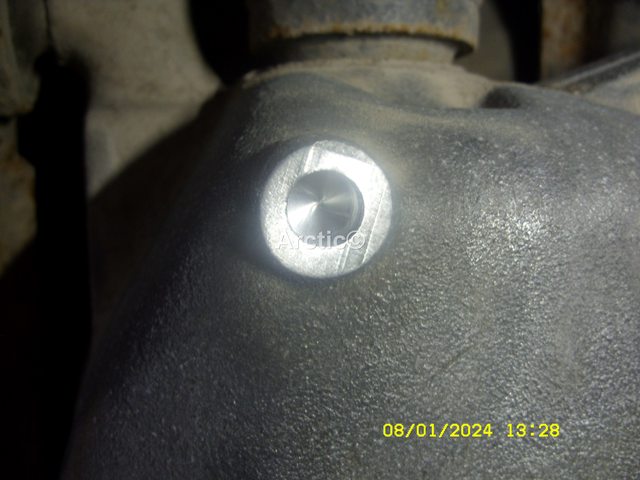
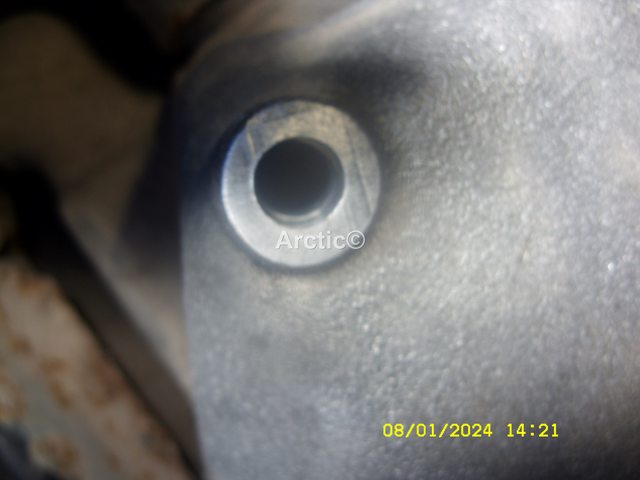
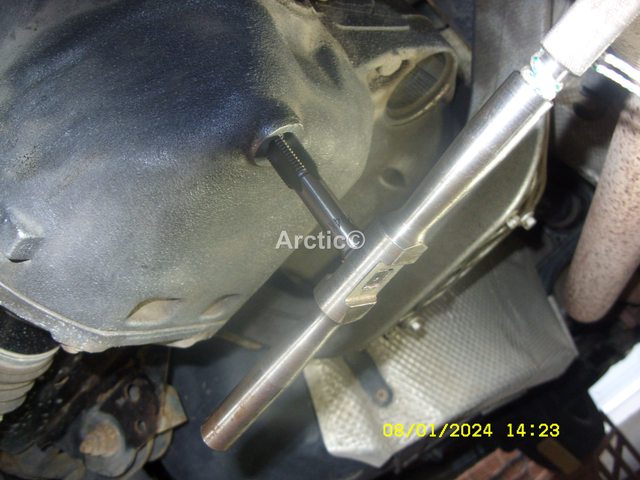
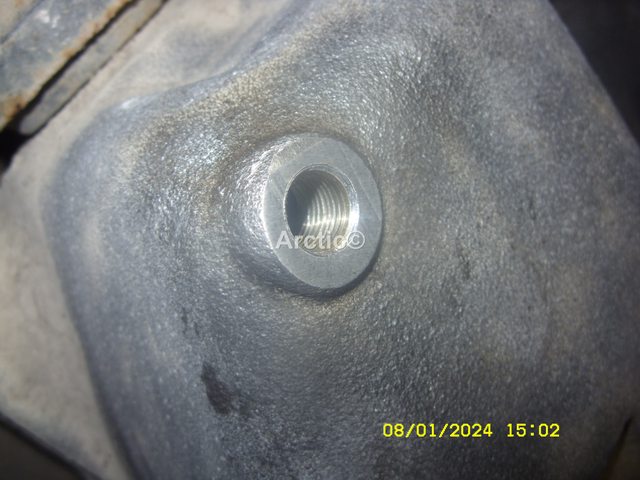
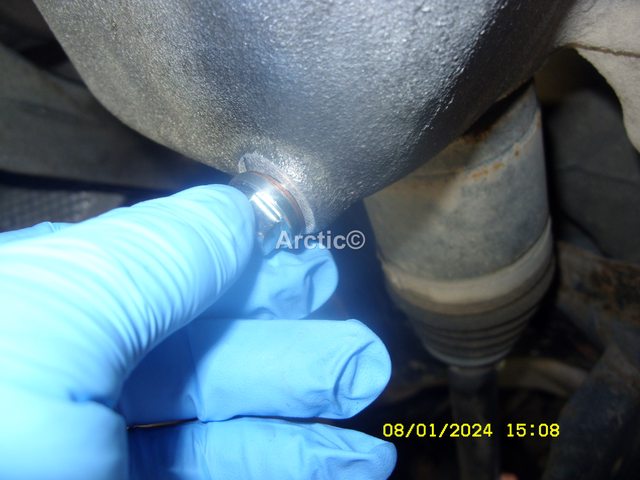
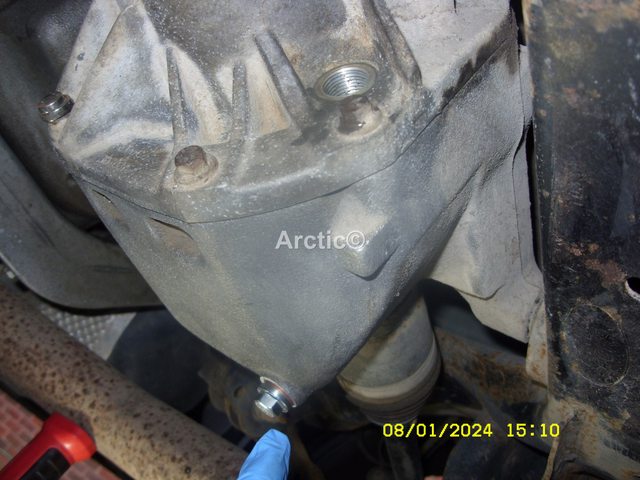
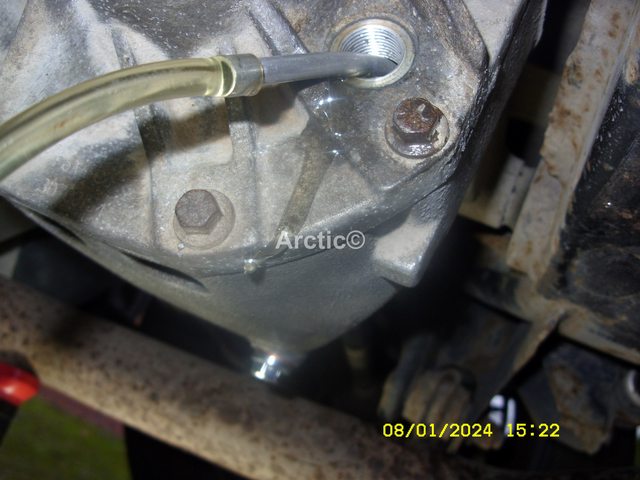
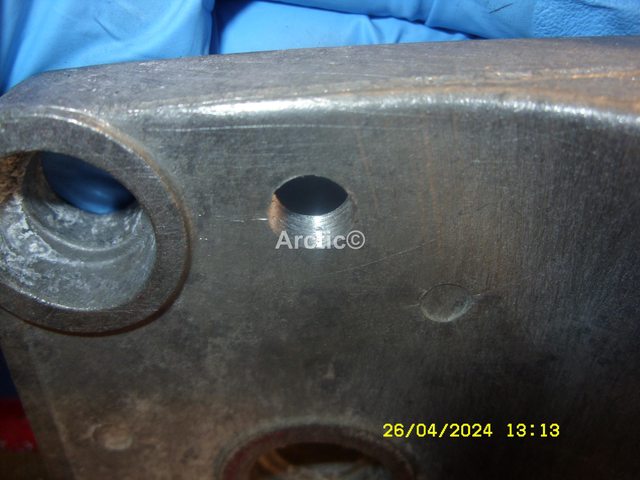
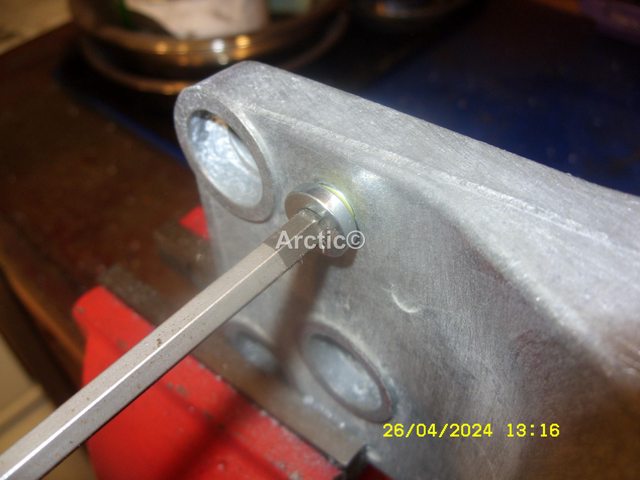
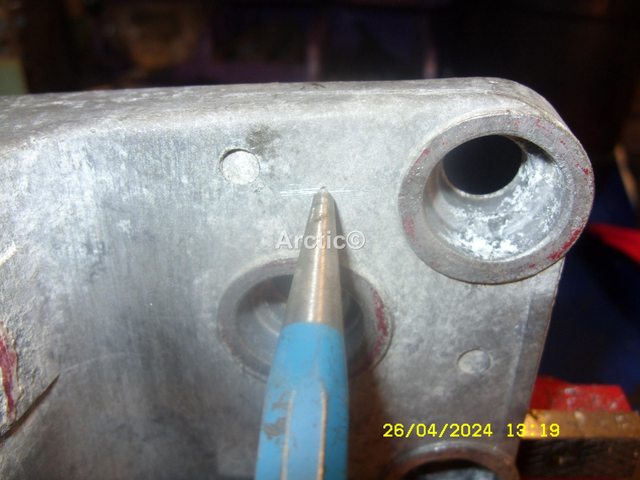
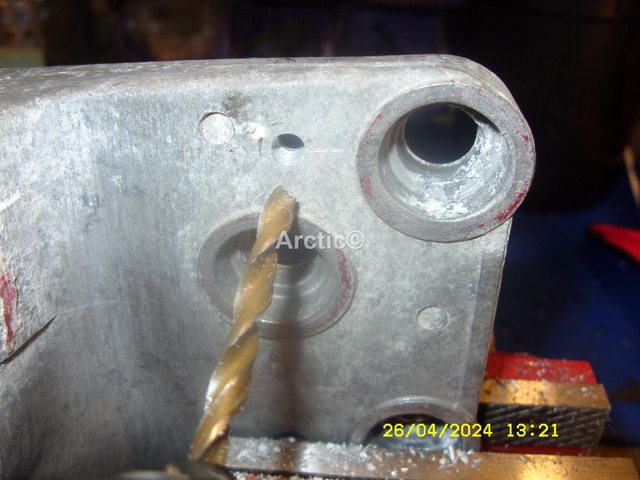
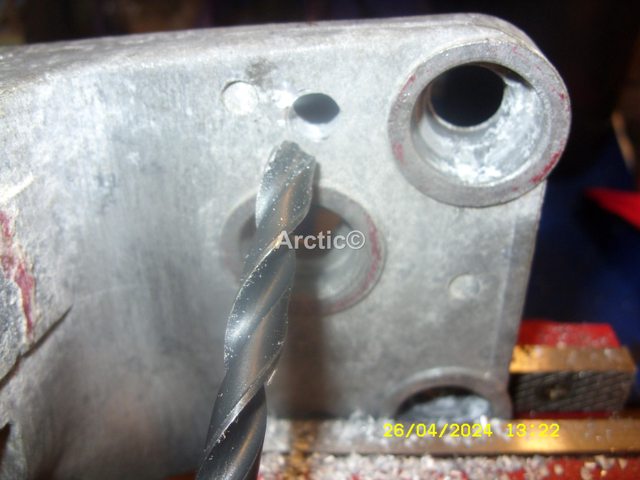
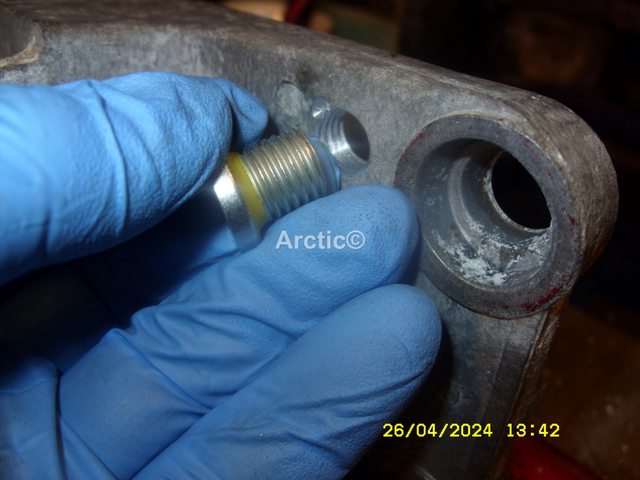
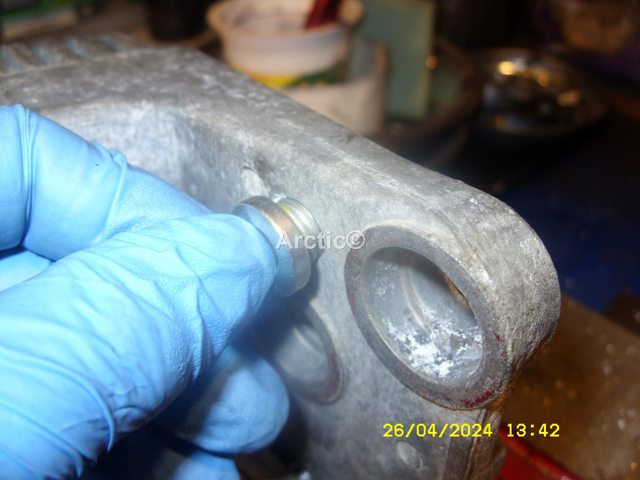
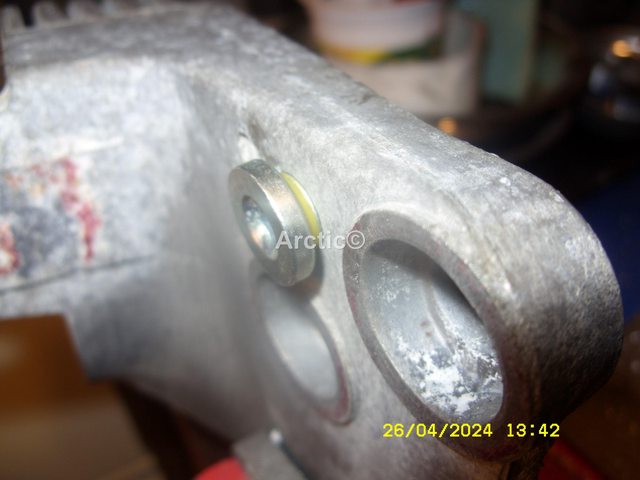
Filler plug was fitted so the engine could be started for about 10mins, i then removed it and sucked out 50ml, the filler plug was refitted and a magnet added to the outside.
CdCdwhkl.jpg
15

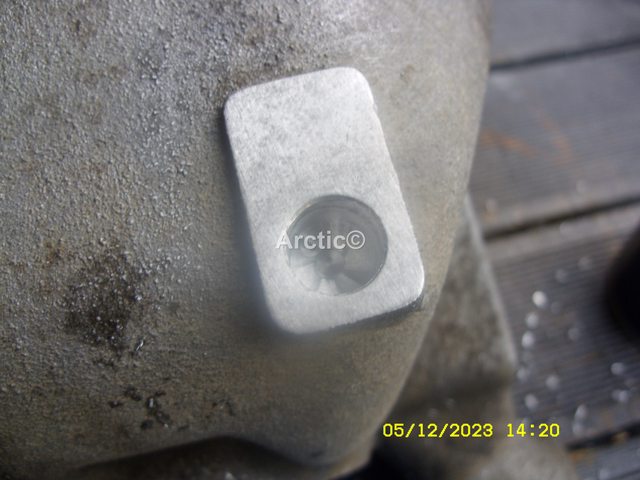
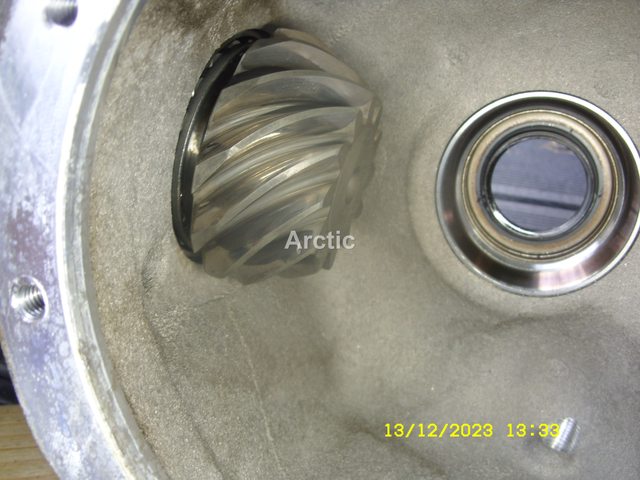
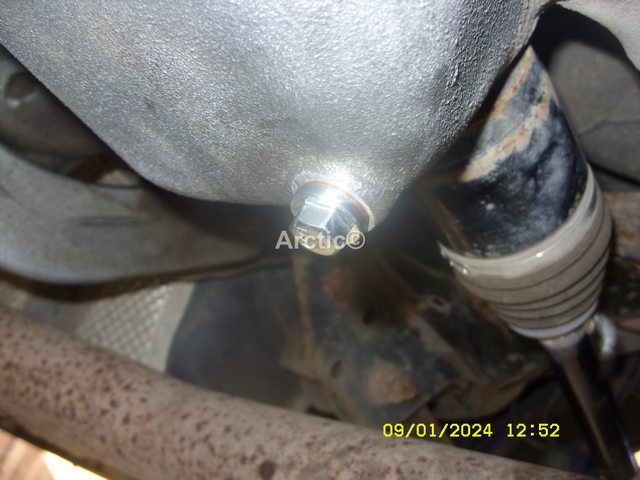
The same has the rear diff one.
FezXQXXl.jpg
16

I took it for a drive and the grabbing/ scrabbling was less than before, I'm now maybe going to leave it at that until the Bell Engineering appointment, or if i do feel like it and get another good day of weather towards end of December i may drop the oil again and refill.

Would it be possible for 8wk old oil to be the colour above ?
 
The saga continues, so after talking to Matt at Auto fault finder, following the instructions to remove the large plug connection from the Haldex, leave it 20mins, after take it for a drive to see if the grabbing stops which it did, so conclusion was it is either the N373 valve, or the ECU.

I have removed the ECU along with the N3763 valve on Friday and they where sent off to Matt to test, he also said to me that the Haldex oil i used is not the best to use really, a proper Statoil manufactured/formulated Haldex oil from either VAG, BorgWarner, Febi, Volvo etc.
K4wfBi6l.jpg
1

8bMtshJl.jpg
2

vpVonKpl.jpg
3

Gen 4 valve next to a Gen 3 valve.
4OhBwzDl.jpg
4

Hopefully the ECU & Valve will be back with me by Tuesday, at the moment the car is on the ramps, and we have 2inc of snow, i was going to try and remove the filter & pump again today but it was to cold to be lying on tarmac under a car.

I spent the day playing and cleaning the Haldex Gen 3 i have in the shed, most likely the same tomorrow, after my FBH has warmed up the shed through the radiator i have it hooked up to.

I also bagged myself a diff with Haldex gen 4 attached that should be with me Tuesday/Wednesday, some thing to play with over the winter months.

Already ordered some febi Haldex oil and proper filter, so busy week coming if the snow goes away, if not then i will be wearing a few layers of jumpers and bottoms.
 
Hi Guy's & Gals.

Ok more news from the above, i have been in contact with Matthew from Auto fault Finder ltd, one and the same ( https://www.haldexrepairs.co.uk/ ).
He informed to remove the ECU & N373 valve send them to him to test, also that the oil above which is Mannol is not really any good and suggested i remove it, replacing it with, Statoil manufactured/formulated Haldex oil from either VAG, BorgWarner, Febi, Volvo etc.
bAtXTnFl.jpg
1

The ORK was back on the ramps, the ECU & N373 valve removed, then posted out to Matthew.
K4wfBi6l.jpg
2

8bMtshJl.jpg
3

vpVonKpl.jpg
4

I also loosened the bolts from the dougnut flange ready to remove the shaft tomorrow weather depending, i will then hopefully remove the Haldex if not at least remove the pump, and the filter.

I have also bagged myself a rear diff with Haldex gen 4 attached to play with, hopefully that will arrive early next week.

My ECU & N373 valve was on it's way back to me after Matthew tested the valve, which turned out to be ok, therefore he has implemented the scrabbling fix to the ECU, once it is fitted i will know for sure what is really going on with the Haldex.

Matthew phoned me and we had a long chat about Haldex's very knowledgeable chap, knows his onions.

Today the rear diff/Haldex i bagged for myself arrived.

It has had a clean and tomorrow i will set about taking it apart to find out how these Diff and Haldex really work Gen 4 mind you Matthew more or less told me all you need to know about them.
CZmqiATl.jpg
5

Sja69O8l.jpg
6

I also partly did a practice run on drilling the drain hole for the diff.
Vo5ss9Cl.jpg
7

UHXjepBl.jpg
8

Not completely drilled through because i want to remove the Haldex first, hoping it will allow me to see the drill break through.
avL4soFl.jpg
9

I will then tap it and fit one of the drain plugs i have purchased.

The ECU and N373 which was off to Matt at Auto Fault Finder, he checked the N373 value that was working and fine, he then suggested i have the scrabble fix on the ECU.

Sent them back to me with an order i had put in with him for a proper genuine filter, Febi oil, and some O-rings for my three Gen 3 Haldex i am cleaning.

The turn round was 3 days mainly because i sent them a Saturday, always send them special delivery next day by 13.00pm

Matt said to me do not change oil yet just fit the ECU and Valve back on the car and get some miles on the car, doing some full circles also, so i have now for four days drove the FL2 with lots of pulling out of junctions, streets onto main roads so i could try and make the Haldex grab or scrabble up to now all is ok.

Reason for not changing the oil was we need to know that what has been done has corrected the problem and not the oil being changed, which i will do at a later date.

I will sometime later drop him an email where he will then give me a call, if i am satisfied and he is by my report, he will then take a payment from me, up to then he had not had any payment for what he had done, so he puts a lot of trust in you to be honest with him, if you say that it's not worked he will then talk you through what to do next.

For me what better advertising could you get than someone willing to sort out a problem for you and not ask for any money up front.

Follow the test on the link below, you do have a Gen 4 Haldex yes.
https://www.haldexrepairs.co.uk/land-rover...solutions/

Saved me forking out nearly £600 from going the Bell Engineering whom could not give me a guarantee or warranty on the work that would have carried out.
 
Haldex Removal & Clean
Report post
I removed the Haldex gen 4 from the spare rear diff i had with the full intention of taking it all apart including the clutch plates, which in the end like you i did not do, the main reason was that luck as it the Haldex looked like it had not been long since the filter was changed, the oil being really clean.

I made a bridge for the Diff/haldex to rest on.
t4QXRhRl.jpg
1

loosened all the filler bolts, and the bolts holding the Haldex to the diff.
SzbAisml.jpg
2

v5OVXvUl.jpg
3

zGhSyxLl.jpg
4

Remove the bracket from the diff.
tmlCEJrl.jpg
5

glZfnzhl.jpg
6

Had my catch bowl ready under the bridge for any oil that came out.
PbcjH61l.jpg
7

With all four bolts removed i teased the Haldex from the Diff.
w55UmABl.jpg
8

bZLjkXbl.jpg
9

Oil slowly came out as the Haldex was parted from the Diff.
WcsnYXZl.jpg
10
oil does not look that bad.
vSA6CD6l.jpg
11

Haldex now free from the Differential.
ZOdtO1ll.jpg
12

EtwmibRl.jpg
13

b6P4zatl.jpg
14

Inside the Diff looks clean also.
BQD3ykNl.jpg
15

I thought this looks promising the spare diff& Haldex i bagged is looking good, moved the Haldex into the shed.
jlfS0V5l.jpg
16

2UBXTzEl.jpg
17

JzgmEF2l.jpg
18

Note the original large rubber seal is square as opposed to new ones which are round.
5ehSxWil.jpg
19


rSjBTmhl.jpg
20

HYjZHe7l.jpg
21

Both plugs had broken tags, not the end of the world, shows that someone has had the pump off or even the Haldex off before.
Y3nGT8pl.jpg
22

xer9ZVwl.jpg
23

Next task was to remove he pump even though the small flange is still in place, as though it was still on the car.
mCMNgzpl.jpg
24

Uat63nUl.jpg
25

There are two small 10 torx holding the outer case of the pump, i undid these.
P6cPhiPl.jpg
26

eAZBXm9l.jpg
27

This helps to clear the flange which i have marked with white tippex.
RKk6HN7l.jpg
28

I intend to grind a chamfer on the edge for future removal.
5VGcomXl.jpg
29

The two torx out and the outer case prised up, inside is the magnet and brushes.
xEW8k28l.jpg
30

4vwgGZwl.jpg
31

qCNKVdIl.jpg
32

Lifting the outer case allows it to clear the flange, You do not pull this off the photo is for showing how it clear the flange only.
vbRxWu6l.jpg
33

Now you can tap or prise up the pump.
e9I6gEcl.jpg
34

The pump and the outer case can now be removed as one.
ZbxjwC0l.jpg
35

TT8sS10l.jpg
36

The pump filter is not that bad either.
ns7kPC6l.jpg
37

A bit of black goo just inside on the shelf, the oil though looks to be fairly clear.
CpkSuo3l.jpg
38

Bit of paper towel to stop the gunk from going further into the pump, before i extract it.
dLTPiCTl.jpg
39

Removed the gunk then took the Haldex back outside to spray some brake cleaner into the pump chamber.
9NN8ipMl.jpg
40

hwcRR2sl.jpg
41

Pump chamber now nice and clean..
wDSdRCPl.jpg
42

Need to really clean out the oil lines holes.
2RsrdpAl.jpg
43

Next removal of the filter cap & the internal filter.
dUJiPfOl.jpg
44

You can see from these next photos that the cap is an oem original one.
c4HhuK0l.jpg
45

Quality bolts.
vNaMJJSl.jpg
46

Number inside the cap, cheap copies do not have this.
hs8RdQWl.jpg
47

Pop the cap off.
K4hk1Czl.jpg
48

Cap bolts and tools.
87w0adxl.jpg
49

Now you need to remove the plastic seal, there is a stupid tag to try and help get the seal out, but this always snaps.
cvqSme5l.jpg
50

Wlt77qGl.jpg
51

You are much better just removing the tag, cut it or break it off, get a point heat it up make an hole.
hyOIWcAl.jpg
52

Now you put a screw in the seal top, add a bolt to prise off.
BKfGhr9l.jpg
53

Out pops the seal very easy, this can also be done in situ on the car.
69uPJPil.jpg
54

Oil inside the filter looks to be dark but that is the back ground colour of the filter.
OsVIm0ol.jpg
55

Q2QDsNYl.jpg
56

Clean the excess out from the top, with some paper towel or rag.
bqCj3Ool.jpg
57

ahEYV6sl.jpg
58

xWmKoj5l.jpg
59

51rnXlIl.jpg
60

As already said the filter looks to be fairly clean ie not that long been changed.
W2OazjEl.jpg
61

Filter chamber does not look to bad either.
CS80IO8l.jpg
62

eONmTBwl.jpg
63

The original quality filters have a valve in the end which opens up/ pushes in.
JDS4aQxl.jpg
64

JDS4aQxl.jpg
65

HrVZjnRl.jpg
66

The Haldex is now ready to be cleaned out properly.
nk3dRfkl.jpg
67

I will show this below in another post.
 
Last edited:
This is the follow on from the above, once i had removed the filter, and the pump from the Haldex gen 4 i wanted to clean it the very best i could without removing the clutch plates.

So to do this i decided that i would spray brake cleaner through every hole in the side of the cage which holds the clutch plates.

There are three holes to each section, there are seven sections, marked is section one.
nk3dRfkl.jpg
1

This was repeated through all 3 holes & the 7 sections.
cQOPG0kl.jpg
2

T4ZvVddl.jpg
3

Next i cut some 3mm clear tube inserted this into the galleries of the Haldex.
hS83dexl.jpg
4

The clear tube was connected to the brake fluid cleaner spray can, and pressed for at least 25 seconds, until the claner fluid came out of the opposite gallery.
JISjCwpl.jpg
5

Also out of the pump chamber & filter chamber, basically a reverse flush.
sogZR07l.jpg
6

Then it was flushed through the other gallery.
Bkjzv0Cl.jpg
7

I was then satisfied that was the best i was going to do without removing the clutch plates.
mQfcQkWl.jpg
8

I left that over night to see if any more old oil drained out, next day Sunday 10th then removed the ECU.
elgOSxml.jpg
9

cNHYFOyl.jpg
10

Removed the ECU.
qw8mrlzl.jpg
11

This leaves the N373 valve in the Haldex, this needs to be removed.
TB0GvJFl.jpg
12

The ECU lid comes away with the seal attached.
Sm2D3mEl.jpg
13

Remove the seal and check inside all is ok no bent pins ect,
q5hedLdl.jpg
14

eoIrfMql.jpg
15

A good grip of the N373 valve with some rubber gloves should see it pull out free.
kLuUwUHl.jpg
16

You can see there is still oil inside the valve gallery, i was happy to see it was nice and clear.
wyL5BmWl.jpg
17

The gallery was also clean no black residue.
Bgt2N1Ul.jpg
18

Bgt2N1Ul.jpg
19

I then sprayed the gallery out with the brake cleaner.
lLmC6Gkl.jpg
20

QHEFmfKl.jpg
21

I think that is the best i am going to get it without the clutch plates being done individually if removed and replaced.
OCrjRmPl.jpg
22

Next i turned my attention to clean the diff oils ways etc.
 
Carrying on from the above, it's been two/three days since i cleaned out the Haldex, so i decided to clean out the port ways of the diff and finish drilling the drain hole, which i had started on the 5/12/23 just a test drill.

So if you have read my other threads/posts on Haldex & Diff oil changes, you may well know i managed to bag myself a spare rear diff & Haldex from a FL2 2010.

My intentions to learn more about the Haldex and rear diff, if you have read this thread from the beginning you will know i changed out the diff oil by using a pump works fairly well but is slow and time consuming, so the next time the oil change is due it will have been drilled and tapped a drain hole.

I used my spare diff to practice on albeit out of the car, the diff was first clean outside.
CZmqiATl.jpg
1

Sja69O8l.jpg
2


On the diff i have there is an ideal place to put a drain hole and plug, not all diff are the same in this area, it has an oblong flat spot.

oaTVog3l.jpg
3


Where my FL2 14 has a round spot for the drain hole in the same place.

Hv3muWel.jpg
4


The spare diff cleaned out side, i tried the 12mm drill bit into the hole already there it fits perfect

YK7cfU1l.jpg
5


oAsZ5oml.jpg
6


I did a little test drill not much.

i6Tag2Bl.jpg
7

The plan was then left for a few days while in concentrated on the Haldex.

With the Haldex sorted and out of the way i then went back to the diff, there are three oil ways in the area where the Haldex bolts to the diff, one is the filler hole.

EqgGFcrl.jpg
8

I cut some clear tubing which i threaded through the diff filler hole.

rExxDEMl.jpg
9

UshzFM9l.jpg
10

BTr2xqwl.jpg
11

The two other oil ways are in port of the diff & one on the outer edge just inside the diff.

vhJEzjql.jpg
12

73DoiOUl.jpg
13

The clear tube was pushed into these oil galleries.

5qP7qxTl.jpg
14

77oWRDcl.jpg
15

The tube was fitted to a can of brake cleaner.

uWyJBN8l.jpg
16

This was then spayed into the galleries, the fluid came out of the filler plug hole.

WQ0OZjil.jpg
17

Same from the inner gallery.

D00uFJPl.jpg
18

ZgcVNkzl.jpg
19

X2famGMl.jpg
20

That was allowed to dry out for another couple of days, before the drain hole can be drilled out completely.

Ok so back to the drilling of the drain hole, 12mm drill bit on slow speed in the drill, on a bench in the shed.

PcIMWw9l.jpg
21

The hole was drilled very slowly checking all the time it was straight.

xVtKQBil.jpg
22

The drill bit broke through under control not knowing what is below inside.

NfM95AYl.jpg
23

xwKeV7Yl.jpg
24

Next it was time to tap the hole with a 14mm-1.5 tap, this again was done slowly and making sure it was straight.

qozVClRl.jpg
25

It was tapped until it came to a stop, more or less the full length of the thread.

caemlutl.jpg
26

The thread looked nice and clean.

SVUPeisl.jpg
27

I had purchased three different drain plugs not knowing the depth.

iblHbk9l.jpg
28

The tap was again inserted so the tap showed no thread.

jL1aDPDl.jpg
29

My thought was the middle plug, would be the best, but i tried them one by one.

ovw6YP9l.jpg
30

The first one i tried was the Vw Skoda/Audi plug


cdn3ZBJl.jpg
31

That came to a stop and did not mate flat.

FTV2b6Jl.jpg
32

The next one was the middle plug from above, Vauxhall/VW drain sump plug.


ngLOWgal.jpg
33

That one went flat has it should.

O0AeiuYl.jpg
34

The last drain plug was the magnetic one, VW/Vauxhall


[]

This too would not bottom out flat, it may have if it was tightened down by using a socket but the second one screwed in by hand.

1TVlVtDl.jpg
36

Therefore the one i thought in the first place fitted best, even though the head is a 22mm would have liked a 17mm or 19mm so have ordered a few more to try waiting on there arrival.

The next step was to remove the bell housing to see what the gears looked like and remove any swarf from drilling, which there was bound to be, maybe doing it is situ on the car with the oil in the diff the swarf would drop out with the oil, i will know that when i come to do mine in the spring.

T8P6FH3l.jpg
37


The above will be in the next post.
 
Last edited:
HNY to all ok so adding more to the thread to share the info and maybe give a god read.

Carrying on from above removing the bell housing, undo the bolts around the housing.
T8P6FH3l.jpg
1

With all the bolts removed i used a wood drift to open the housing as it was stuck, only a light tap mind.
cxZWtwrl.jpg
2

That opened a little gap for me.
imaQ9uVl.jpg
3

I was then able to get a wide 25mm /1inc wood chisel into the gap and lever the housing away from the diff.
afOQtDtl.jpg
4

This was still not enough it was holding hard, so the big guns had to be used, a long lever bar.
bSequjIl.jpg
5

That did the job and the housing was free from the diff.
Keiq4t1l.jpg
6

In this photo you can see the filler plug in the diff.
zxsnfiKl.jpg
7

The housing plate looked fairly clean just a little brown old oil residue.
BUSHc4gl.jpg
8

This i cleaned up using some old rags and some brake cleaner.
MJaMh2kl.jpg
9

Looking inside the bell hosing the large cog seemed ok no damage, from the drilling or any other damage
zQhYCE1l.jpg
10

I pulled out the large gear cog, you could see the swarf from drilling the drain plug.
W6QY979l.jpg
11

Inside the housing there was also swarf.
4p4EXJ6l.jpg
12

Now my thinking is this is there because the drain plug was drilled with the diff out of the car on a bench, it had no oil in it to help the swarf drain out, which if on a car it should do.

The diff housing inside was cleaned out with brake cleaner and wiped dry, this then shows you the drilled and tapped drain hole from inside.
ohtNlrCl.jpg
13

gU8ESMcl.jpg
14

I think this is the bolt hole which some have used to use has a drain hole? ok if your diff does not have the allocation area for a proper drain hole which i think my07 Fl does not have.
S6thvmOl.jpg
15

The drilled and tapped drain hole from the outside of the diff.
Y8hW8H6l.jpg
16

New drain plug fitted, out side view.
GNEQHNGl.jpg
17

Inside view of the drain plug.
D5UQgx3l.jpg
17

I tried all the three drain plugs only the middle one fits perfectly, the other two got thread bound.
ZI1vk3Ll.jpg
18

I next cleaned up the large gear cog, again washing it off with brake cleaner.
SbeZ3cAl.jpg
19

Close up of some of the numbers on the gear cog.
D4twAKEl.jpg
20

All the teeth and rollers look to be in good condition.
VjNCBHjl.jpg
21

There is some stamping on the large cog anyone know what it means please.
iJGTgShl.jpg
22

Feeling the rollers they seem ok, but should there be any play in the cage?
HiE2SYZl.jpg
23

rJl7AS7l.jpg
24

Number on the roller cage.
o9ywHM9l.jpg
25

Also SKF stamped, so would these still be the originals.
7alUtJcl.jpg
26

Another number on the roller.
1dy7gZJl.jpg
27

The drive shaft cog looks ok too no damage to any of the teeth.
CFwMCSTl.jpg
28

I marked the cog and turned round to the starting mark.
pbsaHE0l.jpg
29

Dropped the large cog wheel back into the diff and replaced the bell housing cover plate.
pZC4ricl.jpg
30

The drain plug looks a little large for my liking 22mm very robust but looks out of place.
iNq4Rk9l.jpg
31

So ordered a few other types which came on the 16/12/23
r005UcXl.jpg
32

CptyIFVl.jpg
33

Tried the above one, seems ok.
GKuVw92l.jpg
34

So does the Allen key one.
uJR3Z5yl.jpg
35

Another lot came on the 19/12/23.
6XQLgy4l.jpg
36

They fitted ok and perfect too.
ZdcN5dRl.jpg
37

They where all tested over a few days with oil in the diff all passed the test on the bench.

Which one i will use on the day i drill and tap the diff on the My14 Ork Freelander i will pick on the day.

PS the Ork diff was drilled and tapped on 8/1/24 write up and photos to follow.

Spoiler.
ejnlCaYl.jpg
1
 
Last edited:
A couple days ago Monday 8/1/24 i decided after my above trial run on drilling and tapping the spare Freelander 2 diff i had i would tackle the diff on my current My2014 SD4.

So the FL was raised onto the four ramps which i always use when any work need doing under the car.
s8uIgHjl.jpg
1
Requirements:
12mm drill bit
M14 x 1.5 tap
M14 drain plug with new copper washer.


Once the car was up and on the ramps i could set about cleaning, drilling and tapping the point on my diff, which has a area which is ideal for the drain plug.
0MEb1awl.jpg
2

dUA940dl.jpg
3

First the flatted area was cleaned and polished with a small sanding flap in a drill.
JqEuPqVl.jpg
4

Once i was satisfied it was flat and polished enough it was then ready for drilling out.
W3K9j0Kl.jpg
5

XfU9BkPl.jpg
6

Now the process of drilling out i did not take a photo of has i had to use both hands on the drill to make sure it was straight and square, the recess/hole already in the diff helps this, i used a good make Bosch 12mm metal drill bit, the duff being alloy drills very easy, so you must take care and control the drill steady.

Drilling slowly a little at each time.
RtXnqG7l.jpg
7

ejnlCaYl.jpg
8

Until the drill bit went into the diff void, which you could feel right away by going slow, the oil stated to flow.
cDNEfsyl.jpg
9

Note the oil is a decent colour because it was only sucked out and change in November 11 2023.
8TdK2cPl.jpg
10

Below was a catch pan for the oil.
EyCUou7l.jpg
11

Has the oil drained quickly you could see it was in fact darker in content than when flowing out of the diff, this was most likely mixed with the little i could not get out by pump in November.
igehlXal.jpg
12

The last dribbles of the old oil.
8dKIccil.jpg
13

By 13.45pm the oil had virtually stopped running out, but i jacked the near side rear up to make sure the oil was completely drained out.
CqhOo7yl.jpg
14

The rear diff should hole 0.7ltrs
MBCSt89l.jpg
15

The old oil was poured out of the catch can into a measuring jug, it read exactly 700ml.
6YCJt5Nl.jpg
16

6madYphl.jpg
17

Bits of swarf was left in the catch tin, from drilling out the diff, which the old oil removed has it flowed.
LSKVXYrl.jpg
18

Also some swarf was left in the strainer i used when pouring the oil out of the can into the jug.
wYfKzWRl.jpg
19

I next prepared the new oil for the diff in my pump dispenser, 1ltr = 1000ml, this was left next to my radiator in my shed, which is run by diesel fuel burning heater from a Rover 75, so it would pump easy when needed.
IYOiM0Nl.jpg
20

Now it was time to check the drilled hole for any more swarf and clean the hole out with a few sprays of brake cleaner, even though when looking it looked to be very clean.
I6AqOdNl.jpg
21

Right so with my trusty tap tool, which i made sure was square to the flat, i started to tap the drilled hole, 14ml drill bit.
dfzDhC0l.jpg
22

This was done slowly and precisely bit by bit.
WHtELD8l.jpg
23

If you look close the remaining dregs of oil are bring out the alloy being tapped.
05ShubHl.jpg
24

mTnMO4nl.jpg
25

The drain hole was now tapped out.
h69RIP2l.jpg
26

FnMiNv9l.jpg
27

I then spayed some more brake cleaner into the hole just for good measure, and waited for that to drain out.

In the mean time i picked my choice of drain plug i was going to use.
N5V2iNml.jpg
28


y4Ph12wl.jpg
29

This was offered up to the new diff draining point, it screwed in by hand nicely.
zMGNtPml.jpg
30

9wM1ATMl.jpg
31

This was then tightened up with a 13mm ratchet ring spanner.
04o5jjEl.jpg
32

9pllm0El.jpg
33

It was now time to add the new oil
Sx9nGPPl.jpg
34

The oil pump dispenser was placed below and hooked into the the filler hole.
9dA0bCcl.jpg
35

GsFnMOYl.jpg
36

The pumping of the oil then commenced until the reading in the pump read 300ml which means 700ml into the diff.
JYdJhcel.jpg
37

Which the oil by then was leaking from the filler hole of the diff.
LbIRi5pl.jpg
38

This was allowed to stop and then the filler plug was replaced.
fi6Mm6ll.jpg
39

The magnets i use on the plugs of diff plug were replaced.
zwiHe5Ll.jpg
40

The Ork was then left over night on the ramps for me to check the next day for any leaking from the new drilled and tapped drain hole.
2XgWFN6l.jpg
41

New drain plug checked the next day, all seems ok.
zFFlunVl.jpg
42

Freelander was taken of the ramps, given a good ride out, oil drain plug checked when back home pleased to say that is another job done and easier to do in 12/24months time, most likely 12months knowing how i like to change my oils, i change the engine oil twice a year what ever mileage as been covered, spring and autumn.

Onto the next job.
 
Last edited:
The PTU oil is due to be changed again soon because the first change which i did in November 2023 was to me a flushing change, also my intention is this time round i will drill and tap a drain hole plug.

I have gathered the drill bits, taps, and drain plugs i intend to use, yesterday i did a dry run on an alloy mount which was surplus to my requirements.

I purchased two different sizes and types of drain plugs.

M10 x 1.0 and M12 x 1.5 Allen key type
mTlDElvl.jpg
1


Also the same in six sided hexagon bolts.

M10 x 1.0 and M12 1.5
BP25GPZl.jpg
2


Along with the plugs also purchased and tap & die set.

I already had a few taps and handles but thought be good to get a set.
Fm1vweMl.jpg
3

Used this chart to size the drills needed for the taps.
aIicB5tl.jpg
4

With the alloy mount in the vice i punched a mark for drill on it.
RoxQQpdl.jpg
5

Drilling was done in differing sizes, first drill i used was a 4mm HSS
lP2ufVPl.jpg
6

Next was 5.5mm drill.
KDJigrTl.jpg
6

Then a 6.5mm finally a 8.5mm.
sdjAvv7l.jpg
7

This was to use the M10 x 1.0 plug
5DDxx5tl.jpg
8

So started the tapping.
AowThs9l.jpg
9

Turning the tap slowly back and forth until the hole was threaded.
wZq4Bkjl.jpg
10

sLgQYI2l.jpg
11

Then it was time to try both drain plugs.
DQvyHOfl.jpg
12

jj9cjvEl.jpg
13

First was the Hexagon plug with copper washer, fitted great.
21kvhpOl.jpg
14

Then the Allen key plug with it's Rimlex Sealing.
M6jGQtul.jpg
15

Both types fitted great, so test of the M10 x 1.0 over.
AwDZP3Zl.jpg
16

The same process for the M12 x 1.5 mark & punch.
J4X527ul.jpg
17

This time the 6.5mm drill was used from the off.
eBO7MR5l.jpg
18

Then the 8.5mm drill.
dMe5WBLl.jpg
19

Finally the 10mm drill.
hqwB798l.jpg
20

The hole was ready to tap, 12 x 1.5
gXmc1E2l.jpg
21

9YCA2ypl.jpg
22

Again slowly back and forth until the thread was completed.
xHckau0l.jpg
23

pWZuoY4l.jpg
24

With the thread now done it was time to try the plugs.
nWPImUYl.jpg
25

CUmIuppl.jpg
26

X0JLyLnl.jpg
27

First the Hexagon plug.
qp0FhQdl.jpg
28

MLR1dNTl.jpg
29

Fitted great once again, now the Allen type plug.
Y0B2GgTl.jpg
30

WVfl1Vll.jpg
31

4j3LOt4l.jpg
32

Photo shows both the M12 x 1.5 on the left and the M10 x 1.0 on the right.
bmYMa3pl.jpg
33

The same for the Hexagon plugs.
DJsxikCl.jpg
34

Hopefully the drilling of the PTU and tapping will go smoothly waiting on a nice warm day now.
7y1inoQl.jpg
35
 
Back
Top