honolulujoe
Well-Known Member
- Posts
- 6,137
- Location
- richmond surrey
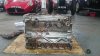
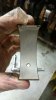
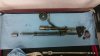
that new chassis looks smart
+1Nice work. Look forward to seeing it go back together all shiny and painted. Keep the pics coming.
")


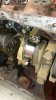


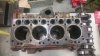
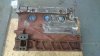
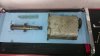
id get crank polished first , its better than a regrind if it cleans up


Welcome To LandyZone, the Land Rover Forums!
Here at LandyZone we have plenty of very knowledgable members so if you have any questions about your Land Rover or just want to connect with other Landy owners, you're in the right place.
Registering is free and easy just click here, we hope to see you on the forums soon!