My new (old) Defender .. ;)

This site contains affiliate links for which LandyZone may be compensated if you make a purchase.
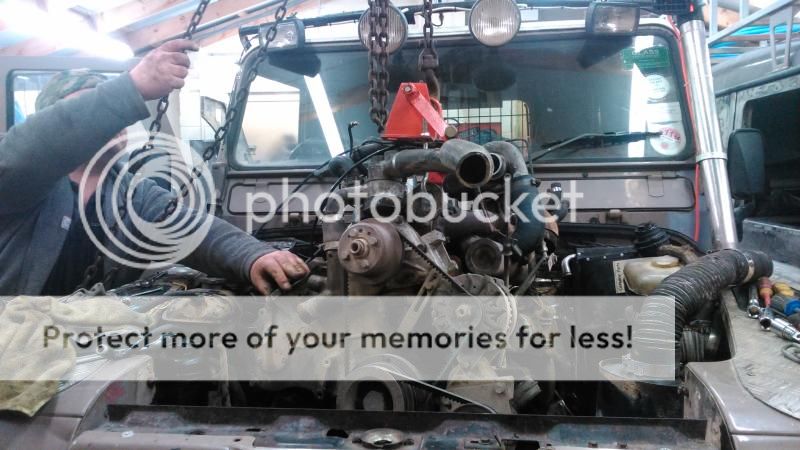
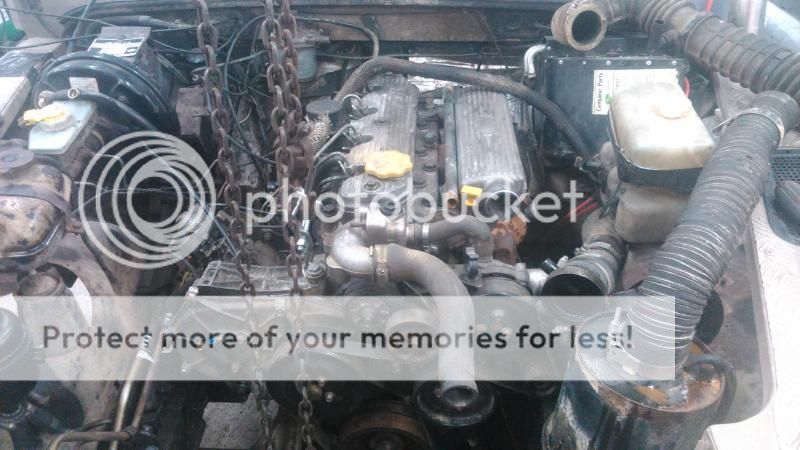
No pics again, but the 300 Tdi engine is now ready to run.

Turns over by hand as smooth as a smooth thing on a smooth day and seems to be sucking, squeezing and blowing at all the right places and times, and it'll now soon be bangin' too!!!

The actual engine swap over starts tomorrow, so we should have a functioning 90 by the weekend. It's functioning now, but should be much betterer at the weekend though .. ;)

Happy .. :D
 
OK, some pics ...

The 300 engine, in the engine mount, upside down .. can't remember why, bu tit probably made it easier to bolt something to it .. ;)

DSC_0047_zpsxx8nqjj5.jpg


The cabin with floor and part of transmission tunnel removed to get to the gearbox/engine bolts ..

DSC_0048_zpsg8kfsqib.jpg


And the engine bay with a lot of bits removed off the engine ready to lift it tomorrow. All that's needed to do is undo the gearbox/engine bolts, engine mount bolts and the exhaust ...

DSC_0046_zpsvyuedwm8.jpg


Incidentally, we think we found ONE GOOD REASON why the engine was overheating .. the oil cooler pipes at the rad were barely connected. Well the pipes were, but the connector between the pipes and rad weren't .. BOTH OF THEM, they had to be tightened about four full turns to get them tight again!! .. with only about a litre of oil in the engine! I know I filled it after Salisbury Plain, and only about another litre of water .. and we know we filled that after swapping the head gasket. Before anyone says, I never had the rad off the 90!!

No matter .. anyone want a 19j engine? £50 ish, it'll have a lot of bits with it, but the bits will depend on what we use for the 300 engine .. ;)
 
Cracking on a bit now, the 19j engine is out .. ;)

We had to undo all the engine/gearbox nuts, some pretended to be bolts and the studs came out too, but no worries. had forgot about the power steering pump and pipes, but also released the exhaust.

So, on with the lift, all in position ..

DSC_0046_zpsaexokwqb.jpg


DSC_0047_zpsqyikvjdn.jpg


Starting the lift whilst checking all connections , cables and stuff ..

DSC_0048_zpsnq7inggc.jpg


As high as it needs to go ..

DSC_0049_zpsufkdtpsu.jpg


Swung in front of the 90 ..

DSC_0050_zpsljqko3pd.jpg


... and on the floor with the 300 engine in the background ..

DSC_0055_zpsiz2jwz2w.jpg


Leaving a nice empty engine bay ..

DSC_0051_zpskfcaqoo6.jpg


Tomorrow we're looking at modifying the 300 flywheel housing, tapping a thread out and re-locating two studs so it'll fit the L77 gearbox/clutch housing. Looks and measures OK but we'll see .. ;)

Similarly we'll have to fabricate at least one engine mount, though the passenger side looks like it'll fit straight in using the original 19j mounts bolted to the 300 block. We don't want to modify the chassis too much, but engine plates are a throwaway almost and can change with any future engine replacement .. if needed!! ;)

As the 300 Disco and 19j 90 exhausts are incompatible we'll be chopping the Disco exhaust to make a straight through side exit, we know they're not stupidly loud and it's the easiest solution.
 
Looking back on the relatively slow progress of the 90, I have to say that throughout the re-build etc, TC has been a star. Always there, always ready to call me a pillock and always ready with a coffee.

It's not his fault that I am only managing about 3 to 4 hours at a time, I screwed my tablets up a while ago and went through a bad patch, but it's all good now, and getting better all the time.

Cheers TC .. ;)
 
The 300 engine is in ..

DSC_0046_zpshfgk6tdf.jpg


Lots still to do and to help the fitting out of ancillaries, tomorrow the engine will come out again!!

We have a plan to do the rest of the fettling, weld the fabricated engine mount properly, rather than having to weld upwards from beneath, change the fuel filter and fuel pipes, change the coolant expansion tank and pipes, cut the radiator mounts and re-weld them so the Disco radiator will fit, it's too high at the moment we think, but we'll mount it tomorrow and try it with the bonnet on and see.

The air pipes will need some fettling, the exhaust downpipe will need cutting and welding, the oil pipes need swapping for the longer 90 ones from the Disco short ones .. but essentially it's there and will work .. ;)
 
Woohoo ...

Tim had a broken ARB Locking Diff .. He also has a mate with a lathe and miller and the nous to use them to good advantage.

So ...

Pic 1, standard diff cage, cut up the crown wheel backing plate to use as a blank to machine into a crown wheel backing plate that suits an ARB ..

DSC_0075_zpsejek8pol.jpg


Pic 2, as above being machined ..

DSC_0076_zpsk6c1c0fk.jpg


Pic 3, the broken ARB plate to the left, the newly machined standard plate sat on the ARB locking diff centre ..

DSC_0079_zps2zq7gmvg.jpg


All it needs now is a locking ring, fitting into a diff and plumbing. OK, it's a 10 spline and I have 24 spline axles, but we have the technology to get me a rear axle locking diff pretty soon.

The standard backing plate is quite substantially thicker than the ARB item, so we hope that'll translate to stronger and more resilient, especially at the point the ARB broke.

We have plans to maybe, if anyone needs them, make a few of these and offer for sale, depends if anyone wants them .. So how many people have broken ARB diffs and don't know what to do to them???

Happy days .. ;)
 
Looks good Paul. Definitely a market I'd say.
If I remember right Nige at megasquirt-v8 sells a billet version to combat the problem.
But I guess price is key as always.
 
Looks good Paul. Definitely a market I'd say.
If I remember right Nige at megasquirt-v8 sells a billet version to combat the problem.
But I guess price is key as always.

We'd taken the old diff for dimensioning only, thinking we'd need to machine from billet/bar stock, but halfway through measuring and discussions we had the brainwave of using the old cage which obviously cuts out loads of machining .. Cost us beer money for this one .. ;)

Can't see why it won't work.

I have also (I think) sourced the part numbers for the internal 24 spline locking and non-locking side gears so we might be able to change the 10 into a 24 spline unit .. just gotta get prices .. ;)
 
Let me know paul. I currently have a 10 spline arb I brought second hand which had leaky seals, I have had it out but need to put it back together and see if it works.
 
IT RUNS ... ;)


Bit rough on the first start, indeed the timing was so out it didn't run at first. Reset it, thanks to TC, by eye and it worked, roughly but worked, see the first video .. a bit smoky!!! I didn't get the very first start, which ended up being a series of stops and goes anyway, but this was the first one where neither of us was holding any wires together or bits of tube .. ;)

https://www.youtube.com/watch?v=dT79RD9fE1w

So, timed it up a bit better, did a few other things and we now have this ...

https://www.youtube.com/watch?v=dT79RD9fE1w

So relieved and pleased .. ;)

In both the videos it's running without an exhaust, air filter, timing cover etc etc .. but no worries, the oil was OK!!

Lots of bits still to do but really pleased that we resurrected what I knew to be a great engine .. despite it being 3 days under water and over a year stood in the back garden .. :)
 
So, the 90's back at home with a 300 Tdi engine in it .. thanks to the fantastic help of a good mate, Cheers TC. He also did me a few new stickers, with a few still to come!!

Nice short, side exit, no silencer, exhaust but still a few minor issues with fuelling .. we overhauled the engine and that runs fine, but the injector pump still seems a little hesitant, so a dollop of injector cleaner stuff and an Italian Tune-Up might be in order .. wink emoticon

Still got to put the floor and tunnel back in, fettle the winch and controller, I just ordered a new fuel solenoid and need to overhaul the alternator or get a new one.

Happy. — ;)

DSC_0091_zpswq5bennd.jpg


DSC_0092_zpssifyubx6.jpg


DSC_0093_zpsd6lpr8yc.jpg


DSC_0096_zpsgfjcm0zk.jpg
 
we have had some fun doing it, i set fire to my hair over the bank holiday whilst welding under the 90 and have had to shave it all off, but not to worry, mine is back in the garage and needs loads of work to get it repaired
 
Heheheh, I would have helped put it out, but was PMSL too much .. ;)

Ordered a Solenoid and Alternator, supposedly both being delivered by Friday!

Soon get yours fettled mate .. ;)
 
So, finally got the 300 engine in, the floors back in, the passenger side step/rock-slider on. Still loads of little bits to do, but mostly there now. ;)

DSCF0889_zps4ee9d5id.jpg
 
Not posted much lately .. the engine's all in and works well .. but the turbo doesn't!

Juliet recalls that I had been complaining about it from before the Disco went swimming and now the seals have properly gone .. took it all apart and meant to do a video to show how to refurb a turbo, but that won't happen .. I have a short couple of videos to show, but essentially the exhaust impellor seal gave way, exhaust coke and ****e got in and at least one bush is broken, the inside also looks properly coked up so not worth fettling further. I thought about a re-core, but they're mostly Chinese and I can't afford to make a mistake and need to buy a turbo again later anyway, so hopefully getting a decent one from James Ayre this evening ... Cheers James .. :)

I had to grind a 1/2" AF ring spanner down to make it fit, and 'cos of the coking up of the core everything was all a bit tight, but I think it's interesting to see something you don't normally see .. ;)

In the second video where I've taken it apart and put it back together you can hear the amount of coking when it's rotated. The seal behind the heat shield is not there at all, the bush behind that isn't either, hence the amount of movement of the shaft.

https://www.youtube.com/watch?v=7plBc9z45jc

https://www.youtube.com/watch?v=e3i6_vyJ9dc
 
... to follow up on the turbo ..

Took about 4 hours for a 1 1/2 hour journey, car smash on A38 kept us stood for 2 1/2 hours, but at least we weren't the poor bugger who caught it!

Cleaned the turbo up, plenty of oil in the oil feed tube, top of the core and bolted it all up, first start up hardly any smoke, let it warm up for a while and took it for a run. Lovely .. a fair amount of blue smoke when pressing on, but mostly clear, then when properly hot it all cleared up. No worries, off home and parked up for the night.

Next morning started up and a puff of grey/blue smoke then nothing .. no smoke at all, went for a run and nothing, just a heat haze!!

Best thing is the engine noise has been reduced so far it's now worth having the radio on .. Vibration is massively reduced and the general 'feel' of the Landy is now just about right. OK, I can now hear the tappets need another fettle (we did them during the build up) and the inlet air pipe now constricts itself that it gets to 70 and just stays there .. but we'll work that out soon.

After running for a while I've felt the movement of the turbo and it's damn near perfect. I is happy .. Cheers James, much appreciated mate .. and yours is a beast of a truck .. ;) We're gonna go to Cromford Sunday ..
 
Back
Top